Film cameras
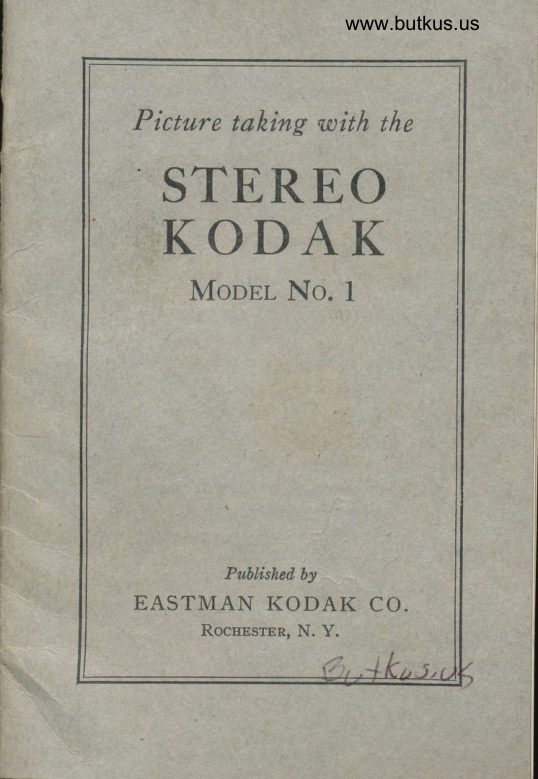
Kodak Stereo User manual
User manual for Kodak Stereo. 52 pages. Read the original PDF, download or print a copy without registration.
52 pagesOriginal document10.0 MB PDF

Loading your manual…Open PDF directly
Document details
- Brand
- Kodak
- Model / document
- Kodak Stereo
- Document type
- User manual
- Language
- Check the original document
- Pages
- 52
- File size
- 10.0 MB
- Category
- Film cameras
- Document date
- Not specified in catalog
Search available document text
Find a term, then jump to its page in the original PDF. Image-only pages may not be searchable; check the PDF for exact wording and diagrams.
Page 4 · Read text
Simple instr.uctionsar.egiven on the
next four pages. These instr.uctions
tell you how to use youl camera on
bright sunny days. These instruc-
tions give you the basic facts of ste-
leo picture taking; for more detailed
inforrnation,  read  farther  in  the
manual.


                       www.butkus.us
View original page 4Page 5 · Read text
www.orphancameras.com


    load

       Loadin subduedlightonly.


       0penthecamerabypressing
                     thelatch.


       Pushout the rewindknob.


        Putfilmin the cameraand
         pushin therewindknob.

     Pulloutjustenoughfilmto extend
rverthetake-updrum.Closethecamera.
       Turnthewindingknobin the
    directionof thearrowuntilit locks.
  Presstheexposurerelease.Windl0 a
    stopagainandpresstheexposure
  release.Windto a stopandpressthe
   exposurereleaseforthethirdtime.
        Windto a stoponcemore' l
View original page 5Page 6 · Read text
Turnthefilmcounterlo 20.
Themarkonthefllm counteropposite
thepotntershowsyouthenumberof
     picturesremainingonthefrlm,
      t h e a b c a d j u s t m e n t s

            Shutterspeed_lvlovetheshutterspeedslide
           sothered50is oppositetheredIndexmark.
          Lensopening_lvl0vethep0interuniilit lines
          upwith(BRIGHTSUN)between5.6andg.
           Distancesetting_R0iateeiiherlensuntilthe
           arrow0ntheleftlensis oppositeCLOSE_UpS,
        GROUPS,or SCENES.Whenin doubtuseGROUpS

                                                                         f i . . ,
                 3     ,ail*ti-                        tlrt

                    l]tOSE.UPS     GRl]I]PS       S C I N I S


                            www.butkus.us
View original page 6Page 7 · Read text
takethepicturewww.orphancameras.com

Viewthepicturethr0ughthefinder.


   Centerthebubbleto holdthe
            cameralevel.
   Squeezetheexposurerelease.


         That'sallthereis t0 takinga picture.
       Windto a stopfor the nextPicture.

  unload

Whenyouhavetaken20pictures,
    andthefilmcounteris at 0:
   Presstherewindleverin the             )il'@l          directionof thearrow
          andholdit there.
Turntherewindknobbyitscrank
     in thedirectionof thearrow.
Whenthe windknobstopsturning,
   thefilmis rewound.0penthe
    cameraandremovethefilm.
View original page 7Page 8 · Read text
tips

       1. Holdthecanterasteady.


2. D0n'tcutOffy0ursublect'sheacl.


3. Dor'tturnthecamefaverticaly.


       4. Do/r'tet thesunshine
               intothelefses.


                            www.butkus.us
View original page 8Page 11 · Read text
www.orphancameras.com

Kodachrome Film K335 is designed for
stereo cameras.  It  makes 20  stereo
pairs, 23 x 24mm, in  full  color with
standard spacing between pictures.
  KodachromeFilm Doylight Type K335
   -for  daylight use
 *KodochromeFilm Type A K335 A
   -for  clear flash and flood
   Transpat'enc'iesare relulned. proc-
essed ana mounted in Kodaslide Stereo
\lounts for hand vierving. The prot'ess-
ing and mouniing costs ure included rn
thF purchase price-unableof the film'
    If you are         to obtain Koda-
chrome Film K335, You can use the
regular 35mm miniature camera film,
Kddachrome K135. If you wish to have
K135 film mounted in Kodaslide Stereo
Mounts. see your dealer about the ad-
 ditional cost ior mounting.
 8
View original page 11Page 12 · Read text
DAYLIGHT


                   FLASH

            *_Kodachrome                          Film Type A can be usedin
               luutjgn!  u'ith the Kodak Daulieht Filter
                  f.or Ko_dakTape 4 -Color Films"(Wiaiiinwww.butkus.usi\io. d,t/ oaer each lens. Reler to the film                instruction sheet,
View original page 12Page 15 · Read text
www.orphancameras.com


                 Draw out iust enough film to extend over the take-up dlum'
                    as illustraied; then close the camera back' The latch will
                        automatically  lock.
                     Turn the winding knob in the direction  of the arrow  until   it
                        locks. The pin in"the take-up drum will automatically catch
                   one of the-perforations in lhe film' Press the exposure re-
                         lease{', indiiated by arrow. Wind  to a stop again arrd press
                       the erposure release' Wind  to a stop and press the expo-
                                   ,.r."  ,"il"or"  for the third  time. Wind  to a stoP once more'
                     Your film is now in a position to take your first stereo picture'
                     Turn  the  fflm  counter  dial  in  the  direction  of the arrow
                           until 20 is oPPosite the Pointer.
                     The counfui  dial  will  ioov"  ott" mark each time the wind
                    knob  is rotated to a stoP' The mark opposite the -pointer
                   shows vou the number  oi  "tpot.tt"t   remaining  on the film'
                        TurJ  the film type  indicatbr  dial  until  the mark  for the
                     tvoe of film you aie using is opposite the pointer" The dial
                       i('.J"a    fJr Kodachrofrel"yligttt and'TypeA films'
                                       lIt                                                i,  coort rtractice to coaer the lens each time the exposure
12                   releas7is operated during loading procedure'
View original page 15Page 17 · Read text
www.orphancameras.com


                                      The shutler sPeed.
                                       The  shutter sPeed controls the
                                                length of time ihe film is exPosed'
                                         ThJ shutter speed is set bY mov-
                                                  ing the snurinn  seeru sr-rou bY
                                                on'e of  the  pins  to  the sPeed
                                                 desired.
                                     The lens opening'
                                        The  lens opening  controls the
                                        amount of light that reaches the
                                                           film. The len1 opening is set bY
                                          moving the lens oPening eorN'rnn'
                                       The DistonceIndicqlor.
                                              Distance  setting  controls  the
                                          sharpnessof youi Picture. Set the
                                                      rlistince  indicator bY  rotating
                                                     either   lens   until   cr-osE-uPs,
                                        cRouPS, OR SCENESis opposite
          Any selting made for..one lens or      the arrow on the left lens mount.
               ,slttitter is Tutomalicalltl mude  lor
note:     the other; the lenses and slt'uttet rte      L4
            accuratelg coupled.
View original page 17Page 19 · Read text
www.orphancameras.com

  Under the three most common lighting
  conditions, you can make the _Ptopel
  setting for the lens opering quickly and
  eirsilv. These settings have been cleter-
  -inJd   for subjects"of average bright-
  ness. For  very  light-colored  or very
  dark-colored subjects, see the instruc-
  tions'nvith yor,rrfilm.
       ExposureSelector.
      Make your shutter sPeed setting.
       For most snaps use l/50.  \'love
        the lens opening Pointer until  it
         lines up   ,i'lttt   tl.i  mark  for  the
          light condition.


        Notice when You change thc
         shutter speed, the mark  for the
          light  condition moves with    it.
        T'he lens oPening Pointer must be
      moved accordinglY.
View original page 19Page 21 · Read text
www.orphancameras.com


                           For most pictures you rviil use the ex-
                          posure selector. For flash and special
                                iiehting  conditions, the lens openings
                                          rlft rrra*tkedas follorvs: 3'5, 4, 5.6,8, 11,
                         16 and 22. The lens opening is largest
                        and allorvs the most amount of light to
                          enter rt 3.5. The lens opening is smnll-
                             est ancl allorrs the lerrstamount of light
                                 to enter at 22.
                          The numbers are calibrated so that
                                et each successiveopening fLom 22 to
                               4. trvice as much light entels the lens:
                                  for example, trvice as much light enters
                             the lens at 5.6 than at 8'
                           Exposure instructions are included
                              with films.
                        1 8


LIote  the pointer  to the selected lens
i'tto-tri"s.  i tie  pointcr - stol's ut  euclt
oj'ening- but- it m:tg be sel beluecn
openings if desirecl.
View original page 21Page 25 · Read text
www.orphancameras.com


The short focal length 35mm lenses on
your camera give your pictures an ex-
iremely  large range oT sharp focus
(that's the distance from the nearest to
the farthest object from your camera
that  will  be sharn). Decide whether
your picture is a close-up. a grouP,,or
l scene. l\lake the setling on vour dis-
lance indicator nnd thafs  it   .   No
exact measuring needed. Don't worry
about accurate focusing because set-
ting the lens in  this rvay gives very
sharp pictures; see page 24.
  When making  flash exposures, use
the distance scale on the  right  lens
mount, becnuse the distance from the
flash lamp to the subject is impoltant
 to obtain-the proper exposure. See the
 guide on the Kodak Flasholder.
22
View original page 25
Page 27 · Read text
www.orphancameras.com


                         The rieht lens also has a scale r'r'hich
                          measures the range of sharp focus. On
                               the red scale are trvo sets of lens open-
                                ing nun-rbers, one set on each sicle of
                                       ali:olv. When vou set the distance indi-
                                cator at crorulun,  and the lens opening
                         between 5.6 and 8, you can read the
                            range  of  sharpness on  the  opposite
                                 lens. One dot betr.veen 5.6 and 8 is at
                             about  3]6 feet  u'hile  the other  is  at
                               abofi7)L feet. Therefore. rvith the lens
                                set for closE-ups, everytl-ring is sharp
                             from 3)}6to7l5 feet. When the lens is set
                                     for cnoups anci the lens opening be-
                               trveen 5.6 and 8, everything from about
                            5 feet to 25 feet is sharn. When the lens
                                        is set for scENEs and ihe lens opening
                           between 5.6 and  8, everything  fi'om
                              rrboul 8li leel lo infinity is iharp.
A,IIdistancesare computeclto th,efiIm plune marker,
View original page 27Page 30 · Read text
www.orphancameras.com


         For }rrrcl helcl slapshots-holrl the carrr-
                          ' rrrror,,l ,rtil,l) r, itlr Lo'lr Lrnrl.. Po.i-
           tion one firrgL.t-near' tlre exposrue rc-
           lc'rse. Ltxrk tlilongh  tlre vjcrv lincicr.
              rcl ir-ame vour'slrbiect. After tlre nec-
         cssiuv ilclillstnients rrc made for- thc
                  \ l , , . l r . f . l \ , , 1    l , r r s o p e r r i n gr.r , l  , l i . -
         tance, cerlter thc lruLble in the notch;
         then squecze thc  exposure Iclease.            'fhis
              action shotrlclbe smooth. Do not
           jer k the canera.
          The illrrstrrtion shorvs one metlod
           of holclinq tlle crrrler-ir.LIse nny rneth-
            ,xl rou prefcr-,as Jorrgls you kecp the
          c.inenr steady nncl levcl.
                lisc a Koclak Flexiclomp,  a tripocl.
               ,rl so e other'filn  srpport rvhed thc                             "8."          ar   clrl is set at
 I                             27
 I                             www.butkus.us        Ttipod. socket.I
View original page 30Page 31 · Read text
The  dunl   shutter   is  itutomatically
                              cocked when  you  advan(e  the  fiim.
                                        Tlis  makes picture  taking  ersier and
                                prevents occidental douLle exposurc."
                                  For tl-roscrare times $'hen vou writ
                                      to recock the shutter without  iclvalrc-
                                   ing the film, you can use the m:rmrtl
                                       set. This feature  is also heJpful rvheD
                              you  $'ish  to demonstlrte  the camera
                                  without  filn.
                                       tr{ove the manuil  set lever torvard
                                   thc arrow as far as it  $'ill go to cock
                                  the shutter; then allorv  it to return.
                               'tSome people ma11ltrefcr
                                      Io adD(lncclhe film iust be-
                                     forc taking the t)icturc to
                                         lrrctcnt  accitlentalhJ_trip-
\Yhen- tlte camera is empt\, _it     l)ittg the erpasure reLease.
mou be necet\drll to rotute Ihe
sDtuckel,Ioutcdinride the cum
eftt. torald  the hinsecl back to a
slop before the shitter can be
set munu(llu ,
View original page 31Page 32 · Read text
www.orphancameras.com


 llolrl  the currela lrith  thc lcrrses to
*,rr cl lou. Pless thc letitrcl lever.in tLe
 lirc.ctionof the arr.orvalcl holcl iL there.
Lilt  thc crink  fionr thc'slot in thc rc-
 r incl knob ancl r-crrind in the clil.ecti(nr
  I the lr1r(J\'.See thc illustration. I.,ccp
:, rur hLurclos'av horn the rr'ind knol) so                                'fhc: lr.ri it tlrrns \\'hilc reNincling.      rr i d
  n  , . r r l s t " t , l r r r r . j r ,r tv l , ,n  t l r c h l  , L

  Opcn the calrclt  luck, pull orrt t)re
: .rvind knob, and lemove tlie mrgezine
  : fihn.
  Scncl tlre exposeclloll of fiLn to tlre
   .lfesl pr-o(c'ssingstrtion. Sc'ethe {iirn
 : iiflr( tion slreet.
                          29

                          www.butkus.us
View original page 32Page 33 · Read text
You can toke flsh  pictures with  your
sl.rco c.rmirr .rse.rily t.s) nrr l.rkcli,-
tures in  clnylight. You  rvill be amazed
with thc lcsults.
   Eithcr  the Kodrk  Standnrd Fhsh-
oldcl  ol the Koclak BC Flnsholilcr  ctn
be  used  with   yolu'  ster-eo camera
Thlead  the screw  srpplied  with  the
flirsholcler into the tripocl sockct in the
bottorr of the camcrt. It is uslrallv con
venient  to lttrch   tlie flasholclel to thc
left sir'leof thc camera. Rcmove the cap
fron-r the  {laslr post  l)y turning   }i tut.rlr
:nrl  ltt:rch  the cotcil. Turn the connec_
tor clockq'ise to lock  it in position.
              NIake certdn rvhen you
               ale  taking  fllsh  pictures
              that thc corcl fi'om the
              fasholclel clocsnot ftll  in
             hort  of eithcr lens, The
                   i    cor'clcan be rvound oncc
View original page 33Page 35 · Read text
Batteriesarenotsuppliedwitheither
theStandard0r the BCFlasholder.They
canbepurchasedfromyourdealer.
  Beforeyouputthe lampin theflash-
0lder,besurethatthebottomof thelamp
baseis cleanand bright.lf the contact
pointis tarnished,rubit ona roughsur-                                 The follor,vingtablesprovide the neces-face.                                        sarv exDosur€information for Koda-  Turnandpushthelampintothesocket                                     chiome^Film Tvpe A when used withuntilit is heldin place.Releasethelamp                                      ClassF (SN{or Sf) lamps and ClassN{bypushingthelampejector.                                      (No. 5, No. 25, or No. 8) Iamps'The
                                         subiect should be the number of feetcauti0n:                                      from the camela shorvnin the tables'
Sincelampsmay shatterwhen flashed,
the useof the Kodak2-WayFlashguardor
othertransparentshieldoverthe reflector
is recommended.Do not flashthe lamps
in an explosiveatmosphereor insertthem
in the socketif the shuiteris open.
32
View original page 35Page 37 · Read text
The fun of tlking  stereo pictules is not
           lirnitecl  to   bright    liilht   conditions.
         \\rhen both tbe ctrlteltr alcl subject iuc
           .rill                      ,.,rr r".rlc l"r'tl .rP..rrIer.[^r               )r,rr
          ir,lFri,,rr.l,itlrt s(( ncs.in{l Inirrr)r,llrel
         sul)jects.
             Io make a long exposule, ploce thc
         camer-itol a KoclLrkFlexiclamp,  tripotl,
         or olher 6rrn support. ltovc  the shutter                        "B."       sDeed sclle to     Press the erposule
         r'cleaseto make the exposrue. Thi  shut-
          ter   l,ill  remtin  open us long  irs ihe
         ertu,"'r|c Icl..r.c i.  I'el,l ,1,'\'r. Alll.r
           tlr. reqrrircd rrrrorrrrtuf iirne fnr (hP
         ex1'rosuie,let  !!o the exposue  rclease.
4   Ihc  shuttel  rvill close.
View original page 37Page 38 · Read text
www.orphancameras.com


The  Kodak   XIetaI  Cable
Release nuo.5, or tl.te Kotlak
TBI  Cable Release No. 2
mak( long exposureseusiet.
The cable-releuseis Ihreaded
into the opENrNc below the
shutter release,


         www.butkus.us
View original page 38Related documents and language editions
From the M. Butkus archive. Original publisher and archive notices are retained.
Check the model and edition against your equipment.
PDF verified 2026-10-10.