Film cameras
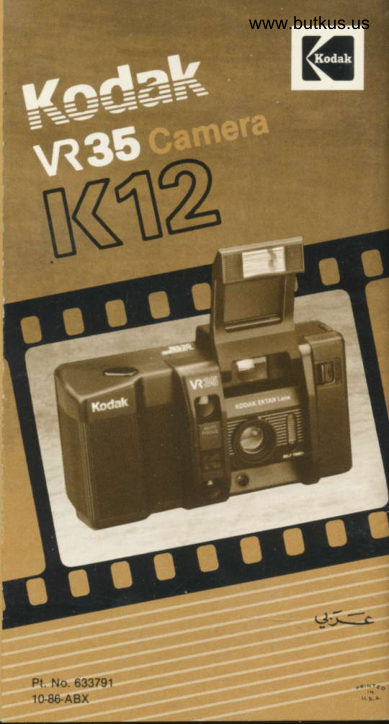
Kodak VR35 K12 User manual
User manual for Kodak VR35 K12. 17 pages in English. Read the original PDF, download or print a copy without registration.
17 pagesEnglish1.3 MB PDF
Loading your manual…Open PDF directly
Document details
- Brand
- Kodak
- Model / document
- Kodak VR35 K12
- Document type
- User manual
- Language
- English
- Pages
- 17
- File size
- 1.3 MB
- Category
- Film cameras
- Document date
- Not specified in catalog
Search available document text
Find a term, then jump to its page in the original PDF. Image-only pages may not be searchable; check the PDF for exact wording and diagrams.
Page 2 · Read text
See illustrations inside both covers
        Para consullar las ilustraciones
           despliegue ambas tapas
        Voir illustrations a I'int6rieur des
             pages de couverture
      :CIffi tmr'(. B tAWUt h'b
          trtEt hir*.a ( tdr"'o
          ;ER*i6tg^srti,E€znh
    ,*\;r{tr";l"l'bl
    ,:+-er;llY5-.!ilr


                        "rffi'lli@!     ''ffi:-w7              ,*ffi'1
            English   2
             Espailol 14
             Frangais 26
            HfF*     38
                            4e          +I                   |I Y:.t-.-t-;'-^


oEastman Kodak Company, 1985
View original page 2Page 3 · Read text
www.butkus.us


Mike Butkus   Digitally                                                  DN:email=mike@butkus.org,Date:cn=Mike2024.12.11signedButkus,by21:58:35Mikeo, ou=Butkus.org,Butkusc=US-05'00'
View original page 3
Page 6 · Read text
www.butkus.us
ENGLISH
Your new KooAK VR 35 Camera, K12,
makes taking pictures easy.  lt lets you
take pictures in almost any kind of light.
Just load with Kodak 35 mm film or
equivalent, aim, and shoot. The camera
features automatic film loading'
advance. and rewind, automatic infra-
red focusing including focus-lock
capability, built-in automatic flash,
automatic film-speed setting and expo-
sure control, a self-timer, and a 35 mm
  f /2.8lens.
Power Soure
Your VR camera contains a high-
energy lithium Power source that
powers the tilm advance and rewind,
electronic flash, and the automatic
focus and exposure controls. With a
new power source in your camera and
at normal temperatures, you can shoot
approximately 100 24-exposure rolls of
film where two of every three pictures
 might require flash.
 Note: As temperature decreases, espe-
 cially below 0"C, power-source  perfor-
mance declines. Therefore we recom-
mend that the camera be kept warm
 under these conditions by placing  it
 beneath your outer garments until you
 use the camera. Refer to the section
 "Replacing the Power Source".


 2
View original page 6
Page 7 · Read text
Neck Strap
Clip the neck strap to the POSTS (1A)
on the side of the camera.
Automatic Film-Speed Setting
Many 35 mm films, including all Kodak
35 mm films, contain a sPecial
electronically-read "DX code". Your
camera with its special circuitry takes
advantage of this code by automatically
adjusting the camera to the correct film
speed. For best results, use DX-coded
films with an ISO speed of 100, 200,    s
400. or 1000.                                                                                                      F,iNote: lf a film is used which does not
contain the DX code, the camera auto-     er
matically sets the film speed for ISO     :
1 00.
Loading
Always load and unload Your film in
                                                                                                                                                                                         ..subdued light. This will help minimize
the fogging effect that light has on film
outside the camera.                                             &r,q:
o Open the back cover by sliding the
  COVER LATCH (18) downwards.              lu:a:o Insert the film magazine into the FILM
  CHAMBER (2A) with the film pointing
  towards the TAKE-UP SPOOL (28).
o Pull only enough film out of the mag-
   azine to align the beginning of the
  film with the GUIDE MARK (2D).
  Make sure that the film perforations
View original page 7Page 8 · Read text
www.butkus.us
  engage the SPROCKET TEETH (2C'
  3A).
o In sequence, close the back cover,
  swing open the FLASH COVER (1C,
 4A) and Press the SHUTTER
  RELEASE (48). The film willautomat-
   ically advance to the lirst picture, and
  the EXPOSURE COUNTER (4G) will
  show "1 " in the center of the window.
Note: To verify proper film loading, the
green FILM RUN SIGNAL LIGHT (4D)
will blink while the film is advancing. lf
it does not blink, reload the film.
Picture-Taking
Auto-Focus
o Swing open the flash cover. The
  camera is now on and the flash
  will be fully charged in less than
  2 seconds.
o Hold your camera steady, gripping  it
   firmly with both hands, while keeping
  your elbows close to Your bodY.
o Frame your subject through the
  luminous frame of the VIEWFINDER
   (4E). The area that you see within the
  four outer  f rame marks will be
  included in your Picture. The two
   smaller frame marks in the center of
   the viewfinder show the area that the
  camera is focusing upon.
View original page 8
Page 9 · Read text
o Gently squeeze the shutter release
   partway. The camera will automatr-
    cally focus on the subject within the
   two smaller frame marks. As confir-
   mation, a red focus symbol will glow
   in the viewfinder. For close-range
   subjects, the symbol wiil appear as a
   portrait of a single person; for mid-
  range subjects, the symbol will
  appear as two people; and for sub-
   jects even farther away, the symbol
    will appear as mountains.
   Note:  lf the portrait symbol blinks on
  and off  , the subject  is too close to the
  camera to be focused properly (less
  than 1 m).
o To take the picture, fully depress the
   shutter release. You may also take a
   rapid succession of pictures by hold-
   ing down the shutter release; this will
   allow you to take a picture approxi-
  mately once every 2 seconds.
Note: There are some focusing situa-
tions which may tend to confuse the
auto-focusing system. When you
encounter these situations, we recom-
mend that you focus on another object
at approximately the same distance
from the camera and use the focus-lock
feature described in the next section.
r Subjects behind glass
o Subjects that do not fiil the auto-
  focus frame marks
View original page 9Page 10 · Read text
www.butkus.us
o Surfaces with a strong reflection
  such as from water or shiny auto-
  mobiles
o Surfaces that reflect almost no light
  such as dark hair
o Subjects without a definite mass
  such as flame or smoKe
o Very bright light sources
Focus Lock
This fedture should be used when
encountering the situations described
above. Also, it can be used when You
desire that the main subject not be cen-
tered within the Picture area.
o To use focus lock, first focus on the
  main subject by placing the subject
   within the auto-focus frame marks
  and depressing the shutter release
  partway until the red focus sYmbol
  glows. While holding the shutter
   release in this position' recompose
  your subject within the viewfinder.
  When you are satisfied with the com-
   position, depress the shutter release
    fully. The locked focus setting will be
   held only as long as You Partially
   depress the shutter release and the
   red focus sYmbol is kePt glowing.
 Flash
 In low-light situations, such as inside
 most homes, and outdoors in deeP
 shade or at night, the flash willfire auto-
 matically. For best results, make sure

 6
View original page 10Page 11 · Read text
that your subject is within the flash
range shown below:
o For ISO 100 film ............ 1 .0 to 4.6 m
o For ISO 200 fi|m............ 1.0 to 6.1 m
o For ISO 400, and
    1000 films                  .. 1.0 to 9.1 m
Sometimes people's eyes appear red in
color flash pictures. The red is caused
by reflections from the retina of the eye.
This effect is. especially evident in a
young subject who has a light com-
plexion and blue eyes, or when your
subject is in dimly lighted surround-
ings. To minimize the problem, you can
turn on additional room lights or have
your subject look directly at one of the
lights, causing the pupils of the sub-
ject's eyes to close slightly.
Fill Flash
Occasionally, the main subject may
have less light falling on  it than the sur-
rounding area and background. To
prevent underexposure of the main
subject, we recommend you use the
fill-flash feature of your camera. This
feature permits the flash to fire and
results in additional  light falling on your
subject.
o To use the fill flash. slide the FILL-
  FLASH SWITCH (5A) towards the
   lens. Hold the switch in this position
  while depressing the shutter release
  with your other hand.
View original page 11Page 12 · Read text
www.butkus.us
Self-Timer
o Place the camera on a tripod or other
  firm support.
o After composing the picture, slide
  the SELF-TIMER SWITCH (58)
  downward and dePress the shutter
   release. A red signal light within the
  switch will start to blink and the pic-
  ture will be taken in approximately
    1 0 seconds.
  Note: lf you wish Your subject to be
   positioned outside of the central pic-
  ture area, first slide the timer switch
  downward. Then, focus on the main
   subject, and while keeping the shut-
  ter partially depressed with the red
  focus symbol glowing, recompose
  your picture before fully depressing
  the shutter release.
o To cancel the timer, close the flash
   cover.
Rewinding
After the last picture on the roll has
been taken, the film will automatically
 rewind. A 36-exposure  roll may take
 approximately 36 seconds before the
 motor stops indicating that rewinding
 is complete.
o Remove the film bY oPening uP the
  camera back. When the back cover
    is opened, the exposure counter will
   reset to the start "S" Position.
View original page 12Page 13 · Read text
.   lf you wish to remove the film before
  the roll is complete, slide the
  REWIND BUTTON (6A) in the
   direction shown by the arrow.
Camera Care
o Glose the flash cover to protect the
   picture-taking lens and conserve the
  power source.
o Protect the camera from dust, mois-
   ture, and excessive heat.
o lf the lens appears dirty, wipe the
   surface gently with a cotton swab or
   soft lintless cloth moistened with
  KoDAK Lens Cleaner or equivalent.
  Do not apply pressure or you will
   scratch the lens. lf lens cleaner is not
   available, breathe a mist onto the
   lens surface and lightly wipe the lens
   with a dry cotton swab. Never wipe a
  dry lens.
  Note: Do not use solvents or solu-
   tions not designed for cleaning cam-
  era lenses. Do not use chemically
  treated tissues intended for cleaning
  eyeglasses.
Replacing the Power Source
In an emergency, you can use a 9-volt
alkaline battery; however, this battery
will have a significantly reduced battery
life compared to the lithium power
source.
o [JseUse aa coincoin loto unlor:kunlock ihpthe RATTtrFlYBATTERY
  CoMPARTMENT DOOR (68).
View original page 13
Page 14 · Read text
www.butkus.us
o Open the door and Pull uP on the tab
  to release the power source from the
  battery comPartment.
o Follow the diagram on the inside of
   the door which shows the correct ori-
  entation of the large and small bat-
   tery contacts when inserting the bat-
   tery into the comPartment.
r Close and lock the batterY door.
View original page 14
Related documents and language editions
From the M. Butkus archive. Original publisher and archive notices are retained.
Check the model and edition against your equipment.
PDF verified 2026-10-10.