Film cameras
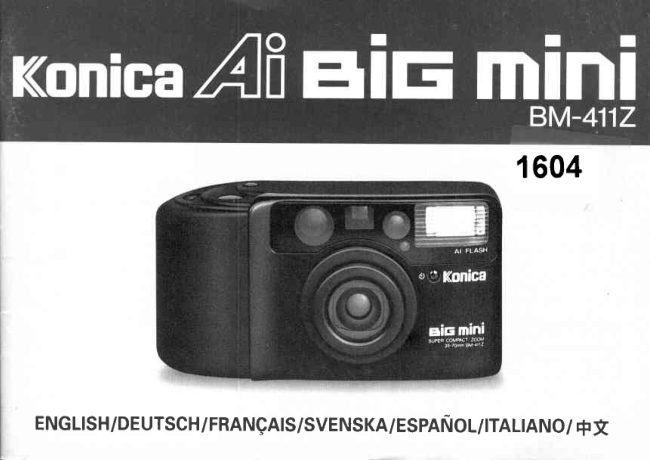
Konica Ai Big Mini User manual
User manual for Konica Ai Big Mini. 20 pages in German, Spanish, Italian, Swedish, English. Read the original PDF, download or print a copy without registration.
20 pagesGerman, Spanish, Italian, Swedish, English1.6 MB PDF
Loading your manual…Open PDF directly
Document details
- Brand
- Konica
- Model / document
- Konica Ai Big Mini
- Document type
- User manual
- Language
- German, Spanish, Italian, Swedish, English
- Pages
- 20
- File size
- 1.6 MB
- Category
- Film cameras
- Document date
- Not specified in catalog
Search available document text
Find a term, then jump to its page in the original PDF. Image-only pages may not be searchable; check the PDF for exact wording and diagrams.
Page 13 · Read text
Names of Parts (Fig.1,Fig.2l                         (Q) Exposure CompensationMode Symbol
O Zoom Switch                                O  Cfrita Flash Mode Symbol
O  Shutter ReleaseButton                    @ Frame Counter
@ Power Switch                        @ Battery Power Symbol
@ Auto-focus SensorWindows                        C  Clor"-up Mode Symbol
@ Lens/Front Filter                              O  S.tf-timer Mode Symbol
@ Strap Eyelet                         @ Continuous Shooting Mode Symbol
(D Viewfinder Window                            O  tnfiniry Mode Symbol
@ Auto-exposure Sensor Window
    guitt-in          Flash€)                               Standard Mode Operation    S.tf-timer              Light@
C) creen Light
@ nea Light                                       1. Loading the Battery
@ ninder Eyepiece                                    Use a single lithium CR-P2 (6V) battery. This camera will
@ fitm Check Window                                          not operate unless the battery is inserted.
@ Back Cover Lock                                                                                  I )  Insert :^athin coin into the groove of the Battery Chamber
@ Back Cover                                              Cover @ and turn to open ih" couet. (Fig. 4l
@ Oisplay Panel                                                  2) Insert a flesh battery aligning the "+" and "-"  poles as                                                       shown inside the cover, then close the cover.
@ Battery Chamber Cover                                         3)  If the Battery Power Symbol @  ir black, the power is full.
@ Manual Rewind Switch                                           (Fig. 5l
@ vode Switch-3                                                            *  Since the auto-date calendar/clock runs on the same bat-
@ uooe Switch-2                                                       tery as the camera, please reset date/time after loading the
@ tvtode Switch- I                                                      battery. (for Auto-date model only)
@ Tripod Socket
DisplaySymbols tris.s)                       When(J Adequateto replacepowerthesupply.battery(Battery Power Symbol is black.)
@ Auto-flash Mode Symbol (StandardMode)                       (?) Low power. (Battery Power Symbol is 213 blank, 1/3
                                                                        black.)                                                               Time                                                                                           to replace                                                                                          the                                                                                                    battery.
@ Pre-FlashMode Symbol                                (O                                                                                                      (l/3                                                               power                                                  No more                                                                                   black                                                                                             portion of Battery Power
O  f'lash ON Mode Symbol (Fill in Flash)                       Symbol blinks, then turns completely blank.)
@ Hash OFF Mode Symbol                               No more pictures can be taken.

 1 2
                            www.orphancameras.com
View original page 13Page 14 · Read text
*  Replace the battery when the Battery Power Symbol is 2/3         *    lf the flash is used with the camera held verticallv. the
   blank. Wait until the end of a roll of film befbre replacing          flash unit should be at the top of the camera.
    battery.
*    After changing the battery please press the Power Switch     4. Using the Viewfinder
                                                     The finder is real image finder. It shows what the camera lens  o.
2. Loadingthe Film                                        SCES.
This camerauses standard35 mm (135 size) roll film maga-
zines with DX coding. The film speed (ISO 25-3200) is set
automatically when the film is loaded in the camera.
*   In case non-DX film  is used. the film speed is set to ISO
   25.
*  For color reversal pictures (transparencies),use film of
   ISO 25, 50, 100,200 or 400 speed.
 l) Push do-wn the Back Cover Lock @ and open the Back
   Cover @.
*  PlaceWhen aloadingnew rollfilm,of filmbe incarefulthe filmnotchamber.touch the back of the
   lens inside the camera. If the lens gets dirty, wipe it gently
   with a soft, dry cloth.                                               a; Parallax compensationmarks
3) Draw out the tip of the film, holding the magazine in        bl  Auto-focus frame
   prace.                                                                  c; Green Light (AE/AF Lock and close-up warning signal)
4) Draw the film tip as far as the FILM TIP mark inside the       d; Red Light (Indicates flash will operate/low light warning)
            (Fig.   camera.                 6)
 \  l           Back                Cover firmly.                         5. Taking Pictures   Close the
6) Press the Shutter Release Button @ once. The film  is          t) Press the Power Switch (O once so that the power is ON.
   automatically advanced to the first frame, and Frame        The lens banel will move forward and Auto-flash Mode
   Counter l9) on the Display Panel indicates "   I  ".               Symbol d opp.ur.. (Fig. 8)
*    If the film has not been correctly loaded Zero Mark at the       2t Lbok thlougir'theFindei Eyepiece@ and pressthe Zoom
   Frame Counter " L-, "  will blink. Open the Back Cover         Switch O  t-oadjusrrhe leni. (fig. Sl
   and reload the film.                                                         *  The field of view in the viewfinder changesautomatically
3. Holding the Camera (Fig.7t                        3)  rsPointthethelenscamerais zoomedso thatin orsubjectout. you want to focus on is in
*  Be sure that the lens and the Auto-focus Windows @ are         the center of the viewfinder (Auto-focus Frame). (Fig.
    not obstructedby anything: fingers, strap, etc.                    1 0 t
                                                                                              1 3
View original page 14Page 15 · Read text
4.1 Press the Shutter Release Button @ halfway  until the     7. Focus Lock
   Green Light @  in the viewfinder comes on. T-hefocus is
    automatically set.                                                                          l)  Aim the Auto-Focus Frame at the sublect. (FiS. 12)
*   Self-timer Light @ turns on at the same time as the Green      21 Depress the Shutter ReleaseButton Q) halfway unril rhe
    Light.                                                 Green Light (D tums on.
5) Press the Shutter Release Button all the wav down to take         *   Self-timei  t-ight @ tums on at the same time as the Green
    the picture. The film will advanceone frame. (Fig. 11)               Light.
*  Camera to Subject Range: 1.0 m (3.3 ft)  -  oo               *  Focus Lock  will be released if the finser is removed from
6) When ypu're finished taking pictures, press the Power          the Shutter Release Button before takiig  the picture.
   Switch O  to tum the cameru'i power off.'                             *  Automatic exposure (AE)  is locked at the same time as
*  At this time the lens retracts automaticallv to the initial         Focus Lock.
    position.                                                          3) With the Shutter Release Button held at this point, com-
*  To extend the battery life, the camera will switch itself off         pose the picture, and then releasethe shutter. (Fig. 13)
    automatically after 30 minutes.                                         *  Focus Lock may not operate properly with some kinds of
*    If the Green Light blinks when the shutter release is          dark or grey objects, reflective or lighlemitting   objects,
   pressed halfway down and the shutter release locks, the           or very small objects. In such cases, set the Focus Lock by
   camera is too close to focus. Move back slightly and take          aiming the camera at another object of similar brightness
    the picture or switch to Close-up Mode.                                 at about the same distance.
6. Using Auto-flash                                                           rt Whenfocus mechanismtaking picturesmaythroughnot focusa glassproperlywindow,becausethe Autoof
If the Red Light @ and Green Light @ tums on when the            reflections. To take photos through glass, press the camera
shutter release is pressed halfway down, there is not enough            directly against the glass. For landscape photos through a
light. and the Auto-flash will operate.                             window, use the Infinity Mode.
 ll  Press the Shutter Release tiutton @ ro take a picture with     8. Unloadingthe Film    flash.
2)  After taking a picture with flash, the Red Light  will        1) When the last frame of the film has been exposed, the film
   appear for a few seconds while the flash is recharging.            will be automatically rewound. When the film  is fully
    Shutter locks until recharging is completed.                     rewound, the motor siops automaticallv.
                                                                     2) When the rewinding has stopped. ch-eckthat the Frame
Flash Photography Range                                      Counter ($) has returned to "  fl  ", the "  fl  " will  blink.
35 mm   ISO 100    I m (3.3 fD -  5.5 m (18 ft)                   3) Open the Back Cover @ and remove the film.
        ISO 400    I m (3.3 f0 -     I 1.0 m (36 ft)              Manual Rewind
70 mm    ISO 100    I m (3.3 tt) -  2.9 m (9.5 ft)              To rewind film manually (forced rewind) before the roll  is
        ISO 400  1 m (3.3 f0 -  5.8 m (19 ft)                     finished.

 1 4
                           www.orphancameras.com
View original page 15Page 16 · Read text
1) Use the tip of the tab on_the camera strap to press the         *  Since all modes are fixed, you can continue to photograph
   Manual Ri:wind Switch @.  fitm  will begin to rewind.            in the mode once it is set.
   (Fis. lal                                                                     *  When you have finished photographing, set it back to the
                                                                                                                            I AUTO.
   Advanced lnstructions           1. Pre-FlashMode (<E)                                                When a figure is photographed in a dark place, it often results
                                                                                in red eyes in the picture. To reduce this red eyed effect, the
Using the Mode Switch-1                               pre-flash function  is used for hring a spare flash to make the
                                                                     pupil smallerjust before shooting the final flash photograph.Pressing         the         Mode Switch-l @  shifts the camera through the      l)^Press the-Mode Switch-l @  until the Pre-flash'Modefollowins        modes.
                                                      Symbol  ( AUTO t <D) appears on the display panel.
                                                                       (Fis. 15)
                                                                                                               ;t  As the main flash will be activated about one second after
 AUTO StandardMode (Automatic self activating flash)            the Pre-flash, please be careful not to move the camera                                                                   during this time.                  decides whether or not to use flash)  I      (Camera                                               2. Daylight                                                 Flash (  I    l
  AUTO Pre-flash Mode                                       Daylightstrong shadowsflash photographyor on cloudy isdays.effective for back-lit subjects,
                                                                       the Mode Switcli-l @  until the    I  symbol will 1<E (To reduce the red eyes)                                                l)  Piess                                                            appear on the display panel to indicate Flash ON Mode.
                                                                     (Fig. 161
      ,     Flash(User ONdecidesModeto (Fulluse flash)in flash)                           2) The flash will operateeven in bright places.
                                               3. Slow Shutter Synch (  I   )
           Flash OFF Mode                                           In the Flash ON Mode, slow shutter speedsare used for avail-
          (User decides not to use flash)                        able light.  Jo                                                          1) Prels the Mode Switch-l @  until the   I  symbol will   J                                                      appear on the display panel to indicate Flash ON Mode.
                                                                     (Fig. 161          +1.5 Exposure CompensationMode                                                                     2) The AE operatesnormally in the flash mode, so it is pos- @  (Exposure corrected to +L5 aperture)
    ffi                                                           dusk,sible toontakecloudycorrectlydays, orexposedat closephotographsrange, and atagainstdawn darkand
                                                              backgrounds.
                                                                                             1 5
View original page 16Page 17 · Read text
*  The use of a tripcld  is recornmended  to prevent camera         When  you have finished  photographing  set  it back  to the
   shake.                                                              standard position.
4. Flash OFF Mode  ( €J )                                            atIn eachthe Self-timershclt.     Mode.   it returns to the standard oclsition
The  flash does not  l-ire in this ntode. Use this mode  for pho-
tographrng in a museum where no flash is allowed,  clr shoot-
ing an evening or night view.
 I ) Press the Vode-Switch-     I @  until the O   symbol  will                    Standard-Position  (non marked)
   appear on the display panel, to indicate Flash OFF Mode.
   The camera  is now  set for programmed  AE  photography
    at up to 3.3 seconds without flash. (Fig. 171
*  P h o t o g r a p h i n g    i n d a r k  p l a c e  r e q u i r e a s l o w e r  s h u t t e r                       Infinity Mode (Flash OFF)
    s p e e d . W h e n  d e p r e s s i n g  t h e S h u t t e r R e l e a s e B u t t o n
   halfway   if a Red Light  blinks, that indicates the warning
    that the shutter speed set is too slow  for hand-hold  pho-                   Continuous  Shoclting Mode
   tography causing a vibration.
*     If the Red Light blinks slowly,  this is the warning  that the
    resultant picture becomes too dark by under exposure.
5. +1.5ExposureCompensationMode                         Self-timer Mode
(@ffi  )
When making your picturefinishedoverall lighter,shootinga
figure      against             the                              ground,                    light, in                       a skiing                                          or photographing
   shadowthe            of             a building                     under                             the                               very contrasty                                                  lighting to     1. InfinityMode (A  )
be brighter,this f unctionis very effective.                   Use this mode to take photos of distant landscapesand when
 I ) Priss the Mode Switch- I @  until the O qE  symbol      shooting scenery or landscapesthrough a glass window.
    will appearon the display panel.This causesthe resultant    Focuswill be set at infinity for maxilnurnsharpness.
   pictureautomaticallyover-exposedby 1.5EV. (Fig. 181            l) Press the Mode Swiich-2 €D until the Infinity Mode
Using the Mode Switch-2                         Symbol ( A  ) appearson the displaypanel.(Fig. 191                                                                   2) This will insure sharpfocusing at very long range.
Prcssing the Mode Switch-2 @  shifts the camera through the         *  Flash will not operatein the Infinity Mode.
following modes.                                                               *    If the Red Light blinks after you have depressedthe
*   Since the Infinitv Mode and Continuous  Shooting Mode          Shutter ReleasJButton €)  tratf*ay, this is a warning that
   are fixed. you can continue  to photograph  in the mode          there is insufficient light. Therefbre press Mode Switch- I
   oncc it is set.
 1 6
                           www.orphancameras.com
View original page 17Page 18 · Read text
@ and selectthe Flash OFF Mode.                                     *   In Self-tirner Mode, the camera will return to standard
2. ContinuousShooting Mode ( =Jr)             modeSwitch-2aftereachonetimeexposure.a Self-timerIt is necessaryMode pictureto resetis taken.the Mode
The Shutter ReleaseButton may be held down to take a         *  To  stop the Self-tlmer before the picture is taken, press
sequenceof photos in rapid succession.(at about 1.5 frames         the Power Switch €).
per secondwith availablelight.)                                             *  Focus and AE Lock may be used with the self-timer.
l l  P r e s s t h e M o d e S w i t c h - 2 @  u n t i l  t h e C o n t i n u o u s       *   Self-timer photography requires a tripod.
         Mode   Shooting               Symbol ( Et: ) appearson the display    Using the Mode Switch-3   panel.(Fig.             20)
2) Press the Shutter ReleaseButton and hold it down for      Pressingthe Mocle Switch-3 @  shifts the camera through the
   continuousshooting,as desired.                              following modes.
3) Remove your finger from the shutterto stop shooting.
*  With flash photography or slow shutter photography the
   next exposurewill be slightly delayed.
*  With the Child Flash Mode, continuousf-lashphotographs                Standard-Position(non marked)
   can be taken at short intervals.
*  Since the focusing and exposureare fixed, fhis is not suit-
   ed for photographinga subject which changesdistant and
   brightnessgreatly.                                                     Child Flash Mode
3. Self-timer Mode ( U   l
 l) Press the Mode Switch-2 @  until the Self-timer Mode
   Symbol ( $   ) appearson the displaypanel.(Fig. 21)                    Close-upMode
2) Set the camera on a tripod or steady surface, frame the
    picture. and press the Shutter Release Button. The Self-
    timer will start. and releasethe shutter after about l0 sec-
   onds.
*   The Self-timer Light @ on front of the camera will light     1. Child FlashMode (continuousflash
    for J seconds              and blink for the last 3 secondsbefore    photography)(O))   release.            lFtS.22l
*  Mode Switch- I modes and Close-up mode can be select-     By selecting this mode, you can take continuous flash pho-
   ed.                                                     tographssuch as of a moving child.
 *  Do not standin front of the camerawhen startingthe Self-         l)" Piess the Mode Switch-J @  until the Child Flash Mode
    timer. (lf you are blocking the lens, shutter releasewill        Symbol (  I  O)  El:  ) appearson the display panel. (Fig.
    lock.)                                                      231
                                                                                              1 7
View original page 18Page 19 · Read text
2) Take continuous flash photographs by keeping the Shutter     Auto-date  (Fig.26,Fis.z7l
   Releusc Button @  depietted.
-lt  Renrove your finger from the shutter to stop shooting.              (fbr Auto-date model onlv)
*  The flash  will  work even when photographing   in a bright      The Auto-date model of-this camera has a quartz-controlled
    krcation. but  it is more effective in dark conditions.             auto-datemechanism (clock/calendar)that is programmed
 *     If you press the Mocle Switch-2 @,  the B   display goes      throush December31. 209 | .
    out. and Continuous Shooting Mode  is cancelled. Now,      Chaiging  the Dispiay Mode
    please press the Shutter Release Button take out each time      Pressthe "MODE" Switch @ and selecteither date or time.
    you wish to take a photograph.                               Adjusting Date and Time
*  Can be cornbined with Pre-flash Mode.                                               I ) Pressthe "MODE" Switch @ and the date or time will be
*  H i g h - s e n s i t i v i t y    f i l m s  o f   I S O 4 0 0 o r a b o v e a r e m o r e          displayed.
    efl-ective.                                                       2) Pressthe "SELECT" Switch @ so that the date and time
2. Close-upMode                                          3) blinks.Pressthe "SET" Switch C  to set the date or time.
It is possible to make a close-up shot at a distance tct the sub-       4) Press the "SELECT" Switch @ again to return to start
                                                                    position.ject                                            (70    as close            as 0.6 m                      with                           the                             telephoto                                        lens                                         mm)."l                                                                 Adjust the Auto-datedisplay after replacingthe battery.          pressing                    the                  Mode                             Switch-3                                             the                                                 lens                                                                      is extend-         *   t When                                @,
   ed      up            to            70 ntm and                           the                              dtsplay panel shows  O   to enter     Liquid Crystal Display    into         the           Close-up                   Mode.                                lFig.24l
2)  Approach  the subject up to 0.6 m-l   m, position  it to  fit     The LCD display darkens at high temperatures,and the
     in the Auto-lircus  Frame and depress the Shutter Release      responseis slower at low temperatures.The LCD returns to
    Button halfway  until the Green Light turns on.                  correct operatingcharacteristicsat normal temperatures.
*  When depressing the Shutter Release Button halfway   if a     Specifications
   Green Light  blinks. that indicates either thc shooting dis-
    tance is shorter than 0.6 m. or farther than   I m. When  the      Type               Auto-focus auto-exposure3 5 m m
    shutter  is locked. correct the distance and depress the                                                                   l e n s s h u t t e r c a m e r a w i t h b u i l t - i n
    Shutter Release Button again. (Note  that  if the shooting                      zoom lens
    distance is shorter than 0.35 rn the shutter is released.)
3)  With  the Shutter Release Butron held at this point, deter-       Format               2 4 x 3 6 m m
    rnine vour shooting angle with  in the Parallax compensa-                           3 5 m m F 3 . 6 - 1 0 m m F 6 . U f o c a l
    tion marks to release the shutter. (Fig. 25)                                            length Konica zoom lens (7 groups 7
*   All photographic modes (except A   ) can be selected.                               elements).Built-in skvlisht filter
*  The carnera vibration can be protected by using a tripod       Shutter           E l e c t r o n i c p r o g r a m m e d s h u t t e r ,
    ancl shooting with the self-timer.                                                    3.3- l/360 sec.

 1 B                            www.orphancameras.com
View original page 19Page 20 · Read text
Power switch         Lens barrel extendedand shutter lock     Continuousshooting  About 1.5 frames per second with
                     cancelledfor Power switch ON                                  availablelieht
Focusing               Infrared  non-scan  active  type  auto-       Self-timer            Electronic self-timer about l0 sec.
                       focus system,  effective  range  1 m                             delay, red LED lights for first 7 sec.
                          (3.3  ft) to oo,  Focus lock with  shut-                           then blinks for 3 sec. Calrcelfunction
                              ter release half stroke                                           provided.
AE adjustment        Programrned AE  with CdS photo  cell      Close-up             Effective range 0.6 m (2 ft)-l  m
                        used, Center weighted                                             (3.3 ft) (70 mm)
AE Couplingrange   ISO 100; f=35 mm EV2-EV  16.5      Film transport        Automatic  film advance to first frame
                    f=70 mm EV3.S-EV 16.5                                                (with  shutter release), auto wind  after
Film speed          With DX film, auto setting ISO 25 to                              each frame,  auto rewind  at end of  roll
                  ISO                        3200. with non DX film defaults                        w( lorcedi t h   a) urewindt o - r e w featurei n d   s t o p ,   r n a n u a l                 ISO 25
Finder              Real-image zoom finder with auto-      Frame counter          Additive type, LCD panel display
                     focus frame, close-up parallax marks,     A u t o - d a t e         B u i l t - i n  d i g i t a l  L C D  d i s p l a y ,
                  Green light (auto-focus/focuslock,      (Auto-datemodel only) Imprints time or date up to the year
                      blinks when subjectis out of range),                         2019, setting for date or time record-
                 Red light (auto flash/flash charge,                                                                 i n g o r c a n c e l f o r n o  i m p r i n t i n g ,
                    b l i n k s  i n F l a s h O F F m o d e w h e n                            adjustableto nearestsecond
                      availablelight is insufficient.)             Battery lif'e          About 30 rolls with flash for half the
Flash               Flash operatesautomatically when                         exposures(24-exposurefi lm)
                     shutter speed approacheslimit for       Power source          Lithium battery(CR-P2;6 V)                    hand-heldshooting,range (lSO 100)
                    f=35 mm  I m (3.3 ft)-5.5  rn ( l8 ft),      Size,weight         129.5x 69 x 46 mm (5.1 x 2.1 x 1.8")
                                         f -10 mm  I m (3.3 ft)-2.9 m (9.5 ft),                         275 g (9.7 oz) battery extra
                     recycletime about 3 sec.Child Flash     Note:                   Specifications  and design subject to
                  Mode: 1-3  sec.                                            change without  notice. Above  data
Mode switch        A u t o  f l a s h , P r e F l a s h , F l a s h O N ,                            based on manutacture's tests.
                    Flash OFF, + L5EV over-exposure,
                                         I n f i n i t y p h o t o g r a p h y ,C o n t i n u o u s
                       s h o o t i n g , S e l f - t i m e r , C h i l d F l a s h
                    photography,Close-upphotography
View original page 20Related documents and language editions

From the M. Butkus archive. Original publisher and archive notices are retained.
Check the model and edition against your equipment.
PDF verified 2026-10-10.