Film cameras
Konica Auto S3 User manual
User manual for Konica Auto S3. 50 pages in English. Read the original PDF, download or print a copy without registration.
50 pagesEnglish6.6 MB PDF
Loading your manual…Open PDF directly
Document details
- Brand
- Konica
- Model / document
- Konica Auto S3
- Document type
- User manual
- Language
- English
- Pages
- 50
- File size
- 6.6 MB
- Category
- Film cameras
- Document date
- Not specified in catalog
Search available document text
Find a term, then jump to its page in the original PDF. Image-only pages may not be searchable; check the PDF for exact wording and diagrams.
Page 1 · Read text
www.butkus.us
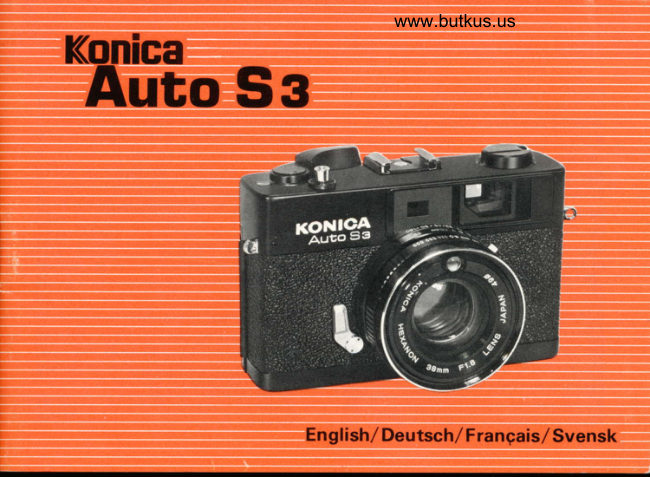
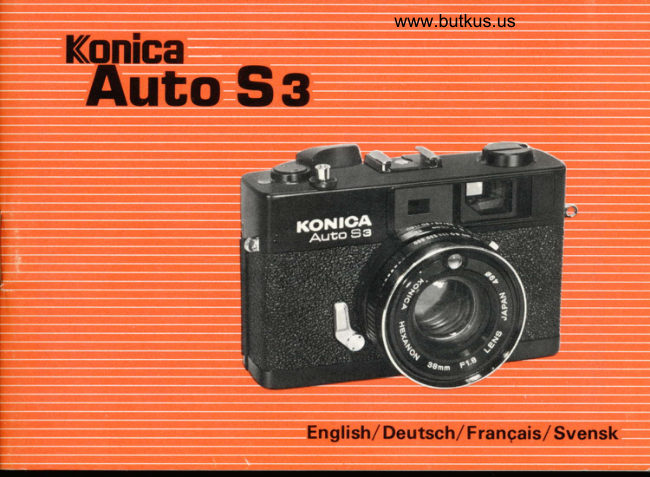
Konica
 Auto Ss


                             English/ Deutsch/ Frangais/ Svensk
View original page 1Page 3 · Read text
I mportant Operating Notes            4       Wichtige Hinweise ftir die
Six Simple Steps for                          Bedienung                        4
  Electric Eye Photography            6      Sechs einfache Schritte zu
                                                                                6Name of Each Part""""""'             8        automatischen (EE) Aufnahmen """
Loading of Mercury Battery                't2      Bezeichnung der Einzelteile """""""'   8
Film LoadinS """""""'               16       Ouecksilberbatterie einlegen           12
Electric Eye Photography             22       Filmeinlegen """"""""                16
                                                                               22Before the Shutter is Released         24      Automatische (EE) Aufnahmen """"'
Holding Your Camera Steady        32      Vor dem Auslosen des Verschlusses  "' 24
Film Rewinding """'.'.              34       Halten der Kamera                 32
In Taking Portraits with                             F ilmri.icktransport                 34
 Behind-the-Subject  Lighting        36       Portrdtaufnahmen  im Gegenlicht """ 36
Use of Self-timer "                  3B         Selbstausloser'.'.........               3B
B (Bulb) Exposure                 39      B Aufnahm6n """"""'              39
Flash Photography                40        Blitzlichtauf nahmen                40
Daylight F lash Photography          43        Tagesl icht-Bl itzl ichtauf nahmen       43
Shutter Speed and Delineation'."".'....  48       VerschluBzeit und Schdrfe           48
Aperture and Delineation               51        Blendenei nstel lung u nd
Accessories                          55         Schdrfe                                51
Features of the Konica Auto S-3      62       Zubehor                            55
View original page 3Page 4 · Read text
www.butkus.uslmportant Operating Notes  Noteimportantessurlefonctionnernent
lMchtige Hinweise fUr die Bedienung Att obserera vid anvandningen
                        1. The Konica Auto S-3's CdS meter, h€art of the automatic
                        exposure system, operates on a m€rcury battery c€ll, As a
                         quick chek on battery condition, look through the camera
                          viewfinder to see that the mat€r needle swings as you mov€
                        the camera in an arc from the sky to the ground. lf the
                           needle does not move or if its action seems sluggish replace
                           the battery with a new one.
                        1. Der 965-9"lichtungsmesser der Konica Auto S-3, das H€rz-
                                 sttick des automatishen Belichtungssyst€ms, wird durch ein
                           Ouecksilberbatterieelement  betrieben. Fiir  eine  schnelle
                          Priifung des Batteriezustandes beobachten Sie durch den
                     Sucher lhrer Kamera das Ausschlagen der Belichtungs_
                        messernadel wdhrend Sie die Kamera in einem Bogen vom
                        Himmel zur Erde bewegen. Falls die Nadel gar nicht oder nur
                             schw€rfellig ausschlegt, ersetzen Sie die Batterie durch eine
                             neue.
                        1. Le posemdtre SdC du Konica Auto S-3, noyau du systdme
                           d'exposition automatique, fonctionne sur une pile au mer-
                            cure. Pour controler le fonctionnement de la pile rapidement,
                            regarder dans le viseur si l'aiguille oscille lorsqu'on d6place
                               l'appareil en suivant une ligne arqu6e entre le ciel et la terre.
                          Si l'aiguille ne bouge pas ou que son mouvement semble lent
                                                        il faut changer la pile.
                        1. Konica Auto S-3's CdS matare, som ar central-organet  idet
                         automatiska exponeringssystemet,  arbetar med ett kvicksit-
                               verbatteri. Fcir att kontrollera batteriet, tittar man  i kamerans
                              siikare  ftjr  att se efter om mdtarn8len ror sig ndr kameran
View original page 4Page 5 · Read text
riktas mot himlen respektive mot marken. Om nSlen inte 16r
    sig eller om rtirelsen tycks trog,6r det tid att byta ut battenet
   mot ett ny tt.
2. The shutter speed is not usable when  it  is ser to an    intermediate point betwen shutter speed calibrations. Make
    sure that the shutter speed ring has clicked into position.
2. Die VerschluRzeiten  sind nicht  fi.ir Zwischenwerte zwischen
  den VerschluBzeit-Markierungen einstellbar. Vergewissern
   Sie sich, daB der Einstellring  ftir  VerschluRzeit bei der
    jewei   I igen Mark ieru ng einrastet.
2. Le point  interm6diaire entre deux calibrations n esr pas
   valable pour d6terminer la vitesse d'obturation. Veiller d ce
   que la bague de 169lage soit bien bloqu6e d une calibration.
2. Slutarhastigheten kan inte stallas in pg punkter som ligger
   mellan de utmarkta punkterna. F6rs6kra Er om att ringen fdr
    slutarhastighet ar installd  i det rafJlade laget.
    Electric eye photography  is not possibte  if there is a flash
   unit in the camera's accessory clip. For flash operation
   Automatische (EE) Auf nahmen sind nicht mdglich, wenn ein
   Blitzlichtgerdt am Zubeh<irschuh der Kamera angescntossen
     ist.
3. La photographie automatique (EE) n'est pas possible lorsqu'il
   y i un 6quipement de flash mont6 sur l'appareil.
3. Det dr inte m6jligt att utnyttja det elektriska <igat om en
    blixt er isatt i kamerans till-behdrsfeste. For anvdndning med
    blixt.
View original page 5Page 6 · Read text
Six Simple Steps for Electric Eye Photographywww.butkus.us
Sechs einfache Schritte zu automatischen (EE) Aufnahmen
Six 6tapes simples pour la photographie automatique (EE)
Sex enkla punkter for fotografering med hjalp av det elektriska Ogat


1. Load Film                  2. Wind F ilm                     ?  Set ASA (DlN)
1. Film einlegen                2. Film transportieren            DIN(ASA) einstellen
1. Mettre la pellicule           2. Bombiner la pellicule            3.  R69ler ASA (DlN)
1. Sett  i film                   2. Vrid fram film                 ?   St6ll in ASA(DlN)
View original page 6
Page 7 · Read text
4.  Set Shutter Speed                5.  Focus and Frame            6, Depress Shutter
4.  VerschluRzeit einstellen         Entfernung  ein stellen und    6. Ausloser betdtigen
                                      Bildaussch nitt  f estlegen4.  R69ler la vitesse                                             6. Appuyer sur le bouton    d'obtu rati o n                       5.  R6gler la mise au point            d'o btu rateu r
                                         et le cadrage4.  Stdll in slutarhastighet                                       6. Tryck ner slutarknappen
                                         St6ll in fokus och sdtt
                                   motivet inom bildramen
View original page 7Page 10 · Read text
www.butkus.us  Loading of Mercury Battery        Chargernnt de la pile i mercure
  Ouecksilberbatterie Einlegen      lsdttning av kvicksilverbatteri
   The Konica Auto S-3's CdS meter ope'
    rates on a mercury battery. Completely
   wipe the mercury battery, which   is
    available as an accessory, with a piece of
   dry, clean cloth and then place in the
   mercury batterv chamber.
   Der CdS-Belichtungsmesser der Konica
   Auto S-3 wird von einer  O.uecksil-
    berbatterie gespeist. Reinigen Sie die als
   Zubehor gelieferte Ouecksilberbatterie
   mit einem trockenen und sauberen Tuch                                                            1.
   und legen Sie sie an den Batterieraum
    ein.
                                                                          1.  Take off the  lid of your camera's
                                             Mercury Battery Chamber (33) by   Le posemdtre SdC du Konica Auto S-3          turning  it counterclockwise with  a   fonctionne sur une pile a mercure. Avant             corn.   de la mettre dans la chambre a Pile,
   essuvez-la bien avec un morceau de          2.  Insert the mercury battery so that
    ch iffon sec bt propre.                          the "+" side of the mercurv battery
                                            comes in contact with the "+" side oJ
   CdS-metaren hos Konica Auto  S-3         the co\    Put the cover on the    utnyttjar  ett  kvicksilverbatteri. Torka        chamber urn it clockwise and screw    ordentligt av kvicksilverbatteriet, som 6r                   it up tigl'rly.
    ett tillbehor, med en torr ren tyglapp.
    Placera det dereJter  i batteriutrvmmet.
t2
View original page 10Page 12 · Read text
www.butkus.us


o The life of a mercury battery exceeds     o Die   Quecksillberbatterie  hat   bei
  one year when it is put to normal use.       normalem Betrieb eine Lebensd auer
  Instead of gradually dropping accord-        von mehr als einem Jahr. lhre Betriebs-
  ing to the frequency of  its u se, a        spannung fallt plotzlich ab, wenn die
  mercu ry  battery  ten ds to  su dden ly        Lebensdauer zu Ende geht. Die Batte-
  drop in voltage when its life has prac-        riespannung nimmt wdhrend des Bet-
   tically expired.                                     riebs nicht allm6hlich ab.
a When it is found that the meter needle      o Wenn sich, der Zeiger im Sucher nicht
  does not swing when your camera is       mehr bewegt, obwohl die Kamera auf
  trained at a bright subject, replace the        ein helles Motiv gerichtet wird, muss
  mercury battery with a new one.                die Ouecksilber gewechselt werden.
a The meter of your camera takes a 1,      o Verwendbare Ouecksilberbatterietypen
 35V  Mallory PX-675 or  Eveready          sind: Mallory PX-675, VARTA 7OO1
  E P X-675.                                  oder Eveready EPX-675 (alle zu 1,35V).
Note that there are batteries similar in      Es ist zu beachten, dass es Batterien in
shape to but different in voltage from a       gleichem Format, aber mit anderer Span-
mercury battery.                           nung gibt.
                                                                                                                                                              fr_i r lange Zeit nichto When your camera is not to be used      o Wenn die Kamera  for a long period of time, take out the        benutzt wird, nehmen Sie die Queck-                                                                                                 Sie                                                           heraus und                                                                 bewahren  mercury           battery and keep it in a dry          silberbatterie                                                                                           auf   .                                                            sie an einer trocknen                                                                                 Stelle   Pl ace.
View original page 12Page 13 · Read text
Film Loading              Chargement de le pellicule
Filmeinlegen                   lsdttning av film


    Filp up the Film Rewind Crank (6)          While the crank is kept drawn, load a
   and forcibly pull it up, and the Back             roll of 35mm catridge film (for 20 or
   Cover (3O) will open and the film         36 exposures) into the Film Catridge
   counter will  indicate the mark "S"        Chamber (26) and return the crank
     (start).                                          to the original position.
View original page 13Page 14 · Read text
www.butkus.us


    3. Insert the film tip into the slit of the       4. Turn the Fitm Wind L€ver (2) and
       Film Take-up Spoot (24). The fitm           ascertain that perforations on both
         tip can be inserted into any slit.                  sides of film are in gear with the film
                                                  Sprocket (23). before the back cover
                                                                                    is closed.


l8
View original page 14Page 15 · Read text
5.  Repeat the winding of film and the       6. Move the Film Speed Lever (28)
       dopression of the Shutter Release          while applying inward pressure, and
      Button (1) until the figure "1"  ap-           turn  it so that the notch in the lever
        pears in the Film counter (7).                 matches the film speed rating of your
                                                        film as indicated on the Film Speed    When                    film                                            trans-             the                            is correctly                                                 Scale (27). When properly matched,       ported,              the                              crank turns.                    film rewind                                               the film speed lever will spring up,
                                                       locked in oosition.

                                 Df N 1S(1.6XlJ)lB(1.eX2.0) 21 tz2)12.3) 24 (2P)(291 27 l2p)(2.s) 30
                 ASA 25132)(40) 50(64)(80)l OO(1 25X1 60)2OO(250X320)4OO(500)(640)8OO

20
View original page 15Page 16 · Read text
www.butkus.us
Electric Eye Photography     Photographie automatique {EE)
                                                                                                                                    ( EE) fotograferingAutomatische {EE) Aufnahmen       Elektris ka ogat


www.butkus.us

 The Konica Auto S-3 incorporates a system in which preference  is given to shutter speed
 in exposure determination. In other words, this system is so designed that when a shuttar
 speed has been determined in aclvance, your camera is automatically set to the correct
 aperture.
 1. Turn the Shutter Speed Ring ('17) and set the predermined shutter speed to the index
    mark. At a bright place, select a somewhat fast shutter speed (a large shutter speed
    reading) but choose a somewhat slow shutter speed (a small shutter speed reading) at
    a dark pf ace. The simplest way will be to set the shutter speed to "125" 11/125 sec.\
    for outdoor shooting and "3O" (1/3O sec.) for indoor shooting.
 2. When the camera is trained at a subiect, the lens will be automatically stopped down
     to the appropriate aperture.    I n th is manner, the correct exposure is assured at all times.
 Die Konica Auto S-3 arbeitet mit einem System, bei dem der VerschluRzeit eine
 vorrangige Stellung bei der Bestimmung der Belichtungszeit zukommt. In anderen
 Worten ist dieses System so konstruiert, daR nach vorausgehender Wahl einer
 VerschluBzeit lhre Kamera automatisch auf den korrekten Blendenwert eingestellt wird.
View original page 16Page 17 · Read text
Before the Shutter is Released Avant le d6clenchenrent d'obturateur
   Vor dem Ausldsen des Verschlusses Innan slutaren nertryckes
    1. Look through the finder.
                 While looking through the finder, you may be able to (1) ascertain the                  exposure, (2) focus the lens and (3) frame the subject. When either an
                    electronic flash unit or a flash gun has been clipped into the accessory
                       clip of your camera, the Synchro Mark will appear in the finder.

    1. Blicken sie durch den Sucher
             Wenn Sie durch den Sucher blicken, kcinnen Sie (1) die Belichtung                 festste|len(2)dasobjektivscharfeinste||enund(3)dasMotivdurchden<
                 Bildrahmen erfassen. Falls ein Elektronenblitzgeret oder ein normales
                     Blitzlicht im Auf;teckschuh der Kamera montiert wurde, so wird das
                  Synchron-Zeichen  im Sucher sichtbar.

    1. Regarder dans le viseur
              En regardant dans le viseur, on peut (1) v6rifier l'exposition, (21 r6gler  la
                  mise au point et (3) cadrer l'objet. Si l'appareil est 6quip6 soit d'un flash
                   electronique soit d'u n  f lash conventionnel. la marque de synchronisation
                   apparaitra dans le viseur.

    1.  I Siikaren kan fiiljande observeras.
               Ndr Ni tittar isokaren, kan Ni (1) bestiimma ljusstyrkan, (2) stiilla  il
                  dbjektivet och (3) placera in motivet ifilmramen.  BBde om en
                   elektronblixtenhet eller om en blixtsynkronisator  har fests till kamerans
                        tillbehcirsf6ste, kommer synkroindikator som synas  i sokaren.
24
View original page 17Page 18 · Read text
www.butkus.us
Bright Frame             Aperture Scale              Overexposure Warning Mark
Leuchtrahmen            Blendenskala                Warnsignal bei Uberbelichtung
                           Echelle d'ouverturesCadre lumineux                                   Zone de sur exposition                             Bliindarskala
Lius ram                                            Varningsmdrke for civerexponering


                                                           Synchro Mark
Paralax Compen.                                                 Sync hron- Zeichensation Mark                                                                  de synchro-Markierung                 frir                                                                             nisationPara  |  | ax en au                sgleic h
                                                                Synkro-merkeMarque de compen-
sation de parallaxe
Mdrke fiir paralax-
kompensation
                                                                    N eedle
                                                                      Zeiger im Sucher
                                                                             Aiguille du posemdtre
                                                                       MdtarnSl

Rangef inder's Oouble-l mage Section
Feld frir den Mischbild-Entfernu  ngqmeser     Underexposure Warn ing Mark
Section d double-image de                    Warnsignal bei Unterbel ichtung
t6l6mitre                                Zone de sous-exposition
Dubbelbildsdelen   i siikaren                   Varningsmdrke fdr u nderexponering
                                                                             25
View original page 18Page 19 · Read text
2.  Ascertaining                     Correct Expcure Range: When the meter needle  is
       Of EE                         with in the correct exposure range,  it means that the
       Exposu re                EE system will work and make it possible to take                                         pictures at the correct exposure. The calibration to
                                 which the needle points represents the aperture at
                                    which the picture  is taken. In other words, this scale     2,  Ermittlung der                   provides you with photographic data.       automatischen
       (EEl Belichtung               Korrekter Belichtungsbereich: lhre  Aufnahmen                               werden vollautomatisch richtig belichtet, solange
                                         sich die Nadel des Belichtungsmessers innerhalb der
     2.  V6rification de                 Blendenskala zwischen dem oberen und unteren                                      roien Warnfeld bewegt. Die Belichtungsmessernadel       l'exp6ition auto-      4        zeigt auf der Skala die Blende an, mit der vollauto-
       matique {EE}                2.8       matisch belichtet wird.
                           Gamme d'exposition correcte: Lorsque l'aiguille est
     2.  Faststallande av                dans la gamme d'exposition correcte, le systdme EE
         elektriska iigat (EEl             fonctionne normalement, l'exposition correcte 6tant       exponering                    toujours assur6e. Le chiffre indiqu6 par l'aiguille     T     repr6sente l'ouverture utilis6e. Autrement dit l'6chel'
                                          le dans le viseur vous fournit les donn6es photo-
                                            grapn rques.
                                   Korrekt exponeringsomr8de: Ndr mdt^arnSlen  ligger
                              inom det korrekta exponeringsomrEdet, betVder
                                         detta att EE-systemet arbetar, vilket  g,iir det majiligt
                                            att ta bilder med korrekt exponering. Vdrdet, som
                                     n8len pekar p9, 6r bldndar vdrdet som utnyttjas ndr
                                         bilden tas. Denna skala fcirser Er alltsb med fotogra-
                                            fiska data.

26
View original page 19Page 20 · Read text
www.butkus.us
        Overexposure Warning Mark  :
      When the meter needle has come into this portion and the
         shutter has been released with the needle as it is, the picutre will
        be overexposed. Turn the shutter speed ring to set the shutter to
       a faster speed, and the needle will come out of this area. One
       way would be to use an N D  f ilter.

         Warnsignal bei Uberbelichtung:
        Steht die Belichtungsmessernadel im oberen roten WarnJeld. so
        w,rd lhre Aufnahme iiberbelichtet. Stellen Sie deshalb den         VerschluRzeit-Einstellring  auf  eine schnellere VerschluRge_
         schwindigkeit, bis die Nadel des Belichtungsmessers den roten
2.8       Bereich verleRt.
It'-    I     Zone de sur-exposition:
 --      Lorsque l'aiguille entre dans la zone de cette marque et qu'on        d6clenche l'obturateur,  il y aura sur-exposition.   ll faut donc
        avant de d6clencher I'obturateur, mettre la bague de r6glage d
       une vitesse plus rapide de  f acon que l'aigu ille sorte de la zone.
       Un des moyens serait d'utiliser un f iltre ND.

         Varningsmiirke  fiir iiverexponering:
       Ndr metarnblen har fcirts in  i varningsavsnittet och slutaren
         nertrycks med nSlen idetta lege, kommer er,6verexponerad bild         att erhSllas. Om ring^en ftir slutarhastighet vrides till en hogre
         hastighet, kommer nSlen att ftjras ut ur varningsavsnittet. Ett
        annat satt skulle vara att anvanda ett ND filter.
                                                                  ZT
View original page 20Page 21 · Read text
Underexposure Warning Mark   :
                   When the meter needle is within this area and the shutter is
                            released with the needle as it  is, the picture will be under-
                         exposed. Turn the shutter speed ring to set the shutter to a
                            slower speed. and the needle will come out of this area. In case
                           the needle has not come out of this area even if the shutter is set
                               to a slower speed, use a flash gun or electronic flash.
                           Warnsignal bei Unterbelichtung:
                        Steht die Nadel des Belichtungsmessers im unteren roten
                           Warnfeld, so wird die Aufnahme unterbelichtet. Stellen Sie den
                             VerschluRzeit-Einstellring auf eine langsamere VerschluRgesch-
                              windigkeit, bis sich die Nadel des Belichtungsmessers  aus diesem
                            B€reich herausbewegt. Sollte die Nadel auch bei Einstellung von
                              2.8      'll3O sec. sich noch im roten Warnfeld befinden, so sollten Sie
                               die Aufnahme mit Hilfe eines Blitzgerates machen.
                              I.U L'                        Zone de sous€xpositaon  :
                         Lorsque l'aiguille se trouve dans cette zone et qu'on d6clenche               -{     I'obturateur,  il y aura sour-exposition. Tourner la bague de
                             r6glage d une vitesse plus lente. de fagon que I'aiguille sorte de
                            cette zone. Si l'aiguille ne sort pas de la zone, mCme lorsqu'on
                               choisit une vitesse lente, utiliser un flash 6lectronique.
                          Varningsmirke  f iir u nderexponering:
                       Ner matarnglen er inom detta omrtde och slutaren trycks ner
                    med nSlen  i detta lage, kommer bilden att bli underexponerad.
                          Vrid slutarringen  fiir att stella in slutaren pg en lagre hastighet
                     och nBlen fijrs ut ur varningsomrBdet. Om nSlen inte lemnar
                         varningsomrBdet even om slutarhastigheten ar instelld lggt,
                         anvdnd dE blixt eller elektronblixt.
28
View original page 21Page 23 · Read text
www.butkus.us


   The lens is out of focus (note the doubte     The lens is in focus (note the double
    image is split).                                image is aligned).

    Die Scharfeinstellung  ist nicht  richtig      Die Scharfeinstellung  ist  richtig (Die
    (Die zwei Bilder stehen voneinander  oe-       zwei Bilder decken sich.)
     trenn  t.  )
     L'objectif n'est pas mis au point                 L'objectif est correctement mis au point
    (remar quez les images doubl6es)             (remarquez qu'il  n'y a qu'une eule
                                                        image).
    Objektivet 6r ej  i fokus (Observera  att de       Obiektivet dr  i fokus (De bBda bitderna
     tvb bilderna ej ligger tillsammansr.                t6cker varandra).
30
View original page 23Page 25 · Read text
Holding Your Camera Steady    Tenez fermement l'appareil
  Halten der Kamera           Hall Kameran stadigt
                                                                     ..-!

             I   To obtain well-focused pictures,  it   is           It is more diff icult to hold your camera,    imperative that your camera is held       long side vertical, than to hold it, short   steady to  prevent your camera from        side vertical. But at times you have to
    being accidentally jarred when the shut-      hold your camera, tong side vertical,
    ter  button  is depressed. Hold your       depending on the subjects.  lt  is advisable
   camera in both hands and put it to your       to get yourself familiarized with is lonq    face to assure its stability. To release the        side vertical hold ing.
    shutter, gently depress the  shutter
    button with your  f inger.
32
View original page 25Page 26 · Read text
www.butkus.us  Film Rewinding             Rebobinage de film
  FilmrUcktransport             Tillbakarullning av filmen


    1. When a predeterm ined     2.  Flip up the Film Re-    3. When there is a sudden     number  of   pictures      wind Crank (6)  and       drop in the Pressure felt
      have been taken, push       turn  in  the  arrowm-        in your hand and the
     down the Film Rewind       arked dirstion. and the        film   rewind  button
      Button  (32l. on  the        film will be rolled back       stops turning, open the
      bottom of your camera.        into the film cartridge.       back cover and take out
                                                                       the cartridge.


34
View original page 26Related documents and language editions
From the M. Butkus archive. Original publisher and archive notices are retained.
Check the model and edition against your equipment.
PDF verified 2026-10-10.