Film cameras
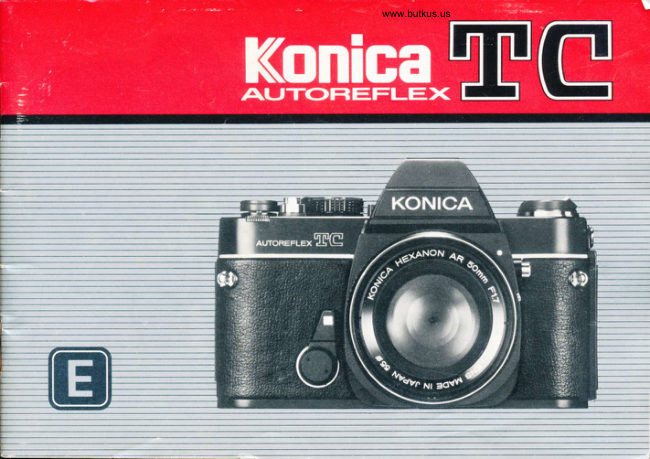
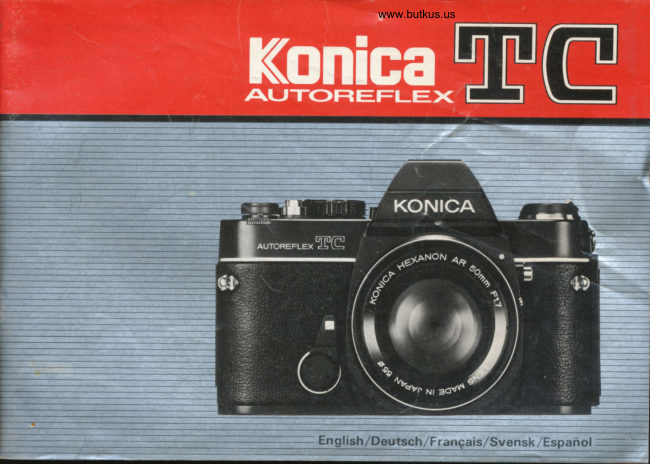
Konica Autoreflex TC User manual
User manual for Konica Autoreflex TC. 41 pages in English. Read the original PDF, download or print a copy without registration.
41 pagesEnglish7.3 MB PDF
Loading your manual…Open PDF directly
Document details
- Brand
- Konica
- Model / document
- Konica Autoreflex TC
- Document type
- User manual
- Language
- English
- Pages
- 41
- File size
- 7.3 MB
- Category
- Film cameras
- Document date
- Not specified in catalog
Search available document text
Find a term, then jump to its page in the original PDF. Image-only pages may not be searchable; check the PDF for exact wording and diagrams.
Page 3 · Read text
www.butkus.us
                    K-oJrim-Te,
USING YOUR
KONICA AUTOREFLEX TC
SEVEN BASIC STEPS

 l.  Insert the two 1.35 volt mercury photographic batteries
   supplied with your camera into the compartment at
   the bottom of thc camera. (This supplies power to thc
   CdS meter.)

2. Load camera. Konica's "Fast Load" takc-up spool assurcs
    troublc-free opcration.

3.  Set ASA rating required for your film speed.
4. Move Aperture Control Ring to "AE" position ("EE" on
   same Lenses).
5.  Select desired shutter speed. (For most shots, 1/l25th  is
   recornmended.)

6.  Focus and compose picture in viewfinder.
7. Shoot ... as long as the needle in the finder is in the
   "white" area, your pictures will be perfectly exposed
   automatically!


                                              3
View original page 3Page 6 · Read text
MAJOR SPECIFICATIONS OF KONICA AUTOREFLEX TC
Camera Type: 35mm TTL (Through-the-Lens metering) AEC       Shutter Speeds: Convenient top-mounted selector for all
(Automatic Exposure Control) SLR (Single-Lens-Reflex)            speeds 1/8th second to 1/1000th second plus ''B" (for time
                                                                    exposures)
 Film: Standard 35mm 20 or 36-exposure cassettes
                                                                 Flash Synchronazation:  Electronic flash synchronization  at
                                                                                               all speeds to and including Ill25th second. Built-In Hot Shoe
Format: 24x36mm                                                        for use with cordless (direct contact) electronic flash units.
                                                                 Also features standard PC Outlet, conveniently side-mounted.
Standard Lens 0ptions:
Konica New Hexanon AR 50mm tll.7 (6 elements, 5 groups)        Self-Timer: Built-In Variable delay, range approximately 4 to
                                                             10 seconds.
Minimum Focusing 0istance: 21.7" from film plane (50mm
f lr.7)                                                       Viewing System: Parallax-Free Single Lens Reflex System.
                                                         Coated, eye-level pentaprism shows upright, unreversed
                                                                   image; apparent magnification 0.9lX with 50mm lens.Lens Mount: Konica Bayonet (47mm diameter)

                                                               Focusing Screen: Konica 3-way focusing system has split-Flange/Film Distance: 40.5mm                                                          image rangefinder plus microdiaprism and fine groundglass
                                                                       focusing.
Aperture Gontrol System: Automatically  sets correct f/stop
(or fractional f/stop) with all Konica Automatic Hexanon                                                                    ln-Finder Readouts: "Control{enter" viewfinder shows yitaland Hexar lenses,                                                                 data at a glance: exact lens aperture being set automatically;
                                                                under/over+xposure  ranges; match-needle indicator for semi-
Shutter : Metallic, vertical-scanning Copal Square                    automatic operation.
                                                                 Automatically signals when in manual exposure mode.
View original page 6Page 7 · Read text
www.butkus.us            xgnip.err,$rtg]
Reflex Mirror: Oversize, coated mirror prevents image cutoff       Loading: Konica Fast Loading system uses multislotted
in finder even with bellows extensions at l: I magnification.        take-up spool to grip film securely.
Mirror design permits automatic operation even with extreme
wide-angle lenses. Instant-return mirror action prevents image
blackout after exposure.                                      Film Tlansport: Single-stroke lever automatically advances
                                                                             film, winds shutter, counts exposures, and prevents unwanted
                                                         double exposures. Lever returns to "ready" position away
Exposure Gontrol System: Fully Automatic Exposure Con-     from camera body to permit continuous operation at
trol (AEC) system selects and sets correct lens aperture (or         eye-level. Unique spring-loaded lever action keeps lever in
fractional aperture) automatically, based on information       "ready" position until "Off' switch is pressed.
obtained from dual through-the-lens CdS cells located in
pentaprism.
                                                               Unloading: Oversize rapid-rewind crank permits rewinding
                                                               within seconds; cutaway film cassette chamber allows drop-
Film Speed Range: ASA 25-1600                                  out cassette removal.

Meter Power Source: Two 1.35 Volt mercury photographic       0ther Features: Meter/Shutter "Off' Switch locks shutter,
batteries, photographic type (Mallory PX-13, PX{25, Ever-       turns meter off; unlocked by engaging Transport Lever.
                                                                                             r/+" x 20 Tripod Socket. Hot Shoe has automaticeady EPX{25, or equivalent).                                   Standard                                                                                   PC outlet is                                                              "off' control to prevent electrical shock when
                                                                                "live".
Exposure "Memory" Lock: Memorizes and holds exposure
reading to allow precise meter operation in backlit or spotlitsituations; operates via shutter release.                           Dimensions: Body Only  5.4" x 3.5" x 1.8"
                                                                        (l36mm x 90mm x 45mm)
                                                             With 50mm f/l.7 Lens  5.4" x 3.5" x 3.3"
Meter Couplino (Sensitivity) Range: with ASA 100 film and                                                    (l 36mm x 90mm x 85mm)
f/1.? lens EV 4.5 (1/8th sec, at tll.1) to EV l8 (U1000th
sec. at f/16). With f/1.2 lens, EV 3.5 (U8th sec. at f/1.2) to                                                                                            18.0 oz. (510g)EV 18.                                     Weighr: Body Only                                                  50mm f/1.7 Lens  25.4o2. Q20e)Meter automatically turns off if shutter speed selected is        With
beyond meter EV Range.
View original page 7Page 9 · Read text
INSERTING BATTERIES
      ,\


   Open Battery Compartment (41) by turning the cover      To obtain longest service from your batteries, always press
    counter-clockwise as shown. Remove batteries from protec-        the Meter/Shutter "Ofl' Switch (34) when you have com-
     tive packing (handle them by the edges to keep the surfaces.       pleted picturetaking. This turns the meter off, preventing
     clean). If the batteries appear to have a thin deposit of dust        battery depletion.
    on them, wipe clean with a dry cloth.
                                                     When needle movement becomes extremely sluggish or stops
     Insert the two batteries into the compartment, with "+" sides         altogether, replace your batteries with a lresh set. Normal life
                                                     indicators are        of PX-13 mercury batteries  is approximately one year under    facing up. (For your convenience, + and -    marked in the compartment.)                                     normal operating conditions.
    After the batteries are in the chamber, replace cover.                Prolonged heat and moisture may reduce battery life. Always
                                                        keep your camera (and any spare batteries) in a cool, dry
                                                                              place. And, when obtaining new batteries, make certain they
                                                            are photographic type 1.35 volt PX-13 (Mallory PX-13,
                                                               PX-625. Eveready EPX{25,or exact equivalent). Many other
                                                                        batteries are similar in appearance, but the difference in
                                                                           voltage and construction may cause incorrect exposures.

8
View original page 9Page 10 · Read text
www.butkus.us
CHANGING LENSES


To Mount the Lens                             To Remove the Lens
on your Camera:                                      from your Camera:
Line up the Red dot on the lens with the matching dot on       Grip lens securely in one hand. With the other hand, hold the
the camera body; the lens will "seat" into the body easily.       camera body and press the Lens Lock Release Button (25).
Now, grip the lens and turn it clockwise gently until  it        Holding this in, turn the lens counterclockwise  until the two
"clicks" into place. No further adjustments are required!           Red dots (one on the camera body, and one on the lens) line
                                                                      up. The lens may now be removed.


                                  Note: Always protect your camera's interior by replac-
                                   ing the lens as quickly as possible, or by attaching the
                                Konica Body Cap (supplied with your camera'1. Never
                                  touch any of the internal parts, or permit dust or dirt to
                                      enter the camera body, when the lens has been removed.
View original page 10Page 11 · Read text
FILM LOADING


       Loading your Konica Autoreflex TC is exceptionally  fast,          hess down Camera Back Release (27), and swing the
        accurate, and foolproof, because of Konica's Fast Loading            back open.
        take-up spool ,. , Here's how:
                                                                                       Slide the film cassette into the Cassette Chamber (29) as                           2  shown above.


['o
View original page 11Page 12 · Read text
www.butkus.us


     Pull out enough film to reach the Take-Up Spool (36).            Close the camera back. Gently, twn the Film Rewind3  Insert film end into any slot in the spool. The film will   5 Crank (21) until resistance  is felt (this takes up the slack
     be gripped instantly  ...                                               of the film within the cass€tte).
    Advance the Film Transport Lever (14) one full stroke.4 Make sure that the sprocket holes in the film engage the
    Upper and Lower Sprokets (35) in your camera.


                                                                                                                11
View original page 12Page 13 · Read text
www.butkus.us
            www.butkus.us


        Press the Shutter Release Button (1) and operate the     To Check Film Advance 6  transport lever until the Number I appears in the center
         of the Film Counter (2).
                                                                                           It's easy to make sure your camera is loaded correctly.
                                                               While operating the transport lever, watch the Film
                                                             Rewind Crank (21) to see if it rotates. If it does, you
                                                      know that film is going through properly;  if it doesn't
                                                                                                                 it's not.


12
View original page 13Page 14 · Read text
www.butkus.us         Konica


METER/SHUTTER "ON.OFF" CONTROL
When the Film Transport Lever (14) is at "ready" position       After you have completed picture-taking, press the Meter/
(away from camera body), the exposure meter is turned on       Shutter "Ofl' Switch (34). This will cause the Transport
and the Shutter Release Button (l) may be operated.              Lever to move flush with the camera body, while simul-
                                                                taneously turning the meter "Offl'and preventing operation
                                                                     of the Shutter Release Button.
                                                        Next time you're ready to use your camera, simply move the
                                                                Transport Lever to "Ready" position.


                                                                                                         13
View original page 14Page 15 · Read text
HOLDING YOUR CAMERA


                                                                                                                   f or your hand   o Hold the Camera securely - comfortably
   One secret for getting ultra-sharp pictures is to prevent        Vertical shots add variety to a series of pictures. They are
     accidental camera movement. To do this it is suggested that         especially desirable when making head and shoulder portraits
    you hold the camera firmly, as shown in the picture above,       and architectural shots. Hold the camera as shown above.
     cradling the body of the Autoreflex TC against the face.
    Gently squeeze the shuttcr releasc button to avoid canrera
    motion during exposure.

14
View original page 15Page 16 · Read text
www.butkus.us
FOCUSING                                            Ksrip,?-TC
              (42) Splitlmage Rangefinder Spot


                                                                                                                                l.l

                                                                                                                            2.8
                                                                  1
                                                                                                                           5.6


                       (43) Microdiaprism Circle                                            OUT OF FOCUS             IN FOCUS
              (44) Fine Ground-Glass Ring
                    Turn the Focusing Ring (l l) of the lens until a sharp, clear image is seen in the
                         viewfinder. The split-image "spot" in the center of the viewfinder shows your
                        subject split into two parts when it is out of focus, then as a single, solid image
                    when it is in focus.
                  The Microdiaprism Circle (43) will prove helpful when the subject lacks clear
                            vertical lines - for example, as in a picture of a field covered with leaves.
                   The Fine Ground-Glass Ring (44) is most useful with ultratelephoto lenses and
                       in close-up photography with bellows unit, macro lenses, or extension rings;
                       under these conditions the other focusing aids may darken appreciably.
                      Your camera's viewing system is designed for clear, comfortable viewing
                      and focusing for persons with normal vision. If you normally wear glasses
                          for distant viewing, do so whcn picturetaking also, Should you prefer to
                           operate your camera without glasses, use of a Konica diopter Correction
                         Lcns (available from your dealer) will provide a corrcction similar to that
                      of your eyeglasses, and simplify operation for farsighted or nearsighted
                           photographcrs.
                                                                                                   15
View original page 16Page 17 · Read text
,,CONTROL           CENTER" VIEWFINDER


    Your Konica Autoreflex TC har-a "Control Center" view-    THE UNDER-EXPOSURE INDICATOR
     finder which shows important picture-taking information  at a
     glance! Without removing the camera from your eye, you     The upper Red Band (47) is automatically positioned to
      see:                                               show the under-exposure range for the lens in use. (For
                                                                example, the Band will move to a higher position with an
    *  Match-Needle Index Mark for use with uncoupled lenses        f/1.7 lens, and a lower position with an f/2.8 lens.) For
        or accessories (46);                                        optimal exposure accuracy, the position of this band is
                                                                        calculated individually for each Konica lens according to its
    *  Under-Exposure Indicator (47);                             focal length and optical characteristics as well as the
                                                                              theoretical maximum f/stop. Thus, the lower edge of the
   x Meter Needle (48);                                Band (47) will not necessarily intersect the maximum
                                                                  aperture number of the lens shown in the viewfinder    *  Aperture Scale (49);                                          Aperture Scale (49).
    *  Over-Exposure Indicator (50);
    *  Manual Operation Signal (45).                            Sowhitelongareaas betweenthe exposurethe upperMeterandNeedlelower (48)Red isBandsin the                                                                                                                                   -                                                                   shoot! Your photograph will be correctly exposed,
                                                                              automatically.


16
View original page 17Page 19 · Read text
USING AUTOMATIC EXPOSURE CONTROL (AEC)


                                  Set the Film Speed.              p   Select the Shutter Speed.                                   I
                                Lift the outer collar surrounding the Shutter     For most situations, lllzith  is an excellent
                         Speed Dial (20) and turn it until the correct       choice;  it's fast enough to freeze most action
                     ASA number appears in the lndicator Window     ard stop camera movement, and lets you shoot
                                    (l6).                                       in most situations with today's film types.
                                                                                    Generally, slower shutter speeds should be used
                                                                           only when there's not enough light to work at
                                                                                    l/l25th; faster speeds are required usually only
   The figures in the chart below show actual values of the dots between      for extremely fast-moving subjects (racing cars,
    marked numbers on the film speed indicator.                                       sports) or when shooting with telephoto lenses
                                                                           which naturally magnify possible camera move-
                                                                 ment just as they magnify the subject. (See  ASA t600 800 400  200  r00  50      25                                                                          page 2O for other situations in which faster or               I l2t0l00 | 610s00 | 320250 | 160125 I 8064 | 10 32  |        O..OaO..Oa..a                                                  slower speeds may be desired)
                                                                                                                                                                                                         I               I g2 gt  | 2929 |  26 25 | ZS ZZ I ZO tg I  tZ rO   DIN  33   30  27   24    2l   18       15

18
View original page 19Page 20 · Read text
www.butkus.us
                                                         Ksni-c.?"TC


$  Check Aperture Ring.                         lf   Take the Picture!
Make certain the Aperture Control Ring (12) is    Aim camera at subject, focus ... and shoot. As
at the AE (EE) position as shown. If lens is not       long as the Meter Indicator Needle(48)  is in the
on AE (EE) position, your picture will be       whitearea,you'll  get a perfectly exposed picture
exposed at the opening shown on the aperture            ... automatically!
ring irrespective of the f/stop indicated in the
viewfinder.


  Should the Aperture Ring inadvertently be
  moved off "AE" position, a red Manual
  signal will appear at the left side of the
  viewfinder (see p.l7).


                                                                                                              r9
View original page 20Page 21 · Read text
UNDER/OVER.EXPOSURE
   SAFEGUARDS                                             METER RANGE
         tl1-7        t 11 '4      tll '2                                                                  All exposure meters are designed to operate over a certain range of film
                                            and shutter speeds. Your Konica Autoreflex TC's meter is actually
                                                               sensitive enough to allow operation both in dimly-lit interiors and in    o                                                     outdoor situations where brightness  is rnore than 12,0O0 times greater -

                                                   With films faster than ASAI(X), the slower shutter speeds are not usable                 aaIx?                                              from l/8 sec. ai f/1.7 to l/l000th sec. at f/16, using ASA 100 film.                                                     in automatic exposure photography. Here, your camera prevents ex-
                                                      posure errors by automatically turning the exposure meter off if the            o!,cf                                                        shutter speed selected  is too slow for AE operation. When this occurs, the
                                                         Meter Needle (48) moves into the red Under+xposure band (47), to show
                                                              that the shutter speed is beyond the meter's EV range. Solution: turn the
                                                           Shutter Speed Dial (20) to a faster speed, until the Meter Needle moves EEEEE         into the white area in the viewfinder. (lf Needle will not move into the
                                                                                                                                                                 p.      If the meter needle goes to the upper red band       White area at any speed, flash photography must be used-see
    (shown above for the three standed Lenses),         29-30.)
     choose a slower shutter speed. If, at the slowest
     shutter speed, the needle's sfil/ in the red zone,     EXPOSURE METERING RANGE OF KONICA TC:     there's not enough light to get a perfectly-
     exposed picture. (Naturally,when using speeds       ASA Film                                                                                  Qnaarl    1t8    1 115     1 /30   1/60  11125 't1250   1 /soo  /1OoC     of 1/30 second or slower, use a tripod or brace
     the camera on a firm support if at all possible,        25----200  o   o   o   o   o   o   o   o
    and trip the shutter with a cable release.)                                                          ,vr,                                                  250 . . .400                                              o   o   o   o   o   o   o      If the needle goes down to the lower red band        soo-.-800 ,2  T)    o   o   o   o   o   o
      (as shown in the fourth example above), there's                                                  1000 - 1600                                                     o   o   o   o   o     too much light; choose a faster shutter speed.                              7t 72, ,2.,
                                                                                  t-ol With in range  V-  out of range


20
View original page 21Page 22 · Read text
www.butkus.us
    HINTS FOR UNUSUAL EXPOSURE SITUATIONS                                   qFt(tTl                                                                                                               aUToREFLExKonica   L-;      \-l
    A unique and most valuable feature of your Konica Autoreflex-TC camera is the
          built-in exposure"Memory"  lock... an easy-to-use control that"holds"a meter reading
        (and exposure setting) to insure correct exposure even in unusual lighting conditions.

1      Backlit Subjects: See how the sun is shining towards the camera in the illustration
         at the right? Chances are, the subject will have a much more natural expression than
        she would if she had to stare into the sun...but as a result, her face is much darker
            the                                  as                        the scene                                             the camera.       than                                                             walk up                                                                              the subject,                   rest of                                    seen by                                                                          to                                                         Solution: I                                                       part (her               cameta                                                                                     shutter                                                                                             release             the                          close                                 most                                                                        face), press                                                                            the       hold                                         important                             to the
       halfway down...and you've ''frozen" the rneter needle at the correct position.
       Holding the release button in place, step back, focus, and shoot: the exposure is
        actually taken at the aperture indicated when you first depressed the release, as
       shown within your Konica's viewfinder.


                                          Extremely Dark Backgrounds:
                                           In the illustration at left, a relatively light subject is being photographed  against a
                                               very dark background. Here again, taking a "close-up" reading, holding or locking
                                                  that reading, then going back to the desired position and taking the picture, will
                                              automatically provide a professional close-up exposure reading and a per-
                                                   fectly-exposed picture. As soon as you release the shutter button, the meter resumes
                                                continuous operation...so  there's nothing to set or re-set.

                                            Sometimes, of course, it's not possible to approach your subject for a close-up
                                                    reading as outlined above. A very practical alternative is to memorize'the exposureI                                                       setting by aiming the camera at your hand, then raising the camera to your eye and
                                                    taking the picture. As your hand almost certainly reflects a similar amount of light to
                                               the subject's face, your exposure will in almost all instances be excellent! Try thisI                                                   "professional"technique when it's impossible to come close to your subject for an
                                                exposure reading, and the subject is much brighter-or darker-than the rest of the
                                                      scene.

                                                                                                               21
View original page 22Page 23 · Read text
SHUTTER SPEEDS AND LENS OPENINGS


       In most cases, it is of more importance to                                                                          .f'
       take the picture at a specific shutter speed
       than at a particular lens opening. Almost all    $        subjects are likely to move to some extent
       during the exposure, and all photographers           i\
      tend to move the camera slightly when
        taking a photograph. By selecting a shutter
       speed fast enough to overcome subject and
       camera motion, you are assured of obtaining
       a sharp, clear picture.                   $$  At  I /30 Second                  At  I /500 Second
           you       Should                    prefer                                the                                                                  /ens                       to take                                       picture at a specific                                                   F-number t21.4 n 2    2.8          5.6      ilt6       opening                                                        (see p.                     more                                          depth-of-field                to obtain                                                                    26),                               or less
          this may easily be done while in "Automatic" (AE) mode.
       Just look through the viewfinder and rotate the Shutter
       Speed Dial (20) until the desired lens aperture  is indicated
     by the Meter Needle (48) ... and take the picturel Your
       photograph will be correctly exposed, automatically,  at                                                        Amount-of-        the lens aperture indicated in the viewfinder.
                                                                 Lisht Ratio 2                       t+++++,+,
     Alternatively,  it is possible to note the lens opening indicated        Like your eye, your camera lens has an iris, generally called
   by the Meter Needle, then manually set the Aperture Ring of        the diaphragm. Open it up, and it admits more light;close  it
    the Lens to this position. However, there is no practical      down, it admits less. The amount of light is indicated by
    advantage in doing this: operation is faster and exposure        f/stops (also known as "apertures"): f/2.8 admits half as
    accuracy is greater when the aperture is set by the automatic      much light as fl2;  f l4 admits onequarter as much as f/2, and
    exposure mechanism.                                              so on.
22
View original page 23Page 24 · Read text
trf,FrfltMANUAL EXPOSURE OPERATION                      www.butkus.us                                                                                                               auroREFLExKonica                                                                                                                                                                                                                 t!=l     \-]


Manual exposure settings are used primarily in flash photography  (p.
29-30), and to obtain intentional under or over-exposure-for ex'
ample, to create a'silhouette'effect by deliberately under-exposing the
subject. It's easy:
l) Set Shutter Speed Dial (20) to desired speed.
2) Press AE Release Button (13) on lens and set lens Aperture Control
   Ring (12) to desired f/stop.
3) Move Film Transport Lever (14) to "Ready" position (so that Red
   Dot on camera top is visible).
4) Frame, focus...and take the picture. Your photograph will be exposed                                                                                                                      2.4
    at the shutter speed and lens opening you have selected.                                                                                                                                                                                                                                                    1fr
                                                                                                                                                                 8*  In Manual operation, the Meter Needle (48) continues to show the                   @
  recommended lens opening. Thus, if the recommended lens opening                                                                                                                   t6fl
    is f/8 and you wish to obtain a silhouette effect, set Aperture Ring to
   f/16 to under-expose by two f/stops. In manual operation, the picture
    will always be exposed at the settings you have made.

                                When the Aperture Ring of your lens is set
                                         manually, a Red - Signal Mark appears at
                                          the left side of the viewfinder. This Signal
                                          also functions when using non-automatic
                                              lenses or accessories, to remind you that
                                             the exposure must be set manually.
                                                                                             23
View original page 24Page 25 · Read text
OPERATION WITH UNCOUPLED LENSES/ACCESSORIES


                                                   @                                                 @


                        www.butkus.us

                                              works   Your          Konica's                                  metering                                       system                     through-the-lens                                                                 per-    $   Alien the lndicator Needle.                                                    which                                                    accessories,                                     and                    non-automatic lenses         even with     fectly
   do not couple to the camera's automatic exposure mecha-      Open up (or close down) the lens aperture until the Meter
    nism. (Example: Pre-set lenses, mirror lenses, lenses from         Indicator Needle (48) lines up with the Stop-down Metering
    other cameras used with Konica adapters, even extension       Index Mark (46). (lf preferred, you can also do this by
    rings or bellows.) Here's how to use your Autoreflex TC in        changing the shutter speed instead of the lens aperture.)
     these situations:
     I   Set the Film Speed.                                            lf   Take the Picture!

                                                                     Remcmber...this stop-down metering procedurc is not     !    Select the Shutter Speed.                                                         needed (and in fact is not possible) with Konica
                                                                Automatic lenses mounted on the camera body. Stop-
                                                     down metering is used only for uncoupled lenses or
                                                                                   accessories.

24
View original page 25Page 26 · Read text
www.butkus.us
oPERArloN wlrH uNcouPLED LENsEs/AccEssoRlES: REMINDERS                                              Kpnige,TC


           c,
      5
      o
                      CIx6'
     o
           a,c
  EEEWhen using the stopdown metering system with uncoupled        Using Preset Lenses .....
lenses or accessories, keep in mind that the f/stop scale in the
viewfinder no longer applies; neither do the under or       Lenses of this type do not automatically close down to the
over€xposure warning bands. If the needle's above the Index        desired aperture; you turn the aperture control ring by hand
Mark (46) as shown (above, left) there's not enough light; if       to select the desired f/stop. Still, you can speed up operation
it's below this mark (above, right) there's too much light.        considerably by setting both control rings of these lenses to
Solution: change lens aperture and/or shutter speed until the         the sma!test flstop (f|22 in the example shown above), then
needle lines up with the Index Mark.                                turning them together until the meter needle lines up with
                                                          the Index Mark in the viewfinder. As soon as it lines up,
In full-aperture metering with Konica Automatic lenses stray        you're ready to shoot...
light which may enter the eyepiece and reach the meter cells
has virtually no effect on exposures. In stopdown metering
with uncoupled lenses or accessories, however, such light can
have the effect of incorrectly influencing the meter's reading.
Whenever you're using the stop-down metering system, be
sure to place your eye as close as possible to the eyepiece, to
prevent stray light from entering. (A Konica Rubber Eyecup,
available from your dealer, helps here.)
                                                                                             25
View original page 26Related documents and language editions
From the M. Butkus archive. Original publisher and archive notices are retained.
Check the model and edition against your equipment.
PDF verified 2026-10-10.