Film cameras
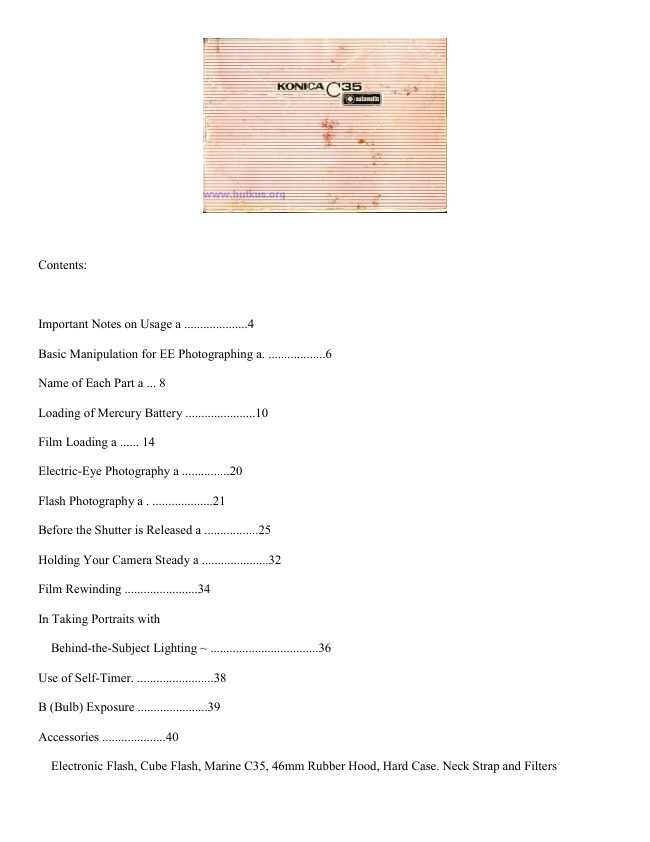
Konica C35 User manual
User manual for Konica C35. 61 pages in German, French, Spanish, English. Read the original PDF, download or print a copy without registration.
61 pagesGerman, French, Spanish, English6.1 MB PDF

Loading your manual…Open PDF directly
Document details
- Brand
- Konica
- Model / document
- Konica C35
- Document type
- User manual
- Language
- German, French, Spanish, English
- Pages
- 61
- File size
- 6.1 MB
- Category
- Film cameras
- Document date
- Not specified in catalog
Search available document text
Find a term, then jump to its page in the original PDF. Image-only pages may not be searchable; check the PDF for exact wording and diagrams.
Page 3 · Read text
www.butkus.usTABLE DES MAtrIERES           INDICE
lrlotes importantes sur l'emp|ci ".'"""""""   4   Notas importantes para el uso"""""":""" 4
Prise de vue""""""                      6   Orden de sacar fotografias'              6
Noms des pidces                       8   Nombres de las partes          """"""   8
Comment poser la pile i mercure""""""'12    Colocaci6n de Pila de mercurio""""""""'12
Comment mettre la oellicule """"""""""'16      Colocaci6n de Pelicula    """""'..'"""'16
Photographie EE (cellule incorpor6el"""""21    Tomas a EE (autom5ticas)      """"'21
Posemetre dans le viseur"        """'25    Exposimetro en el Visor""""""""""""""25
Mise au point et emploi du viseur""""""'31    Enfoque y observaci6n en el Visor""""""'31
Tenez fermement l'appareil       """'36    Sostenga   fi rmemente la C5mara """""""'36
Rebobinage de pellicule         """"'38    Enrollado Inverso de Pelicula """"""""""38
Photo avec flash              """"""41    Tomas con Flash               """""41
Emoloi de l'auto-d6clencheur  """"'50   Uso del Disoarador Autom6tico """"""""'50
Demi-exposition """"               """"'52    Exposici6n de "B"""'           """""""'52
Emploi de filtre                  """54   Uso del Filtro""""'                 ""'54
Accessoi res                   """""""'55   Accesorios                  "" ""'  ""55
                                                                                       3
View original page 3Page 4 · Read text
IM PORTANT NOTES ON USAGE  NOTES IMPORTANTES SUR UEMPLOI
WICHTIGE HINWEISE FUR DEN GEBRAUCH NOTAs IMPoRTANTES PARA EL Uso
                E Tne KONICA C35's CdS meter operates on a mercury
                                 battery. Place the mercury battery which is available as
                       an accessory to your camera into the mercury battery
                              chamber and look into the viewfinder. lf the meter needle
                                  is seen swinging, it means that the CdS meter is func-
                                  tioning correctly.
                E Der CdS-Belichtungsmesser der KONICA C3S wird von einer
                                 ouecksilberbatterie gespeist. Die als Zubehiir mitgelieferte
                                   ouecksilberbatterie  in den Batterieraum einlegen und durch
                          den Sucher betrachten. Wenn sich der Zeiger im Sucher
                               bewegt, funktioniert der Belichtungsmesser.
                E Le posemdtre CdS du KONICA C35 fonctionne sur une pile
                 D mercure. Mettez la pile b mercure dans la chambre
                                                    i  pile. La pile d mercure est liv16e comme accessotre.
                                Ensuite rega rdez )  travers le viseur. Si  l'a iguille oscille   ,
                                 cela signifie que le posemdtre CdS fonctionne normalement.
                E El exposimetro de CdS de la KONICA C35 funciona a una
                                          pila de mercurio. Coloque en la c6mara para pila de mercurio
                                   la pila de mercurio que viene de accesorio de su Cdmara
                       y vea el visor adentro. Si la agua de exposimetro est6
                                  oscilando, se indica que el exposfmetro est6 funcionando
                                debidamente.
View original page 4Page 5 · Read text
www.butkus.us
                 E The film speed scale cannot be used at intermediate points
                            between film speed readings. When the scale is to be
                                 used, make sure that the scale has cilcked into position.
                 E Die Filmempfindlichkeitseinstellung findet nur an einrast-
                                 baren Stellungen statt.Stellen Sie fest, dass der Einstellring
                             genau einrastet.
                 E Aucun points interm6diaires entre deux valeurs indiquante@       la sensibilit6 d'6mulsion sur l'6chelle de sensibilit6 ne
                               peut atre utilis6. ll faut donc bloquer l'6chelle i  chaque
                                      16glage.
                 E La escala de sensitividades de la pelfcula no podr6 usarse
                      a las posiciones fuera de los puntos marcados. Al usar
                              esta escala, aseg0rese de que la escala ha enganchado
                           en una de las posiciones marcadas.

                                          .31 When turning the manual ring, make sure that the manual
                                 button is kept pressed down.
                 B Wenn Sie den Einstellring  fijr Handbedienung drehen,
                                        ml.issen Sie den Knopf fiir Handbedienung gedrijckt halten.
                 B Lorsqu'on manipule l'anneau manuel, n'oubliez jamais de
                                  oresser sur le bouton manuel.
                 B Al girar el aro de maniobra manual, debe girarlo mante-
                                  niendo oorimido el bot6n de maniobra manual con un dedo.
View original page 5Page 7 · Read text
www.butkus.us
4 Set camera to AUTO.
4 Handbedienungsring  auf     5 Focus and frame.                 6r Depress shutter.
  AUTO einstellen.              5- Entfernung einstellen und           16. Ausliisen driicken4 R6glez sur AUTO.                  Bildausschnitt  f estlegen.          6. D6clenchezi[ Arregle su C6mara a AUTO                              :5 R6glez la mise au point et le                        | 'obtu ra te u r.
                                     caorage.                         6- Oprima el boton
                      5 Enfoque y componga la vista           di spa ra dor.
                       .*$                    ".=-IIE-T f*            {  *o","o c".


                                          .4, Set guide number.
                      4  Leitzahl einstellen.
                            L4 R6gtez le chiff re-guide.
                                Ei Arregle el n6mero de guia
View original page 7Page 10 · Read text
RART NOMENCLATURE NOMS DES  PIECES
 BEZEICHNUNG DER EINZELTEILE  NOM BRES DE LAS PARTES
 O Viewfinder Eyepiece  @ Sprocket          6 Fitm Inlet Stit
                     gr Film Guide \ a? fitr Take-Up
                                                        Spool
 @ Flash Contact
    Socket


                                 @ Back Cover

 @ Film Rewind
     Spindle
                                @ Film Pressure                       Mike Butkus   DigitallyDN:email=mike@butkus.org,Date:cn=Mike2025.01.04signedButkus,by19:20:17Mikeo, ou=Butkus.org,Butkusc=US-05'00'
                                                                                      Plate

                                                                      Button
 @ Film Cartridge  @ Mercury                               @ Film Stabitizing
    Chamber              Ba tte ry Chamber @ Tripod Screw Tap-hole          Roller    /110
View original page 10Page 11 · Read text
www.butkus.us
@ Suchereinblick'         @ Oculaire                          6l  Ocula r
C^  Filmf   ii h ru ng                      u9 Entrainement de pellicule    6^ Guia de pelicula
in  Filmtra nsportrolle              61 Ta mbour                                                 A(9r Rueda dentada
@ Aufwicke lspu le        @ Bobine 16ceptrice       @ Carrete de toma de
G                                                                            pelicula    Filmschlitz           @ Porte du film                                                                                               ,f;                 @ C5mara para pila deAK9 Anschluss fiir                           K9' Douille de contact an                                                           me rcu r to
    Blitzlichtge rlit                      flash                                    @ Enchfe de flash
@  Rilck spu lspinde    I                C^ Axe de rebobinage            6t Eje de enrollado inverso
@ Raum fijr Filmpatrone    @ Chambre i  cartouche        de pelicula
@ Raum fiir                                    6n\ Chambreipilebmercure  @ C6mara para cartucho de
   Ouecksilberbatterie      @ Prise du trepied                   pelfcula
@ Gewinde fiir Stativ      @ Bouton de rebobinage
o Rijckspulknopf                                   A^ Galet de pression                           /il)@ RoscaBot6n deparaenrolladoel tripode
@ Filmandruckrolle               Plaque {e pression             inverso de pelicula
6i  Filma ndruckplatte       @ Couvercle de dos      @ Rodillo para sujetar la
@ Riickwa nd                                                               pelicula
                                                                              A  Placa de presi6n de
                                                                             pelicula
                                   @ Tapa trasera


                                                                                                    11
View original page 11Page 12 · Read text
Merci de faire un don de 2,50 € pour soutenir ce site via E-bay ... www.PayPal.me/butkus


Bitte spenden Sie 2,50 Euro, um diese Website über E-Bay zu unterstützen ... www.PayPal.me/butkus
View original page 12
Page 13 · Read text
LOADING OF MERCURY BATTERY  COMMENT FOSER IA PILE A MERCURE
 OUECKSILBERBATTERIE EINLEGEN  COLOCACION DE PIIA DE MERCURIO
 The KONICA C35's CdS meter op€rat€s on a
 m€rcury battory. Completely wipe the mer- cury batt€ry, which is available as an aoces-    \?h
 sory, with a piece of dry, clean cloth and
 then place in ths mercury battery chamb€r.
 Der CdS-Belichtungsmesser der KONICA C35                  ,9d, wird von einer Quecksilb€rbatt€rie gespeist.
 Reinigen Sie die als Zubehijr gelieferte Oue-
 cksilberbatterie mit einem trocknon und sau- www.butkus.us
 beren Tuch und legen Sie sie in den Batterie-
 raum ein.                                             tr Take off the lid of your cam€ra's Mercury
 L€ pos€mdtrs CdS du KONICAC35 fonctionne       Battery Chsmber @ by turning it counter-
 sur une pile d mercure. Avant de la mettre      clockwise with a coin.
 dans la chambre i  pile, essuyez-la bien avec
 un morceau de chiffon sec et propre.      E Insert the mercury battery so that the "+"
                                                    side of the mercury battery comes in con-
 El exposimetro de CdS de la KONICA C35      tact with the "+" side of the cover. Put
 funciona a una pila de mercurio. Limpie bien      the cover on the chamber, turn it clock-
 la pila de mercurio que viene de accesorio,     wise and screw it up tightly.
 con un paio soco y limpio, y col6quela en la
 camara para pila de mercurio.
I2
View original page 13Page 14 · Read text
www.butkus.us

til Die Kappe fiir den Batterieraum @ mit einer Miinze abschrauben (im Gegenuhzeigersinn
   drehen).

                                                                              KappeEn Die Ouecksilberbatterie  einlegen. lhre "*"-Seite muss der "+"-Markierung der
   gegeni.iberstehen. Die Kappe aufschrauben (im Uhrzeigersinn drehen).

lil Retirez le couvercle de la chambre d pile@en le tournant dans le sens inverse des aiguil-
   les d'une montre d l'aide d'une pi6ce de monnaie par exemple.

                                                                          marque[! Posez la pile, en veillant d ce que le c6t6 positif "*"  se trouve en face de la
   "*"  sur le couvercle. Remettez le couvercle, tournez-le dans le sens des aiguilles d'une
   montre et serrez-le ferrnement.

[il Ouite la tapita de la C6ma16 @ para Pila de Mercuriio, gir6ndola con una moneda en e]
   sentido contrario al de las aguias del reloi.
E Coloque la pila de mercurio a fin de que la cara (*) de la pila de mercurio quede enfren-
   tada a la cara (+) de la tapita. Coloque la tapita sobre la c6mara, gire en el sentidodel
  de las agujas del reloi y atornillela firmemente.
                                                                                 13
View original page 14Page 15 · Read text
O The life of a mercury battery exceeds one Q Die Quecksilberbatterie hat bei normalem
    year when it is put to normal use.            Betrieb eine Lebensdauer von mehr als
    Instead of gradually dropping according to    einem Jahr. lhre Betriebsspannung fdllt
    the  f requency of its use, a mercury battery       plcitzlich ab, wenn die Lebensdauer a.r
    tends to suddenly drop in voltage when its    Ende geht. Es ist nicht der Fall, dass die
     life has practically expired.                   Batteriespannung wdhrend des Betriebs
                                                        allmiihlich abnimmt.
 O When it is found that the meter needle                         O Wenn sich der Zeiger im Sucher nicht
   does not swing when your camera is train-    mehr bewegt, obwohl die Kamera auf ein
   ed at a bright subject, replace the mer-     helles Motiv gerichtet wird, muss die
    cury battery with a new one.                 Ouecksilber gewechselt werden.
                         O Verwendbare Ouecksilberbafterietypen O The meter of your camera takes a 1. 3V       sind: Mallory PX-675 und Eveready EPX-    Mallory PX-675 or Eveready EPX-675.                                        675 (alle zu 1,3V).
   Note that there are batteries similar in      Es ist zu beachten, dass es Batterien  in
   shape to but different in voltage from a      gleichem Format, aber mit anderer Span-
   mercury battery.                          nung gibt.
                         O Wenn die Kamera frir lange Zeit  nicht
 O When your camera is not to be used for     benutzt wird, nehmen Sie die Ouecksilber-
   a long period of time, take out the mer-     batterie heraus und bewahren Sie sie an
    cury battery and keep it in a dry place.       einer trocknen Stelle auf.
T4
View original page 15Page 16 · Read text
www.butkus.us
O Au rythme d'usage normal, une pile d mer-  O La vida 0til de la pila de mercurio ser6 de
   cure peut 6tre servie au moins un an. La     m6s de un afro en usos normales. EI vol-
   particularit6 de cette pile est qu'elle ne      taje no va bajando gradualmente, sino que
   s'use pas graduellement mais qu'elle de-     se perder6 de fuerza repentinamente  al
   vient plate au dernier moment, la tension       agota rse.
   baissant subiternent.
                        O Si se nota que la aguja de exposimetro
0 Si l'aiguille du posemitre n'oscille pas lor.     no oscila cuando Ud. haga enfrentar su
   sque vous visez un objet bien 6clai16, cela     C6mara a un objeto brillante,cambie de la
   signifie que la pile est us6e. Remplacez-la        pila de mercurio con una nueva.
  donc par une nouvelle  Pile.
                        O Se usa una pila de mercurio de 1, 3V de
O La pile d mercure peut 6tre: Mallory PX-      Mallory PX-675 o Eveready EPX-675.
  675 ou Eveready EPX-675.
                                           Tenga cuidado en que hay pilas similares
  Notez bien qu'il y a des piles qui ont la      de forma, pero de diferente voltaje al de
 m6me forme que la pile d mercure mais       la pila de mercurio.
  dont la tension est diff6rente.

O Si vous n'utilisez pas votre appareil pen-  O Cuando no va a usar su C6mara durante
   dant longtemps,  retirez la pile i  mercure     mucho tiempo, saque la pila de mercurio
  et mottez-la dans un endroit sec.            y gu5rdela en alg0n lugar seco.
View original page 16Page 17 · Read text
FIL M     L                  @II,IMENT METTRE tA PELTICULEFIL M  EIOADINGNLEGEN  COTOCACIoN DE PELICULA


 ln Flip up the Film Rewind Crank @ and pull  E Put th€ film cartridge into th€ Film Cart-
   out the Knob @. Using a film extend pull       ridge Chamber @, the side througb which
     it out further, b€fore th6 Back Cover @ is      the cartridg€ spindle sticks out facing th€
   opened.                                     bottom of your cam6ra. Put tho Knob @
                                          back into tho original position. lf it does
 O The KONICA C35 tak6scartridgocontained      not roturn fully to the original position,
  35mm film.                                   turn th€ knob right and left.
O For film loading, avoid direct sunlight and   E! Insert tho film tip into th6 Film Inlot Slit
    load film in the shad€. lf th€re is no   @ of the Film Take-Up Spool @. Any slit
    shade, one possible way will b€ to us€        is usable. Choose the ono into which the
   your own shadow.                              film may b€ ins€rtod with ease.
10
View original page 17Page 18 · Read text
ausziehen.    Wird dieserE Die Filmriickspulkurbel O hochklappen und den Drehknopfwww.butkus.us@
   weiter gegen Druck ausgezogen, ldsst sich die Rtickwand @ iiffnen.
O Fi.ir KONICA C35 verwenden Sie einen 35mm-Film in Patrone.
tr Die Filmpatrone in dem Raum frir Filmpatrone@einlegen,wobeidas Patroneende mitder Spin-
   del nach dem Kameraboden zeigt.Den Drehknopf @in die Anfangsstellung eindrticken. Dieses
   Verfahren wird dadurch erleichtert,dass man den Drehknopf leicht nach rechts oder links dreht.
ts Den Filmanfang in den Filmschlitz @ der Arfwickelspule @ stecken. Sie konnen beliebig
   einen der mehreren Schlitze wdhlen.
lll Relevez la manivelle de rebobinage @ et tirez sur le bouton @. Tirez-le d fond jusqu'd
  ce que le couvercle de dos @ soit ouvert.
O Avec le KONICA C35, on utilise les cartouches de pellicule 35mm.
                                                                                     deE Mettez la iartouche dans la chambre d cartouche @, en mettant le culot sur le fond
   I'appareil. Remettez le bouton de rebobinage @ en place.  Si le bouton ne se remet
   pas, tournez-le l6gdrement a gauchb et d droite'
                                                                                              @.B Introduisez le bout de la pellicule dans la porte du film @ de la bobine d'entrainement
  Toute porte peut 6tre utilis6e, choisissez-en une o0 la pellicule entre facilement.
[il Levante la Palanquilla O de Enrollado Inverso de Pelicula y saque el Bot6n @. Y vuelva
  a tirarlo y se abrir6 la Tapa Trasera @.
O Para la KONICA C35 se usa la pelicula de 35mm., contenida en cartucho.
E Coloque el cartucho de pelicula en la C6mara @ para Cartucho de Pelicula, poniendo el
   eje saliente del cartucho hacia la parte inferior de su C5mara. Oprima el Boton @ hasta
  que quede en su posici6n original. Si no retorna suficientemente a la posici6n original,
   gire el bot6n a la derecha o izquierda.
                                                                                      deB Inserte la tira de pelicula en la Ranura @ de Insercion de Pelfcula en el Carrete @
  Toma de Pelicula. Podr6 utilizar cuaqluier ranura, pudiendo elegir una m6s conveniente.
                                                                                         T7
View original page 18Page 19 · Read text
;'ry             0             r6,
 UI Turn the Film Wind Lever @ to take up G&"1" appears in the window of ths Film
    th€ film on the spool. Ascortain that the      Counter @.
    Sprocket teeth @ are in contact with the
    tilm psrforations, before the back cover is                        O One full wind of th€ film wind lever ad-
    closed. The back cover may be closed     vancos th€ film by one frame and at the    depressing it with your fing€r.              ssmo tirn€ charges ths shutt€r (h6r€, th€
 E Aftor th€ back cover has been closed,flip       shutt€r hrtton is ready to b€ depr€ssod 8t
   up th€ Film Rewind Crank @ and slowly     any moment).
    turn tho crank to minimiza the film slack.  O The film countsr advances by one frame                                            each tirn€ the film wind lever is fully wo-
 @ Wind tho film and depress the Shutter     und and indicates th€ numb€r of pictures
    Button (D a few times so thst th€ number      that have b€en taken.
l6
View original page 19Page 20 · Read text
www.butkus.us
      E! Den Filmaufzughebel @ betdtigen, um den Film aufzuwickeln. Stellen Sie fest, dass die
        Zdhne der Zahnrolle @ in die Randlcicherung des Films greifen, bevor Sie die Rrickwand
        schliessen. Die Rrickwand lasst sich durch Andrticken mit dem Finger schliessen.
       tr Nach dem Schliessen der Ruckwand klappen Sie die Filmrtickspulkurbel @ hoch und dre-
       hen Sie sie im Pfeilrichtung, um den Film straffzuziehen.
    6 Den Film transportieren und den Ar.rslciser O drticken. Wiederholen Sie dies, bis die Zahl
        "1" im Kontrollfenster des Bildzdhlwerks @ erscheint.
      E0 Tournez le levier d'entrainement @ pour que la pellicule s'enroule autour de la bobine.
          V6rifiez que les dents du tambour @ s'engagent aux perforations de la pellicule, avant de
        fermer le couvercle de dos. Celuici se ferme lorsqu'on le presse avec les doigts.
   @ Aprds avoi r ferme le couvercle de dos, relevez le levier de rebobinage @ et tournez-


                      I       doucement la manivelle pour bien tendre la pellicule.
    6 Entrainez la pellicule et d6clenchez I'obturateur O d plusieurs reprises jusqu'd ce que le
          chiffre "1" apparaisse dans la fen6tre du compteur de pose @.il
      E! Gire la Palanca @ de Avance de Pelicula con el fin de enrollarla sobre el carrete de toma.
        Aseg0rese de que el diente de la Rueda Dentada @ est6 enganchado en la perforacion
                       I    de la pelicula, antes de cerrar la tapa trasera. La tapa trasera quedar6 cerrada al apre-
         tarla con el dedo.
   E Despu6s de cerrar la tapa trasera, levante la Palanquilla @ de Enrollado Inverso de Peli-
        cula y girela lentamente para minimanizar el aflojamiento del rollo de pelicula.
   @ Haga avanzar la pelicula y oprima el Bot6n Disparador @ dos o tres veces hasta que
        aparezca el n0mero "1" en la ventanilla del Contador de Tomas @.
ri                                                                                    19
View original page 20Page 21 · Read text
Kontrolle des Filmtransports
                               Wenn d€r Film richtig transportiert wird,
                                            dreht sich der Drehknopf  fijr Filmriicktrans-
                                                 port @ im Gegenuhrzaigersinn. Sonst find€t
                                          der Filmtransport nicht sachg€miss statt.

                                   Co ntrdle d'entrainement
                   www.butkus.us                 Si la pellicule €st bien entrain6e, le bouton
                                    de rebobinage @ tourne dans le sens inverse
                                          des aigurlles d'une rnontre chaque fois que le
 Check How the Film ls Wound           levier d'entrainom€nt est actionn6. Par con-
 When the film is wound in the correct man-   s6qu€nt, si le bouton ne tourne pas cela sig-
 ner, the Film Rewind Knob @ turns count€r-    nifie que la pellicule n'€st pas bien entrain6e.
 clockwise each time the film is advanced. lf
  it does not turn, tho film is not b€ing pro-
 perly wound.                               Verfficaci6n del avance de palicula
                                         Cuando la pelicula ost6 avanzando en forma
                                                  correcta,6l Bot6n @ de Enrollado Inverso de
                                                   Pelicula girar6 en €l s€ntido contrario del de
                                                     las agujas del reloj cada vez que haga aven-
                                              zar la pelfcula. Si no gira, la pelicula no ost6
                                            avanzando debidarnente.
20
View original page 21Page 22 · Read text
ELECTRIC-EYE PHOTOGRAPHY   PHOTOGRAPHIEwww.butkus.usEE (CEILULE INCORPOREEI
AUTOMATISCHE (EE) AUFNAHMEN  TOMAS A EE (AUTOMATICAS)
                                               [n Filmempilindlichkoit eirstellen {ASA oder
                                                   DrNl.
                                    Den Einstellring fiir Filmempfindlichkeit @ mit
                                  dem Finger drehen, bis die Empfindlichkeit
                                         des benutaen Films im Kontrollfenster fUr
                                                 Filmempfindlichkeit @ erscheint.

                                                                       tI] R5glez l'appareil rolon la rsruibilit5 de
                                                     l'6mulsion de la pollicule (ASA ou DlNl.
                                             Tournez l'anneau-commutateur de sensibilit6
                         @ jusqu'd ce qu'apparaisse dans la fen€tren S:€t fto Film Speed IASA or DlNl.                                                      indicatrice @, la valeur de la sensibilit6 deManipulate the Film Speed Switch Ring @                                                  l'6mulsion de la pellicule utilis6e.and turn it so that the reading indicating the
speed of the film loaded in your camera ap-
pears in the Film Speed Indicator Window @.
                                                                       [I] Haga 6l ajuste de actrrdo con la Sonsiti-
                                                 vidad de Pelicula IASA o DlNl'
                                         Ponga un dedo sobre el Aro @y girelo hasta
                                        que el indice de la velocidad de sensitividad
                                        de la pelicula en uso apareEa en la Venta-
                                                              nilla @ Indicadora de Sensitividad de Pelicula.
                                                                                       21
View original page 22Page 23 · Read text
E Handoinstolhirig auf AUTO rchalton.
                                       Wdhrend Sie den Handbedienungsknopf @
                                                       driicken, drehen Sie den Handeinstellring @,
                                                      bis die Markierung 'AUTO" der Markierung
                 @ gegenriberliegt. Der Ring wird in dieser
                                                   Stellung eingekuppelt.

                          E R5glez l'anneau nranuel  i  la position dela
                           /^    Toutpiseen automatiqueappuyant sur (AUTOI.le bouton manuel @,
 E Set rhe Manual Ring to AUTO.              tournez l'anneau manuel @ pour aligner la
 While the Manual Button @ is being depres-   marque "AUTO" avec la marque indice @.
 sed, turn the Manual Ring @, and align the   L'anneau doit se bloquer a la position.
 mark 'AUTO" with the Index Mark @. The
  ring will be fixed into position with a clutch.                          E Ponga a AUTO el Aro de Maniobra Ma-
                                                           nual.
                                           Manteniendo oprimido el Bot6n @ de Manio-
                                            bra Manual con un dedo, gire el Aro @ de
                                           Maniobra Manual para que la marca 'AUTO"
                                        quede en frente de la Marca-lndice @.    El
                                               aro d€be16 quedar afirmado en la posici6n
                                       con un clic.
zz
View original page 23Page 24 · Read text
www.butkus.us
                                                    Falls der Zeiger @ in dem Bereich frir richtige
                                               Beilchtung(im gelben Feld mit Verschlusszeit-
                                     und Blendenablesungen)  liegt, wird die Beli-
                                            chtung richtig geregelt. Stellen Sie die Ent-
                                             fernung ein, legen Sie den Bildausschnitt  fest
                                     und driicken Sie den Ausloser  t   .
                         E Regardez i  l'int5rieur du viseur tout en
                                                      visant l'obFt.
                                               Si l'aiguille 6.s se trouve dans la gamme de
                                                      l'exposition correcte (partie iaune oi l'on voit
                                                     le temps de pose et l'ouverture), votre pose
B Look at the Meter in the .Mewfinder   sera bien. R6glez la mise au point, avant de
   Whil6 Watching Your Subject through the   d6clencher l'obturateur Ol pour effectuer la
   Viewfinder.                                    prise automatique.
When the Meter Needle €n is situated some-  E Obcerve el Exposinrtro en el Msor para
where in the correct exposure range (yellow      nirar el obioto a trsv6s del Msor.
section where the shufter speed and the   Si la Aguja €3 de Exposimetro se encuentra
aperture readings are visible), you will be   dentro de la zona de exposicion correcta (la
able to secure a correct exposure. Focus the   secci6n amarilla en donde est6n seialadas  la
lens and frame your subject, before the Shut-   velocidad de obturador y las condiciones de
ter Button O is depressed to take pictures    aperturas), usted podra obtener la exposicion
with the electric-eye system.                   correcta. Enfoque y componga la vista.
                                                                                         podreg Botachton Si€ Ftzt durch den Sucher   Oprima el Bot6n Disparador C y usted
  und beobachten Sie den Zeiger darin.         fotografiar baio el sistema EE (autom5tico).                                                                                ,?
View original page 24Page 25 · Read text
f
 NOTES FOR SETTING THE FILM SPEED
 O The film speed readings are calibrated in ASA and DlN. Both  indicate the sensitivity of
    a film.
 O Intermediate points between stops cannot be used. Make sure that the film speed scale
    . is used after it is ascertained that it has clicked into position.
 BEMERKUNGEN TIJN OIC EINSTELLUNG DER FILMEMPFINDLIcHKEIT
 O Atlf der Filmempfindlichkeitsskala  sind Werte nach DIN und ASA angegeben.
 Q Die Filmempfindlichkeit lesst sich nur auf einrastbare Stellungen einstellen.
 NorE suR LE nEclace oe rAppARErL sELoN LA sENstBtLtrE DE
 L,EMULsIoN DE LA PELLICULE
 O La sensibilit6 de l'6mulsion est calibr6e soit en ASA soit en DlN, qui indiquent le degr6   de la sensibilit6 de l'6mulsion.
 O Aucun point interm6diaire entre les deux valeurs de sensibilit6 n'est pas utilisable. V6rifiez
    bien que I'appareil est 16916 selon la sensibilit6 de la pellicule utilis6e,et que le cadran
    est bien bloqu6 d la position voulue.
 CUIDADOS AL HACER ARREGLO DE LA SENSITIVIDAD DE PEL1cULA
 O La escala de sensitividad de pelfcula est5 marcada en ASA y DlN. Ambos indices indican
    el grado de sensitividad de pelfcula a la luz.
 O No podr5 usar posiciones intermedias entre los indices marcados en donde la escala se
   quede atrancada con un clic.
24
View original page 25Related documents and language editions
From the M. Butkus archive. Original publisher and archive notices are retained.
Check the model and edition against your equipment.
PDF verified 2026-10-10.