Film cameras
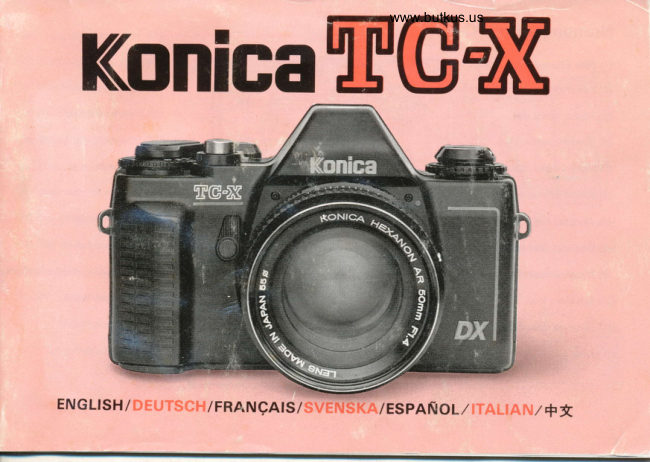
Konica TC-X User manual
User manual for Konica TC-X. 31 pages in English. Read the original PDF, download or print a copy without registration.
31 pagesEnglish3.7 MB PDF
Loading your manual…Open PDF directly
Document details
- Brand
- Konica
- Model / document
- Konica TC-X
- Document type
- User manual
- Language
- English
- Pages
- 31
- File size
- 3.7 MB
- Category
- Film cameras
- Document date
- Not specified in catalog
Search available document text
Find a term, then jump to its page in the original PDF. Image-only pages may not be searchable; check the PDF for exact wording and diagrams.
Page 2 · Read text
Back to main camera manual page


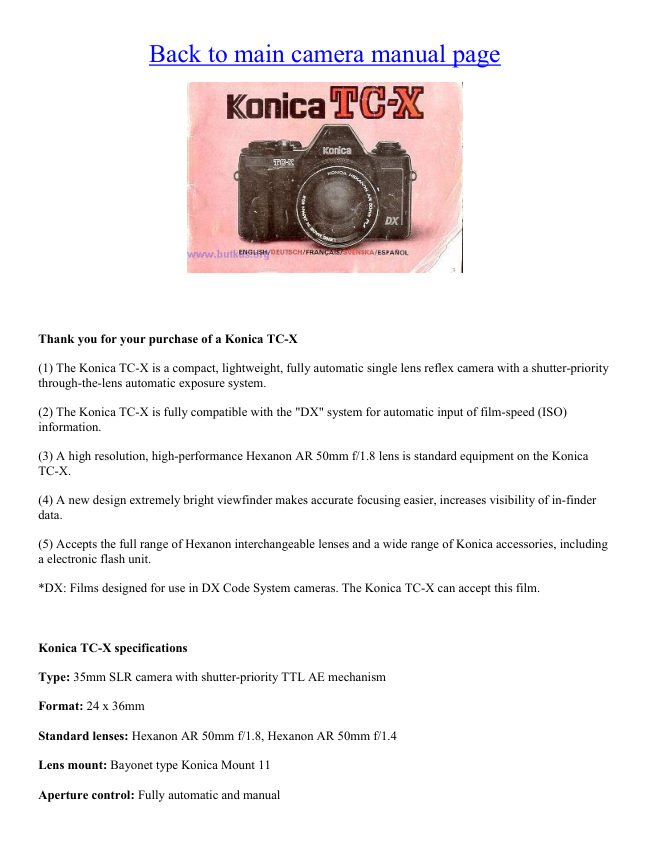
Thank you for your purchase of a Konica TC-X

(1) The Konica TC-X is a compact, lightweight, fully automatic single lens reflex camera with a shutter-priority
through-the-lens automatic exposure system.

(2) The Konica TC-X is fully compatible with the "DX" system for automatic input of film-speed (ISO)
information.

(3) A high resolution, high-performance Hexanon AR 50mm f/1.8 lens is standard equipment on the Konica
TC-X.

(4) A new design extremely bright viewfinder makes accurate focusing easier, increases visibility of in-finder
data.

(5) Accepts the full range of Hexanon interchangeable lenses and a wide range of Konica accessories, including
a electronic flash unit.

*DX: Films designed for use in DX Code System cameras. The Konica TC-X can accept this film.


Konica TC-X specifications

Type: 35mm SLR camera with shutter-priority TTL AE mechanism

Format: 24 x 36mm

Standard lenses: Hexanon AR 50mm f/1.8, Hexanon AR 50mm f/1.4

Lens mount: Bayonet type Konica Mount 11

Aperture control: Fully automatic and manual
View original page 2
Page 3 · Read text
www.butkus.us

Shutter: Vertical transport mechanical focal plane shutter, "B" 1/8--1/1000 sec

Flash sync: X sync at 1/8 through 1/60 sec

Self-timer: 10 sec. delay (approx.)

Viewfinder: Real image eye-level pentaprism Finder with split image range finder, microdiaprism ring and
peripheral matte screen; field of viewfinder is 92 percent 0.87 x with 50mm lens

Finder display: Needle indication of aperture from f/1.4 to f/22, with over and under exposure warnings,
manual operation signed, stopped-down metering mark and AE coupling range indication.

Metering system: Through-the-lens center weighted metering at full aperture, CdS cell

Exposure control: Shutter-priority AE mechanism, with standard Hexanon AR lenses, AE mechanism is
coupled with film speed, shutter speed and widest lens aperture; correct aperture indication for manual
metering, in stopped-down mode, meter coupled with film speed, shutter speed and aperture

AE coupling range: EV5 (f/1.4, 1/15 see) through EV18 (f/16, 1/1000 see) for ISO 100

Film speed: ISO 50 through 1600 (1/3 step). Both of automatic setting (DX code film) and manual setting are
possible.

Power switch: Turns battery on/off and locks shutter release

AE Lock mechanism: Partial depression of shutter locks AE mechanism (for exposure compensation)

Power source: Single LR03 or R03 dry battery (AAA size)

Film loading: Konica "easy load" system; film check window for DX type film

Film advance: Single action top lever, wind angle of 135 degrees, 20 degrees play.

Film rewind: Crank driven rewind mechanism, film rewind button resets automatically

Frame counter: Additive type, auto-reset

Size, weight: Body 130 x 84 x 44mm ( 5. I I x 3.11 1 x 1.73"). 375g ( 13.2 oz) (without battery)

Note: Specifications and design subject to change without notice.
View original page 3
Page 4 · Read text
Eight simple steps for photography


1. Insert battery (p. 12)

2. Set film speed (p. 16)

3. Load film (p. 18)

4. Set "AE" mark (p. 22)


5. Set shutter speed (p. 22)

6. Check exposure and framing (p. 26)

7. Focus and shoot (p. 24)

8. Rewind and unload film (p. 28)
View original page 4
Page 5 · Read text
www.butkus.us


                                                       Digitally signed by Mike Butkus
                                          DN: cn=Mike Butkus, o=Butkus camera manuals,
                                              ou=butkus.org, email=mike@butkus.org, c=USMike Butkus  Date: 2022.11.28 19:36:58 -05'00'
View original page 5Page 7 · Read text
www.butkus.us


2. Inserting battery


                                                             2. Inserting Battery

                                            The Konica TC-X uses a single LR03, R03
                                                    dry battery (AAA size) as the power source
                                                           for the AE system

                                                       1) Open the battery chamber cover (36) by
                                                   pushing the cover in (he direction of the
                                                      arrow.

                                                       2) Place a fresh battery in the chamber,
                                              making sure that the " + " and "" -- "" poles
                                                       of the battery march those in the battery
                                                  chamber. Close the battery chamber cover.

                                                       3) To make sure the battery is working,
                                                    look through the view-finder with the
                                              power switch "on" aiming towards the sky
                                                       or a light. The AE needle will swing
                                                         rapidly if the battery is operating.

                                           *Wipe battery with a dry cloth before
                                                         loading.


*Battery will last about two years with normal use (manufacturer's estimate). When the AE needle does not
move even if the camera is aimed at the sky or bright light with power switch "on", replace battery.
View original page 7Page 13 · Read text
www.butkus.us


6) Turn the film advance lever (1) as far as
it turns and press the shutter release button
(6). Repeat until the number " I " appears
in the frame counter (26).

*When the film is advancing properly, the
film rewind knob will turn
counterclockwise.

*Film should be loaded or unloaded in the
shade or indoors, avoiding direct sunlight.

*The film check window is for use with
DX type film, and lets the user check the
kind of film, film speed, and number of
frames exposed, while the film is in the
camera.
View original page 13
Page 21 · Read text
www.butkus.us


                                 Exposure meter range -


Depending on the ISO rating (film speed) of the film used, the effective range of the Konica TC-X's exposure
                              meter is as shown in the following table:


           CLICK HERE FOR CHART WITH METER RANGE OF 50MM 1.4 LENS
View original page 21Page 24 · Read text
Exposure compensation


Bright subject, dark background
                                        To prevent this, move up close to the subject and
                                                       press the shutter half way down to lock the AE
If the subject in the frame is brightly lit (ea. by direct
                                               mechanism. Then move back to frame and shoot the
sunlight) and the background is dark, the subject will
                                                         picture you want.
be overexposed in normal AE photography.


Exposure compensation

Use the AE Lock mechanism to control exposure in special lighting situations.

If the subject is in front of a bright background or fight source, the foreground will be underexposed. To prevent
this, aim the camera towards the ground (widening the aperture by I or 2 steps) and press the shutter release
halfway down.

The camera will take a reading for the foreground and will lock at that reading as long as the shutter is held
down half way. Then aim at camera at the subject and press the shutter all the way down to get a correctly
exposed picture.
View original page 24Page 25 · Read text
www.butkus.us

Using depth of field


Using depth of field
Depth of field is the range in front of and behind the point on which the lens is actually focused which also
appears In sharp focus in the photograph.

It has the following features:

1) The smaller the lens aperture ("F" stop) the greater the depth of field.

2) Wide angle lenses have greater depth

3) Depth of field behind the point of actual focus (away from the camera) is greater than depth of field in front
(towards the camera). It is possible to render the background and foreground in focus (a great depth of field), by
using a small aperture, or to blur the background whilst keeping the subject in focus, using a larger aperture.
View original page 25Page 29 · Read text
www.butkus.us

                                Chart of accessories available for Konica


Precautions for use


                                                                 · If you are not using your camera for some
                                                     time, remove battery and keep the camera in a
                                                   place free of dust and humidity. Do not leave
                                                    film in the camera for a long time.
View original page 29Page 30 · Read text
·Turn off the power switch when not using the
camera.


· Do not keep the camera in or around new
wooden or plastic furniture, since the
chemicals used in such furniture are harmful
to both cameras and film.


· Do not leave the camera in direct sunlight in
the summer, or in the trunk of a car in the sun.
Too much heat or humidity may hurt both
battery and camera, as well as film.


· At temperatures of less than 0°C (32° 1;)
battery voltage will drop and meter
performance will be affected. When using
camera in extreme cold, replace with fresh
battery or warm the battery in pocket or hand
before use.
View original page 30
Page 31 · Read text
www.butkus.us


·Clean lens and mirror with blower brush when
necessary.


 ·Attaching a UV or skylight filter to your lens is a
 good way to protect lens from scratches and din.


· If your camera does not work, take it with your
warranty and purchase receipt to the shop where
you purchased it or to your nearest Konica Service
Station.
View original page 31
Related documents and language editions
From the M. Butkus archive. Original publisher and archive notices are retained.
Check the model and edition against your equipment.
PDF verified 2026-10-10.