Film cameras
Konica Tc X User manual
User manual for Konica Tc X. 48 pages in German, French, Spanish, Italian, Swedish. Read the original PDF, download or print a copy without registration.
48 pagesGerman, French, Spanish, Italian, Swedish10.1 MB PDF
Loading your manual…Open PDF directly
Document details
- Brand
- Konica
- Model / document
- Konica Tc X
- Document type
- User manual
- Language
- German, French, Spanish, Italian, Swedish
- Pages
- 48
- File size
- 10.1 MB
- Category
- Film cameras
- Document date
- Not specified in catalog
Search available document text
Find a term, then jump to its page in the original PDF. Image-only pages may not be searchable; check the PDF for exact wording and diagrams.
Page 1 · Read text
www.butkus.us
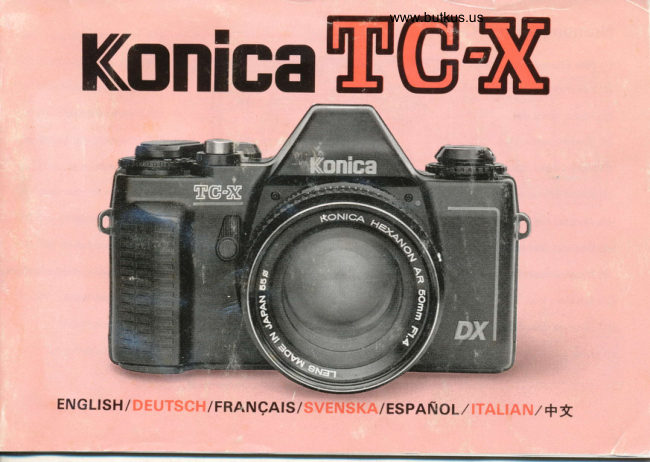
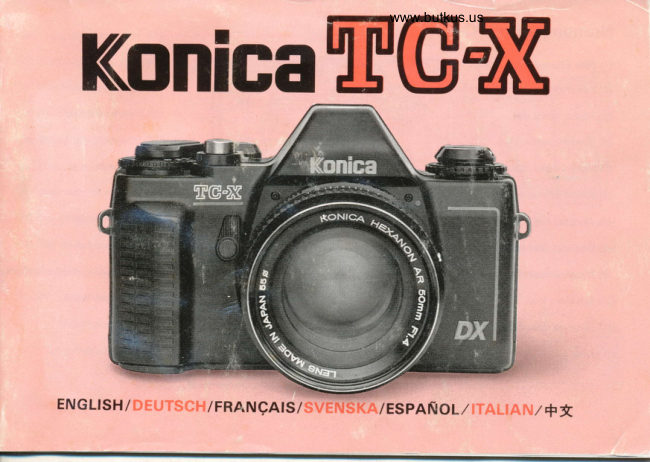
 KonicaTGil


ENGLtsHI DEurscH/FRerugelsiS        ESPANOL,/ITALIAN/+*
View original page 1
Page 4 · Read text
Bitte spenden Sie 2,50 Euro, um diese Website über E-Bay zu unterstützen ... www.PayPal.me/butkusView original page 4
Page 10 · Read text
www.butkus.us

(22), introduire I'arridre de la monture    1. Cambio del objetivo              china e inserire gentilmente  il
dans le corps de I'appareil. Tourner I'ob-   Para montar el Objetivo:                 portaobiettivo. Girare poi I'obiettivo in
jectif dans le sens des aiguilles d'une   Haga coincidir  el punto rojo (22) del ob-   senso orarit-r finch6 esso si arresta emontre jusqu'ir ce qu'il s'arr6te avec un    jetivo con el del cuerpo de la c6mara e   rimane bloccato.
petit bruit sec.                             introduzca suavemente el portaobjetivo
1. Byte av objektiv                  en la c6mara. Tome el portaobjetivo y   r.*firtti(                                          girelo hacia la derecha hasta que unObjektivets montering:                                                   *#t,*                                        "clic" indique que ha llegado a suAnpassa                 punkten                        pd        den roda                              objektivet                                             posici6n.                                                                                               t4                                                                                                                     |fr.*. F,Hlrr,*.  rt iE + trLg La.! tT. }:i.QZ),            punkten                      (22)                                  pit                            kameranfill den roda
och lit objektivfattningen sakta sjunka                                                                 r'1.ff(ll|tiE,tff EfrD+t4.Efri  'r Fpj" F t               Fatta                                   Cambio                                                          dell'obiettivo                                   1.in i kameran.                    tag i objektivfattn-                                                                     t.ingen     och vrid den                 medurs                                           onta                                          tills den sitter  M                                                            g g io dell'obiettivo
fast. Du h6r ett klick niir mekanismen    Far coincidere  il punto rosso dell'obiet-
kommit  i rdtt liiee.                            tivo (22) con quello del corpo della mac-


D6montage          de l'objectif:                                   Para                                        desmontar                                                               el Objetivo:                                                                                                          ffifrn},)*,Presser        le bouton                                 Haga               de verrouillage  (25),                                                    girar el portaobjetivo                                                                     hacia la iz-
tourner I'objectif dans le sens inverse de   quierda al mismo tiempo que presiona  el   =1rf4.E F.Ifuf4."nQ5), -jA-\4+F.* raE
la rotation des aiguilles d'une montre.   bot6n de liberaci6n del objetivo  (25). Sa-        ( iE Ei ft  ij 6t  ) +tTtJrH* LhrJtr :5.fi+n"qLorsque le point rouge de la monture   que el objetivo cuando los puntos rojos                                                                                                                                fR f; {F h.coincide avec celui du corps de I'ap-   del portaobjetivo y los de la c6mara   }.fr\?I.F.-L\h tL,
pareil, I'objectif peut 6tre d6gage.          coincidan unos con otros.
Objektivets demontering:             Per rimuovere  l'obiettivo
Hill knappen f<ir objektivets frikoppting   Mentre  il bottone di scatto (25) b tanuto
(25) intryckt och vrid objektivet morurs.   abbassato, girare il  portaobiettivo  in
Dra loss objektivet ndr den rcida   senso antiorario finch6 i punti  rossi
punkten pA objektivfarrningen  anpassas    dell' obiettivo e della macchina  foto-
till den rcida punkten pi kameran.        grafica coincidono. Rimuovere poi
                                                 I'obiettivo.
View original page 10Page 15 · Read text
4. Setting film sPeed
                                              4. S€tting film speed                      2) Drehen Sie das Filmempfindlichkett-                                                                                                         (14), bis die mit der Emp-          t+,,0,         l) When the film speed dial (14) is set at      seinsrellrad                                       ';DX " the camera automatically  reads     findlichkeit des eingelgten Films
                                         the film speed of the film magzine, so     tibereinstimmende  Filmempfindlichkeit
                                      manual film speed setting  is unnecessary.     der Indexmrke der lSO-Filmempfind-
                                         This is onlv effective with "DX" type      lichkeitsskala (17) gegenubersteht, wenn
                                                     films.                                         es kein "DX"-Film  ist.
                                                  2) When non-DX type film is used' turn
                                               rhe film speed dial (14) to set the camera     4. Changement de sensibilit6 du film
                                                 for the rating of the film.
                                                                                                      a'                                                                                                                         l) ;'trx".Aiuster l'6chelleAinsi ladesensibilitesensibilit6 dudu filmfilm
                                              4. Einstellen der Filmempfindlichkeit   "DX" qu'on utilise sera adaptee auto-
                                                         l) Stellen Sie die ISO-Filmempfindlich-      matrouement.                                            keitsskala auf "DX" ein. Die ISO-      2) Pour I'emploi d'un autre film, ajusner
                                           Filmemofindlichkeit des "DX"-Films   ist      l'6chelle de sensibilit6 du film (17) de
                                           automaiisch eingesfellt.                       l'appreil'en fonction de la sensibilit6 du
                                                                                                   film ou'on utilise.


                                                   Konica Color SR VlOO
View original page 15Page 17 · Read text
5. Loading film
                                              5. Loading film                              5. Einlegen des Films
                                                                 l) Turn the power switch (2) "on." Pull       l) Stellen Sie den Hauptschalthebel  (2)
                                                the rewind knob (16) all the way out and    so ein, dafj die Indexmarke auf ON
                                         the back cover (37) of the camera will      ausgerichtet  ist. Den Filmriickspulknopf
                                          oDen.                                      (16) hochziehen und dann mit etwas
                                                      2t Place a roll film into the film  cassette     916Berer Kraft bis zum Anschlag ziehen.
                                  chamber (31), then push the rewind     Der Riickwanddeckel (37) offnet sich.
                                    knob all the way back down.                2) Eine Filmpatrone in die Filmkammer
                                              3) Pull the tip of the film out a few cen-    (31) einsetzen und den Filmriick-
                                              timeters until  it reaches the film take-up     spulknopf nach unten in die Ausgangs-
                                           spool (39). Then insert the tip into the     position drticken.
                                                                    slit in the take-up spool.                       3) Halten Sie die Patrone fest und ziehen
                                                                                                     Sie den Filmanfang soweit heraus, bis er
                                                                            in einen beliebigen Schlitz der Auf-
                                                                                         wickelspule (39) gesteckt werden kann.
View original page 17Page 19 · Read text
4) Turn the film advance lever (l) and     4) Halten Sie die Patrone weiterhin  fest
make sure the holes in the edge of the    und betatigen Sie den Filmaufzugshebel
film fit on the teeth of the sprocket (,1O).      (l). Transportieren Sie den Film soweit,
Now close the back cover tightly.             bis die Perforalion oben und unten von
5) Raise the film rewind crank (15) and    den Zahnen der Filmtransportrolle  (40)turn  it slightly in the direction of the ar-    erfasst wird.  SchlieBen Sie  die
row to reduce slack of the film inside the     Kamerariickwand.
magaz ine.                                5) Klappen Sie die Filmri.ickspulkurbel
6) Turn the film advance lever (l) as far     (15) nach auBen und drehen Sie die
as it turns and press the shutler release     Kurbel vorsichtig in Pfeilrichtung,  bis
button (6). Repeat until the number " 1"     Sie einen leichten Widerstand sptiren,
appears in the frame counter (26).           der Film ist jetzt in der Patrone gestrafft'
*When the filrn is advancing properly,      6) Drehen Sie den Filmaufzugshebel (l),
the  film rewind knob will  turn    bis er anh?ilt, und driicken Sie dencounterclockwise.                            Ausl<iser (6). Wiederholen Sie diesen                                         Vorgang, bis die Zahl "1" dem Index-
                                                strich im Bildziihlwerk (26) gegenuber-
                                                            lieel.
                                                                              ' Wenn der Film ordnungsgemiilJ  trans-                                                  portiert wird, dreht sich der Filmriick-
                                         spulknopf wiihrend des Filmtransportes
                                           entgegen dem Uhrzeigersinn.
View original page 19Page 25 · Read text
Steht der Zeiger an der oberen Marke, soChecking the exposure O Ch€cking the aperture:                                       The correct aperture setting for the shut-     wird unterbelichtet. Verliingern Sie die
                                                     ter sDeed to which the camera  is set will     VerschluBzeit, entfernen Sie den Zeiger
                                  be shown by the needle in the finder.     von der Marke und machen Sie dann die                                    The camera will automatically  select this    Aufnahme. (Die Grenzenmarke der
               under-exposure  Imd                   aperture*The properwhenexposurethe shutterrangeis pressed.varies ac-     Unterbelichtungdem F-Wert furverschiebtdas gebrauchtesich nach
                                         cording to the open-aperture f-number      Objektiv.)
                                  and the minimum stop-down f-number    @Warnsignal  bei Uberbelichtung:
                                           of the lens used.                            Steht der Zeiger an der unteren Marke,
                                   @Under-exposure warning:              so wird tiberbelichtet. Verktirzen Sie die
                                                             If the meter needle moves to the top of     VerschluBzeit, entfernen Sie den Zeiger
                                         the finder, there is not enough light for     von der Marke und machen Sie dann die
                                             the shutter speed you have set. Choose a    Aufnahme.
                                     slower shutter speed to avoid an    D6clencher l'obturateui apres avoil
                                       underexposure. (The under-exposure     v6rifi6 I'exposition.
                                                      limit mark shifts according to the open-    @Lecture de la valeur d'ouverture
                                            aperture f-number of the lens used.)         cotrecte:
          Under exposure wal         @ Over-exposure warning:              Lorsque l'aiguille du posemitre  reste
                                                         If the metei needle moves down to the     dans. la zole de I'exposition correcte,
                                      bottom of the finder or "22 " a faster    contmuer (les pnses,                                                shutter speed may be needed to avoid an     * La zone de I'exposition  correcte varie
                                              overexposure.                                   suivant  la valeur F i toute ouverture ea la
                                Nachdem Sie die Belichtung geprtift     valeur de I'ouverture minimum de I'ob-
                                      haben, liisen Sie den Verschluf3 auf.      jectif utilis6.
                   @ Anzeige der korrekten Blenden-  @ Avertissement de la sous-exposition:                                        werte:                                  Iorsque I'aiguille du posmdtre indique
                              Wenn sich der Zeiger des Belichtungs-     la sous-exposhion, choisir un temps de
                                          messers im Sehfelde innerhalb des kor-    pose plus ient, faire eloigner I'aiguille de
                                  rekten Belichtungsbereichs befindet,      la marque de sous-exposition, sinon I'ex-
                            machen Sie die Aufnahme ohne     position reste insuffisante. (La marque
                                                   weiteres.* Der Belichtungsbereich veriindert sich    deselonlimitela devaleurla sous-expositionF A toute ouvenurese d6placede
                                      nach dem F-Wert bei gedffneter Blende      l'objectif qu'on utilise.)
                                     und dem minimalen Blendenwert fiir das   @Avertissement de la sur'exposition:
                                             gebrauchte  Objektiv.                     Lorsque l'aieuille du posemdtre indique
                                   @Warnsignal  bei Unterbelichtung:        la sur-exposition,  choisir un temps de
View original page 25Page 28 · Read text
www.butkus.us

3) Flip up the film rewind crank (15) md    3) Dra upp filmiterspolningsspaken  (15)
turn  it in the direction of the arrow.      och vrid den  i pilens riktning.
4) When film is completely rewound, re-   4) Vrid pi filmaterspolningsspaken  tills
wind crank will turn freely. Then open   du kanner att trycket mot den lattar.
the back cover and remove the film   Oppna bakstycket och ta ur filmen.
magazine for processing.
                                             3) Suelte la manivela de rebobinado de
3) Die Filmriickspulkurbel  (15) aufstellen    pelicula y hegah girar en la direcci6n que
und in Pfeilrichtung  drehen.                indica la flecha.
4) Das Filmrtickspulen  ist beendet, wenn     4) una vez que la presi6n de la palanca de
der Druck plcitzlich nachlaiBt. Offnen Sie   rebobinado cese mientras este
dann die Riickwand und die Patrone    rebobinando, abra la tapa trasera y sa-
herausnehmen.                        que la pelicula.
3) Ddployer la mmivelle de rembobinage   3) Sollevare la manovella per  il riavvolgi-
(15) et la faire tourner dans la direction   mento della pellicola  (  I 5) e girarla nella
de la fliche.                                direzione della freccia.
4) Lorsqu'un relAchement de la tension    4) Quando Ia pellicola e completamente
sur la manivelle  est senti, ouvrir le dos de    riavvolta. la manovella  di riavvolgimento
I'appareil et retirer la pellicule.             girera liberamente. Aprireallora ilcoper-
                                        chio posteriore e togliere la pellicola.
                          3)D€ EiElffi f6{lr,  r"-J Efr * EFrfift tr.
                                                                                   qc                                              a r,lEffE.f 6flHJ:;frS-f tr, +Tf trH,
                                         ,lJli+.
View original page 28Page 30 · Read text
www.butkus.us

 * Bei Belichtungsregelung kann die    tion, utiliser un accessoire  i attacher d   dexmdrket anpassas pa ratt satt innan du Messung leicht durch StOrlichr, das    I'oculaire pour emp€cher  I'entr6e possi-    tar bilden.
 durch das Sucherokular  eintritt,    ble de lumiere parasire par cer oculaire
 ungtinstig beeinflullt werden. Sorgen Sie   de vlsee.                                    8. Toma manual de fotografia durch Verwendung der Augenmuschel   * Effectuer la prise aprds avoir v6rifli6   Reglaje semiautom6tico:
 dafiir, daB eine Fehlmessune durch    que,l'aiguille coincide compldtement   Cuando se usa un anillo de extensi6n v
 Streulicht vermieden wird.                 avec le repdre.                            fuelles para fotografia de primeroi
 * Nachdem Sie bestiitigr haben. dall der                                            planos o cuando no se puede usar la
 Zeiger vollstiindig mit dem Jusrierpunkte    8. Manuell fotografering                 abertura automatica, se recomienda que
in Ubereinstimmung  gebracht worden   LjusmStning med bliindarfcirval:         se tomen fotografias usnado el sistama                                      rekommenderar                                                                              de                                                            ljusmAtning                                                                          toma                                                                                       manual. ist, machen Sie die Aufnahme.          Vi                                                                               -narmed                                                 bl2indarfcirval                                                                     fcir fotografering                                                                   du                                                                                                escala                                                                                                              l) La                                                                                  de abertura manual (19) se
8. Prise de vues manuelle                anviinder mellanring och balgar vid niir-    reglard girando el anillo de abertura (Z)
R69lage semi-automatique     :              bildsfotografering  eller niir bliindarauto-    mientras el bot6n de liberaci6n AE (24)
Lorsqu'on ne peut adapter le systdme    matiken med fcirval av slutartid inte kan    es presionado.
automatique par I'emploi d'un soufflet    anviindas.                          *Cuando se tomen fotografias con elou d'une bague-allonge, utiliser la     l) Hall knappen fdr blandarautomati-    sistema manual, la marca roia de manual
m6thode semi-automatique pour d6ter-   kens (AE) frikoppling (24) intryckt och    aparecer6 en el visor.
miner I'exposition.                           vrid pi ringen fcir bl?indarinstiillning  (7)   2) La exposici6n correcta se obtiene
 l) Tourner la bague d'ouverture (7) en     frir att stdlla in den manuella bliindar-   cuando Ud. gire el anillo de abertura o el
appuyant sur le bouton de ddverrouillage    skalan (19).                                  selector de velocidad del obturador (3)AE (24) pour I'aligner d  l'6chelle    * Det rdda miirket (symbol fcir manuell   mientras mira por el visor y ve que la
                                                                                                                                           reglajed'ouverture* Lors de lamanuelleprise de (19).vues manuelle,  la    2)fotografering)Titta  i scikarenvisasochdi vridi sokaren.pd ringen f6r   agujasemlautomatlco.estd. en la posici6n de
marque rouge apparaitra dans le viseur.    blandarinstllning eller pii ringen fdr   *Las fotograffas ser6n subexpuestas
2) Tourner la bague d'ouverture ou    slutartid (3) tills visaren pekar pA in-   cuando la aguja est6 situada por encima
s6lecteur des temps de pose (3) en regar-   dexmdrket fdr ljusmiitning med bliin-   de la marca indice y seriin sobieexpuestzts
dant dans le viseur et laire placer    darforval.                             cuando est€ por debajo de la misma.
I'aiguille du posemitre entre les repdres    * Kortet blir underexponerat nar visaren   *La determinaci6n de exposici6n suele
pour le r6glage semi-automatique,  afin      lir ovanfcir indexmiirket och dverexpone-    ser afectada por la luz adversa del
d'avoir* Si I'aiguilleI'expositionse placecorrecte.au dessus des    rat* Stroljusnar visarenvia scikarfcinstretdr under indexmdrliet.kan pdverka    ocular.*AsegrireseSe recomiendade que la agujael usoest6de oiera.perfec-
repires, I'exposition est insuffisante et   exponeringen. Vi  rekommenderar   tamente alineada con la marca indice
au contraire,  si elle est au-dessous,  I'ex-   anviindning av strciljusskydd framfcir    antes de tomar una fotografia.
position est exc€ssive.                          s<ikarfdnstret.
* Lors de la d6termination de I'exposi-   * Se till att ljusmetarens visare och in-
View original page 30Page 31 · Read text
8. Segno indicatore apertura manual   8.+artE&
                                                                                     :   Misura          zione              diafiammata
           un anello                               o un sof-  &*&rutr                       di estensione   Quando    fietto e usato per  i primi piani o in circo-    |'.l+*4, Htlr&[tEirE{Ert, gItrE
            nelle                    meccanismo                        AE   stanze                auali                                     il                                non     t&.Tt tr z,JtWJ'cIXF Bn, FJH +ajE trE   pud essere                            si                                             la                                      misu-                   raccomanda               ushto.
    razione diaframmata.                        fttlkY(,BiilIYc+XFt"
                       AE      l) Premere                          il bottone                           di satto                                          (24) e   D - tu t4.8 E AWJLWW&.ihQ4),  - tu    girare                                 (7) per                                           fissare            l'anello                  di apertura   manualmente  I'aDertura.                 ffi+iltafiQ),  lFnI it.E+ +A ftErll
   * Un segnale roiso apparird nel mirino     ,E0e).
   per       mostrare                che la macchina e pronta per                                   N rt ft ? zil l&F/ Ft, WY F Z+B H tItr h\              manuale.     controllo      il                                                                                           Light Mstering at Full Lens Opening:    2) Un'esposizione corretta puo essere   t++Eat!.*.                        Manual picture-taking may be carried
                        I'anello         giando   ottenuta                               di apertura
                                                     (3).   selettore                          dell'otturatore           di velcitii                                    o il     2) - )LAWF' I#, -iaft 1+RflBEUl     outReadeventhe withaperturethe valueHexanonshownARbylens.the   mentre si guarda attraverso  il mirino fin-    E*'(3)lt+Fff {;TqttE  iql tH €.f. if     needle of the meter md set the manual
                                                                                                                    rcale (19) according to the aper-   chb la lancetta b nella posizione di mrsura-   €IT, fEFIiA€Eg@JT.                     aperture
    zione* La fotografiadiaframmatab sottoespostaall'interno delquandomirino.la   x +Fff ,fn+&tEl ir{)tH €.F.6!.t.E,      Belichtungseistellungture value.            bei offener    lancetta b sopra  il contrassegno e sovrae-   lu*z-EiLTE,,fnTt.{Tia, nu*    Blende: Auch bei Hexanon AR-
                   essa b        quando   sposta                            sotto.
                       dell'esoosizione         misurazione    * La                                                    al   MR)L'JH.                              Objektivenmit manuellerkrinnenBelichtungseinstellungSie die Aufnahme   modo diaframmato puo risentire della   x i*€R)tfarf, 6B*rIJr\R R?S E    machen. Lesen Sie den von der
    luce che enta attraverso l'oculare della    +HttF-6\ lct*,8\YzrFt, E [tDltH BEl  .    Belichtungsmessernadel  angezeigten   macchim.    Si raccomanda I'uso di un occhino.        xnhi)\tr*rt.eft iE+€.{tr, FlSl-    Wertfiir Manuell-Einstellungab und stellen die(19)Blendenskalaauf ihn ein.
   * Assicurarsi che la lancetta sia oerfetta-    +&Ft.                             Mesure de lumiCre a tou.o ouver-
   mente allineata con il contrassesno di                                              ture: La prise de vues manuelle peut
    misurazione diaframmata.                                                               6tre effectu6e m6me avec un objectif
                                                                Hexanon AR. Lire et conn?itre la
                                                                       valeur d'ouverture indiquEe par
                                                                                                             I'aiguille du posemdtre et faire adapter
                                                                                                  l'6chelle d'ouverture manuelle (19) d
                                                                                                         cette valeur.
30
View original page 31Page 38 · Read text
www.butkus.us
 Ies caract6ristiques  suivantes.              skiirpan mindre framf6r motivet  iin   anche in maniera chiara nella foto.
 (l) Plus l'ouverture est petite, plus la  bakom motivet.                    Ha le seguenti caratteristiche:
 profondeur de champ est grande. Plus    Niir du friljer dessa regler vid fotografe-     (l) Quanto minore I'apertura  dell'obiet-
 I'ouverture est grande, plus la pro-   ring, kan du ta kort,  i vilka alla detaljer     tivo ("F'stop), tanto maggiore  la profon-
 fondeur de champ est petite.             framfor motivet, motivet och dven deta-     ditir di camoo.
 (2) Plus la distance focale de I'obiectif   ljerna bakom motivet iir klara och  i     (2)  Il grandangolare ha una profonditi di
 est courte, plus la profondeur de champ   fokus, eller viilja att visa motivet klart  campo maggiore dell'obiettivo
 est grande. Plus la distance focale de   och detaljrikt mot en suddig och otydlig     telescopico.
 I'objectif est longue, plus la profondeur   bakgrund.                                         (3) t-a profonditd  di campo oltre  il punto
 de champ est petit.                    Abertura y profundidad de campo       della messa a fuoco attuale (lontana dalla
 (3) Plus le sujet est eloignd de l'appareil,   Cuando se enioca un objeto, hay cierta    macchina) d maggiore della profondita  di
 plus la profondeur de champ est grande.    distancia delante de y detrds del objeto   campo in fronte (verso la macchina).
 Plus le sujet est proche de I'appareil,   que quedard delineado de manera nitida     E'possibile avere uno sfondo o un primo
 plus la profondeur de champ est petite.   en la fotografia terminada. Esta distan-    piano messi a fuoco (grande profondita'
 De plus, la profondeur de champ devant    cia es conocida por profundidad de cam-    di campo). usando un'apertura  piccola
 le point de mise au point est plus petite   po, y tiene las caracteristicas  siguientes:    oppure uno sfondo sfuocato mentre il
 que celle de derriire.                         (l) A menor abertura, mayor profun-    soggetto d a fuoco, usando un'apertura
 Profiter de I'echelle de profondeur de  didad de campo. A mayor abertura,    maggrore.
champ                  des images                                     en         et obtenir                                             profundidad de                                 efficaces,                                   menor                                                        campo.                                                             ttG presentant           nettement                          les scdnes                           de pres                                          (2)                                                     de                                 La profundidad                                                   campo con ob-au loin, ou en procurant du flou sur le   jetivos granangulares es mayor que para    hiEi+R,f.a!-,F.fl., {Httr-€H!ffi
fond pour faire                                                                      i6g" ts-  ffi ElAf,tt           1s1n1 le sulet.          objetivos(3) La profundidadde telefoto.de campo es mayor         ffiBtr,itt+Ht*f+tE E
Dcl lrrrrrs crr visst omrade tramfor och   para objetos a larga distancia que para      -f.rF"
bakom        motivet             som Ar                          dA moti-                                       objetos                                        i fokus                                                            distancia.                                                               Ademiis,                                                                                                       el                                                corta                                  a                                                                FWE\++',m\,                                                                               (1))tE*t4.&i , tEvet        fokus. Detta                 omrAde    ar i                                 kallas                                                       fcir                                          6rea enfocada                                                        delante                                                                              es m6s                                                                   del objeto                                                                                   (2)tH*R[F.rufe&lfi,                                                                                     *e&                                                                           rutfr&i{,bildens        djupskiirpa.                                              que                                            estrecha                                                                       el                                                          6rea                                                        enfocada                                                                        detrds                                                                                         del
Den kan karakteriseras pa foljande  satt:   objeto.                                      fr4it' (3)lE"R, & *. H A(ffi ilLroiL ru r^,
 l) Ju mindre blandarcipping,                             Un uso                            desro stOrre                                                      efectivo de                                                                         las caracteristicas                                                                                                  ar-    ruiltfteit.                                                                             H,*'BtDit, tr,ai . tUffidlupskiirpa.                                            riba                                        mencionadas          Ju stcirre bliindaroppning,                                                        hard                                                                   posibte el enfo-                                                                                                                    tedesto mindre diupskaroa.             que completo desde el primer plano   E   ++ffi., 1€EI H i1 it E4AiFtleffi
2) Djupskarpgn  biir storre vid fotografe.    hasta el fondo o el desenfoque  del iondo   4r, eIR iF€re+&H\ring med                                              contraste con          vidvinkelobjektiv och mindre   en
med      teleobiektiv.                                                                       el objeto enfocado.    s, n^fiaf*itR"  ^Vr,,ftHff*fiE                                      Profondita'di                                          campo
3.) Niir avsthndet  rill motivet  ?ir ldngt,  tir   La profondita di campo d la gamma in
djupskdrpan storre an ndr avstindet till    fronte e dietro  il punto in cui I'obiettivo d
motivet iir kort. Dessutom ar djup-   in realtir messo a fuoco e che appare
View original page 38Page 41 · Read text
Exposure meter range
   Exposure meter range             Alcance de exposimetro
   Depending oq the ISO rating (film     El alcance de exposimetro varia como se
    speed) of the film used, the effective     especifica en la tabla de abajo, segfn sea
    range of the Konica TC-X's exposure      la sensibilidad ISO de la pelicula que se
    meter is as shown in the following table:     use.
    (I  AE coupling without conditions)        ( IAlcance  incondicional)
        ( U No AE coupling with conditions)          ( t :Alcance condicional)
                             Gamma dell'esposimetro
    Belichtungsbereich               La gamma dell'esposimetro varia a
   Der Belichtungsbereich verdndert sich    seconda della sensibiliti  della.oellicola
   nach der lSO-Filmempfindlichkeit des    (lSO) usata. La gamma effettiv;  dell'e-
   gebrauchten Films wie die folgende    sposizione della Konica TC-X's b
    Tabelle angibt. ( I    der bedingungslose     mostrata nella tavola sguente:
    gekuppelte Belichtungsbereich El  der     (  I.   Accoppiamento AE  senza
    bedingte gekuppelte Belichtungsbereich)     condlzlonr)
                                                ( m  Accoppiamento non AE con
   Ljusmitarens rdckvidd                     condizioni)
    Ljusmatarens rdckvidd varierar enligt   t)t*HatEE
   den fdljande tabellen ner du anvender   in{Jh*&afiEia>ME#."   en        film        med ISO-fihkanshghetstal.
           Ovillkorligt                   omride)             (rftrtJfiE)    ( f    ( r.:-l Villkorligt omride)                          ( n a +.f+F!${i.rtdE)                                                                   tso 100
  Gamme de couplage                                                   EV7lF2.1/3O\   Gamme de couplage varie en fonction de
     la sensibilit6 du film (ISO) qu'on utilise.                                    -EV14(F22.1/3Ol
    Regarder  le tableau ci-dessous.
    (  I   Gamme de couplage sans condi-
    tion)
    (  f:l  Gamme de couplage sous condi-
    tion)


40
View original page 41Page 42 · Read text
www.butkus.us

            Exposure meter range with Hexanon AR 50mm f/l.4 lens (EVSto EVlgl

                                                   '1ro


;E uoup'irg wtlnoul conotlons INo AE coupling with conditions
View original page 42Page 48 · Read text
www.butkus.usKonica TC-X specifications
           Type:            35mm SLR camera  wittr                                           ter speed and widest lens aper-
                                       shutter-priority                                                 ture; correct aperture indica-
                       TTL AE mechanism                                        tion for manual metering; in
           Format:          24x36mm                                            stopped-down mode, meter
           Standard lenses:      Hexanon AR 50mm f/I.8                               coupled with film speed, shut-
                           Hexanon AR 50mm f/1.4                                      ter speed and aperture
           Lens mount:         Bayonet type Konica Mount II    AE coupling range:   EV5  (f /1.4, l/15 sec) through
           Aperture control:     Fully automatic and manual                        EVl8 (f/16, l,/1000 sec) for
            Shutter:                 Vertical transport mechanical                       ISO IM
                                  focal plane shutter, "B "           Film speed:          ISO 50 through 1600 (l/3 step).
                                1,/8-ll1000 sec                                     Both of automatic setting
            Flash sync:       X sync at l/8 through l,/60 sec                      (DX code film) and manual
             Self-timer:             l0 sec. delay (approx.)                                          setting are possible.
            Viewfinder:           Real image eye-level pentaprism     Power switch:        Turns battery on/off and locks
                                 Finder with split image range-                               shutter release
                                    finder, microdiaprism  ring and    AE Lock mechanism: Partial depression of shutter
                                   peripheral matte screen; field                              locks AE mechanism  (for ex-
                                of viewfinder is 9290; 0.87 x                            posure compensation)
                              with 50mm lens                 Power source:        Single LR03 (R03) dry bauery
           Finder display:       Needle indication of aperture                     (AAA size) or LR6 (R6) dry
                             from  f /1.4 to  f /22, with over                                 battery (AA size)
                            and under exposure warnings,       Film loading:         Konica "easy load" system; film
                            manual operation  signal,                                check window for DX type film
                              stopped-down metering mark       Film advance:          Single action top lever, wind
                            and AE coupling range indica-                              angle of 135', 20'play
                                    tion                              Film rewind:         Crank driven rewind
           Metering system:      Through-the-lens  center-                               mechanism; film rewind button
                               weighted metering at full aper-                                 resets automatically
                                    ture, CdS cell                   Frame counter:        Additive type, auto-reset
          Exposure control:      Shutter-priority AE mecha-          Size  :              Body : l30 X 84 X 44mm (5.1 t X
                                nism: with standard Hexanon                                    3.1 | x 1.73',)                   AR lenses, AE mechanism is     Weight:        AAAsize 3759 (13.2 oz)
                               coupled with film speed, shut-      (without battery) AAsize 3809 (13.5 oz)

                                                Note: Specifications and design subject to change without notice.
               #r
View original page 48Related documents and language editions
From the M. Butkus archive. Original publisher and archive notices are retained.
Check the model and edition against your equipment.
PDF verified 2026-10-10.