Film cameras
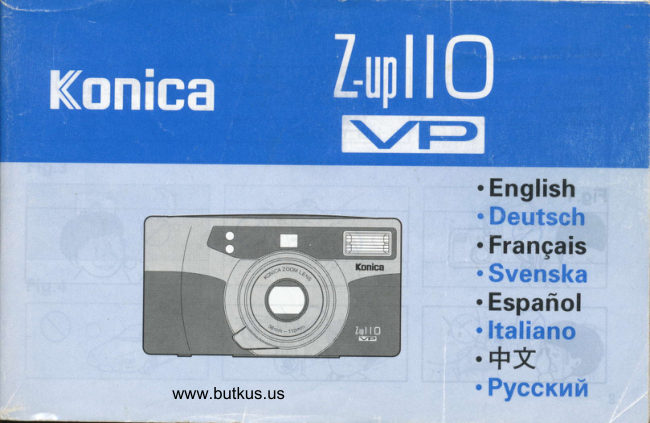
Konica Z-up 110 User manual
User manual for Konica Z-up 110. 31 pages in English. Read the original PDF, download or print a copy without registration.
31 pagesEnglish3.6 MB PDF
Loading your manual…Open PDF directly
Document details
- Brand
- Konica
- Model / document
- Konica Z-up 110
- Document type
- User manual
- Language
- English
- Pages
- 31
- File size
- 3.6 MB
- Category
- Film cameras
- Document date
- Not specified in catalog
Search available document text
Find a term, then jump to its page in the original PDF. Image-only pages may not be searchable; check the PDF for exact wording and diagrams.
Page 20 · Read text
I.AwARNING  (Fis. 1) sA'F-*                     $ Never disassemble this camera. There are high voltage
   This product is intended for photography. Please do not use      wires inside thc camera so there is a danser of electric
     it for any other purposes other than photography. Every        shock.
   precaution has been taken to insure the safety of this  $ Do not expose the battery to heat or flame. Do not attempt
   product, please use this product correctly after reading the       to short, disassemble or charge the battery. There is a
   information below. The followins indication mark is a       danger of explosion and severe injury.
   warning/caution  label to sho',r horito use this product so  $ Put the battery in a place where young children cannot    that damage or injury does not result.                        reach it. There is a danser of death bv accidentallv
                                                              swallowing the battery.
                                                                                                                                       sun.Awnnrurruc                          $ TherePleaseisdoa dangernot useoftheinjurycamerato thetoeye.look directly at the                  is   This      mark                       mark                                           states              a waming                                                      product                                  that                                              that                                                                    if the
    is         used     not              conectly,                       death                                   serious                                                    the                              or                                          injury                                               of                                                     user or  $ cannotPut thereachcamerait. Therestrapisina adangerplace ofwhereaccidentalyoungsuffocationchildren
   others may result.                                                    ifthe strap is wrapped around lhe neck.
AcRunoru                       Q touchWhen itthewithcamerabare ishands.left atIt lowis possibleor high thattemperatures,you may sustaindo not
   This mark is a caution mark that states that if the product  is      an injury due to burning.
   not used correctly, death, serious injury or disability may  $  If you become aware of something abnormal with the
   result. It also warns of the possible danger of damage to      camera (for example  it generates abnormal sound or heat,
   property.                                            smokes, smells of burning, etc. ) during operation,
                                                              immediately remove the battery out of the camera taking
Q This mark indicates items that are prohibited when using       care not to burn your hands and ask the store that you got  it
   this product.                                                         at or our agent io repair  it. If the camera is leit as-it is
                                                                  abnormal,  it may cause a burn or fire.
*  If the warning/caution information is unreadable, we  O If the inside of'the camera is exposed as a result of getting
  recommend obtaining new operating instructions  at our      dropped or damaged, be sure not to touch the exposed
   service station.                                                    inside to avoid getting an electric shock, burnt or injured.
   (There may be a charge for this.)                                 In such a case, imnrediatelv remove the batterv out of the
                                                          camera taking care not to get an electric shoik, burnt or
                                                                         injured, and ask the store that you got it at or our agent to
                                                                                                  19
View original page 20Page 22 · Read text
$ Please do not use organic solvents such as alcohol or paint    l_\lame of parts (Fig. 6l
   thinner            to             clean                   the camera.                                                                  Shootine                              O                                                                                    display'  pant'l/lilrn'          counter              become       lens         may                       clouded with water droplets if the$ The                                                              switch                                                            €) Power
   temperature of the camera changes suddenly, for example   @Zoom Switch
     if it is quickly brought tiom the cold outdoors into a warm  @ Shutt.r Release Button
   room. Let the camera sit for a while before using.            (O Remote Control Sensor
Q A camera is a precision instrument. Please do not drop it,    G) Strap attachment clip
    strike  it or use excessive force when handlins the camera.   @ "Reit-eye" reduction lamp/Self-timer lamp
                               @ RB Ptr,lto Sensor Window
5.HOLDING THE CAMERA: (Fis. 5)               €) t4ode Selector Swirch
* Keep your clbows down to hold the camera steady.      @ Manual Rewind Switch
* Whether fbr vertical or horizontal photography, hold the  O View-finder Window
  camera with both hands and draw your elbows to your  @ Flash
   body.                         @ Auto-focus sensor Windows
*  If the flash is used with the camera held vertically, the flash  @ Lcns/lens cover
   unit should be at the too of the camera.                       (D Green lamp
*  If you use the flash while holding the camera with the flash  @ Date and time indicator panel
  down, the picture (especially portrait) comes out  @ Back cover release knob
   unnaturally.                      @ Back cover
* Be careful that fingers, hair and the camera strap are not in  @ Tripod Socket
   the way of the lens, the auto-focus windows or the flash.   @ View finder eyepiece
* Hold the camera firmly with both hands in a stable posture  @ Pitm Check Wiridow
   and press the shutter button with your finger tip.       @ Battery cover/cover  release button
                               @ Auto-date/time selector/adjuster switch
6. (€                                                       * @@euto-aate model only
  The CE Mark indicates that the product conforms to a   directive of the European Union (EU).           How to use the strap (Fig. 7)                                                      * Use the protrusion on the plastic piece of the strap for ease
                                                                        of pushing the small button switches.

                                                                                                           21
View original page 22Page 26 · Read text
reflections. To take photos through glass, press the camera      completely turned off, open the back cover and take the
    directly against the glass. For landscape photos through a       film out of the camera.
    window, use the Long distance Mode (Fig. 25).             * When the film is exposed more than the resular number of
                                                                     frames, the last two irumes may be double e-xposures.
                                                                                              tr 6.Close-up Photography (Fig. 15)
 You can focus in as close as 0.8 m (2.6 ft). with ll0 mm  Manual Rewind (Fig. 17)
 telephoto fbr extreme close-up photos.                     To rewind the film manually (forced rewind) before the roll is
V Match the Auto Focus target with your subject that you     finished.
   want to focus on. Make sure the subject is in-the centei of   Use the Strap Ring tip to press the Manual Rewind Switch @.
          focus   Auto                          at a                target                         distance                                   of 0.8 (2.6
      you            set               the lens                         at                           the Telephoto                                          distance * As                                                                 ft) -  of1 mll0(3.3mm,ft).    The film will begin to rewind.
   you can zoom towards Wide-angle to adjust your picture
    composition.                                                                                             '*"                                                 *
   Frame the picture within the finder's close-up (parallax                            Advanced   f nstructions /
    correction) marks and press the shutter release button.
 * Use fbcus lock when the subiect is outside the auto-focus   S.Using the Mode switch (Fis. 18)
    frame.                                         Each time the mode selector switch @ is pressed, the * When depressing the shutter release button halfway if the    indication ({mark) points at a shooting mode one after
   green lamp blinks, that indicates the shooting distance  is    another in circulation motion on the shooting display panel.
    shorter than 0.8 m. When the shutter will lock. correct the    * The camera remains in the select shootins mode until
    distance and depress the Shutter Release Button again.            another shooting mode is selected. However, the self-timer
 * Camera vibration can be prevented by using a tripod and      photography mode is automatically reset to the AUTO
   shooting with the self-timer.                              mode each time self-timer photographing  is complete.
                                                      *  If the power is turned OFF and ON again, the shooting
T.Unloading the Film (Fig. 16)                    mode is set to the AUTO mode.
l/ When the loadcd film reaches the end, it is automatically
   rewound.                                                        Auto Mode (automatic  self activating  flash)
/  When the film is completely rewound, the rewind operarion             (Camera decides whether or not to use flash)   automatically stops. After il in the film counter brightens
   for about 5 seconds, the LCD is turned off with nothing              "Red-eye"  reduction Mode (Flash Auto Mode)
   appearing in the window. Confirming that the LCD is
View original page 26Page 27 · Read text
photography the slowest shutter speed that can be           Flash ON Mode (Fill in flash) (User decides to        *  In flash                                                             selected                                                                          is l/30 sec. at wide ansle mode or l/60 at           use flash)                                                                          mode.                                                                        telephoto
            Selt-timer Mode (Flash Auto Mode)
                                                                                                                                                                                                                                                             ":                                              l0.Flash                                         Mode                                  ON                                                                             lFas.2ol                                        ?                                                                       photography                                                                                                                    cf-fbctive                                                                               flash           Night View Portrait Mode (Flash ON Mode)           Daylight                                                                                                           is                                                                                                                fbr back-lit subjects,
                                                                               .strong shadows or on cloudy days.
           Flash OFF Mode (User decides not to use flash)           l// Press the mode selector switch to make the indication ({
                                                                mark)                                                                             point                                                                                             at t.           + 1.5 Exposure Compensation Mode (Exposure        The                                                                               flash                                                                                         will operate                                                                             even in bright places.
           corrected to +1.5 apefture) (Flash OFF Mode)        *  Slowest shutter speed is l/30 sec. at wide angle, 1/60 sec.
         Long distance Mode (Flash OFF Mode)                      at Telephoto. Hold the camera steady to prevent blurring at
                                                             slow shutter speeds.
                                              11.Self-timer Mode (Fig.21) O                                                       Use a tripod for taking not only souvenir pictures but also9."Red-eye" Reduction Mode (Fig. 19) @       *When taking pictures of people's faces under dim light, using       close-up pictures. Be sure to use a tripod to prevent the
 flash, reflection of f]ash on the retina, sometimes called "Red-      camera fiom shaking that causes blurred picture.
eye" may result. This mode reduccs "Red-eye" phenomenon     /  Press the mode selector switch to make the indication
because the flash lamp flashes after the "Red-eye" reduction       (Vmark) point at l).
lamp makes the pupils of the eyes smaller.              7 Press the shutter release button from behind the camcra.
/   Press the mode selector switch to make the indication ({      The self-timer will start and release the shutter after about
   mark) point at @.                                                  l0 seconds.
/   ff rne ahutter ope|irres when the camera is pointed towards    *  If you want to cancel the operation while the self-timer is
   a person, the "Red-eye" reduction lamp lights, the flash         in operation, press the powei switch to turn OFF.
   oDerates and the shot is taken.                            * Each time self-timer photographing is complete, the self-
* The flash operates approximately  0.5 seconds after the red-       timer photography mode is cancelled. Be sure to set the
   eye reduction  larnp. Make sure the subject or the camera is      camera to the self'-timer photography mode whenever you
   not moved during this time.                                          are going to take a picture with the self-timer.
* The flash will not fire in brieht conditions.
26                www.butkus.us
View original page 27Page 29 · Read text
lS,Adjusting Date and Time lFig.271         lg.Photography using Remote control (Fig.28)
                                                                                  needs                                                                                              to be purchased                                                                               transmitter                                                                       control                                                        remote   Prcss          the MODE switch to show year, ntonth and day on   TheI                                                                                               with the                                                                               not supplied                                                                                    that are                                                           models                                                          separately                                                                    for        display.    the
7  Press tire SglPCt switch to select numeral to blink.             transmltter.
/  While the selected numeral is blinking, press the SET     / When the remote control transmitter is pointed at the   switch to correct the numeral.                                camera receiver and the remote release button is pressed,
*  Press the SET switch repeatedly until the numeral changes        the shutter operates after the self-timer lamp has flashed for
    as desired.                                                           three seconds.
* Reneat the above ,tr}rT  andV until all numeral   * Remote control photography  is possible in all photography
    indications. vear. month and dav, are corrected as desired.       modes except self-timer.
                                                                                                                                           (effective                                                                                                          control                                                                                                                 signal                                                                                    drstance                                                                                 receptible                                                                  the                                                                                           of remote                                                    press                                                     is                                          complete,                                                      * The                    of the                                 all numerals    After adjustment/                                                                                                                                                          in                                                                                                                    is                                                                                                     within                                                                  5m (l6.4ft)                                                                                            controller)                                                           range                                       numeral                                                   stops                                                and                                                                     of the remote                                                                                                   it                                      of the                           Blinking             switch again.  SELECT
    lights continuously with the "Ready" mark (-)  appearing        front of the camera.
   above the numeral to indicate that the camera is ready for   * When the ohotosensor of the remote controller receives a
    shootins.                                                      strong light (sunlight or fluorescent lamp) or the remote
* Wheneier the calendar (year, month, day) is reset for       controller is operated near a fluorescent lamp, etc., remote  -
    correction. correct the clock (hour, minute) too without fail.        controlled photographing may result in failure. In such a
   For adjusting the time, press the MODE switch to show        case. use the self-timer for the remote controller.
   day, hour and minute on the display and then adjust the   *  Batteries are included  in the remote control.
   clock by repeating the above stepsy' andV in the same
   munncr as adjustment ol'date.                 AWARNING Danger of explosion leading to major
 *  After adjustment of minute  is complete, press the SELECT                          injury. Please do not expose remote control
   switch and the "  : " mark starts blinking. Press the                          to naked-f'larnes, dismantle, or heat  it.
  SELECT switch once again to enter the camera into the
   "Ready" status.                          How to attach the remote control (Fig.29)
 * To adjust the clock by second, get the "  : " mark blinking    * Remote control can attach to the strap.
     first and then press the SET switch to set the clock by the    * When detaching, please fbllow the reverse procedure.
   time signal while listening to the radio. etc. Then, press the
  SELECT switch to enter the camera into the "Ready"
    status.
28               www.butkus.us
View original page 29Page 31 · Read text
,    You can rewind the film before the
                              roll if finished.
 Franre counter      Additive type, LCD panel clisplay
Auto-datc           Built-in digital LCD display. Imprints
 (Aukr-date model only) time or date to the year 20,19. setting
                         fbr date or time recording. or cancel
                    for no inrprinting, adjustable to
                           nearcsf sec.
 Opclntiol temperature range -10'C to 50'C
 Battcly lit-e          AboLrt 15 rolls with flash for half the
                      exposures (24-exposure lllm)
Power source       Lithium battery (CR  | 23A, DL  I 23A:
                  3 V)., battery power check on LCD
                         panel
Remote control     Exclusive remote control system
(Remote control     using infrared light. Operates via the
model only)          relrote release button. The signal
                         reception distance is within about -5 m
                             (16..1 fi) (iionr).
                       Battery lif'e: About 10,000 signals can
                                 bc tlansmitted.
                       Lithium battery   ( CR202-5   : -lV  )
Size, weight                I 19x67.5x55 mm (4.7x2.6x2.  l")
                    255 g (tt.9 oz) battery extla
                    260 g (9. I oz) (with auto date)
Note: Specifications and design are subject to chan-ee without
        notice. Above data basctl on nranufacturer's  tests.

30               www.butkus.us
View original page 31Related documents and language editions
From the M. Butkus archive. Original publisher and archive notices are retained.
Check the model and edition against your equipment.
PDF verified 2026-10-10.