Film cameras
Mamiya NC1000 User manual
User manual for Mamiya NC1000. 38 pages in English. Read the original PDF, download or print a copy without registration.
38 pagesEnglish1.9 MB PDF
Loading your manual…Open PDF directly
Document details
- Brand
- Mamiya
- Model / document
- Mamiya NC1000
- Document type
- User manual
- Language
- English
- Pages
- 38
- File size
- 1.9 MB
- Category
- Film cameras
- Document date
- Not specified in catalog
Search available document text
Find a term, then jump to its page in the original PDF. Image-only pages may not be searchable; check the PDF for exact wording and diagrams.
Page 2 · Read text
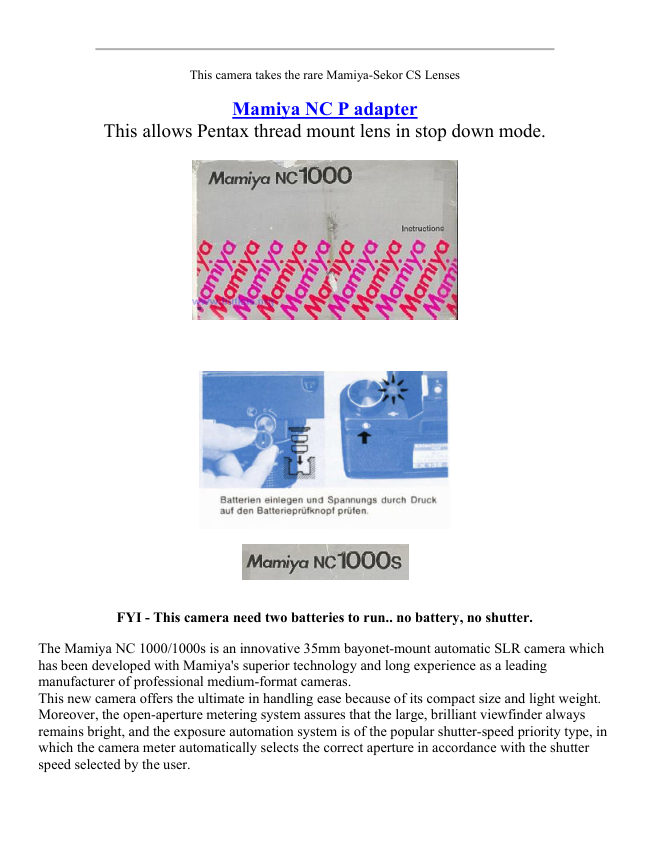
This camera takes the rare Mamiya-Sekor CS Lenses

                 Mamiya NC P adapter
        This allows Pentax thread mount lens in stop down mode.


         FYI - This camera need two batteries to run.. no battery, no shutter.

The Mamiya NC 1000/1000s is an innovative 35mm bayonet-mount automatic SLR camera which
has been developed with Mamiya's superior technology and long experience as a leading
manufacturer of professional medium-format cameras.
This new camera offers the ultimate in handling ease because of its compact size and light weight.
Moreover, the open-aperture metering system assures that the large, brilliant viewfinder always
remains bright, and the exposure automation system is of the popular shutter-speed priority type, in
which the camera meter automatically selects the correct aperture in accordance with the shutter
speed selected by the user.
View original page 2Page 3 · Read text
The NC 1000/1000s is designed to meet the needs of the amateur and professional photographer
alike. To further enhance its remarkable capabilities, a wide range of accessories are available
including an adaptor which allows stop-down metering and diaphragm automation with the TL,
DTL, SX series lenses.
Every care has been taken to assure that your Mamiya camera will provide you with years of
trouble-free service. However, to avoid possible mishandling, be sure to read this instruction

Contents


                                                  Unloading the Film ..............14

                                                 Using the Self-Timer ................ 15
Nomenclature 1
                                                 Using Flash .........................16
Outline of Automatic Exposure (AK) operation......3
                                                       Interchanging Lenses ...............18
Inserting Batteries ..........5
                                               Advanced Technique Depth-of-Field ....... 20
Battery Check and Exposure Meter Switch .......6
                                              Manual Exposure ................21
Loading Film ............7
                                                       Correct Exposure in Unusual Lighting ......21
Setting the Film Speed ............... 9
                                                 Using Infrared Film ............23
Setting the AE Button ........ 9
                                               Stopped-Down Metering .............24
Setting the Shutter Speed ............... 10
                                                     Multiple-Exposures ...........25
Focusing ............11
                                               Mamiya-Sekor CS Lenses ........... 26
Determining of Correct Exposure .......12
                                                      Accessories ..................27
Holding the Camera Correctly …. 13
                                                  Care of the Camera .............32

                                                          Specifications ...............33


Nomenclature  - Differences of NC 1000s
View original page 3Page 4 · Read text
1. Exposure Counter

2. Meter OF F Button
                                                9. Neck Strap Eyelet
3. Film Advance Lever
                                            10. Self-Timer Lever
4. Shutter Release Button
                                            11. Self Timer Activating Button
5. Hot-Shoe with Safety Cover
                                    12 Lens Release Button
6. Film Plane Reference Mark
                                            13. Depth of Field Preview Button
7. Film Rewind Knob and Back Cover
                                        14. ASA/DIN Windows
Release

8. Battery Check Lamp
View original page 4Page 5 · Read text
15. Film Memo Pocket
                                            20. Alignment Dot for Lens Mounting
16. Shutter Speed Ring Flange
                                         (body)
17. Shutter Speed Ring
                                            21. Mirror
18. Film Speed Ring Knob
                                            22. Focusing Screen Frame Latch
19. Film Speed Ring Lock Button
View original page 5Page 6 · Read text
24. Alignment Dot for Lens Mounting (lens'

                                      25. Aperture Ring

                                      26. Depth-of-Field Scale and Central Index Mark
                                      (orange)


27. Focusing Ring

28. AE Button

29. Battery Check Button


 30. Film Chamber
                                            35. Back Cover
31. Viewfinder Eyepiece
                                            36. Film Pressure Plate
32. Focal Plane Shutter
                                            37. Tripod Socket
33. Sprockets
                                            38. Battery Compartment Cover
34. Film Take up spool
                                            39. Rewind Button
View original page 6Page 7 · Read text
End of NC 1000s differences


Nomenclature NC 1000

1. Exposure Counter
                                                5. Hot-Shoe with Safety Cover
2. Meter OFF Button
                                                6. Film Plane Reference Mark
3. Film Advance Lever
                                                7. Film Rewind Knob and Back Cover
4. Shutter Release Button
                                         Release
View original page 7Page 8 · Read text
8. Battery Check Lamp
                                            12. Lens Release Button
9. Neck Strap Eyelet
                                            13. Depth-of-Field Preview Button
10. Self Timer Lever
                                            14. ASA/DIN Windows
11. Self-Timer Activating Button


15. Shutter Speed Ring Flange                                            19. Alignment Dot for Lens Mounting
                                         (body)16. Shutter Speed Ring

                                            20. Mirror17. Film Speed Ring

                                            21. Flash Sync Terminals (X and FP)18. Film Speed Ring Lock Button
View original page 8Page 9 · Read text
22. Alignment Dot for Lens Mounting (lens)

23. Aperture Ring

24. Depth-of-Field Scale and Central Index Mark (orange)

25. Focusing Ring

26. AE Button

27. Battery Check Button
View original page 9
Page 10 · Read text
28. Film Chamber

29. Viewfinder Eyepiece                    34. Slim Pressure Plate

30. Focal Plane Shutter                      35. Tripod Socket

31. Sprockets                               36. Battery Compartment Cover

32. Film Take-up Spool                     37. Rewind Button

33. Back Cover


INSERTING BATTERIES - Batteries must be good for shutter to work.


Remove the Battery Compartment Cover (36) by rotating it a quarter turn counterclockwise with a
fingertip or coin, Insert two 1.5V silver-oxide batteries (Eveready S-76, Mallory MS--76 or
equivalent) into the Battery Compartment with the + (positive) side facing the Battery
Compartment Cover (it has a plus sign indicated as a reminder on its underside). Perspiration,
grease and dirt are harmful to the batteries so do not handle them by your fingertips when inserting
into the battery compartment. Batteries should be wiped with a soft, dry cloth or tissue before
insertion. After inserting batteries, replace the Battery Compartment Cover, aligning its white dot
with the "O" (open) symbol indicated on the camera, and lock cover into place by rotating it a
quarter-turn (90°) clockwise.

Precautions
1. Do not use 1.3V mercury batteries which are similar in size and shape, Even if a battery fits into
the chamber if it is not a silver-oxide battery, proper functioning of the camera cannot be
guaranteed.
View original page 10
Page 11 · Read text
2. When the camera is not used for a long period of time, remove the batteries and store them in a
cool, dry place, Be careful so that the plus and minus sides are not accidentally touching and
shorted.

3. When replacing batteries, properly dispose of the used batteries immediately as they are
potentially dangerous. Silver-oxide batteries are explosive and should never be thrown into a fire.

4. To assure consistent performance and the utmost accuracy, your Mamiya camera is equipped
with an electronic shutter. However, when the batteries are exhausted, or there are no batteries in
the Battery Compartment., the focal plane shutter will function only at B (bulb), and when the
Shutter Speed Ring is set to any shutter speed other than B. a speed of approximately 1/1000 sec.
will result. Of course, the metering system will not operate at this time.

Battery Check and exposure meter switch


                                       After inserting the batteries, check their voltage by
                                     pushing the Battery Check Button (27). If the
                                       Battery Check Lamp (8) illuminates, it indicates the
                                            batteries are in good condition. Battery condition
                                     should also be checked when the camera has not
                                   been used for a long period of time. When the
                                       Battery Check Lamp fails to light, remove the
                                            batteries and wipe with a soft, dry cloth to assure
                                 good contact, Failure of the Battery Check Lamp to
                                             light after wiping the batteries indicates they must
                                   be replaced with fresh batteries.

                                 Exposure Meter Switch
                            When the Film Advance Lever (3) is slightly pulled
                                away from the camera (about 1/2 in. or 1,5cm) to its
                                           click stop, the exposure meter is activated. To turn
                                           off the meter, merely depress the Meter OFF Button
                                               (2).

                            When the Film Advance Lever is pulled away from
                                         the camera, the Meter OFF Button will "pop" up,
                                     exposing an orange rim which serves as a reminder
                                            that the exposure meter is turned on.

                                 * On the NC 1000, depressing the Meter OFF
                                     Button simultaneously turns off the exposure meter
                                  and locks the Shutter Release Button (4) preventing
                                         the possibility of an accidental exposure.
View original page 11Page 12 · Read text
Loading Film


                                 Avoid direct sunlight when loading and unloading
                                            film. Pull up on the Film Rewind Knob (7) to open
                                         the Back Cover (33), and drop a 35mm film
                                          cartridge into the film chamber (28), locking the
                                          cartridge into place by pushing down on the Film
                                Rewind Knob. If the Film Rewind Knob does not
                                          return flush with the camera top, rotate it while
                                        gently pushing downward until it recesses flush.

                                            Insert the film leader into one of the slots in the
                                   Film Take-up Spool (32). The arrow appearing on
                                         the Film Take-up Spool indicates the direction in
                                  which it revolves.


                              Wind the film until both the upper and lower
                                        sprockets (31) are engaged in the film perforations.
                                                 If the Film Advance Lever stops advancing, free it
                                 by depressing the Shutter Release Button (4).
                                     Before securely closing the Back Cover, take up all
                                         the slack in the film by gently rotating the Film
                                Rewind Knob clockwise,

                             Move the Film Advance Lever as far as it will go
                                   and then depress the Shutter Release Button. Repeat
                                         the above procedure until the Exposure Counter
                                          indicates 1 (one). The camera is now loaded and
                                     ready to use.
View original page 12Page 13 · Read text
Each time the film is advanced and the shutter
wound, the Exposure Counter advances one
number, informing the user of the number of
frames the film has been advanced. When the
Back Cover is opened, the Exposure Counter
automatically returns to "S" (start).

As the film is advanced, the Film Rewind Knob
should revolve counterclockwise. If it does not,
it indicates there is slack in the film, or the film
is not being advanced at all.

Turn the Film Rewind Knob clockwise to take-
up the slack, then depress the Shutter Release
Button and wind the film again. I f the Film
Rewind Knob still does not turn, open the back
and check the film loading.
View original page 13
Page 14 · Read text
Setting the film Speed


                                     Before taking pictures, be sure to adjust the
                                   camera to the film speed of the film being used.
                              To do so turn the Shutter Speed Ring (16)
                                     while depressing the Film Speed Ring Lock
                                     Button (18) until the correct ASA or DIN
                                 number (as indicated on the film information
                                          sheet) appears in the appropriate window (14).
                            When setting the film speed, hold the knurled
                                        portion of the Film Speed Ring (17) with one
                                  hand and depress the Film Speed Ring Lock
                                     Button with the other hand.

                                The correct values of the dots appearing
                                   between the ASA and DIN numbers are
                                         indicated by the smaller numbers in the table
                                     below.

                            When using the automatic exposure (AK)
                                    system of your camera, be sure to set the
                                     Aperture Ring (23) of the lens to the AE
                                           position. To do so, rotate the Aperture Ring
                                             until the orange AE Button (26) is aligned with
                                         the similarly colored Central Index Mark (24).
                            When set to the AE position, the Aperture Ring
                                           will lock into place.
View original page 14Page 15 · Read text
Setting the Shutter Speed


                                    Caution:
                                  Automatic exposure is not possible when the
                                  Aperture Ring is NOT set to the AE position.

                           Do not set the Aperture Ring to the AE position
                                      while depressing the Depth of-Field Preview
                                        Button. If you turn the Aperture Ring forcibly, the
                         AE mechanism of the lens will be damaged though
                                         the Aperture Ring will be stopped just prior to
                                       reaching the AE position. (When operating the
                                   camera to see the depth-of-field in the viewfinder,
The numerals on the Shutter Speed
                                   be especially careful to avoid the operationRing indicate fractions of a second;
                                        described above.)
thus, "500" represents 1/500 second.
                                The shutter speed plays a very important role in
For an exposure time of longer than 1
                                      determining the sharpness of your pictures.second, the Shutter Speed Ring is set
                                        Therefore, as a general rule, use as fast a shutter
to "B" (bulb). In this position, the
                                     speed as the prevailing lighting conditions allow.shutter will remain open for as long as
                                    For sharp pictures, do not use shutter speeds longerthe Shutter Release Button is
                                       than 1/30 sec. (1/15 to 1 sec., or longer) unless the
depressed.
                                   camera is mounted on a sturdy tripod and the
                                           shutter is tripped with a cable release.
For general purpose photography, you
                              To select a shutter speed) rotate the Shutter Speed
may find it useful to set the Shutter
                                   Ring (16) until the desired shutter speed is alignedSpeed Ring to the speed indicated in
                                      with the Central Index Mark.
the following table.


        Lighting Condition                    Shutter Speed

          Outdoors, Sunny                    1/250 or 1/125 sec.

       Cloudy or in the shade                  1/125 or 1/60 sec.

         Twilight or interiors                        1/30 sec.
View original page 15Page 16 · Read text
1. While looking through the viewfinder, adjust the Focusing Ring
                             until the most important part of the subject appears sharp.

                            2. Extremely accurate focusing is simplified by the split-image
                         rangefinder spot located in the center of the focusing screen. Its
                    wedge is set at a 45° angle, making it possible to use either
                          horizontal or vertical lines of the subject for precise focusing. The
                          split-image rangefinder spot is surrounded by a microprism collar
                      which fractures the image whenever it goes slightly out-of-focus;
                         consequently, it is an invaluable aid for pinpoint focusing accuracy.

                            3. The outer ground glass area (which surrounds the rnicroprism
                            collar) can also be used for focusing. Since the camera is an SLR,
                          the photographer always sees in the viewfinder exactly what will
                        appear on the film, regardless of the lens or accessory being
                         used. Moreover, simply depressing the Depth of-Field Preview
                       Button after setting the Aperture Ring to the desired F-stop will
                        allow one to preview the Depth-of Field and appearance of out-of-
                        focus images.


Determining of Correct Exposure


Pull the Film Advance Lever slightly away from the camera to its click-stop position and
look through the viewfinder to check that the Exposure Meter Indicator Needle is located
within the correct exposure area before releasing the shutter.

· Correct Exposure Area
The correct exposure area is anywhere between the upper edge of the numeral
corresponding with the maximum aperture and the lower edge of the numeral of the
minimum aperture of the lens being used.
View original page 16Page 17 · Read text
For example, when using an f/1.4 lens and the Indicator Needle points anywhere between
the upper edge of 1.4 and lower edge of 16 on the aperture scale in the viewfinder, correct
exposure will be obtained.
When using an f/1.7, f/2, or f/2.8 lens, the upper edge of the respective numeral on the
aperture scale in the viewfinder is the upper limit of the correct exposure. When using an
f/3.5 lens, the lower edge of 2.8 is the upper limit of the correct exposure.
If the Indicator Needle moves beyond the upper limit, underexposure will result, so adjust
the Shutter Speed Ring to a slower shutter speed until the Indicator Needle drops into the
correct exposure area.
If the Indicator Needle lies below the lower limit, this indicates overexposure, and the
Shutter Speed Ring should be adjusted to a faster shutter speed until the Indicator Needle
enters into the correct exposure area.

Aperture Scale:
The Aperture Scale is found on the left-hand side of the focusing screen area. The
Exposure Meter Indicator Needle moves up and down in this area, indicating the aperture
automatically selected by the camera when the Aperture Ring of the lens is set to the AE
position.

Stop-Down Metering Index:
This index is the small rectangular area found beside 1.2 on the Aperture Scale. For
manual stop-down metering, the Indicator Needle is aligned with this index. Details appear
later in this text.

Holding the Camera Correctly

                         Support the camera in the palm of the left hand with the
                      thumb and forefinger gripping the Focusing Ring. The palm
                          of the right hand should fit against the right side of the
                       camera body with the forefinger resting near the Shutter
                         Release Button and the thumb on the camera back.

                     Look through the viewfinder with the camera resting against
                           the forehead to help steady it and the left elbow held in
                            against the body.
                    As a general rule, the camera should not be handheld at
                             shutter speeds slower than 1/30 second. This becomes
                             particularly important when using lenses of longer than
                        normal focal length, where it may be necessary to use even
                              faster speeds to eliminate camera movement. At speeds
                         slower than 1/30 sec., a tripod is a must for optimum
                           sharpness.
View original page 17Page 18 · Read text
Caution:
* During automatic exposure (AK) operation, be careful not to
inadvertently apply pressure to the Meter OFF Button while
releasing the shutter, otherwise incorrect exposure may result.

* When attaching the camera to a tripod that has a long attachment
screw, adjust the screw to less than 3/16 inch (4.5mm) to prevent
damage to the interior of the camera body.

Unloading Film

                          After exposing a roll of film, it must be rewound into its
                             cartridge, for if the Back Cover of the camera were to be
                       opened without first rewinding, anywhere from a few frames
                             to the entire roll may be ruined.

                    To rewind the film, push in on the Rewind Button (37) and
                           gently rotate the Rewind Knob (7) with its foldaway Rapid
                     Rewind Crank in the direction of the arrow (clockwise). To
                         avoid damaging the film, do not rewind the film too rapidly
                         nor apply excessive force, After the tip of the film leader
                           separates from the Take-up Spool, there will be less tension
                      upon the Rewind Knob and this indicates it is safe to open
                           the Back Cover.

                    To prevent the possibility of fogging the first few frames, do
                          not unload the film in direct, bright light nor rewind the film
                         completely into its cartridge, but leave part of the film leader
                          protruding to prevent light from leaking in between the felt
                               lips of the cartridge.
View original page 18Page 19 · Read text
Using the Self-Timer

                      The Self-Timer provides a method of taking delayed action
                              pictures, allowing a photographer to get into his own
                          photographs!

                   When ready to take a picture, rotate the Self-Timer Lever
                           (10) counterclockwise and push the Self-Timer Activating
                         Button (11 ) to start the Self-Timer.

                          Rotating the Self-Timer Lever as far as it will go (180°) will
                               result in a shutter release delay of approximately 9 seconds.
                      The time delay is adjustable by rotating the Self-Timer Lever
                             in a 90 to 180° arc. However, when rotated to an angle of
                              less than 90°, the Self-Timer will not start.

                      The Self-Timer Lever may be set either before or after the
                           film is advanced. Starting the self-timer before the film is
                         advanced, however, will not result in releasing the shutter.

                      Even after setting the self-timer, it can be by-passed as often
                           as desired by releasing the shutter with the Shutter Release
                           Button.

Caution:
When using the self-timer in the automatic exposure (AK) mode, be sure to attach the Hot
Shoe Safety Cover (5A) (which also doubles as a viewfinder cover) to the Viewfinder
Eyepiece (29) to prevent extraneous light from entering the eyepiece, possibly causing
underexposure.
When using the self-timer, be sure the Film Advance Lever is at its click-stop position,
protruding slightly from the camera. If the lever is flush with the camera top, the meter is
turned off.
If the self-timer is started with the Film Advance Lever flush with the camera top, the
shutter will not release because pushing the Meter OFF Button not only turns off the
meter, but also locks the shutter release mechanism. In the event that the self-timer is
accidentally started with the Film Advance Lever flush with the camera top, pull the lever
out to its click-stop position and then reset the self-timer; there will be no need to push the
Self-timer Activating Button again because the self-timer will start as soon as pressure is
released from the Self-Timer Lever.
View original page 19Page 20 · Read text
Using Flash

                                 Your camera is provided with two flash Sync
                                        Terminals: FP for synchronization with FP class
                                            flash bulbs, and X for synchronization with
                                           electronic flash units. Compact electronic flash
                                            units designed for cordless operation may be
                                         attached to the Hot-Shoe (5) after its Safety
                                   Cover is removed. For a large flash unit used
                                      with a bracket, or for a compact electronic flash
                                            unit without provision for cordless operation,
                                           attach the flash synchronization cord to the
                                         appropriate Sync Terminal.

                                        Caution:
                             When using flash units with synchronization
                                          cords, an electrical charge is present in the "Hot
                                       Shoe". Therefore, keep the Safety Cover (5A) in
                                        place to prevent the possibility of a light
                                               electrical shock while the cord is connected.
                                 The Hot-Shoe Safety Cover, as explained in the
                                        previous section, USING THE SELF-TIMER,
                                           also doubles as a viewfinder eyepiece cover.

The shaded areas of the Flash Synchronization Chart indicate the usable shutter speeds
with the various types of flash illumination. For example, when using electronic flash, the
Shutter Speed Ring should be set to 1/60 sec. or slower (1/60 to 1 sec., B).


· Exposure for Flash Photograph
In flash photography, exposure is determined by the guide number of the flashbulb or
electronic flash unit. The guide number represents a relationship between the power of
the flash and the speed of the film. Flashbulb guide numbers can be found on their
package. Guide numbers for electronic flash units are found in the manufacturers
specifications. Once you've found the correct shutter speed for your type of flash, (see
Flash Synchronization Chart), you can compute the correct lens opening by this formula.
View original page 20Page 21 · Read text
GUIDE NUMBER / CAMERA-TO-SUBJECT DISTANCE = APERTURE

If the flash you are using has a guide number of 56, for example, and if, after focusing,
you determine from the lens barrel Distance Scale that the subject is 7 feet away, divide
56 by 7. The answer is 8, therefore the correct aperture is f/8 (56 / 7 = 8 [f/8] ).

Not only is flash the most effective light source for indoor photography end for shooting in
dimly-lit places, but it's also an effective tool for backlighting outdoor portraits and filling in
shadows outdoors. Remember that when flash is used as a supplemental light source,
exposure must be based on the light from the main light source (such as the
sun). Remember, also when shooting with electronic flash, the Shutter Speed Ring must
be set to 1/60 sec. or slower (1/60 - 1 sec., B).

Interchangeable Lenses


                         To remove the lens from your camera, push in on the
                            Lens Release Button (12), securely grip the lens by the
                                  lens barrel, give it a short (approximately 45°) twist
                                counterclockwise, and after the lens stops, merely lift
                                                  it straight out of the bayonet mount.

                               Attach the lens to the camera as follows: while
                              matching the red Alignment Dots (19 & 22), seat the
                                  lens in the bayonet mount, giving it a short (approx.
                                45°) twist clockwise until it comes to a stop with a
                                      click, locking into place.

                                Caution:
                           * Do not press on the shutter release button when you
                                interchange lenses. Such mishandling of the camera
                        may lead the malfunctioning of the automatic exposure
                             mechanism.
* When the lens is removed,
protect the mirror chamber of                           * Do not apply pressure to the Depth-of-Field Preview
the camera from dirt, and never                              Button (13) while interchanging lenses, as it may
touch the mirror. If dirt                               cause damage to the diaphragm automation pin on the
particles must be removed from                                     lens.
the mirror chamber, use a
blower or soft brush.                           * Protect your camera body and lens by using lens and
                           body caps.
View original page 21Related documents and language editions
From the M. Butkus Camera Manual Library. Original publisher and archive notices are retained.
Check the model and edition against your equipment.
PDF verified 2026-10-10.