Camera accessories
Mamiya RZ67 / RZ WINDER II User manual
User manual for Mamiya RZ67 / RZ WINDER II. 8 pages in German, French, English. Read the original PDF, download or print a copy without registration.
8 pagesGerman, French, English1.0 MB PDF

Loading your manual…Open PDF directly
Document details
- Brand
- Mamiya
- Model / document
- Mamiya RZ67 / RZ WINDER II
- Document type
- User manual
- Language
- German, French, English
- Pages
- 8
- File size
- 1.0 MB
- Category
- Camera accessories
- Document date
- Not specified in catalog
Search available document text
Find a term, then jump to its page in the original PDF. Image-only pages may not be searchable; check the PDF for exact wording and diagrams.
Page 3 · Read text
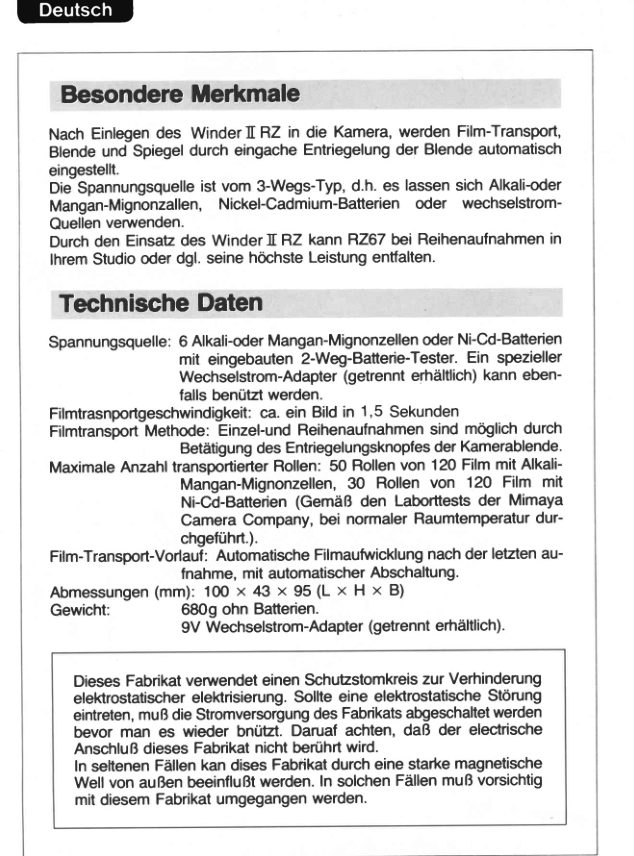
Special Features

The PowerWindertr Rzfits convenientlyunderthe RZ cameraand attaches
to its tripod socket. lt recocksthe shutter, moves the mirror and advances
the film wheneverthe shutterreleaseis activatedeitheron the cameraor by
meansof the electromagneticshutterreleasecablesor by wirelessremote
control. lt can make single or continuousexposures.lt uses alkalineor
rechargeableAA Nicad batteries.In the studio it can also be used with an
AC adaptor.The RZ Winder adds even more versatilityto the Mamiya RZ
System,in the studioor on location.

 Specifications

Power source: 6 AA alkaline/manganesebatteriesor Ni-Cd batterieswith
                 buift-in 2-way Battery test. A special AC adapter (sold
              separately)can be used.
Film TransportSpeed: One frame approximatelyevery 1.5 seconds.
 Film TransportMethod: Singleand continuousexposurespossiblewith the
              operationof the camera'sshutterreleasebutton.
MaximumRollsTransported:50 rollsof 120film with AA alkaline/manganese
               batteries,30 rollsof 120 film with Ni-Cdbatteries(according
                to Mamiya Camera Company laboratory tests made at
             normal room temperature).
 Film Advance: Automaticwinding after the last exposure,followedby auto
               stop.
Dimensions: 100 (Length)x 43 (Height)x 95 (Width)mm
Weight:     5309 withoutbatteries.
           9V AC Adapter (sold separately).


   This productemploysa protectivecircuitfor preventionof electrostatic
    electiiflcation.Shouldan electrostatictroubleoccur,be sure to turn off
   powerto this Productbeforeusing it again.Be carefulnot to touchthe
    electricalcontact of this Product.
    In rare cases, this Product may be atfected by a strong external
   electromagneticwave. In such cases, carefullyuse this Product.


                       www.orphancameras.com
View original page 3Page 4 · Read text
Inserting Batteries        Precautions
                                   o Be sure to turn off the Power Switch1. Release the Battery Cailridge from                               when WinderRZ is not in use. When notthe winder by moving the BatteryCar-                                  used for prolongedperiods,removethetridge ReleaseLever in the directionof                                            batteriesfrom the cartridge and storethe arrow.(Photoll)                                        separately.For the Winder[-Rz,use 6 AA alkaline/                                   o When usingcold batteriesor shootingmanganesebatteriesor Ni-Cd batteries.                                             at low temperatures,batteryperformance2. Insert fresh batteries,matcfhingthe                                    drops and the Winder may becometpoles of the batterieswith the symbols                                         inoperative.Should this occur, immedi-in the cartridge.Replacethe cartridgein                                          ately turn off the Power Switch. Whenthe winder,pushingit completelyin until                                      using the Winder at low temperatures,it clicksand locksin place.(PhotoE)                                       care must be taken to prevent the
                                          batteriesfrom growingtoo cold.
                                   o Continous, prolonged or  frequent
 BatteryTest                     batteryshould betestingavoided.will drain batteries and
                                    Pleasenote:
1. Turn on the power switch and press   When the AC Adapter is connected,it
the battery test button. The red lamp    automaticallyengagesthe Winde/s AC
(LED) lights when the batteriesare set     circuit and disconnectsbattery power.
correctlyin the cartridge,as indicatedin    The lamp will lightbut in this mode is not
the figure.(pnotoEl)                  a batterytest. When replacingbatteries,
                                  be sure to replace all six batteries.
With Alkaline/manganesebatteries......   Do not mix battery types, or new with
   Press LR button.                     old batteriesin the cartridgesince this
With Ni-Cd batteries               may cause battery leakageor damage
   Press Ni-Cd button.                    to the unit.
  Lamp is on: The batterycapacityis    o When the performanceof the winder
      sufficient.                              (film advance) grows sluggish,replace
   Lamp flickers: The batterycapacity     all six batteriesas soon as possible.
    has decreased. Replace all bat-    e Do not mix batterytypes or new and
      teries.                              old batteriesin the cartridgeas this may
   Lamp does not light: The batteries   lead to battery leakage,damagingthe
     are inserted incorrectly, or  not     unit.
     insertedat all.
View original page 4Page 5 · Read text
o  When         inserting                  batteries,                     be sure                                the   UsingWindertr                                    in thet  poles      match             the               symbolsfound
cartridge.
o Batterv life varies considerably in    Load a Roll Film Holder beforehand,
accordancewith the following factors:    with the arrow of the backing Paper
battery type, battery brand, freshnessof    alignedwith the StartedMark of the Film
batterieswhen purchased,the conditions    Insert.
under which the batteries are stored   (When testing the winder with an un-
from time of purchaseto time of use,    loadedholder,set the R-M Leverto 'M'.)
temperatureat time of use, whetherthe     1. Turn on the Power Switch.
batteriesreceivefrequentor intermittent    2. The film will automaticallyadvanceto
use.                                   the first frame after pushing the Start
                                     Buttonof the winder. (PhotoEl)
                                            3. While the Winder is advancingthe
 AttachingWindertr             film,The theshutterbatterybuttontest lampwill willbe remaininoperableon.
                                       during this time in order to avoid acci-
1. Slideopenthe WinderCouplerCover    dental exposures.
of the camerabdy. (Photo4)              4. When the last exposure is made
2. Fit the winderto the base of the cam-    (#10 with 120 and #20 with 220 film),
era,aligningthe AlignmentPinswiththe    the film and backingpaperwill autumat-
two openingsof the camera body. Next,     ically be wound on the Take-up Spool
lock winder to camera body by rotating   and the winder will then stop.
the Lock Key clockwise.(PhotoE)          5. Upon pressingthe Shutter Release
3. Make sure that the Winder is seated    Button,the exposurewill be made, film
firmly,so that its pressureloaded elec-    automatically advanced, and shutter
tronic contact pins connect properlyto    and mirror recockedfor the next expo-
the camera's. Check this condition    sure.
periodicallyduring use.

                                   o Continuous exposures are possible
                                    by maintainingpressureon the Shutter
                                   ReleaseButton.
                                   o When a loaded holder is attachedto
                                        the camerain mid-rolland not advanced,
                                        the shuttercan not be released.At such
                                   a time, just push the Start Buttonof the
                             www.orphancameras.com
View original page 5Page 6 · Read text
winder and the film will automatically
advance to the next frame, ready for
shooting.                      .
o When the Release Button Collar is
set for the emergencyshutter operation
mode, the winder Start Button must be
used to advance the film after each
exposure.
r Even with a loadedholderattachedto
the camera in mid-roll and advanced,
the shutter will not always release,if the
shutterat the body side is not set. In this
case, press the start button on winder.
The shutter will thus be set to allow
exposures.
o  lf the Start Buttonis pressedwhile the
R-M Lever is set to'R', the winder may
stop after the R-M Lever returns to its
normal (central) position. lf this occurs,
press the Start Button once again.

When the Winder]I is used
in combinationwith
RB67Serieslens.
o When using an RB series lens with
the Winder RZ, the winder will start
winding the film immdediatelyafter the
pressureis removedfrom the shutter re-
lease button even if the shutter is still
open. Especiallywhen using a slow
shutter speed, be sure to keep the shut-
ter release button depressed fully until
the shutter operationis completed.
View original page 6
Page 8 · Read text
Bezeichnungder Teile      Description
@ Ebknrische Kontakte           O Contaas 6bctriques
@ Batterie-Tester/Betdtigungslampe  @ Dispositifde contrOlede piles/T6moin
@ PaBstifte                           d'adionnement
@ Befestigungsschrauben       @ Plots d'alignement
@ Hauptschalter           @ Vis de fixation
@Spenscfrhigsel           @ Interrupteurd'alimentation
@Veniegelung            @ Embase pour pied
@ Batterielestknopf             O Venow
@ Entriegelungdes Batteriemagazines @ Bouton de contrOledes piles
@ Stan-knopf             @ Levierde d6venouillagedu port+piles
@ Wechselstromquelle-Buctrse     @ Bouton de mise en route
@ Batteriemagazin             O Jacf de source d'alimentationCA
                   @ Porte-piles
View original page 8Related documents and language editions
From the M. Butkus archive. Original publisher and archive notices are retained.
Check the model and edition against your equipment.
PDF verified 2026-10-10.