Film cameras
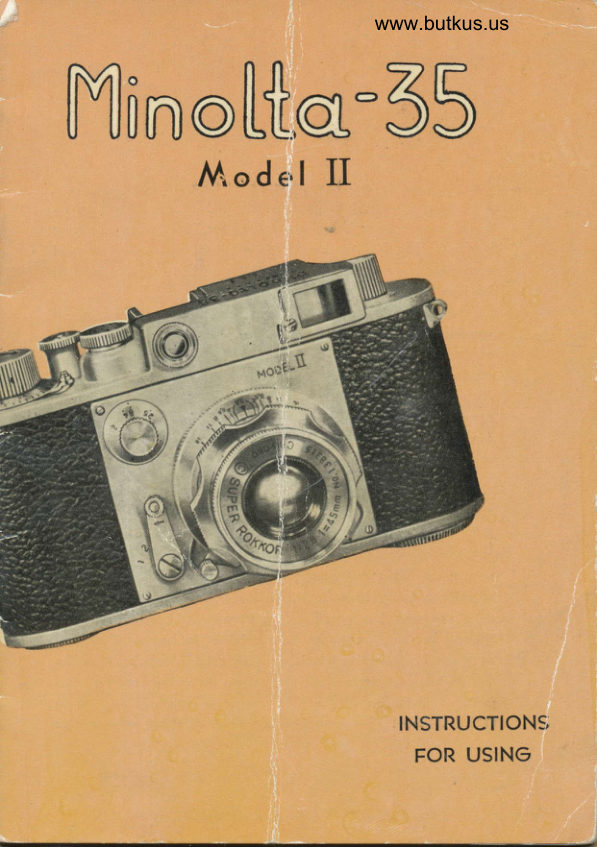
Minolta-35 model II B&W User manual
User manual for Minolta-35 model II B&W. 21 pages in English. Read the original PDF, download or print a copy without registration.
21 pagesEnglish9.3 MB PDF
Loading your manual…Open PDF directly
Document details
- Brand
- Minolta
- Model / document
- Minolta-35 model II B&W
- Document type
- User manual
- Language
- English
- Pages
- 21
- File size
- 9.3 MB
- Category
- Film cameras
- Document date
- Not specified in catalog
Search available document text
Find a term, then jump to its page in the original PDF. Image-only pages may not be searchable; check the PDF for exact wording and diagrams.
Page 2 · Read text
\


                                                                                                                                             i f ru uiJt l-pio'J gs.-"C"i"t"
 Minolta-3s Model ll is a carirera oF 3-5mm in size devised and
 integrated with adjustable selF-timer and Flash synchronizer, its
 back cover system being convenient for film loadings, having
 eye adjustable device for its single eye-piece range finder and
 conveniently you can make your shot withouL putting Forward
 its lens barrel.                                                    I                                                                                     I
OF course the shutter is set simultaneously when the Film was
wound, thus preventing double exposures. The film is very
economically used by loading it to the attached magazine,
cutting it at will in proper length out oF long film.
Also various suitable telephcto lenses being provided, one
camera can be utilized for Features usually necessary For several
cameras.

          Gi' o[ Minolta-35 $stu"dard
                                                                                                                                                      i
The Super Rokkor Co:ted Ffz.a-+smm Lens fitted makes
very sharp focus and from the shortest range to infinite it has
superior capacity to make sharp tine depictions.                               :
Also the lens has noted colour transparency capacity, highly
praised by many known photo specialists in homeland as well
as those in abroad and it  is now an established fact that the
tullest satisfactions are being expected by various users oF this
lens. This is one oF the reasons that we are srill sticking to
this  f ine standard F/z.A lens rather than those oF larger in
d iameter.
View original page 2Page 5 · Read text
t.  Super Rokkor Lens F f z.a-+smm
        is a lens wider in  its covering
       angle and deeper in its range oF
      focus in comparison with  usual
     scmm lenses for 35mm cameras
     and most  fitted   for   snap-
        shoLtings.

   2.  The lens barrel is unnecessary to
      be pulled it out when you make
      your shotting. The lris-Stop Dial
        is graduated from F 2.8 to F t6
      and its graduations are registered
       their respective stages from  I m.
       (s.sFt)  to  inFinite along with
       depths oF range oF focus too.


   3.  The Focal Plane Shutter   f itted
      works coupled with shutter speeds
     oF tlzs-soo   second and B in
      the case oF its rapid shutter and
       in the case of slow speed shutter
       ib works coupled with from t18
       sec. to  l. and T.

  4.  Counter Dial :  When the counter
     number t o'  is fixed under the
      arrow-mark aFter loading the
       film in the camera, the same will
     move on one by one following
     your successive takings until  it
       reaches to No. 39.


@
View original page 5Page 6 · Read text
www.butkus.us
         Couplad Range-Finder and Viewer   :    m@*"  ffiffi
       Two - image - coincidence tyPe         coupled range finder is devised  -#
        combined with  through finder.
        The view range covered in tilm is
           slightly larger than that seen in
         the finder and is convenienL tor
            its snap shoLtings.


           Visual Regulating Finder: Loosen
         the eye lens s:rew properlY and
         push eye lens out.  Then visibilitY
       oF the far-sighted can be Pro-
         perly  ad justed.  The  sYnchro
          terminal is two-terminal sYstem
            like Leica.


        Opening and shutting of   l:he
         back cover i; made by means oF
            fixing the mark 'Shut' or 'Open'
           to the point marked rz. Si,nultane-I'         ously the window oF m:gazine
          loadeC will automatically open or
            shut.


     B. The magazine is  consisted oF
         three parts/ spool, inner case
        and the outer case. \ilhen you
           de:ire to load your suitable long
           film in it, please cut it in proper          length and lo:d  it  in the  Cark   lHl    n                         If,l
           room.
                                                                                                                       fit
View original page 6Page 7 · Read text
Mike Butkus                 Digitally                                                                                                                                                                                                 DN:email=mike@butkus.org,Date:cn=Mike2023.05.21signedButkus,by21:18:20Mikeo=ButkusButkusc=US-04'00'camera manuals, ou=butkus.org,


         A.  Winding Knob
         B.  Counter D ial
        C.  Release Button
        D.  Rewind Lever
         E.  Rapid Shutter Dial
          F.  Slow Shutter Dial
        G. Rewind Knob
        H.  Back Cover Lock
                 l.    lris Stop Rins
           J.  Focusing Lever


(D,,
View original page 7Page 8 · Read text
www.butkus.us

K.  Self -timer Lever
L.  Starting Button for Self-timer
M. Rewind Shaf t
N.  Full-view Range Finder
C.  Terminal for Flash Synchronizer
P.  AccessorY Rail
O.  Pressure Plate
R.  Take-up SPool
S.  Sprins CliP
T.  Sprocket Gear
View original page 8
Page 9 · Read text
R"gulation     of
                 Shutter   Speeds

      The [ollowing festures do not tunc-
       tion properly beFore the shutter
        is autonratic set by w inding the
       film winding knob.
            It.   Rapid Shuttgr :  Pick up the knob
      oF Rapid Shutter" Dial and turn it
       to  right or leFt to the desired
     speed under the  point  arrow-       www.butkus.us
       marl:ed in case the speeds sought
      ranging from  tl25   to  tfsoo
      second. ln such case, however,
      the dial oF Slo'az Shutter has to
     be  l..ept under speed point oF
       tf2s  sec.
      Slow Shutter:  ln case oF shutter
      speeds desired are ranging frorn
           l-l lB sec. turn the dial tc' the
       point under the mark (.) .   In such
      case dial oF Rapid Shutter has to
     be placed under the point  oF
                   t f 25 sec.
         {   Bulb Shutter:  Put " 8 " oF Rapid
      Shutter Dial under the  arrow-
      marked point.  ln this case/ as long as you push on the shutter,
      the shutter screen will be kept open. But in such case the dial
     oF Slow Shutter has to be kept under shutter speed oF | 125
        SEC.

  4.  Time Shutter: To open the shutter screen, fix   '( T " on the
     Slow Shutter Dial at the mark (.) and push the button. To
       close the shutter screen just remove the dial from mark  .. T " to
       shutter speed "  I " second. Beware in such case the Rapid
      Shutter Dial has to be kept fixed at the point of   t lzs  sec.
@
View original page 9Page 10 · Read text
www.butkus.us
   How to Use Self-Timer

Remove the lever oF selF-timer to the direc-
tion arrow-marked.   lt   v,,ill stop at  any
position. When you push the Starter Button
to the direction arrow-marked, the  lever
will start its movement and act auhomatically
on the shutter. When you push down the
lever to a degree oF right angle, then the
working time oF it will be about B-9 seconds
and a degree oF t-3 the cori'esponding time
will be about 4 seconds, when the shutter
is to be released.


   Coupled  Range
              Fi nder & Viewer

Looking through the     f inder  push
forward or backward the lens barrel
by turning it bv means oF Focusing
Lever until the round image on the
range finder in center oF finder and
the whole image on    f inder would
coincide, which are seen at the outset
separately or doubly. Coincidence oF
these two images means a right focus
oF objectives aimed.
             Remove this visual ad-
                juster by turning it to
              the point that suit to
              your visibility, then it
                will help you to look
            through the      f inder
             much easier. Especially
                 this device is eFFective
              to eyes tar-sighted.
View original page 10Page 11 · Read text
t-


      Two-Terminal LEICA TYp"
         Synchronizer is being used. Please
         fix the terminal oF the cord to
       the plug to the.red point follow'
        ing the direction arrow-marked.
          Being twin-terminal system,                       'flash       the same is       synchronized in
        either position keeping the Flash
         Unit entirely apdrt from the camera
       or fixing it on the accessorY rail
        of the camera. Thus the sYnchro-
                    f lash taking   . is possible any time
       and place just as shottings under
        bright duy time. Please use the
       flash bulbs prepared for  Focal
        Plane Shutters.


        Turn the Back Cover Lock " OPen""
       at the bottom oF the camera to
       the point red marked, then the
        Back Cover will open. To fix the
        Back Cover again, you have to keeP
        the magazine inside in .right Posi-
        tions and rewinding nozzle must
      be kept not to leave it  uPward,
        otherwise the back cover will not
       be fixed properly.


          In case to interchange with vurious
        telephoto lenses, please turn the
        lens barrel in Anti-clock-wise way
         for about two or three times, then
        the lens will come otf.
                                                            www.butkus.us
View original page 11Page 12 · Read text
www.butkus.us


              Completion

               K-

        Magazines for  Minolta-g s Camera
        are consisted of A, B, €* C  in
         three parts. PIease tamilialize your-
p**ifi'l;l       selF with empty magazines without
ffii      the film loaded inside.
      As shown in diagram "  l "   put
                  t' B "  in  " C",  bewaring not  to
         place "B"  in upside down.
       As show,n in diagram " 2" &  " 3'l
        put " C"  in  " A",  placing each
      window oF them in straight and
        turn " C"  in anti-clock-wise way
                                                      ah|       until it  will. be fixed stable with
       sound oF " Tick "    f rom it.   (OF
         course the sound " Tick " will occur
        even by turning it in clockwise waY
        but in this case it  is advisable to
        turn  it  in anti-clock-wise way in
        order to avoid any inconveniences
         that might occur atter loading the
           ttlm,f.r         \  .
      As shown in diagram " t+"  the
       windows oF "A"  €t "C"   should
        coincide each other in  straight,
.-{       otherwise the sarne will  not  be
        fixed properly'.1.tI
&zf
View original page 12Page 13 · Read text
Film  to M"gazine

                       As shoarn in diagram "  | " put the
                        end oF film to spool " B "  facing
                                  e;nulsion side of the  filnr  inside.
                                 In case of using long film, please
                               cut  it  in about 1.6 meters (S tt.)
                                   in length and roll up. As shown
                                   in diogram " 2 "  put  it  in  " C"
                             From "b"  side oF B.
                                  InserL it as shown in diagram " 3 "
                            so as to make the end of film not
                                to  prevent smooth insertion.  ln
                              such case iF the end oF film would
                                 bent slightly outward, it will be con-
                                 venient for the tollowing actiens.
                       From the  abovementioned  point
                                 that was bent, the end oF film
                                       will come out from the magazine,
                          so  push ing  it and turn " C "   in
                                anti-clock-wise way,  the  sound
                                      " Tick "   will  be heard and the
                             magazine window will  ciose.   In
                            case when the film be impossible
                                to  pull   it  out  trom  magazine,
                        open  the  window  by   turninq
                                                      it  right or leFt pushing " C"    's
                            knob,  then  turning  only  the
                              spool  (' B "  in anti-clock-wise lvay,
                             the film end thar was bent  will
                          come out From the window.  Then
                              please take out the film and turn-
                                inq " 6 "  again and then fix   it  as
                                 abovementioned.


@
View original page 13Page 14 · Read text
www.butkus.us


                                                     I . Place the Rewinding Lever to the
                        position oF " R ".  (Then Film
                             \flinding Knob will turn treely to
                        the direction arrow-marked.)
                     2. Open the back cover.
                    3. Pull up the Revrinding Knob anci
                              insert it trom the bottom oF maga-
                         zine and attach it to the Rewind
                             ShaFt.
                    As shown in diagram (3) it has to
                      be made so as to make film come
                        out from center oF the magazine"
                        Diagram (4) shows that in case iF
                           outlet oF the film is one-sided the
                          back cover will not be closed even
                         though  it mighr be inserted torcibly.
                    4. Turn the Fitm Winding Knob and
                             fix the end oF film from the front
                          side to the Spring Clip.
                    5. Wind the \X/inding (nob slowly so
                   as to ascertain whether pertora-
                           tion oF the film have well geared
                           into the Sprocket Gears and close
                         the Back Cover.
                    6. Return the Rewind Lever to the
                              original position from the position
                               rrR".
www.butkus.us                     7. Turn the [:ilm S/inding Knob to the
                        position where it   automatically
                      stops and release the  shutter.
                          Please repeat such action for two
                       or three times and wind up to the
                       Take-up Spool all those film ex-
                     posed during such trial time oF
                          loading  it.
                   B. Turn the knob on the Counter
                          Dial with finger tips and fix O at
                       the arrow mark.
                           @
View original page 14Page 15 · Read text
t .  Hold camera firmly pressing on your face in order to
    prevent it from shaking. When you release shutter at
     .hutt.t  speed slower than t/2s  second, please use a
    tripod or ptace the camera on or Pressing along something
   '   stable, so as to keep it from shaking.
2.  \0ind the Film Winding Knob until the same will automati-
     cally stop.  The rotabion of the Film Rewinding Knob at
    the time when you wind the Film V/inding knob means
    that the film is being wound.
3.  Please turn the Shutter Speed Dial and fix the determined
    speed.
4.  Turn the lris Stop Ring and fix the desired iris diaphra3m.
    Please reFer to the relative lisb in next page for diaphragm
    versus shutter speeds.
5.  Looking through the finder move the Focusing Lever until
   two images will coincide.
6.  Push the release button slowly but gradually firm' Do not
    push strongly because the camera will  shake'  Light
     ihysmical rno[ion oF Focal Plane Shutter gives a fine ex-
    posure on the film.
Determination of Exposure Times:
     Determination of exposure time is the most important factor
     for general photo takings.  lt has to be ascertained usually
    undJr .ureful consideritions of degree of light available,
    season' time, sensitiveness of grade oF film etc.   But it
     being too complicated to explain simply on. these vario-us
    .omSined conditions to the beginners, the shortest cut for
    them will be rather rely on use of exPosure meters at the
     beginning until they could master them theoretically'-
View original page 15Page 16 · Read text
Rclation of lrir Stop                        ,      www.butkus.us                  vr Shutlqr ppcrdr
         Figures engraved on the surFace oF lens barrel such as 2.8, 4,
        5.6, 8,  I  l ,  l6  etc. are slgns shov,,ing brightness oF the lens.
       The smaller the number oF figures mentioned means the wider oF
         diameter oF the lens, volume oF light would pass through. On
        the supposition that total volume oF light that would pass thr.ough
        the lens under a condition oF iris diaphragm oF F 2,8 as l/t, the
         corresponding volume oF light under iris diaphragm oF F 4  will
                                                 rf 4, trs  I f B, Ft r r/r6 and Fr6  r f sz, i.e. theli     6e rfz, trs.6       volume oF light will be less by a ratio oF approximately one
ri      double-foldpriate at shutterSr.rpposingspeed oFa volumet/5o  secondoF rightunderwouldF8,be justthe appro-similar
        volume oF light will reach upon the film surFace at shutter speed
   II     oF tltoo  under Fs.6 or tlzoo  under F4
+     Dep*h of  Focus
       S/hen a cerLain subject is  focused,
        those other than the fixed objectives
        around vrill also be accurately focused
        simultaneously. I his range oF fccus
       means the depth oF focus.
      The dial shown lett  is a simple list
                                    for   same.
                              Accbrding
                                 to this list,
                       when  you
                             focus     a
                                       certain sub-
                                   ject   loca-
                                  ting  at  a
                                 distance oF
        to  teet and fix the lens under iris
        diaphragm F4  all those objectives in
         location between about B- I 2 feet will
        be accurately focused. The smaller the
          diarneter oF the iris diaphragm oF the
         lens the corresponding depth oF focus
          will be deeper in distance. ln the latter
        case, hcwever, the time oF exposure
        has oF course to be made lonqer.

                    @
View original page 16Page 17 · Read text
RoLation oF Fi !m Winding Knob
   rzill stop autonratically when all
  shoLtings have been completed.
    l.  Please replace  Rewin.Jin3
       Lever to the position oF " R ".                                                                 ffi/ {r:"  2.  Pick up the Rewinding Knob                              fL t&
     and turn to  the  direction
      urrow-murked. The tilm  v',ill
     be wound in  the  original
      magazine. As soon as all the
       film has been wound up in
      the magazine, you will    f eel
      very light on your rvinding nroiion,  so you can easily notice that
        all has now bsen vround up.
  3.  Open the bottom cover and take out the film.


                              For Minolta 3 5  Camei'a various
                                     interchangeable lenses suitin3  for"
                                            all the purposes ure for your needs,
                                  such as for taking portraits, close-
                           up to distant takings oF botanical
                                  and animal lile, sports etc. for which
                                    rvonderlul features of  ROKKOR
                                 Lenses rvill meet with all oF your
                                  such requirements. Ot course thsy
                                                                                                  anci                                  ^rc interehanncehl- t,J Leica                                  other cameras and will give to  all
                                  those users their tull  srtislacticns.
                    Standard Super Rokkor Coated
                                   F z.g   f:4  5 mm.
             ffi'$+              Weight,Length, 51.5ouncesinches(tsogrm.)(s.em1.

\TJ'
View original page 17Page 18 · Read text
www.butkus.us

         lsa
      Weight,  | 3 ounces (: zo grm.)
      Length, 3 inches (2.6 cm.)
 Especially adaptable for close-up portraits.
 Excellent for distant scenes. Capacity oF
 angle range is 260.   lmage taken is t.9
 times that oF standard lens.

   w ia
   Weight, only 9.5 ounces (zzogrm.)
   Length, 2.7 inches (6.Bcnt.)
 Relatively small size and light weight of
this lens make  it a special favorite.  ln
universal demand. Capacity oF angle is
 2oo.  lmage taken is 2.4 times that oF
standard lens.


    Weight,  t 8.5 ounces (szcgrm.)
     Length, 4 inches (tocm.)
Most suitable for  distant subjects and
scenes. Virtually takes your camera into
the action for sport shots.
Capacity oF angle range is  | 7o. lmage
taken is 3 times that oF standard lens.
                   @
View original page 18Page 19 · Read text
Interchangeable Lenses  :
    Super Rokkor Coated  Flz.a - B5mm
      Tef e Rokkor Coated   tr/s.6 - | lomm
    Tele Rokkor Coated  F/+. - l35mm
Lens Shade: Round Typ..
Filters:      g Colour Set encased in fancy celluloid
                 case.
Flash Unit:  Minolta B.C. Model & Minolta Penlite
            Model E.
Enlarger:  "Pennant" 6 X 6 Model fitted with
              enlarging lens " E. Rokkor " 5ornm or
             75mm.
View original page 19Related documents and language editions
From the M. Butkus archive. Original publisher and archive notices are retained.
Check the model and edition against your equipment.
PDF verified 2026-10-10.