Film cameras
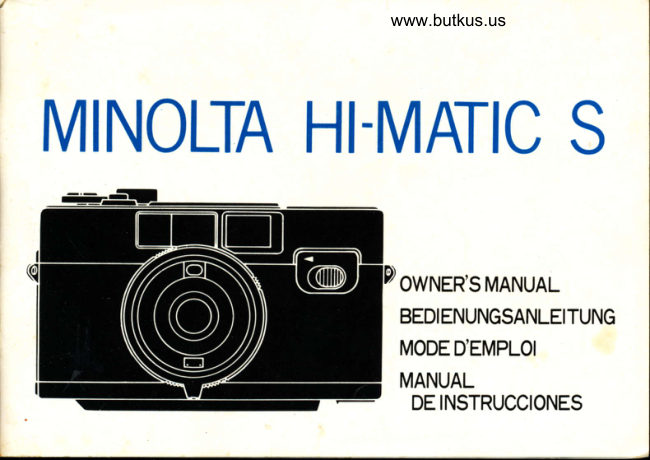
Minolta Hi-matic S User manual
User manual for Minolta Hi-matic S. 36 pages in English. Read the original PDF, download or print a copy without registration.
36 pagesEnglish4.2 MB PDF
Loading your manual…Open PDF directly
Document details
- Brand
- Minolta
- Model / document
- Minolta Hi-matic S
- Document type
- User manual
- Language
- English
- Pages
- 36
- File size
- 4.2 MB
- Category
- Film cameras
- Document date
- Not specified in catalog
Search available document text
Find a term, then jump to its page in the original PDF. Image-only pages may not be searchable; check the PDF for exact wording and diagrams.
Page 3 · Read text
,,IMPO     RTANT SAFEGUARDS''
  When using the  f lash un it, the specif ic
 cautionary notices in the owner's manual
 should always be observed and complied
 with, 0s well as basic precautions, includ-
 ing the  f ollowing:

     1 . Read and understand all instructions.
    2. Do not operate the flash unit if the
     camera has been dropped or darnag-#   ed   until it has been examined by
    an authorized Minolta service facili-
       ty.
View original page 3Page 4 · Read text
www.butkus.us
   3. To protect against electrical shock
     hazards, do not immerse camera
     and/or flash unit in water or other
       liqu ids.
  4.To avoid electric shock hazards, do
     not disassemble this unit, but take it
     to an authorized Minolta service faci-
      lity when service or repair work is
     required. Incorrect reassembly can
     cause electric shock hazard when the
      unit is used subsequently.
,,SAVE     THESE INSTRUCTIONS"
View original page 4Page 5 · Read text
Your light, compact Hi-matic S with its programmed electronic shutter and built-in
electron ic f lash is one of the most conven ient and easiest-to use cameras available. lts CdS E E
system provides perfect automatic exposure in conditions where flash is not needed. Simply
popping up the built-in flash automatically switches on the flashmatic system and couples
aperture and focus for accurate exposure adjustment over a considerable range. The
information-center  viewfinder tells you when there is enough light for normal hand-held
auto exposure without flash, warns when to use tripod or flash, and indicates when the flash
is ready to  f ire.
   Please take a few minutes to read this manual carefully for best results and longest
service life from your new Hi-matic S. Then keep it for reference as needed.
View original page 5
Page 6 · Read text
www.butkus.us

6 CONTENTS                      INHALTSVERZE ICH N IC
  NAMES OF PARTS                   8   BEZEICHNUNG DER TEILE              I
  BEFORE TAKING PICTURES           12   VOR DER ERSTEN AUFNAHME  ....   12
     lnstalling batteries  . .   .               12       Einsezen der Batterien                  12
    Check ing batteries                     15       Batteriekontrolle    .                     16
    Loading and advancing  f ilm            21       Film einlegen und transportieren   . . .  .  21
    Setting film speed                   29       Einstellung der F ilmempf indlichkeit  .  .  30
 HOW TO TAKE PICTURES         . . . 32   FOTOGRAFIEREN              32
   Focusingandframing     ......   33       Scharf einstellen                  33
    Automatic exposure control           . . 3b     Aufnahmen mit Belichtung sautomatik 36
    Automatic flash photography  . . . . . . 39      Automatisches Blitzen             39
   Unloadingexposedfilm     ....  50      Herausnehmen des Films .           50
  SPECtFICAT|ONS....             TECHNISCHEDATEN   .......   55
 CARE AND STORAGE            ..61    PFLEGE UND AUFBEWAHRUNG  62
View original page 6Page 8 · Read text
www.butkus.us


10


              Pressure plate @
  Safe Load Signalwindow @
            Finder eyepiece @
                 Sprocket @
            Take-up soool @
           Back-release lock @
     F ilm-cartridge chamber @
     Rewind-release button @
             Tripod socket @
    Batterychamber cover @
         Film rewind crank fi
View original page 8Page 9 · Read text
T
12 BEFORE TAKING PICTURES                                                                                                                       I  VOR DER ERSTEN AUFNAHME
  AVANT D'EFFECTUER DES PRISES DE VUE
  ANTES DE TOMAR FOTOS

     !nstalling batteraes                              Positionner les piles
     The automatic exposure and flash sys-      Le systdme automatique d'exposition et
   tems of the Minolta Hi-matic S are powered      le systdme flash du Minolta Hi-matic S sont
   by  two AA  (penlight)-size alkaline-     aliment6s par 2 piles de type AA (penlight)
   manganese (Eveready E 91 or equivalent),    alkaline-mangandse (Eveready E 91 ou
    sealed carbon-zinc, or nickel-cadmium bat-    6quivalent), ainsi que carbone-zinc ou
     teries.                                          nickel-cadmium.

    Einsetzen der Batterien                            Inatalaci6n de las pilas
      Das automatische Belichtungs- und Blitz-       Los sistemas autom5ticos de exposici6n
   system der Minolta Hi-matic S wird durch    y flash de la Minolta Hi-matic S son alimen-
   zwei Alkali-Mangan-, Karbon-Zink- oder     tados el6ctricamente por dos pilas AA (tipo
   N ickel-Cadmi  u m- Batterien gespeist.            pluma) alcalino-manganesas (Eveready E 91
                                       6 equivalentes), de carb6n-cinc blindadas, o
                                                        baterias de n iquel-cadmio.
View original page 9Page 10 · Read text
www.butkus.us


                                            13


1. Open the battery-chamber cover by slid-
   ing it in the direction of the arrow and
    lifting  it as shown.

   Offnen Sie den Batteriekammerdeckel.
   indem Sie ihn in Pfeilrichtung schieben
   und leicht hochziehen (siehe Abb.).

   Ouvrir le couvercle du logement des piles
   par glissement en direction de la fldche
   et lever comme indiqu6 ci-contre.

  Abra la tapa del alojamiento de pilas
   desliz5ndola en la direcci6n de la flecha
  y sac6ndola, seg0n se muestra.
View original page 10Page 11 · Read text
www.butkus.us                          2.  After wiping terminals with a clean, dry
                                             cloth, insert two alkaline, carbon-zinc or
                                   Ni-Cd batteries, making sure that plus
                                              (+) and minus (-) ends are positioned as
                                           indicated inside the chamber. Then close
                                     the latch cover by holding  it down and
                                            sliding it in the direction of the arrow,
                                       then letting it snap back in the opposite
                                               direction.

                             Nachdem Sie die Kontaktstellen der
                                           Batterien mit einem sauberen, trockenen
                                  Tuch abgewischt haben, setzen Sie diese
                                wie in der Batteriekammer gezeigt ein.
                                     Vertauschen Sie nicht die Plus (+)- und
                                    Minus (-)- Pole der Batterien. SchlieRen
                                         S ie die Abdeckplatte durch leichtes
                                         Zurirckziehen in Pfeilrichtung, damit sie
                                       in die alte Position zuriickfedern kann.
View original page 11Page 12 · Read text
www.butkus.us
                                         Checking batteries                      15
                                     The batteries should be checked immedi-
                                             ately after inserting and from time to timeAprds avoir nettoy6 les contacts avec un
chiffon sec, positionner les 2  piles     thereafter, especially before starting on trips(alkaline, carbone-zinc ou   Nickel-    or taki ng especially important pictures. To                                do this, pop up the built-in flash by slidingcadmium) dans le sens indiqud dans le
boitier (+) et (-). Pour fermer le cou-    the flash-release lock in the direction of the                                        arrow toward the lens. lf the finder/monitorvercle, pousser vers le bas en le glissant                                   lamp lights and begins to pulsate within 20en direction de la  f ldche; puis le laisser se                                        seconds with alkaline, or 15 seconds withfermer.                                            carbon-zinc, the batteries are serviceable.  lf
                                            these signals do not light within 30 seconds,
Tras de limpiar los terminales con un    make sure fresh batteries are properly insert-
pafio seco y limpio, inserte dos pilas    ed or replace exhausted batteries with fresh
alcalinas, de carb6n-cinc, o baterias Ni-    ones. To conserve power, be sure to push
Cd, estando seguro de que los polos    the flash all the way into the camera after
"mtts" (+) y "menos" (-)  quedan     checking batteries.
puestos como se indica en el interior del     To  positively prevent unsatisfactory
alojamiento. Despu6s cierre la tapa    operation, a special device built into the
sosteni6ndola por abajo y desliz5ndola     Hi-matic S locks the shutter so that pictures
en la direcci6n de la flecha, apretdndola    cannot be taken if batteries are too weak or
luego firme hacia abajo en la direcci6n     there are none in the camera. Thus if you
opuesta.                                     find it impossible to release the shutter, you
                                           should install or change batteries.
View original page 12Page 13 · Read text
16  Batteriek ontrolle                              Alkali-Mangan, bzw. innerhalb von 15s mit
     Die Batterien sollten sofort nach dem     Karbon-Zink-Batterien zu blinken anfdngt,
   Einsetzen und zwischendurch iiberpri.rft       ist das Geriit betriebsbereit. Wenn das Signal
   werden. Insbesondere vor Antritt einer    nicht innerhalb von 30s aufleuchtet,  ver-
   Reise oder vor dem Anfertigen wichtiger    gewissern Sie sich, ob die Batterien richtig
    Fotos. Zur Kontrolle lassen Sie das Blitz-    eingesetzt sind oder ersetzen Sie sie durch
    geriit mittels des Entsperrknopfes  - den Sie    neue. Um Energie zu sparen, muB der Blitz
   in Pfeilrichtung schieben -  herausspringen.    nach der Batteriekontrolle wieder voll-  Wenn die  Monitorlampe im  Sucher     stiindig bis zum Anschlag in die Kamera
   aufleuchtet und innerhalb von 20s mit    eingeschoben werden.
                              Um falsch belichtete Aufnahmen zu ver-
                                                meiden, besitzt die Hi-matic S eine spezielle
                                                    Schaltung, die das Auslbs'en des VerschluBes
                                             unmoglich macht, wenn das Blitzgeriit noch
                                              nicht voll aufgeladen ist oder gar keine
                                                    Batterien eingesetzt wurden. Wenn Sie also
                                              nicht ausl6sen kiinnen, m0ssen Sie neue
                                                    Batterien einsetzen oder Sie mirssen warten,
                                                          bis das Geriit voll aufgeladen ist.

                                                Contr6le des piles
                                   Les piles doivent 6tre  contr6l6es
                                           immddiatement aprds insertion et de temps
                                                                              i autre par la suite, sp6cialement avant de
View original page 13Page 14 · Read text
www.butkus.us

18   CAUTION                           ATTENTION
  o When replacing batteries, be sure to   o Changer les 2 piles en m6me temps' Si
      change both batteries at one time. lf an       vous utilisez une pile qui est d6ji 6puis6e
      exhausted battery is used with a fresh one,      avec une autre pile neuve ou que des
      or if different types of batteries are used        piles de types diff6rents sont utilis6es
       together, there is a possibiliW of battery       ensemble,  il y a risque de perte d'6nergie
       leakage or explosion.                        ou d'exposition.
  o  lf the camera is not to be used for two     r Si vous pensez ne pas utiliser votre
     weeks or more, batteries should be        appareil pendant deux semains ou plus,
      removed.                                               retirer les piles.

  ACHTUNG                           PRECAUCION
  o Beide Batterien m0ssen immer gleich-   o Al reemplazar pilas, aseg0rese de cambiar
       zeitig ausgetauscht werden. Wenn alte      ambas pilas a la vez. Si una pila agotada
       u nd  frische Batterien zusammen-      se usa'con otra nueva, o si diferentes
     kommen, ist die Leistung schlecht, und        tipos de pilas se usan juntos, hay posibi-
     est besteht Auslauf- oder Explosions-         lidad de goteo de pila o explosi6n.
       gefah  r.                        o Si la c6mara no se ha de usar por dos
  o Wird die Kamera ldnger als zwei Wochen       semaffas o m5s, se deben romover las
       nicht benutzt, ist es ratsam, die Batterien          pilas.
      herauszu neh men.
View original page 14Page 15 · Read text
Loading and advancing  f ilm                                                                      21
Film einlegen und transportieren
Chargement et mise en place du film
Carga y Descarga de la Pelicula
                                            1. Slide the back-release lock in the direc-
                                              tion of the arrow and open the back
                                                          cover.
                                       Schieben Sie den Kamerar0ckwand-
                                           Entsperrknopf in  Pfeilrichtung und
                                                 offnen Sie die Kamera.

                                                 Tirer le bouton de ddverouillage du dos
                                 de l'appareil en direction de la fliche
                                              pour obtenir l'ouverture de celui-ci.

                                                    Deslice el cierre de liberaci6n de la tapa
                                                       trasera en direcci6n de la  f lecha y abra la
                 www.butkus.us             tapa.
View original page 15Page 16 · Read text
www.butkus.us

22

   2. Pull out on the rewind knob, place a f ilm       Ziehen Sie die R0ckspulkurbel hoch,
      cartridge into the chamber as shown and        legen Sie eine Filmkassette wie gezeigt in
     push the knob all the way in, rotating  it      die Filmkammer ein, und schieben Sie
       sliqhtlv  if necessary.                      dann den RUckspulknopf wieder ganz
                                              hinein; falls notig, unter leichtem
                                                       Drehen.

                                          En laissant le bouton dans cette position,
                                                mettre en place une cartouche dans son
                                                  logement, puis repousser le bouton de
                                                     d6verouillage vers le bas en tournant si
                                                             ndcessa  ire.

                                                  Tire hacia afuera del bot6n de rebobi-
                                                    nado, emplace el cartucho de pelicula en
                                               el interior del alojamiento, seg0n se
                                                     muestra, y apriete el bot6n hacia dentro
                                                     hasta el tope, gir5ndolo ligeramente, si es
                                                            necesario.
View original page 16Page 17 · Read text
23

3.  Insert the film leader into one of the
    slots in the take-up spool and engage the
   second or third perforation from the end
   with the tooth on the slot.

   Stecken Sie den Filmanfang so in einen
   der Schlitze der Aufwickelspule, daB das
   zweite oder dritte Perforationsloch im
    Schlitz festhackt.

    Introduire I'amorce du film dans l'une
   des fentes de la bobine r6ceptrice de
   sorte que l'ergot soit engag6 dans la
   deux idme ou troisidme perforation.

    lnserte la punta de la pelicula en una de
   las ranuras del rodillo de toma, y en-
   ganche la segunda o tercera perforaci6n,
   contando desde el extremo, con el diente
  de la ranura.
View original page 17Page 18 · Read text
www.butkus.us

24
  4. Pressing the  f ilm gently against the      lndem Sie den Film leicht auf die
      sprocket, actuate the film advance lever       Zackenrolle dr0cken, bewegen Sie den
     slowly until the perforations on both       Filmtransporthebel langsam vorwdrts.
     edges of the film are engaged with the       Die Filmperforation muB beidseitig von
     sprocket teeth. (lf the advance locks      der Zackenrolle erfaBt werden. (Wenn
     during this, release the shutter and con-        sich der Schalthebel hierbei nicht mehr
        tinue.  )                                    betdtigen leBt, so drticken Sie den
                                                         Ausltiser und Sie kiinnen sofort weiter-
                                                             transportieren).

                                                        Presser le f ilm doucement sur le d6biteur,
                                                     actionner le levier d'avancement jusqu'd
                                                 ce que les deux c0t6s des perforations du
                                                       film soient engag6es sur l'axe d'entraine-
                                                ment. Si le levier se bloque pendant cette
                                                      op6ration, appuyer sur le d6clencheur et
                                                             conti nuer comme ci-dessus.
                                            Presionando la  pelicula suavemente
   www.butkus.us                               contra el engranaje, accione la palanca de
View original page 18Page 19 · Read text
25
avance, despacio, hasta que las perfora-     5.  Close and latch the back cover.
ciones de ambos bordes de la pelicula
queden prendidas en los dientes de en-                                        SchlieBen Sie die Riickwand durchgrane. (Si el avance se atasca durante esta                                             Andrircken und E inrasten.operaci6n, libere el obturador y con-
tinu6.  )
                                        Fermer le dos du boitier jusqu,i blocage
                                         de celu i-ci.

                                                  Cierre la tapa trasera.


                                                                                                                                                  r/
View original page 19Page 21 · Read text
28

     Avance la pelicula y libere el obturador   CAUTION
      hasta que el n0mero "1" aparezca clara-   o Do not use the film rewind crank to
      mente en el centro del 5rea del contador        conf irm  f ilm transport as turn ing  it
     de cuadros, seg0n se muestra. Una sefral       before all exposures have been made
       naranja deber5 aparecer a la derecha en     may cause improper spacing between
        la ventanilla de carga de la pelicula, en la                  f rames.
      parte de atr5s de la c5mara. Esto indica   o Load and unload film in subdued  light,
    que la pelicu la est6 cargada y  bien        never in direct sunlight.
      insertada en la ranura del rodillo de
      toma. Si esta Sefial de Carga Segura no   ACHTUNG
      aparece, abra la tapa trasera de la cdmara   o Versuchen Sie  nie, die  Filmr0c-     y compruebe si el extremo de la pelicula                                                     kspulkurbel zu bet6tigen, wenn der Film       est5 firmemente prendido en el diente de                                             noch noicht zu Ende ist. Dies konnte die      la ranura del rodillo. Conforme vaya                                           exakten Zwischenrdume der einzelnen     tomando fotos, el borde del eirea naranja                                                    Auf nahmen auf der F ilmebene ver-    se mover5 grad ualmente  h acia  la         sch ieben.
       izquierda en la ventanilla, indicando que     r  Laden und Entladen Sie die Kamera         la pelicula avanza apropiadamente.                                                    moglichst bei dunklen Lichtverhdltnissen
                                        bzw. im Schatten; niemals direkt im
                                                         Sonnenlicht.
View original page 21Page 24 · Read text
www.butkus.us


                                                                                     35
Automatic exposure contro  I
1. After framing your subject in the view-    2. To take the picture, hold the camera
   finder, determine the light level and      steady in a comfortable position and
   picture taking mode by push ing the       squeeze the shutter release smoothly  all
   shutter-release button down slightly. lf        the way down.
   the lamp at the bottom of the viewfinder
  does not come on, light is adequate for   NOTE
  normal hand-held exposure without     No camera adjustments are necessary  if
   flash, and you can proceed to take     filters are used, since the CdS cell meters
   pictu res.                                only light that has passed through the  f ilter.    lf the exposure-warning lamp lights, a
   shutter speed of 1/45 sec. or slower  is
   indicated and use of a tripod is recom-
  mended  if you are not using the built-in
   flash. As this lamp will stay lit as long as
  the shutter is open, it is important to
  remember that you MUST HOLD THE
  SHUTTER RELEASE DOWN UNTIL
  THE LAMP GOES OUT.
View original page 24Page 25 · Read text
39

Automatic flash photography                  Automatisches  Blitzen
   Lighting of the exposure-warning lamp     Das Aufleuchten der Warnlampe bei
when the shutter release is pressed slightly      leicht angedriicktem Ausloser zeigt ebenfalls
also indicates that you should use flash if    an, daB ein Blitzgerdt verwendet werden
suitable for your subject and if slow shutter    muB, vorausgesetzt, daB lhr Motiv sich im
speeds using a tripod are not desired.         vorgeschriebenen Entfernungsbereich
When the built-in flash pops up, it auto-    befindet und langsamere VerschluBzeiten
matically switches the Hi-matic S over for    mit einem Stativ nicht erwiinscht  sind.
aperture-distance-ASA-coupled  exposures at   Wenn das eingebaute Blitzgerdt heraus-
1/30 sec., and the flash-ready lamp will start     springt, wird die Hi-matic S automatisch auf
to glow. This lamp will begin to pulsate    1/3Os fiir gekuppelte Blende-Entfernungs-
when the flash is charged.                Aufnahmen eingestellt und die  Blitz-
                                              bereitschaftslampe  leuchtet auf. lst der
                                       Kondensator voll aufgeladen, fdngt die
                                             Anzeige an zu blinken.
View original page 25Page 26 · Read text
www.butkus.us


1. Slide the flash+elease lock in the direc-       Schieben Sie den Blitz-Entsperrknopf  in
   tion of the arrow toward the lens. The        Pfeilrichtung zum Objektiv hin. Das ein-
   built-in flash will pop up from the top      gebaute Blitzgeriit springt heraus und
    left side of the camera and start charging      beginnt sich auf zuladen, wenn  f rische
     if serviceable batteries are installed.              Batterien  ei ngelegt  si nd.

                                                Libdrer le blocage du flash en direction
                               de la fldche vers l'objectif, le flash
                                                 incorpor6 apparaitra sur le c6t6 gauche
                                  de l'appareil et sera disponible instant-
                                              an6ment.

                                                   Deslice la llave de liberaci6n del flash en
                                                  direcci6n de la flecha hacia el objetivo.
                                        El flash incorporado se liberar6 desde
                                                  arriba a la izquierda de la cdmara, y
                                      empezar5 a cargar si hay instaiadas
                                                      baterias en buen estado de servicio.
View original page 26Related documents and language editions
From the M. Butkus archive. Original publisher and archive notices are retained.
Check the model and edition against your equipment.
PDF verified 2026-10-10.