Film cameras
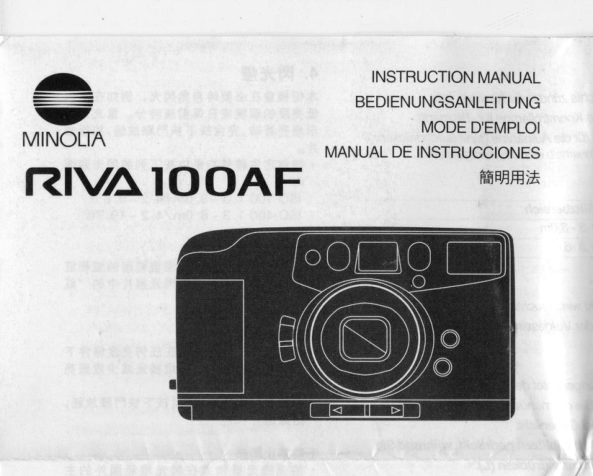
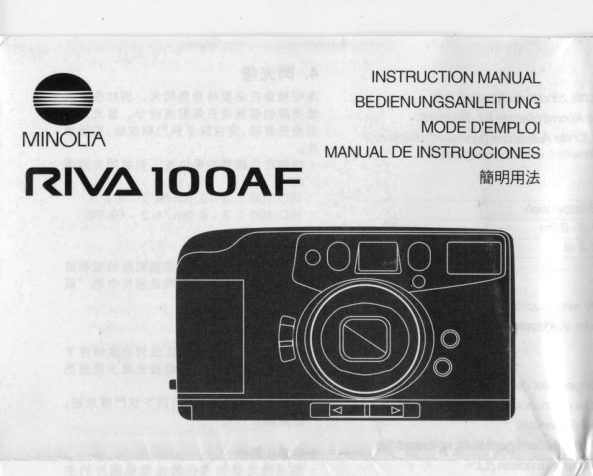
Minolta RIVA 100AF User manual
User manual for Minolta RIVA 100AF. 21 pages in French. Read the original PDF, download or print a copy without registration.
21 pagesFrench3.3 MB PDF
Loading your manual…Open PDF directly
Document details
- Brand
- Minolta
- Model / document
- Minolta RIVA 100AF
- Document type
- User manual
- Language
- French
- Pages
- 21
- File size
- 3.3 MB
- Category
- Film cameras
- Document date
- Not specified in catalog
Search available document text
Find a term, then jump to its page in the original PDF. Image-only pages may not be searchable; check the PDF for exact wording and diagrams.
Page 5 · Read text
Digitally signed by Mike Butkus
                                          DN: cn=Mike Butkus, o=Butkus camera manuals,
                                              ou=butkus.org, email=mike@butkus.org, c=USMike Butkus Date: 2023.06.01 12:25:07 -04'00'


          www.butkus.us
View original page 5Page 6 · Read text
CARE AND STORAGE
 .  lf the lens becomes  dirty, clean  it gently with a lens brush. lf necessary,
  moisten a sheet of lens tissue with one drop of lenscleaning fluid and
  gently wipe the lens. Never touch the lens sur{ace with your fingers.
 . Never use alcohol or chemical solvents on the camera body.  lf it is dirty, wipe
    it gently with a soft, clean, dry cloth.
 . Do not subject the camera to shock, high heat or humidity
. This camera is designed  for use between -10" and 40'C(14" to 104'F).
. Do not transfer the camera  directly from an extremely cold to warm area,
  since condensation may form inside and prevent normal operation.
. Do not let the camera get wet.
. Do not let the camera come in contact with sand, salt or other grit.
. When not in use, keep the camera in a cool, dry place away from dust and
  chemicals. For extended storage, place the camera in an airtight container
  with a drying agent such as silica gel.
. Do not attempt to disassemble  or repair the camera youself.
. This camera's  circuitry may switch  off, even when a battery with sufficient
  power  is installed. To resume operation, remove the battery and install  it
  again.
. To assure prompt service, please contiact an authorized  Minolta Service
  Center before shipping your camera  for repair.
. For more information about your camera, contact your local camera dealer or
  write to the Minofta distributor or subsidiary  in your area.
View original page 6Page 7 · Read text
1.INSERING BATTERIES                               1. MISE EN PLACE DES PILES
    Use two AA alkaline-manganese or carbon-zinc        L'appareil est aliment6 par deux pites bAton 1,5V (type
      batteries. For optimum performance, alkaline cells are     AA), soit alcalines,  soit au carbone-zinc.
    recommended. Open the battery-chamber cover (A),       Ouvrir le logement piles (A), et meftre en place les pites
    and insert the batteries as indicated on the inside of the   comme indique sur le couvercle (B). ll est recommand6
     battery-chambercover  (B). To close the cover, press it        d'utiliser des piles de type alcalines. Pour refermer le
    down, then push  it back to the original position firmly.      couvercle, appuyer dessus fermement.
                                                                                                                        . Ne pas utiliser d'accumulateurs  Nickel-Cadmium.         ' Do not use nickelcadmium  batteries or lithium batteries.
        . The camera  will not operate without batteries.                                     . L'appareil ne peut fonctionner  sans piles.
  WARNING                              ATTENNON
    MIXED OE INP|VIDI IAL IJSE OF ANY O ITIER        NE PAS UNLEEBD_E P]LES PIEEEBENTES DU TYPE
                                                             II,NfiED USE=-- PRECONISE. NE PAS ME-   BAiTERIES NOT SPECIFIED ABOVE. OR
  OFABOVEBATTERIESMAYCAUSEPROPERTY NATURE DIFFERENTE. CECI PTJET EN EFFET
   DAMAGE OR PERSONAL INJURY.                CONSTITUER UN RISQIIE D'EXPLOSION.
                                    www.butkus.us
View original page 7Page 8 · Read text
2. LOADING FILM                                    2. CHARGEMENT DU FILM
Use ISO 100 or 400 DX coded 35mm negative films.           Utiliser des films n6gatif format 135 codds DX, de
Polaroid instant films can not be used.                            sensibilite ISO comprise entre 100 A 400.
  . Load film in subdued light, or at least shaded from direct                  . Charger le film en lumidre attenu6e, ou au moins d I'abi du
   sunlight.                                                                               soleil direct.
1. Make sure the frame counter  is at 0, then slide the        1. S'assurer que le capteur de vues indique 0, puis
  back-cover release down to open the back cover (C).      ouvrir le dos (C).
2.Insert the film cartridge into the film chamber (D).        2. Mettre la cartouche du film dans son logement (D).
3. Extend the tip of the film over the take'up drum          3. Tirer I'amorce par dessus le tambour
  and align  it to the film-leader index. To prevent a         d'entrainement jusqu'au repire. Pour fviter tout
  film-loading  error, make sure the film tip is              problime de chargement, bien s'assurer que
  aligned with the film-leader index (E).                   'amorce coincide partaitement avec le repdre (E).
  . The film must be positioned between the film guide rails or             . V6rifier que le film est bien positionnd entre ses guides.
   a film transport  error may occur.                                                       . Si I'amorce  est trop tiree, repousser en douceur I'excedent
 .  lf the film tip e)dends beyond the film-leader  index, gently            ans la cartouche.
  push the excess film back into the film cartridge.                     4. Refermer le dos.
4. Close the back cover.                                               5. Actionner  la commande du volet, puis appuyer d
5. Slide the lens-cover/landscape-mode  switch over       fond sur le d6clencheur. Le fil,n avancera
   ("  to open the lens cover, then press the             automatiquement sur Ia premiire vue (F).
   shutter-release button att-the-way down. The                    . Si le compteur de vues indique toujours 0, reprende  le
  camera will advance the film to frame one (F).              chargement du film.
.   lf the frame counter remains at 0, the film did not load. Open             . Si le tdmoin d'anomalie  clignote, le film est mal charg6.
. thelf thebackred coverwaming-lampand reloadblinksthe slowly,film.   the film was loaded             Reprendre au debut les opdrations de chargement..
   inconectly. Open the back cover and reload the film.
View original page 8Page 9 · Read text
3. TAKING PICTURES                              3. PRISES DE VUES
 1. Slide the lens-cover/landscapemode  switch to          1. Pousser la commande du votet jusqu'au € @u centre) (G).
  the center position, l!  (G).                                   2. Assurez-vous que votre sujet se situe au moins d 1,3 m de
2. Make sure your subject is at least 1.3m (4.3 ft.)             I'appareil, et composez votre image.
  from the camera, then compose  it inside the             3. Tenir I'appareil fermement et appuyer d fond sur Ie
   viewfinder frame.                                      ddclencheur pour prendre la photo.
3. Holding the camera steady, gently press the                    . Si le tdmoin d'anomalie  clignote rapidement,  aftendre que lt1moin du flash
   shutter-release button all-the-way down to take                (veft) s'allume clairement, puis declencher.
  the picture.
 .   lf the red warninglamp  blinks rapidly, wait for the green       Mode Paysage
   flash-ready lamp to glow brightly, then take the picture.           Vous pourrez utiliser ce mode lors de vos voyages touristiques par
 . The shutter wiil lock while the llash is cnarging.                 exemple.
Landscape Mode                                            1. Poussez Ia commande du volet jusqu' au A   1H1.
                                                                    2. Composez votre image.Landscape mode is for photographing scenic subjects
at least 13m (42.7 ft.) away.                                             3. Appuyer d fond sur le d6clencheur pour prendre la photo.                                                                                                        . Le flash n'etant pas utilisable en mode paysage, il est pr5fdrable de I'annuler
1. Slide the lens-coverflandscape-mode switch              en maintenant enfoncde  la touche d'annulation.  L'utilisation d'un pied est
  toward A  GD.                                            recommandde.
2. Make sure your subject is at least 13m (42.7 ft.)
  from the camera, then compose  it inside the          Retardateur
  viewfinder frame.                                  La fonction retardateur permet de prendre une photo dix secondes aprds
3. Gently press the shutter-release button all-the           avoir appuyd sur le d6clencheur.
  way down to take the picture.                                                 l. Agir sur la touche du retardateur pour le mettre en fonction  (l).
  . In low-light situations, press and hold the flashcancel  button.        2. Appuyer sur le d6clencheur. La lampe situde d l'avant de
  Use of a tripod is recommended.                                    I'appareil clignote pour indiquer Ie d6compte du retardateur (J).
                                                                                                        . La fonction retardateur reste s6lectionnde aprds la prise de vue. Pour
Self-timer                                                                     I'annuler, remettre la touche retardateur sur sa position initiale.                                     www.butkus.usThe self-timer will delay release of the shutter for
View original page 9Page 10 · Read text
t qPPatcu  vttgrrv.c  Pvur  trr.ttLluer  tc uea;gulPae Qu reaarcraaeur F r.
                                                                                                        . Lafonction retardateur reste sdlectionn6e aprds  la pise de vue. Pour
Self-timer                                                                     I'annuler, remettre la touche retardateur sur sa position initiale.
The self{imer will delay release of the shutter for
approximately 10 seconds after you press the shutter-
release button.
1. Slide the self-timer switch up to set the self-timer  (l).
2. Press the shutter-release button  all the way down
   to start the timer. The self-timer lamp on the front
   of the namera will blink to indir:ate operation (J).
  . The self-timer switch remains up after you take picture.
 .To cancel the self-timer, slide the self-timer switch down
   to the original position.
 . Be sure that your fingers or the camera strap do not cover the         . S'assurer que bs doigts ou la counoie n'rccuftent W  I'objectif, le flash ou la
   lens, flash. or meter window.                                                     cellule.
 . When taking vertically-framed  pictures, hold the camera so               . Pour les pises de vues vefticales,  tenir I'appareil flash en haut.
  the flash is on too.                                                                 . Apres chaque pise de vue, le film avance sur Ia vue suivante.
 . The film automatically advances  to the next frame. I                        . Si l'appareil ne fait plus la mise au point,  il est n1cessaire de changer les pites.
 .  lf the focus will not lock, battery power  is low. Replace the                . Une fois vos pises de vues termindes, bien refermer le volet de prot&tion de
  batteries.                                                                                    I'objectif.
 . When you have finished taking pictures, slide the lens-                   . Aprds exposition de la demidre vue, le t6moin d'anomalie  clignote. Rembobiner
  cover/landscape-mode   switch over (l   to close the lens                 le film imm6diatement  sinon la demidre vue isque d'6tre exposee une nouvelle
  cover. This protects the lens and prevents accidental                           fois.
  exoosure.                                                                                 . Une fois vos pises de wJes terminees, bien refermer le volet de protxlion &
 . After taking the number of pictures indicated on the film                      l'objectif.
  cartridge, the red waming lamp will blink slowly. Rewind the               . Si le t6moin s'allume, mais que le declenchement est impossible, remplacer les
  film. Otherwise,  additional exposures may ovedap  in the last             piles. Ceci isque egalement de se produire par temps trds froid, meme avec
  frame.                                                          des piles neuves. Dans ce cas,  il est necessaire de rechauffer les piles.
 .When you use this camera in a very cold condition, the focus
 may not lock even when the camera has new batteries. To
  restore power, warm up the camera.
View original page 10Page 14 · Read text
4. FLASH                                                   4. FLASH
This camera automatically fires the flash when necessary, such       Le flash se d6clenche dds que n6cessaire. Loreque le t6moin
as low-light situations indoors and before or after sunset. When          verl s'allume clairement, appuyer a fond sur le declencheur pour
the green flash-ready lamp glows brightly, press the shutter-           prendre la photo.
release button all the way down to take the picture.                                t Assurez vous que la distance du sujet est inf6rieure it la limite
   . Make sure your subject is within the flash range listed below.          de oorl6e de l'6clair:

            tso              Range                                          Film ISO          Range
              100              1..3- 3.0m / 4.2 - 9.8ft.                              3m
                                  1..3 - 6.0m / 4.2 - 19.7 ft.                                400        6m

Red-eye Reduction                                    Rdduction des yeux rouges
When the shutter-release button is pressed partway down, the        Lorsque l'on appuie  it mi-course sur Ie declencheur, la lampe
red-eye-reduction lamp on the front of the camera glows to             anti-yeux rouges clignote affin d'atteinuer  le ph6nomene
reduce the red-eye effect in flash pictures (K).                        ddsagr6able bien connu des yeux rouges sur les photos (K).

Manual Fill-flash                                                    Fill-flash manuel
In this mode, the flash willfire regardless of lighting. Use manual      Dans ce mode, le flash se ddclenche quel que soit le niveau de
fill-flash to reduce harsh shadows or to illuminate a backlit              lumiere. Cela permet par exemple de "ddboucher.  les ombies
subject.                                                                disgracieuses.
Press and hold the manual filFflash button (L), then press         Maintenir enioncAe  la touche de fitl-ttash manuel et appuyer
the shutter-release button all the way down to take picture.       d fond sur le d6clencheur pour prendre Ia photo (L).

Flash Cancel                                            Annulation du flash
Use flash cancel when photographing twilight scenes or subjects       Cette fonction s'utilise pour restituer I'ambiance de l'6clairage
that are beyond the flash range.                                          naturel ou lorsque le sujet est trop distant.
Press and hold the flash-cancel button (M), then press the        Maintenir enfonc6e la touche d'annulation du flash et
shutter-release button all the way down to take picture.          appuyer d fond sur le d6clencheur pour prendre la photo (M).
View original page 14Page 15 · Read text
5. REWIND                                                       5. REMBOBINAGE
1. Slide the rewind switch in the direction shown to begin film        1. Pousser  la commande de rembobinage dans la direction
   rewind (N). The rewind switch locks and the frame counter          indiqu6e pour lancer le rembobinage (N). Pendant le
   counts backwards during rewind.                              embobinage, le compteur de vue revient progressivement
2. When rewind  is complete, the motor shuts off and 0 appears        e0.
    in the frame counter. Open the back cover and remove the       2. Lorsque Ie rembobinage est termin6, le moteur s'arrdte et
    film.                                                                                        le compteur de vues indique 0. Ouvrir le dos et 6ter le   . After taking the last picture, the red wamingJamp will blink slowly.
   Rewind            the film.                                                                                            . Apres I'exposition de la demidre vue, la lampe d'anomalie  clignote  .       lf the frame               counter shows anything other than 0 when the rewind
   motor stops, DO NOT OPEN THE BACK COVEB. Replace the                  lentement. Rembobiner  le film.                                                                                      . Si le compteur de vues indique autre chose que 0 lors de I'arr€t du    batteries, slide the rewind switch, and wait until rewind  is complete_-_   before opening the back cover.                                                  moteur, NE PAS OaJVR\R LE DOS. Changer les piles, puis pousserld#
  .  lf rewind is not started after the last exposure, the red waming lamp will         cornmande de rembobinaoe. Attendre alors Iafin du rembobinaqe
                                                                          pour ouvir le dos.    blink slowly for 20 seconds, then the camera  will shut down. When the                                                                                      . Aprds la deemidre pise de vue, rembobiner  le film ou arrdter I'appareil   camera  is turned on again, the warning lamp will not blink and an
                                                                                                    afin d'6viter I'usure de la pile.    additional exposure could overlap on the last frame                                                                                      .  Veiller d touiours rembobiner  le film avant d'ertraire la cartouche.  . Never oull the film out of the camera. Alwavs use automatic rewind.


BATTERY CAUTIONS                             PRECAUTIONS D'EMPLOI DES PILES
 . Read and follow  all warnings and instructions supplied by the battery                             . Lire et suivre les indications et les precautions  d'emploi bumies par le
  manufacturer.                                                                             fabicant de la pile.
 . When inserting batteries, make sure that the (+) and (-) terminals face in the                   . oujours s'assurer de bien respecter  la @arit6 + et - lors de la mise en place
  correct direction.                                                                  dans I'appareil.
. Never use batteries that show signs of leaking or cracking.                                             . Ne jamais utiliser de piles pr6sentant des fuites ou des fissures.
. To prevent battery leakage or bursting, never mix batteries of different types,                   . Ne pas utiliser ensemble de piles de types, marques ou dges diffdrents.
  brands, or ages.                                                                                                          . Ne pas jeter au feu des piles usagdes.
. Used batteries should not be discarded  in fire.                                                               . Ne pas laisser Ia pile d la port5e des enfants.
. Keep batteries away from children.
                                            www.butkus.us
View original page 15Page 17 · Read text
BATTERY CAUTIONS                                  PRECAIJTIONS D'EMPLOI DES PILES
 . Read and follow  all warnings and instructions supplied by the battery                             . Lire et suivre les indications et les prdcautions  d'emploi foumies par le
  manufacturer.                                                                                      fabricant de la Pile.
 . When inserting batteries, make sure that the (+) and t) terminals face in the                   . oujours s'assurer de bien respecter  la polaritd + et - Iors de la mise en place
  correct direction.                                                                 dans l'appareil.
 . Never use batteries that show signs of leaking or cracking'                                             . Ne jamais utiliser de piles prdsentant des fuites ou des fissures'
 . To prevent battery leakage or bursting, never mix battenes of different types,                    . Ne pas utiliser ensemble de piles de types, marques ou Ages diff6rents.
                                                                                                                                    , Ne pas jeter au feu des piles usagees.  brands, or ages.
 . Used batteries should not be discarded  in fire.                                                              . Ne pas laisser  la pile d la por76e des enfants.
 . Keep batteries away from children.


                                                                                                                                                                                                                                                                                      I Q U ESTECHNICAL DETAILS                                        C AR ACT E R I STI Q IJ ES T EC H N
Lens               34mm t/5.6, 3 elements in 3 groups (all glass)     Obiectif              34 mm f/5.6, 3 elements en 3 grouPes
Focusing                Type: Active infrared autofocus                 Mise au point           Type: Autofocus acilf e infrarouges
                         Range: 1.3m (4.3 ft.) to infinitY                                          Plage:1,3mAl'infini
                          Focusing steps: Two. Focus distance set to                               Distance de mise au poiil e 13 m en mode
                     13m (42.6 ft.) in LandscaPe mode                                   Paysage
Shutter speed:                 1/1 OO sec. or 1/30 sec. based on light level        Vitesse d'obturation  1/100 s ou 1/30 s suivant  les conditions
Film-speed range        ISO 100 to 400 for DX-coded negative film.                                   d'6clairage
                      Non-DX coded film set to ISO 100.            Sensibilitf       De 100 A 400 ISO pour films cod6s DX
Flash range (lSO 100)      1.3 to 3.0m (4.3 to 9.8  ft.)                                                 (Reglafe sur 100 ISO pour films non-codes).
Recycling time            approx. 8 sec.                                 Port6 du flash (lSO 100)     3m
Battery performance      Approx. 20 rolls using Alkaline cells (based      Temps de recyclage du flash  environ I secondes
                        on Minolta's standard test method, using 24      Dimensions            126 X 70,5 X 47,5 mm
                          exoosure film with flash on 50% of              Modele dateur         26 X 70.5 X 51 mm
                            exposures).                                 Poids                  1909
Dimensions (WxHxD)      126 x70.5 x 47.5mm                         Mod1le standard   2009
                          (4-15116x2-314 x 1-13/16 in.)
DATE model             126x70.5 x 51mm                           Les caracteristiques mentionnees sont bas6es sur les dernidres
                             (4-15l16 x2-314 x 1-15/16 in.)                     informations disponibtes au moment de I'hpressbn et sont suiettes d
Weight (without battery)   190g (6-1 1116 oz.)                                 modification sans preavis.
DATEmodel *    *    2009 (7-1116 oz.)

 Soecifications are based on the latest information available at the time of
 printing and are subject to change without notice.
                                          www.butkus.us
View original page 17Page 18 · Read text
FOR OWNERS OF QUARTZ DATE MODEL r         MODELES A DOS DATEUR
Using the data back you can record the date or time directly onto      Le dos dateur permet d'enregistrer la date ou I'heure directement
the film.                                                               sur l'image.

Names of Parts (O)                                          Nomenclature (O)
 1. Print indlcator                                                                        1. lndicateur d'impression
2. MODE button                                                             2. Touche MODE
3. SELECT button                                                           3. Touche SELECT
4. ADJUST button                                                           4. Touche ADJUST

Mode Selection (P)                                                S6lection du mode (P)
Press the MODE button to change the data display as shown.        La touche MODE permet de passer d'un affichage A l'autre
1. year, month, day                                     comme indique ci-dessous.
2. Time imprinting (24-hour format)                                                     1. annde, mois, jour
3. No irnpriirtinE                                                              2. lmpression de i'heure (Format 24 heuresl---
4. month, day,year                                                              3. Pas d'impression
5. day, month, year                                                               4. mois, jour, annee
                                                                                             5. jour, mois, ann6e
Setting Data
 1. Use the SELECT button to move between different parts of     R6glage des donndes
  the displayed data.                                                                       1. Appuyer sur la touche SELECT pour passer d'une donn6e
  . With the data displayed, pressing the SELECT button successively           d I'autre sur I'afticheur.
   causes the settings for year, month, and then day to blink (Q).                          . Lorsque  la date est affich6e, des pressions successtVes sur la touche
  . In time imprinting mode, pressing the SELECT button successively           SELECT permeftent de faire clignoter surcessivement I'ann6e, le mois
   causes the hour, minute, and then the colon to blink (Q).                             et le jour (Q).
2. Press the ADJUST button to change the blinking display                . Lorsque l'heure est affich1e, la touche SELECT permet de faire
                                                                                                clignoter successivement  I'heure,  Ies minutes, puis les deux points (Q/   (R).
  . In time imprinting mode, pressing the ADJUST button while the colon is       2. Appuyer sur la touche ADJUST pour modifier la valeur
   blinking synchronizes  the seconds counter to 00.                            clignotante  (R).
                                                                                                                . En mode heure, une pression sur la touche ADJUST pendant le
                                                                              clignotement des deux points permet de synchroniser  les secondes  itBattery Replacement
Tho nr rqrtz data hack rrcoc a 3V lithir rm battenr (CR2O25) to                  00.
View original page 18Page 21 · Read text
Battery Replacement                                                      clignotement des deux points permet de synchroniser les secondes  it
The quartz data back uses a 3V lithium battery (CR2025) to                 00.
maintain memory when the camera batteries are changed.
                                                      Remplacement de la pileReplace the quaftz data back battery  if the display changes or
                                                                La pile lithium (CR2025) du dos dateur assure la sauvegarde desbecomes dim when the camera batteries are removed.
                                                            donn6es lors du changement des piles de l'appareil' Elle doit1. Open the camera back. Remove the screw from the
  battery covar using a small phiilips screwd{iver (s}=._-        etre changee si I'affichage s'affaiblit lorsqu'on retire les piles de
2.|nsertthenewbattery(+sideup)(T)'Rep|acethebatteryt'appareit.
                                                                                             1. Ouvrir le dos de I'appareil. Enlever le couvercle du  cover ano anacn wrtn rne screw.
  . After battery replacement, follow the instructions under Setting Data       logement pile en utilisant un tournevis cruciforme  (S).
   to reset day and time.                                                          2. Mettre en place Ia nouvelle pile (pole + vers le haut) (T).
                                                         Remonter le couvercle.
                                                                                                               . Remettre  le dos d I'heure et d la date.Care and Storage
 . Gently press the center of the button. Pressing the edge with a sharp
   object may cause the button to stick.                               pr1cautions d,emploi
  . This unit is designed  for use between 0o and 40'C (32" and 104'F). At            . Ce dos est destin1 A 6tre utitis1 d des temp1ratures  situ1es entre   \
   temperatures above or below this range, LCD and imprinted data may        40. et 0"C (104' e B2'F). pour des temp1ratures en dehors de cette
  become  difficult to read. Even higher temperatures may cause the LCD     pbge, y6cran ACL et l,impre.ssion des donn1es peuvent devenir
   to temporarily blacken.                                                                  difficites d tire. De hautes temp1ratures peuvent temporairement
                                                                                              noircir l'6cran ACL.
Warning
Keep batteries away from children.                          Attention-
                                                        Ne pas laisser la pile A la poft6e des enfants.

                                       www.butkus.us
View original page 21Related documents and language editions
From the M. Butkus archive. Original publisher and archive notices are retained.
Check the model and edition against your equipment.
PDF verified 2026-10-10.