Film cameras
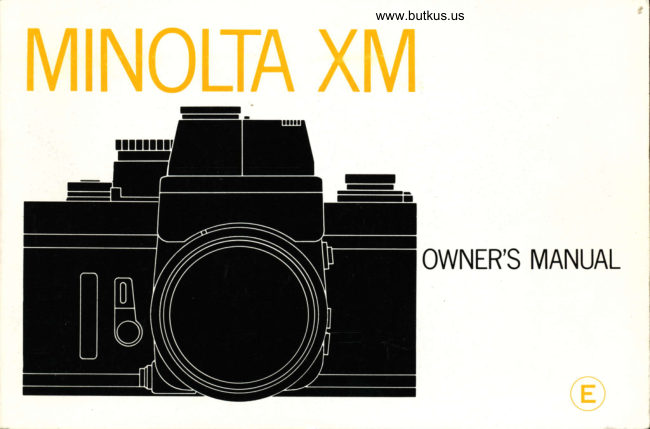
Minolta XM User manual
User manual for Minolta XM. 60 pages in English. Read the original PDF, download or print a copy without registration.
60 pagesEnglish8.1 MB PDF
Loading your manual…Open PDF directly
Document details
- Brand
- Minolta
- Model / document
- Minolta XM
- Document type
- User manual
- Language
- English
- Pages
- 60
- File size
- 8.1 MB
- Category
- Film cameras
- Document date
- Not specified in catalog
Search available document text
Find a term, then jump to its page in the original PDF. Image-only pages may not be searchable; check the PDF for exact wording and diagrams.
Page 3 · Read text
www.butkus.us                               .


                               Your Minolta XM is a wide-scope electronic svstem
                                camera that accepts all Minolta SLR lenses and acces_
                                           sories as well as XM interchangeable   f inders and focusing
                                      screens. lt is engineered and built to give you greatest
                                        precision; easiest, most convenient operation; and maxi_
                     mum versatility. lt gives full information and offers
                                complete control of all camera exposure variables. ln
                                 automatic operation, the XM will adjust exposure with
                               utmost accuracy electronically, freeing you for more
                                              en joyment or greater creativity.
                                     Before using your camera for the  f irst time, study this
                                                                                             the                               manual carefully all the way through - or at least all                                       sections needed to cover your own photographic needs.
                             As you read, assemble the screen, finder, lens, and body
                                      as described on pages 49,37,and 53, load batteries, and
                                  handle your XM and acquaint yourself with its parts and
                                       features. Then load it with film and proceed to actual
                                      picture-taking. In this way, you can take good photos
                              and begin to realize the great potential of your XM right
                              from the start. Be sure to keep this manual for reference
                                              later as necessary.L
View original page 3Page 6 · Read text
www.butkus.us


CHANGING FOCUSING SCREENS
    To Install                               49
    To Remove           .....    . . ....::::               : 49
LENS.SCREEN COMBINATION CHART . ..  . .  . 50
COMPENSATION.FACTOBSELECTOR   ......   52
CHANGING LENSES
    To Install                                ...  ... 53
    To Remove                              ...  .. 53
USING OTHER THAN MD OR MC ROKKOR
LENSES
    Auto Rokkor Lenses .           ,. .....   .. 54
    RF (Mirror-Type) and Manual-Preset Lenses. 54
MANUAL MIRROR CONTROL
   ToLockMirrorUp                ....55
    To Lower MirrorAfter Lock-Up  ........    55
CARE ANDSTORAGE                   ....,  56
View original page 6Page 7 · Read text
NAMES OF PARTS


           Shutter-speed index
Shutter-speed  /f uncti on selector
         Shutter-release button
   Long-exposure selector lever
                 Neck-strap lug
                 Self-timer lever
          Auto "Senswitch"
    Stopdown/lock-up button


                                                                                Digitally signed by Mike Butkus
                                                            DN: cn=Mike Butkus, o=Butkus
                                                            camera manuals, ou=butkus.org,            Mike Butkus email=mike@butkus.org, c=US
                                                                      Date: 2021.04.06 19:51:51 -04'00'
View original page 7Page 9 · Read text
Mount-lock release button
           Film-plane indicator
                 Distance scale
                       lnf rared index
            Depth-of-field scale
            Film-speed selector
  Compensation-factor wi ndow
Auto-exposure override control
          Long-exposure scale
            Film-advance lever
            Exposure counter
                   Serial number
View original page 9Page 10 · Read text
www.butkus.us


 Finder- release button
 Finder power switch
 Finder eyepiece
 Loaded-film reminder
 Eyepiece shutter control
 Titanium shutter curtain
 Battery chamber
 Tripod socket
 Sprocket
  Fi lm-advance release button
 Take-up spool
 Back cover
 Pressure plate
View original page 10
Page 11 · Read text
MINOLTA XM BODY SPECIFICATIONS

          Type:  Interchangeable-finder-type 35mm single-lens reflex with electronic
                          focal-plane shutter
        Lens mount:  Stainless-steel Minolta SLR bayonet, 54o rotating angle
                        (Standard lenses: MD Rokkor 50mm F 1 .7, 50mm F1 .4, or MC Rokkor
                           58mm F1.2)
                       Coupling: For full-aperture metering and automatic diaphragm operation
                                 with MD and MC Rokkor Lenses (Stopdown metering  is used
                                     for other Rokkor Lenses.)
                       Button for depth-of-f ield preview and stopdown metering
          Shutter:  Electronically controlled   f ocal-plane type with titanium curtains and
                    2 mechanically controlled settings
                         Electronic speeds :     16 to 1 I2OOO sec. in steps,4 to 1/2000 sec.
                                              continuously variable (with Auto Electro Finder)
                       Mechanical settings: X (1 /100 sec.) and B
                        Curtain traverse time: 9ms
                    Power source:     Two 1.5v silver-oxide batteries
                                             (Eveready 5-76, or equivalent)
                                              Film advance locks when voltage is insuff icient.
      V ewr nd        e'                                                                                                                     ?'ff :'"'                    IJi: li:,l:t [^1ffi,:#:iH ::ff  ';:l1-i:Ji"i ??ffi?JH filJ;
                 PM focusing screen (central horizontally oriented split-image focusing spot
                       surrounded by microprism band) supplied as standard, interchangeable

                                                                               1 l o"windins ansre arter 20o       Firm advance: li::,t,T:T;:::T  lll,',]0," ,,,oke,
                       unengaged movement; advanci ng-type exposure counter resets automatically
                   when camera back is opened.
View original page 11Page 12 · Read text
www.butkus.us


Multiple exposures: Possible with  f ilm-advance release
          Mirror:  Oversize, quick-return type, with lock-up device: no image cutoff even
                     with extreme telephotos (PO value: 140mm)
       Self-timer; Lever type,operating time variable from approx. 6 to 1O sec.
        Flash sync.: X contact: Electronic flash synchronizes at1l100 (X) and longer stepless
                   and step speeds, FP contact: FP bulbs synchronize at all step speeds through
                    1l2OOO sec. including X (1/100); single terminal in threaded socket with
                  X/FP switch; direct contact on accessory mount for Minolta cordless
                       flashguns with optional accessory hot shoe
         Other:  Built-in Auto "Senswitch" keeps  f inder power on while camera is held in
                        usual operation (alternate switch located on Auto Electro Finder); battery
                     checker on end of body; accessory mount (with direct flash contact) on body
                     around back-release knob; loaded film reminder on bottom
     Dimensions: 84 x 145 x 48mm (3-5/1 6" x 5-314" x 'l-15116") without tens
        Weight: 67OS Q3-9116 oz.) without lens
View original page 12Page 13 · Read text
www.butkus.us


              AUTO ELECTRO FINDER SPECIFICATIONS

10                         Type:  Eye-level pentaprism with built-in meter and automatic electronic and
                                             match-needle/manual exposure-control  apparatus
                               Circuits: Incorporate monolithic and hybrid lC's with 41 transistors
                               Magnif ication: 0.8X with SOmm lens
                              Visible in  f inder:  F-number, shutter-speed/f unction scale, meter/indicator needle,
                                              speed/function bar, light-emittingdiode  exposure warning signal
                         Exposure meter:  Built-in TTL CLC with 2 CdS cells for full-aperture metering with
                             MC Rokkor Lenses, stop-down metering with other Rokkor Lenses
                         Measuring range: EV 1 to Ev 17 (e.g., 1 sec. at F1'4 to 1l2ooo at FB) with F1.2 lensatASA1o0
                          Film-speed range: ASA 12 to 6400
                             Sh utter-speed/
                                function dial:  AUTO,X, B, 1 ,2,4,8, 15,30,60, 125,25O,500, 1000 and 2000
                            Auto-exposure
                                                                        stepless manual control                             override: -2 EV to +2 EV                                                                                half-step graduations                     Compensation scale: -0.5 EV to +3.5 EV in                          Power source: 2 silver-oxide batteries for shutter control in camera base (shared use)
                        Dimensions: 50 x 76 x 65mm fi-15116" x 3" x 2-9116"1
                          Weight: 225 S l8-118 oz.l
                            Other: Power switch for use in lieu of body Auto "Senswitch"
View original page 13Page 15 · Read text
www.butkus.us                                                                   llI


                                                 BATTERIES AND POWER

L2                                               Two 1.5-volt silver-oxide batteries, Eveready
                                                                5-76 or equivalent, supply the power for con-
                                                                                      trolling electronic shutter speeds and for meter
                                                      and electronic exposure control when appli-
                                                                                       cable.


                                                                     I lrn ^,r -r A NT.
                      Should viewing become impossible because
                     the mirror of your XM remains up after the
                       shutter is released, it does NOT mean that the
                   camera needs repair. The automatic electronic
                        features of the model cause this to happen if
                   you release the shutter 1 ) when battery voltage
                                is insuff icient at an electronic setting or 2) when
                       current is off on automatic mode or when no
                         finder is installed. To restore viewing and usual
                        function,see page 16 in case 1l or page 27 in
                         case 2 ).
View original page 15Page 16 · Read text
2. Handling them only by the edges, insert two
1. Using a coin or similar object, turn the     of the specified batteries plus (+) side out
  battery chamber cover until the dot on it  is      into the sleeve on the inside of the cover. lf
  aligned with "O" on the camera base plate       batteries are inserted improperly, they will
  and remove the cover.                          not make contact, and no current will flow.
View original page 16
Page 17 · Read text
www.butkus.us


                                                   Testrnq Batterres
                                                    Depress the battery checker lever toward the
                                        bottom of the camera. lf the red lamp lights,
3. Replace the cover and return the dot to "C"    batteries are serviceable.
   position.                                 Test batteries immediately after installing
                                              them. lf the lamp does not light, make sure that
                                                 they have been inserted correctly.
                                                       Batteries should be tested from time to time
                                                    thereafter, particularly before starting picture-
                                                 taking sessions or trips. A set of batteries will
                                                       usually last for about one year.


                                                                              tq
View original page 17Page 18 · Read text
ilr
lir,",itr.lttrtq  l'r)rnrt:t  ()lr,,rrtl   l)fi                       shooting, or when the camera is not held as
  With the Auto Electro Finder, power for    normal. Some may wish to keep it on whenever
metering and electronic exposure control will be    they are using the camera.) To avoid possible
on whenever the Auto Senswitch is being    excessive battery drain from the exposure warn-
touched and off when it is not, provided the    ing signal, however, make sure the finder power
finder power switch is in the "OFF" position.      switch is turned off when the camera is not
  Turning the finder power switch to the "ON"    in use.
position, however, will override the Auto Sen-      With non-metering finders,  it is unnecessary
switch and keep power on even though it is not    to turn power on and off. The camera will use
being touched. (The finder power switch should   power only when the electronic shutter  is
be used for unmanned auto exposure, tripod     released.
View original page 18
Page 19 · Read text
www.butkus.us


  Your XM camera is equipped with a device to
lock the  f ilm-advance lever and to warn you and
prevent much waste  f ilm in case battery voltage
becomes insufficient while the shutter-speed
selector dial is at an electron ic setting (i.e., any
one other than "B" or "x"1.
    lf film has not been advanced when voltage
falls too low, it will be possible to advance  f ilm     1. Pull out on the back-cover release knob until
once and release the shutter once. lf film has       the camera back springs open.
been advanced, it will also be possible to release
the shutter once. In either case, however, the
film will receive no exposure. and the mirror
will stay up so that viewing is impossible
thereafter. At the same time, the film advance
lever will lock and cannot be operated   f urther.
   Inserting batteries having suff icient voltage
will restore normal operation immediately. For
mechanical operation at "X" or "8"  settings
without serviceable  batteries, see instructions on
page 47.

Space for two extra batteries is provided in the
shoulder pad of the camera strap.
View original page 19Page 20 · Read text
2. Leaving the knob pulled out, position a film
   cartridge in the chamber with the projecting
  spool end toward the bottom of the camera.     3. Insert the end of the film leader into one of
  Then push the back-cover release knob all the      the slots in the take-up spool so that the
 way in, rotating  it  slightly to do so if      tooth is engaged in the fourth or  f if th sproket
   necessary.                                           hole  f rom the encl


                   www.butkus.us
View original page 20Page 21 · Read text
www.butkus.us


t8
                                                                                 5. Press down  f irmly on the  f ilm with the  f ingers
                                                                 between the sprocket holes and one edge of
                          4. Operate the  f ilm-advance lever in several short      the  f ilm so that it cannot move. While doing
                        strokes until the film has begun to wind       this, take up any slack in the cartridge by
                        firmly around the take-up spool and the      folding out the rewind crank and turning  it in
                         sprocket teeth are engaged with the holes on      the direction of the arrow until resistance is
                       both edges of the film. lf the advance lever          fel t.
                          locks at the end of a full stroke during this     6. Close the camera back and push in on it until
                         procedure, release the shutter and continue.           it clicks locked.
View original page 21Page 22 · Read text
7. While watching the rewind crank, release the    CAUTI ON                                                                                                                                I  r-)
  shutter and advance film until the index    Film should be handled and loading done in
                                                                     shaded from direct  points to "1" on the exposure counter dial.   subdued light                                                                     -  at least  Rotation of the crank during the  f ull stroke     sunlight by the body.
  in the direction opposite that of the arrow
  indicates that the  f ilm is advancing properly.    Loaded Filrn Reminder
   lf the crank rotates during only a small part     The dial on the bottom of the camera may be
  of the stroke or not at all, make sure of    turned so that one of its symbols  is aligned with
  proper  f ilm loading and alignment by repeat-    one of the numbered dots beside it to serve as a
   ing steps from 3 above onward.                reminder that a cartridge of 12, 20, or 36
                                                exposures of black-and-white, color negative, or
                                                       daylight- or tungsten-type color reversal  f ilm is
                                                 loaded in the camera.
View original page 22Page 23 · Read text
www.butkus.us


  A scale for converting DIN to ASA  f ilm-speed      Film is advanced, the shutter cocked, and the
ratings is located on the back cover of the    exposure counter advanced by operating the
camera. Convenient for  film-speed  setting    film-advance lever in one or more strokes
lp.2al.                                      through its 1  'l 0" engaged angle untJl it springs
                                                   back. The  f ilm-advance lever has 20- unengaged
                                               play before the beginning of its engaged stroke
  Around the ASA/DlN conversion table is a    to allow offsetting  it   f rom the body so that the
convenient frame that can be used to keep     right thumb will  f it comfortably behind it.
memos handy with the camera. lt is just the           lf  the    f  i lm-advance lever remains locked
right size to hold the film-box end, which can   between exposures even though the shutter has
be inserted as a reminder of the  f ilm in use.        been released, battery voltage is insuff icient for
                                                     electronic operation (see P. 16). lf the advance
                                                  lever stops in mid-stroke and resists further
                                          movement,  f ilm is exhausted. The  f ilm-advance
                                                     lever should never be forced when it locks or
                                              cannot be operated normally.
                                     The exposure counter is of the advancing
                                              type and is numbered to 40, past which point it
                                                           will  not move regardless of the number of
                                             exposures made. This exposure counter auto-
                                               matically resets for  film  loading when the
                                            camera back is opened.
View original page 23Page 24 · Read text
Minolta's exclusive CLC ("Contrast Light     Stopdown metering is used for other Rokkor
Compensator") metering system employs two     Lenses.
CdS cells mounted on the pentaprism to take     The metering method is changed by means of
separate, overlapping light readings. These cells    the stopdown/lock-up button. This has two
are wired so that the reading of each af  f ects that    positions: Inner for  f ull-aperture metering and
of the other to automatically yield optimum    outer for stopdown metering (or depth-of-f ield
exposure in both normal and most high-contrast     preview). Pushing the button once will set it at
lighting situations. For best results, the photo-    one of these positions; pushing  it again wi ll set it
grapher should thus generally not make compen-    at the other.
satory adj ustment for such differences. One     Though the CLC system and finder are
exception is that the lens should generally be    designed to minimize the effect on the meter of
stopped down from % to 1 F-stop if the most     light entering through the eyepiece under usual
important subject area is much brighter than the    conditions, care must be exercised to prevent
rest of the picture (e.9., is in a spotlight or shaft     this especially if you wear eyeglasses. Use of a
of sunlight). Some photographers also prefer to    rubber finder eyecup is further recommended
open a half to a full stop with a backlighted    when the subject is in shade and the camera is in
subject or one whose most important area is con-     sunlight. when bright sidelight  falls between eye
siderably darker than the area surrounding it.      and eyepiece, or when stop-down metering  is
  With MD and MC Rokkor Lenses, metering  is    used, particularly at small apertures. When
done at full aperture, for greatest sensitivity and    viewing is unnecessary, the eyepiece shutter (see
accuracy. The viewf inder thus remains at maxi-    page 28) can be used to completely eliminate
mum brightness for utmost ease of composing     this problem.
and  f ocusing, and the automatic diaphragm
closes down to the preset aperture only at the
moment of exposure.
View original page 24Page 25 · Read text
www.butkus.us


                EXPOSU R E.CONTRO L F UN DAM ENTALS

22                   The two camera exposure-control  setti ngs are    shutter speed (e.9. , 1l60 sec.) allows light to
                        lens opening (aperture) and shutter speed. The    strike the film twice as long as the next higher
                          size of the aperture determines the amount or    speed (111251 and half as long as the next lower
                    volume of light reaching the  f ilm from a given   one (1/30) . Total exposure on the  f ilm  is
                        subject and lighting. The shutter speed deter-    determined by the combination of aperture and
                      mines the length of time this light acts upon the    speed. Other things being equal, using the next
                       film. Apertures are expressed in F-numbers,    smaller F-number will balance using the next
                   which are larger for small openings and vice    higher shutter speed, and so on. A great range of
                       versa (e.g., F16 represents a smallopening, F2 a    combinations  (e.g., F5.6 at 1/30, F4 at 1160,
                       large one). Shutter speeds are expressed in    F2.8 at 11125, F2 at 11250, etc.l will thus yield
                    seconds or fractions thereof, which are the    the same total exposure. The specif ic combina-
                          reciprocals of the numbers on the shutter-speed     tion you choose under given lighting conditions
                            scales. At usual apertures, each F-number setting    will depend upon how much you want the
                              (e.9., F8) lets in twice as much light as the next    greater depth of  f ield (see p. 35) of smaller
                       numerically larger one (F11) and half as much    apertures and the greater movement-blur pre-
                as the next smaller (F5.6) . Similarly, each    venting ability of faster speeds.
View original page 25Page 27 · Read text
www.butkus.us


Setting Film Speed                                            2016
  For correct exposure, the meter must be set
for the effective exposure index of the film in
use.
  To do this, turn the  f ilm-speed selector until
the proper ASA value indication appears oppo-
site tts index dot. Dots between numbered
graduations ind icate ASA numbers as shown   :


                                   NO f E:.
                                    ASA/DIN conversion scale is located on the
                                               back cover of the camera (see p. 20).
View original page 27Related documents and language editions
From the M. Butkus archive. Original publisher and archive notices are retained.
Check the model and edition against your equipment.
PDF verified 2026-10-10.