Film cameras
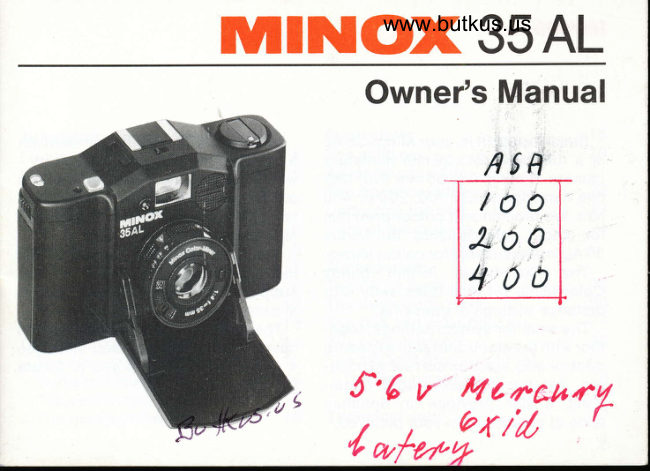
Minox 35 AL User manual
User manual for Minox 35 AL. 32 pages in English. Read the original PDF, download or print a copy without registration.
32 pagesEnglish8.4 MB PDF
Loading your manual…Open PDF directly
Document details
- Brand
- Minox
- Model / document
- Minox 35 AL
- Document type
- User manual
- Language
- English
- Pages
- 32
- File size
- 8.4 MB
- Category
- Film cameras
- Document date
- Not specified in catalog
Search available document text
Find a term, then jump to its page in the original PDF. Image-only pages may not be searchable; check the PDF for exact wording and diagrams.
Page 3 · Read text
Introduction


  Small though  it is, your Minox 35 AL     Your Minox 35 AL on ly operates with
is a full-frame 24x36mm miniature   a correctly fitted Type PX27 battery -
camera.  lt takes any 35 mm (No. 135)   which must be neither spent nor too
film cartridge of ISO 100, 200 or 400    old. Pages 6 to 8 tell you how to  f it and
film. We recommend colour print film    test the battery; do this before you
for colour enlargements; the Minox    start using your Minox 35 AL.
35 AL is less suitable for colour slides.    The main points in the text of this
 The fixedjocus 35 mm Minox    instruction book are printed in bold;
Color-Minar    f /4 lens does away with   supplementary information appears
distance settings or guessing.             in normal type.
  The weather symbol settings, toge-     The numbers in brackets refertothe
therwith the electronic auto exposure   camera controls annotated on pages
control (AE) assures correct exposu-  4 and 5 and will help you to locate
res. For the prevailing light condi-   these items quickly.
tions, it also provides an optimum
zone of sharpness in your pictures.
2
View original page 3
Page 4 · Read text
www.butkus.usGontents


Annotated camera views               Flash shots                      18
Front view                        4   The selftimer                   20
Rear view                         5   Advancing the film                21
                                  The frame counter              22
Handling the camera                  Unloading the film              23
The battery                       6   Care of the camera             24
Inserting the battery               6
Battery check                        AccessoriesOpening and closing the camera      7I   The FA 35 flash unit             25
Loading the film                 10   The ever-ready case            26
Film speed settings               13   The belt and wrist pouch         27
Daylight exposures               14   The pocket tripod              28
                                15   The skylight filter -- The slow-speed warning
                                16    The lens hood                29- Subject distance
                                17- The viewfinder - Releasing
                                18   Technical data                 30- The backlight switch
                                                                                 3
View original page 4Page 5 · Read text
1 Frame counter
 2 Shutter release
 3 Backlight switch
 4 Battery check button
 5 Hot shoe
 6 Selftimer switch
 7 Selftimer LED
 8 Viewfinder window
 9 Rewind crank
10 Battery compartment
11 Weather symbol and
    flash distance
   selector ring
12 ISO film speed window
13 Film speed setting lock
1 4 Lens
1 5 Front cover
4
View original page 5Page 6 · Read text
www.butkus.us


16 Film cartridge chamber
17 Viewfinder eyepiece
18 Film transport lever
19 Film track
20 Takeup spool
21 Film transport sprocket
22 Rewind release
23 Tripod bush
24 Back cover locking latch
View original page 6
Page 7 · Read text
The Battery
  Certain functions of the Minox
35AL, such as the shutter and auto-
matic exposure setting, are controlled
electronically. The camera therefore
on ly works with a battery. Use a 5.6 volt
mercuric oxide battery, for instance:
Duracell PX27
Ucar  EPX27                                                                             Digitally signed by mike butkus
Varta  V 27 PX                                                         DN: cn=mike butkus,
                                                                                      o=orphancameras, ou=29,                     mike butkus email=mike@butkus.org, c=US
                                                                                                 Date: 2019.08.10 19:56:41 -04'00'

Inserting the battery
  Open the front cover (15).
  Unscrew the battery compartment
cover (10) - with a coin  if necessary -       Refit the cap and screw tight again.
by turn ing anticlockwise.              A click on pressing the release does
  Insert the battery so that its * end   not necessarily signify correct opera-
faces the inside of the cap, also   tion of the electronic shutter. So
markedwitha*sign.               check the battery.
6
View original page 7Page 8 · Read text
r  Battery check                  www.butkus.us
                              l0tQ                                             /'     Open the front cover (1Sldnd pull
     the film transport lever 1fp fully to
     the right (page 18). To check:
      Press the battery check button (4)
    and keep  it depressed for 2-3 sec. lf
     the red LED lights up in the top of the
      finder and remains bright,the battery
       is OK.
         lf the red LED quickly becomes
     faint on pressing the check button
       (4), the battery is exhausted. Replace
          it.
          lf the red LED fails to light at all
    when you press the button (4), you     either have no battery in the camera f?fl    or have inserted it the wrong way
     round. Or, the battery is totally spent.
    (Remove it immediatelyto avoid cor-
     rosion risk.)
                                                                                                     7      L-j
View original page 8Page 9 · Read text
The battery check cannot tell you         f ire or into domestic waste - and keep
how much longer the battery is likely   them out of reach of children. Photo
to last. Preferably replace the battery   dealers often accept spent batteries
once a year - even  if the battery check    for disposal.
still appears OK.
  Apparent early batteryfailure may in
fact be a poor contact. Remove the
battery, firmly rub down both termi-
nals with a rough cloth, and replace.
  Battery output also drops with tem-
perature. So in  f reezing weather carry
the camera inside outer clothing (a
coat, anorak etc). lf the camera has
been in the cold, put it in an inside
pocket to warm up for 5-10 min before
taking pictures.
  Preferably remove the battery  if the
camera is likely to be out of use for
prolonged periods.
  Note: This battery contains mercury
compounds that could pose a health
risk. Do not throw spent batteries in a
8
View original page 9
Page 10 · Read text
Opening and closing             www.butkus.us
the camera


 To get the Minox 35 AL ready to
shoot, fully pull down the front cover
(1 5). After shooting push the cover up
again against the camera body.
  Opening the front cover automati-
cally extends the lens, closing the
cover retracts it. So there is no lens
cap liable to go astray.
  The closed cover also covers the
finder, blocks the release and
switches off all electric circuits.
  Even with the camera closed you
can still advance the film (page 211 or
rewind an exposed film (page 23).
View original page 10
Page 11 · Read text
Loading the film


  Never load the camera in direct      Insert the filrn cartridge in the film
sunlight - at the very least do it in the   chamber to the left of the film track,
shade of your body.                   with the film leader pointing to the
  Turn the backcover latch (24) in the    right.
camera baseto uncoverthe red dotin     Open the camera front cover (1 5) to
the latch recess,then pulloff the back   be able to operate the relase button
from underneath (illustration a).        (2). Work the transport lever (18)
                                 (pressing the release whenever
                                    necessary) to bring the broad open
                                           slot of the take-up spool (20) to the
10
View original page 11Page 12 · Read text
www.butkus.us


top. Then press the rewind release      ation rows is drawn across the film
button (22, al the right in the camera     track (19) and lies flat against it
base) to lock the take-up spool (20).     (arrow in illustration  c);
Push the film leader underneath the  O One sprocket of the sprocket
metal sleeve as far as it will go (illu-    wheel (21, at the right below the
stration b), then let go of the rewind     film gate) engages a perforation
release button.                         hole of the film (circled in illustra-
  Alternately advance the film and      tion c).
release until                      Push the camera back fully on
O The fullfilm width with both perfor-   again and lock by turning the back
                                                                                              11
View original page 12Page 13 · Read text
latch Q$ inthe camera base to cover    You can also check during shoot-
the red dot (illustration d).                 ing, whether the  f ilm is advancing cor-
  Advance the film, release the shut-    rectly as you work the film transport
ter, advance once more. Check also    lever (18): The rewind crank (9) with
that the rewind crank (9) atthe left in   the light dot must rotate, too.
the camera top rotates - watch the
light dot.
  The frame counters (1) is now at 0.


12
View original page 13
Page 14 · Read text
Film speed settings               www.butkus.us


  Set the film speed on the front of
the lens:
  Push the film speed lock (13) out-
wards with your thumbnail. Turn the
front ring so that the small window
(13) shows the ISO speed of the film
you have loaded. Then let go of the
film speed lock (13).
  There are three settings: ISO 100,
200 and 400. Do not use films of any
other speed.
  Every film package is marked with
the appropriate ISO speed value.
                                                                                13
View original page 14Page 15 · Read text
Daylight exposures


  On the lens turn the selector ring
(11) with the white weather symbols
(sun, cloud etc) to the weather and
lighting that best matches prevailing
conditions:
  Sun: The subiect is lit by direct sun.
Sun half obscured by cloud: Slightly
overcast or hazy sun. Gloud: Dull
without sun. You can also set inter-
mediate positions.
 The weather index is the white
arrow head (without flash symbol).
  Once you have this basic setting,      For technical interest: The weather
the electronic exposure control of   symbol setting presets an optimum
the Minox 35 AL automatically se-   lens aperture for the prevailing light
lects the correct shutter speed (from   and film speed. The camera automati-
1 to 1/300 sec).                             cally sets the correct shutter speed.
14
View original page 15
Page 16 · Read text
The slow-speed warning              www.butkus.us

  A blinking red light signal in the top
of the finder warns you that with a
given weather symbol and film speedsetting the exposure time is longer ["]bl
than 1/30 sec: You are risking camera
shake with hand-held shots.
  The immediate remedy: Seta diffe-
rent weather symbol for poorer light
- turn beyond the'cloud'symbol,  ifnecessary all the way to the stop on L-j
the ring (11 ). You can shootas soon as
the red signal in the finder has gone
out.
    lf the red light still blinks with the
'cloud' setting, you cannot rely on a
shake-free hand-held shot. ln that
case either use flash (page 18) or -with static subjects mount the
camera on a tripod (page 28).
                                                                                15
View original page 16Page 18 · Read text
The viewfinder - Releasing             www.butkus.us
  Look through the finder (12) and
aim the camera so thatthe bright-line
frame outlines the view you want.
  Gently depress the release button
(2): This takes the picture.
    lf you hold the camera horizontally,
you get landscape format pictures.
Hold  it vertically for upright shots.
View original page 18Page 19 · Read text
When you no longer need this cor-
                                           rection, push back the switch (3).
                               Use the backlight switch also for
                                   landscapes and similar scenes with
                                     predominant sky or snow areas.


The backlight switch
    lf in a brightly  lit scene the subiect   Flash shots
itself is in the shade you get better
results by doubling the automatic
exposure time:                            Slide the black protective panel out
  Push the backlight switch (3) for-   of the camera's hot shoe (5).
ward to uncover a red square marked     Push the Minox FA35 flash unit (an
                                                                                                                                                                                                                                                             i nto the hot shoe'2x' in white. This signals that the   optional accessory)
backlight correction  is active.             (5). Switch on by pushing the switch
18
View original page 19Page 20 · Read text
in the back of the flash from 0 to  l,     www.butkus.us
uncovering a red panel. Before every
flash exposure wait for the ready-
flash lightto lightup in the backof the
unit.
  Turn the red arrowhead with the
white flash symbol (11, to the right of
the weather symbols) to the red
marking that best represents what
the picture takes in (half-length
figure, two figures, three figures etc).
You can use intermediate settings.


  The maximum distanceatwhich you
can use the flash depends on the
film's ISO speed rating:
  ISO 100: approx. 4 m or 13 ft
  ISO 200: approx. 6 m or 20 ft
  ISO 400: approx. 8 m or 26 ft
View original page 20
Page 21 · Read text
The selftimer


    lf you push the smallsliding switch
(6) in frontof the hotshoetothe leftto
uncover a red windowwith "T" (ti mer)
in white, the shutter release is
delayed by about 10 seconds after
you have pressed the release button
or released with a cable release.
  A red  f lashing LED (7) on the camera
front signals that the selftimer  is
operating, but the exposure has not
yet started. The blinking rate doubles
each time after the first and second
3 seconds of the delay period.
    lf you want to use the selftimer with
flash, push the sliding switch to "T"
before mounting the  f lash unit, for the
latter covers this switch.
20
View original page 21Page 22 · Read text
Advancing the film               www.butkus.us
   Pull the film transport lever (18) - at
 the top right of the camera back -
 fully out to the right and forward.
 Repeat this once more.
      lf you failed to pull the lever  f ullyfor-
ward either time, pull once more.


  A checkthatyou have loaded a film   A light dot on the rewind crank
anf that it is advancing correctly  is the   shows up this movement.
fact that the round knob with the    When the whole film is exposed, the
rewind crank (9, at the top left of the   transport lever no longer swings out
camera) also rotates as you operate    fully and the release is blocked.
the film transport lever. So do not    You can advance the film with the
stop this knob from moving as you    front cover open or closed.
wind.
                                                                                      21
View original page 22Page 23 · Read text
The frame counter


  The frame counter (1) tellsyou how
many pictures you have already
taken on the film.
  Provided you have not pulled the
transport lever (even partly) after the
last exposure, the  f rame counter
returns to the start when you remove
the camera back (see also page 23).
22
View original page 23
Related documents and language editions
From the M. Butkus archive. Original publisher and archive notices are retained.
Check the model and edition against your equipment.
PDF verified 2026-10-10.