Film cameras
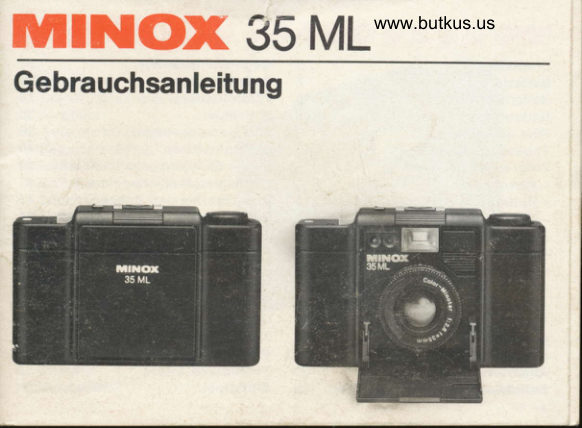
Minox 35 ML User manual
User manual for Minox 35 ML. 53 pages in English. Read the original PDF, download or print a copy without registration.
53 pagesEnglish10.3 MB PDF

Loading your manual…Open PDF directly
Document details
- Brand
- Minox
- Model / document
- Minox 35 ML
- Document type
- User manual
- Language
- English
- Pages
- 53
- File size
- 10.3 MB
- Category
- Film cameras
- Document date
- Not specified in catalog
Search available document text
Find a term, then jump to its page in the original PDF. Image-only pages may not be searchable; check the PDF for exact wording and diagrams.
Page 3 · Read text
1 Framecounter
 2 Cable releasesocket
 3 Shutter releasebutton
 4 Backlightswitch
 5 Battery test button
 6 Hot shoe
 7 SelftimerLED
 8 CdS celI controlling
   the LEDs
 9 Front opening key
10 Viewfinder
11 Rewindcrank
12 Batterycompartment
13 Aperturering
14 Distancescale
15 Siliconcell
16 Lens
17 Front cover

                             www.orphancameras.com
View original page 3Page 4 · Read text
18 FindereyePiece
19 Selftimerswitch
20 Film transport
21 Take-upspool
22 Rewind release
23 Tripod bush
24 Film speed scale
25 Back cover locking lever
26 Filmcartridgechamber
View original page 4
Page 5 · Read text
Contents                       Releasing                   30
                                    Prereadings                  30
The front cover                  5   The backlight switch            32
The battery                      6   The selftimer                  33
Fitting the battery                6   Advancing the film             34
Checking the battery            8   The frame counter             35
Loading the film               10   Unloading the film             36
Shooting in daylight           15   Shooting with flash            38
ProgrammedAE mode          16   Slow speeds - The tripod       39
- Switching to programmedAE   16   Extreme-speed films           41
- Settingthe distance         17   Accessories                      .43
- The viewfinder              19   Flash units                   44
Aperture-priorityAE mode      20     - M F 3 5                        4 4
- The aperture                20     - M F 3 s S T                     4 5
- Distance and depth of field    22     - M T 3 5                       4 6
- The finder and exposure          The ever-ready case            47
  display                    25   Push-on filters                48
- The camera shake/slow-          The belt and wrist pouch        49
  speed warning            27  The pocket tripod             50
 - The overexposurewarning    28   Care of the camera            51
 - Indirect shutter speed              Technical data                52
  preselection              29   Annotated illustr.    Fold-out pages
 4                           www.orphancameras.com
View original page 5Page 6 · Read text
The front cover
  To  open  the  front  cover  (171:
Depress the key (9) to rblease the
front cover, then  pull down  all the
way.
  To close the front cover: Push the
cover up against the camera body to
engage. Do not press the key (9)
while doing so.


  Closing the f ront cover retracts the
lens (16), covers the finder window
(10),locks the shutter release (3) and
switches off all circuits.
  Hence the front cover is also an
electric main switch. So to preserve
the battery,close the cover whenever
you are not shooting
View original page 6
Page 7 · Read text
The battery


  To operate, the Minox 35 ML needs   Suitable battery types include:
a correct battery fitted in it. Suitable    Lithium batteries
batteries are lithium and silver oxide   Duracell        P X 2 8 L
types in the 6 volt PX 28 size.        Ucar            L 544 (PX28 L)
  Generally lithium batteries have a   Varta          V 2 8 P X L
longer shelf and operating life (about   Silver oxide batteries
5 years) and tend to be more efficient   Duracell       PX 28
at low temperatures. But in freezing  Ucar           544 (PX28)
cold weatheryou should still carry the   Varta          V 2 8 P X
camera inside your coat, anorak etc. lf
the batteries in the camera have got    Fitting the battery
strongly chilled, put the camera in an     Press the key (9) and pull open the
inside pocket for 5-10 min. to warm it   front cover (17).
up before you shoot.                 Push up the ribbed section of the
                           www.orphancameras.com
 o
View original page 7Page 8 · Read text
front battery holder (12) paneland let    Push back the battery holder with
go. This releases the battery holder,   the battery into the camera and let it
allowing you to grip and withdraw  it.   engage.
  Rub both battery terminals clean    Gheck the battery state (see next
with a rag and insertthe battery in the   page).
holder. Be sure  it is the correct way    A click on pressing the releasebut-
round: The plus (*) end of the battery   ton does not necessarilyindicatecor-
must be next to the plus sign in the    rect operation of the electronic shut-
holder.                                     ter. So be sure to check the battery.
View original page 8
Page 9 · Read text
Checking the battery
             Press the key (9), open the front
            cover, (17),operate the film transport
            lever (20) once or twice  till  it locks
          and look through the finder.
             Press the battery check button (5).
            The battery  is OK  if the red light-
            emitting diode (LED) below the P
          mark in the finder lights and stays
             brightly  lit for several seconds.


                        lf the red LED fails to light you have
          an exhausted, wrongly fitted or no
            battery in the camera.
                        lf the red LED goes noticeablydim-
          mer after 2-3 sec. the battery is near
           exhaustion - so replace it as soon as
            possible.
www.orphancameras.com
View original page 9Page 10 · Read text
Repeat the battery check from time
to time, especially if your battery is
getting older.
    lf a battery appears to fail unexpec-
tedly early you may have a poor con-
tact. Remove the  battery from the
camera, firmly rub both contact faces
with a rough cloth and replace.
  Never keep spent or too old batte-
ries in the camera. Also remove the
battery if you do not expect to use the
camera for some time.
View original page 10Page 11 · Read text
Loading the film


  Never load the camera  in direct     Swing over the back cover locking
sunlight - at least do it in the shade of    lever (25)  in the camera base to
your own body.                      uncover the recessed red dot, then
                                             pull off the back from below.


                           www.orphancameras.com
View original page 11Page 12 · Read text
Check that the frame counter (1) is      Insert the film cartridge in the film
in loading position (black dot before   chamber (26) to the left of the film
0).lf not, press the key (9), open the    track with the film leader pointing to
front cover, operate the film trans-   the right.
port lever till  it locks and press the     Slowly pull the film transport lever
release button (3).                     (20) until one of the two white flaps
                                  on the film take-up spool (21) swings
                                   open. Push the film leader between
                                       the open white flap and the black
                                     spool core.
                                                                    1 1
View original page 12Page 13 · Read text
Operate the film transport  till the     Replace the camera back by push-
film lies flush on the film track and    ing   it on and lock by turning the
covers the red dot  in the track.   lf   locking lever (25) to cover the red
necessary, press the shutter release    dot again.
(with  the   front  cover  open)   in
between operating the transport.


1 2                        www.orphancameras.com
View original page 13
Page 14 · Read text
With the front cover open, operate     The frame counter is now at 0. After
the film transport, press the release   setting  the  film speed  (see next
button and advance the film once   page) the camera is ready for shoot-
more. Check that the rewind crank    ing.
(11)at the left in the camera top rota-
tes as well - watch the light dot. lf it
does not rotate, load the film afresh.
View original page 14
Page 15 · Read text
Setting the film speed

  Set the speed of the film in the
camera on  the  scale  (24)  in the
camera base.
  Every film packing carries the film
speed in ISO is marked on it.
  Check - and correct as necessary
-  the speed setting whenever you
change the film.
  The f irst number of the ISO speed
rating is the same as the former ASA
speed (red on the scale),the second
number- afterthe oblique- is the for-
mer DIN value (green on the scale).
The speed setting for auto exposure
control covers films from ISO 25l15o
to ISO 1600/33'.
  With films faster than ISO 400/27"
note also the recommendationson
page 41.
1 4                        www.orphancameras.com
View original page 15
Page 16 · Read text
Daylight shots
  For all shots without flash you have
 a choice of two auto exposure (AE)
 modes.

o           @                                                      t .
  Programmed  AE  mode  (pages      Aperture-priority AE mode (pag'bs
16-19). The auto exposure control   20-29). Set the lens aperture ring (13)
selects both the size of the lens open-    to one of the marked f-stops. The auto
ing (aperture)and the exposure time   exposure control now selectsthe cor_
(shutter speed). This is the simplest,   rect shutter speed for the lens aper-
fastest and most convenient way of   ture chosen. This speed value is
shooting - but you neither know nor   marked in the finder when you touch
can control the aperture, depth of   the release button. You can read the
field or shutter speed. Set the aper-   depth of field on the lens barrel. By
ture ring (13)to "P".                 changing the aperture setting you
                                 can modify depth of field and shutter
                                speed to suit the subject.
                                                                   1 5
View original page 16Page 17 · Read text
Shooting in programmed AE mode


Switching to programmed AE
  Turn the aperture ring (13) to P.
  Providedyou have opened the f ront
cover (17)and f ully advanced the f ilm
transport (201, a red LED lights up      P  .ru 30 60 125 250 500  *
below the P mark in the finder (18)         o
when you touch (partly depress) the
release button. That LED indicates
that you are in programmedAE mode.
  The brightnessof the LED in the f in-der automaticallymatches the lumi- I         l
nance of the finder image.
  With ISO 100 film programmed AE
mode extends from 1/500 sec. atf /16
(EV 17) to 1 sec. atf /2.8 (EV 3).                          www.orphancameras.com
1 6                                                  Programmed AE mode
View original page 17
Page 18 · Read text
Setting the distance                  from the lefthand ,,16,,mark to the
                                      righthand "16".
                                 Where the main subject  is more
                                     than about 30 ft or 10 m away, set the
                                      distance scale (14) to the infinity stop
                                                             - the infinity symbol-   in the centre
                                            of  the  rbd  marker. The  nearest
                                      distance is 3 ft or 0.9 m.
                                              In practice you  rarely set exact
                                    distances but usually distance ran-
  Turn the ring with the scale (14) to   ges. Minimumsharp zones extendfor
set the distance to the main subject.   instance lrom 22 ft (6.6 m) to infinity
  This setting does not have to be    (set the  infinity mark opposite the
dead accurate. Even in less favour-   righthand tip of the red marker), or
able  conditions  (slow  film,  poor   from about 61/zto 10 ft (2 to 3 m) etc.
light) the depth of field -the nearand    The maximum sharp zone extends
far limits of the sharp zone - extends   from 4 ft (1.2m) to infinity (with right-
at least from the lefthand tip of the   hand "16" mark opposite -).
red focusing index to the righthand    To select specific depth of fietd
tip. In brigt light and with medium to   zones switch from programmed AE
high-speed films the depth of fietd    (P) to aperture-priority AE mode (see
grows, up to the maximum extent   page 20).
ProgrammedAE mode                                                                't7
View original page 18Page 19 · Read text
Typical minimum depth of field
zones in programmed AE mode:


Top: Minimum sharp zone from
22 ft (6.6 m) to infinity.


Bottom:Minimumsharpzone from
61/zto10 ft (2 m to 3 m).
1 8                        www.orphancameras.com        Programmed AE mode
View original page 19
Page 20 · Read text
%The viewfinder                                 30 60 125 250 500  *
                                                             a
  Raise the camera to your eye and
look through the viewfinder (18).
  The bright-line frame outlines the
field of view. For upright shots turn         f:       l
the camera through 90o.
 When you touch the yellow release
button (3) (slightly depress  it to its
first pressure point) and the camera
is set to programmed AE mode, a red
LED should light up underneath the P    Finder display: S/ow-sp eed warning
at the top left of the finder. lf it does
not, operate the film transport (page
34).
    lf in addition to the red LED under-
neath P a second red dot lights up
underneath the shaded bar to the    The shutter speed scale (1/30 to
right of  it (slow speed warning for   1/500 sec.) at the top of the finder and
shutter speed slower than 1/30) use   the overexposurewarning (star sym-
flash (page 38) or  - depending on    bol to the right of 500) are not opera-
the subiect - a tripod (page 39).       tive in programmed AE mode.
ProgrammedAE mode                                                 1 9
View original page 20Page 21 · Read text
Shooting   in  aperture-priority  AE
                             mode


                                 The aperture
                                      Set the required f-stop - between
                                       t12.8 and  tl16     including  any
Sef fhe aperture ring to an f-stop (here   intermediate valuen on the aperture
t/ 5.6): You are now in aperture-priority    rins (13).
AE mode.                             With an f-stop setting and without
                                          flash you are in aperture-priority AE
                                mode.
                                      With aperture-priority AE the expo-
                                    su re control selects a correct shutter
                                 speed to match the subiect bright-
                                      ness, preset aperture and film speed.
                               Wth ISO 100 film the shutter speed
                                   range extends from 1/500 to 1 sec.
                            www.orphancameras.com          Aperture-priorityAE
View original page 21Page 22 · Read text
To  avoid  accidental  switching      ln programmed AE mode (aperture
between the two AE modes you have   ring setto P) the camera automatically
to overcome a  distinct  resistance   selects both shutter speed and aper;.,
when  moving  the  aperture  ring   ture. But in aperture-priorityAE mod{.'
between 2.8 and P.                 you can choose whether you wagt  t
  The aperture or f-stop designates   greater depth of f ield to suit your suf-
the size of the lens opening that   ject or a faster shutter speed.
        light                                f ilm while                         the                             shut-admits            to the
        You               control                     the size                                 of                                   this                                               *;-1 .ter    is open.
opening by setting different f-stops.                           :e€*
With larger openings (low f-values -
maximumaperture t/2.8) vou can use
shorter exposu re times (fastersh utter
speeds) but get more restricted depth
of field. With a smaller lens opening
(high f-value - smallestaperture f/16)
you need  longer exposure times
(slower shutter speeds) but get an
extendeddepth of field zone of sharp-
ness.

Aperture-priorityAE                                                   2 1
View original page 22Related documents and language editions
From the M. Butkus archive. Original publisher and archive notices are retained.
Check the model and edition against your equipment.
PDF verified 2026-10-10.