Film cameras
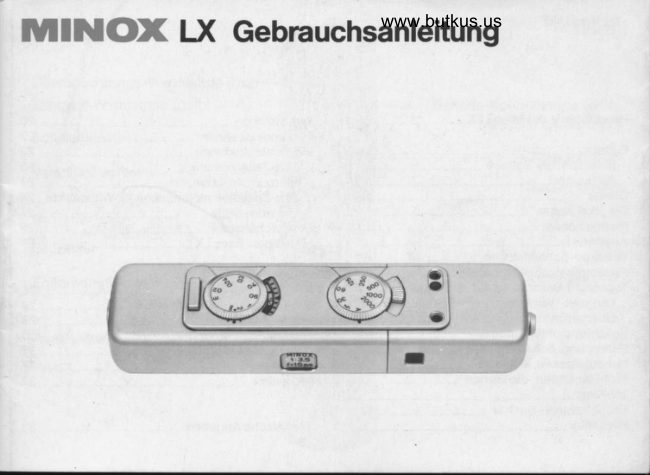
MINOX LX User manual
User manual for MINOX LX. 40 pages in English. Read the original PDF, download or print a copy without registration.
40 pagesEnglish3.2 MB PDF

Loading your manual…Open PDF directly
Document details
- Brand
- Minox
- Model / document
- MINOX LX
- Document type
- User manual
- Language
- English
- Pages
- 40
- File size
- 3.2 MB
- Category
- Film cameras
- Document date
- Not specified in catalog
Search available document text
Find a term, then jump to its page in the original PDF. Image-only pages may not be searchable; check the PDF for exact wording and diagrams.
Page 3 · Read text
Inevitablyyou willfind some technicalterms in
this booklet.So beforeyou start readingthe
Manual,fold out this and the last page. Then
you can see at a glancewhich particulardial,
window or other part of the Minox LX the text
refers to.


                               www.orphancameras.com
View original page 3Page 5 · Read text
Contents


Minox LX operation
                                            Loadinothefilm                            .20
The battery                             2  Unloading                           22
   Insertingthe battery                     2  Flashshots                          23
  Batterytest                           3    Automaticf lashexoosure                23
Openingthe camera                          4    The Minox FL 4 with flashcubes-            23
Thethree"eyes"                            5    Automaticrangeswith flashcubes_         24
Holdingit steady                             6     Electronicflash-                      24
Takingthe picture                            7  The ever-readycase                     26
The push-pullrapidwind                       8  Careof MinoxLX                       27
Settingthefilmspeed                         o
Automaticdaylightexposure                  1 0  Minox accessories
  Longtimesignal                          1 1  Minox8x11mmfilms                   28
  Overexposuresignal,ND filter                1 2  Flashunit and flashaccessories_            28
Manualexposuresettings-                    1 3  Tripodshots                         29Focusinganddepthoffield-               14  Binocularshors                      30 t
Close-upswiththe measuringchain:            15  Documentcopying                    30
No aperturesettings-                       16   Projection                          32
The ultravioletfilter                        1 6  Homedarkroom                       32
The bright-framef inder                       1 7
The exposurecounter                        1 8  Technicaldata
                               www.orphancameras.com             r
View original page 5Page 6 · Read text
Congratulations!


Yournew MinoxLX is the latesttoo modelof the famous  While you can operatethe Minox LX controlswithouta
8 x 11 mm Minox ultraminiaturecamera range.         film, it does need a batteryto powerthe electronicshut-
You don't need to know much Minoxtechniqueto make   ter and automaticexposurecontrol.That's why we start
good pictures. In each section the most important  with insertingthe battery on the next page.
pointsare summed up in bold type. For more details
read also the paragraphsbelow them.
The Minox LX works even withouta film - so you can
familiariseyourselfwith-MinoxLX operationbeforeyou  So now read on and get acquaintedwith Minox LX pho-
start shooting.                                    tography.Have fun with your Minox LX!
                               www.orphancameras.com
View original page 6Page 7 · Read text
The battery
                                         The Minox LX only functions with a correct battery
                                                 (Varta 7150, Ucar EPX 27 or Mallory PX 2n  in the
                                                     battery compartment (check correct polarity). Don't
                                            use spent or old batteries.


www.orphancameras.com                             Inserting the battery
                                                      Pull the camerafully open, depress the snap lock in
                                                 the base and pull open the sliding cover. The bat-
                                                       tery compartment is now accessible from the ca-
                                         mera top.
                                                   Firmly rub both battery contacts clean against
                                      some rough fabric (e.9. your coat sleeve).
                                              Raise the black battery compartment tongue. Insert
                                                  the battery the correct way round (note polarity
                                           marks on tongue and battery) so as to permit easy
                                            removal by pulling the tongue.
                                      A clickon pressingthe releasedoesnof signifycorrect
                                                    shutteroperation.Use the batterytest to check correct
                                                   batteryfunctionand correctinseftion.
                                                                                         lf a batteryappearsto failtoosoon,try removingit,firmly
                                               rubbingdown its contactsand re-inseftingit.
                              www.orphancameras.com               2
View original page 7Page 8 · Read text
Battery test
You can check the battery with the camera closed
or open, but not released.
Push the check switch, next to the shutter speed
dial, fully towards the camerafront and hold for ab-
out one second: The green signal must light up.


lf the greensignallightsup at firstbut fadesor goesout
withina second,the batteryis nearly exhausted'Re-                                                    Battery test. The signal lights up green.place as soon as possible.
lf the green signal does not light,the battery is fully
spentor too old (removeimmediatelyfrom the camera),
or was insertedthe wrong way round.
Check the batteryevery time you load a film or when
you haven'tused the camerafor a week or more. But
don't check the batterytoo often or for too long - that
also exhaustsit.
The batterytest does not indicatehow long it will still
last. Preferablyfit a fresh batteryat least once ayear,
even if the batterytest still shows sufficientpower.
Removeeven a good batteryf rom the cameraif you are
likelyto store the latterunusedfor long periods.
3                              www.orphancameras.com
View original page 8
Page 9 · Read text
Opening the camera
 To shoot - or to view the subiect - pull the Minox LX
  fully open.


  The Minox LX can shoot only when open. When you
  closethe camera,the lens windowand viewfinderare
  protectedinside the body and the shutter release is
  locked.You can open the MinoxLX and view through
  the findereven if you are not yetsurewhetheryou want
   to expose. Closing the camera without releasing it
  wastes no pictures.
www.orphancameras.com
View original page 9
Page 10 · Read text
The three "eyes"
The front of the Minox LX shows - from top to bot-
tom in the illustration- the silicon blue cell window
(the metering cell of the automatic exposure con-
trol),the finder window and the lens window. Take
care not to obstruct these three windows with your
fingers while shooting.
Keepthe lenswindow absolutelyclean- that is vital
for sharp and brilliant pictures.


 lf you cover the meter window as you shoot, you get
wrongexposures.
To checkwhetherthe lenswindowis clean,slidein the
neutraldensityfilter(page 12); any dirt or fingerprints
willimmediatelyshowup againstthe darkfilter.Prefer-
ably clean the lens window with a clean rag wound
rounda matchstick.Chemists'cotton-tippedswabsare
also useful (see page 27).
5                               www.orphancameras.com
View original page 10
Page 11 · Read text
Holding it steady
  Hold the Minox at eye level firmly, but relaxed,with
  both hands. Keep the thumbs against the camera
  base, the other fingers on top. Keep the fingers
  away from the front to avoid obstructing any of the
  windows.


  The picturesshow suitablecameraholdsfor horizontal
  and uprightshots.
    lf you coverthe lenswindowwhileshooting,you will get
  a shapelessshadowcoveringmostor all of the picture.
    lf you obstructthe small meter window the exposure
  becomestoo long.
  For the steadiest hold, press both hands against
  your head and press the camera ends againstyour
  thumbs- as if you were tryingto bend the Minox.
  The MinoxLX remainsin its ever-readycasefor shoot-
  ing.Foldoverthe hingedsectionof the caseflat against
  the fixed section.
www.orphancameras.com
View original page 11Page 12 · Read text
Taking the picture
Once you have framed the view as you want  it
within the brightline finder frame, gently press the
release key - without moving the camera.


Gentlepressureon the releasekey is enoughto trigger
the shutter.
Duringreleasingholdyour breathand take the camera
from your eye only after you have heard the shutter
close. (There are two soft clicks- with short exposure
timesthey sound like a singleclick.)
7                              www.orphancameras.com
View original page 12
Page 13 · Read text
The push-pull rapid wind
                                          To get your Minox LX ready for the next shot push
                                                  the camera closed and pull it open again. This ad-
                                           vances the film and tensions the shutter. The film is
                                           however only advanced if you have released the
                                                   shutter before closing the camera.


The circle in the lens window means your Minox is
ready to shoot.

                                           Always push and pull the camera movementall the
                                              way.
                                      A small circle in the lens window indicatesthat the
                                           MinoxLX is tensionedand readyfor shooting.Afterthe
                                            exposurethe circle disappears;so push the camera
                                               closedand pull it open again for the next shot.
                                    When you havefinishedshooting,closethe Minoxand
                                                  put it in your pocket.
                                              For quickshootingsequencespush and pullthe Minox
                                             as fast as you like -  it can stand it.
                               www.orphancameras.com
View original page 13Page 14 · Read text
Setting the film speed
Set the speed of the film you are using on the film
speed scale in the camera base. Depress the milled
button and turn it to bring the ASA or DIN speed ra-
ting of the film opposite the arrow index on the win-
dow rims. (Every Minox film packing carries both
ASA and DIN values.)
To save space the scale carries figures for every
third step only; intermediate steps are marked by
dots (e.g. 64 and 80 ASA between 50 and 100 ASA).


                                                  Film speed scale, set here for 80 ASA or 20 DlN.


Too high an ASA or DIN speed settingyieldsunderex-
posed shots, too low a setting overexposedpictures.
You can also exposedeliberatelyfor longeror shorter
than indicatedby the meter. For double the exposure
time set the film speed dial to half the ASA value or 3
DIN lower.To halvethe time,set the film speedto dou-
ble the ASA valueor to 3 stepshigheron the DINscale.
See page 28 for a list of Minox28 x 11 mm films.
 I                              www.orphancameras.com
View original page 14Page 15 · Read text
Automatic daylight exposure
                                              For daylight shots (or artificial light other than
                                                       flash, see page 23) set the shutter speed dial to A
                                                  (automatic).This controls the exposure automatic-
                                                             ally between 1 I2OOOsecond and about 15 seconds.


                                         The up-to-date automatic exposure control of the
                                           Minox LX uses a siliconblue cell (SBC) and an elec-
                                                      tronic shutter.This providesa long steplesscontrolCamera sef fo automatic daylight exposure control                                             rangewith rapid and reliableresponseeven to abrupt
                                                      lightinglevelchanges.
                                         The automatic system controls the correct exposure
                                                duringthe actualshot. For deliberatelongeror shorter
                                             exposuresadjustthe film speedsettingbeforeyou take
                                                 the picture(page 9).
                                         The automaticsystem on the Minox LX controlsthe
                                            exposuretime. As with all Minoxultraminiaturecame-
                                                       ras,the lens apertureof the LX remainsconstant(see
                                         page 16).
                                         The Minox LX readingis centre-weighted:it depends
                                      much more on the brightnessin the centreof the view
                                              than in the corners.
                               www.orphancameras.com            1 0
View original page 15Page 16 · Read text
Long time signal
In poor light you can check before you shoot
whether the exposure time is likely to be longer
than about 1l3O second:
Set the shutter speed dial to A (automatic). Point
the camera at the subiect at waist level. Push the
check switch next to the speed dial fully towards
the rear of the camera.
lf the yellow slow speed signal lights up with the
key fully pushed back, the exposure time is longer
than about 1l3Osecond. That means greater risk of
camera shake.

                                             Slow speed check. The signal lights up yellow.
With times shorterthan 1/30 second,the slow speed
signalstillblinksbeforethe key reachesits end position
- the "blink"ist aboutthe lengthof the automaticallyset
time.
You can operatea slowspeedcheckwith the MinoxLX
closed,opened or tensioned.lf you have alreadyre-
leased(no circlein the lens window)just push the ca-
mera closed beforeoperatingthe slow speed check.
You can still take picturesin poor light:either use the
Minoxpockettripod(page29) or shootwith flash(page
 23).
To avoid excessive battery drain, operate the slow
speed check only briefly.
 1 1                             www.orphancameras.com
View original page 16Page 17 · Read text
Overexposuresignal, ND filter
                                             Very bright scenes (beach or high mountain sub-
                                                      jects with brilliant sun) can on a fast film lead to
                                              overexposure even with 1l2OO0second.
                                         To check, point the cameraat the subject, and push
                                                  the check switch next to the shutter speed dial fully
                                               towards the camera back (as for the slow speed
                                              check, page 11).lf the red signal lights up, you risk
                                               overexposure.
                                         To avoid that, slide the neutral density (ND) filter in
                                                        front of the lens by the filter slide above the finde.r
                                            window. Push this fully towards the lens window.

                                      A red mark in the top right finder image corner is a
Overexposure signal   lf it lights up red, slide in the neu'   reminder that the ND filter is in position.
tral density  filter.


                                         The overexposuresignal again operateswith the ca-
                                         meraclosedor with the cameraopen,but not released.
                                            Operateit only brieflyto save batterycurrent.
                                         The neutraldensityfilterincreasesthe exposureabout
                                             4 times.The exposurecontrolautomaticallyallowsfor
Sliding the ND filter into position.                       this when the ND filteris in position.
                               www.orphancameras.com             1 2
View original page 17Page 18 · Read text
Manual exposure settings
   You can set exposure times from 1|2OOOto 1/30
   second manually without using the automatic ex-
   posure control. ln this case turn the shutter speed
    dial away f rom "A" to the required time. The figures
    indicate fractions of a second (e.9. 30 : 1/30 sec-
   ond).


                                                      Shutterspeed set manually to 1/2000 second.


4  Automaticcontrolsets a continuoustime range.With
   manualcontrolyoucanset onlythevalueson the dial.lf
   you happento set the dial betweentwo markedtimes,
   the shutteroperatesat the nearestadjacentspeed.
   The Minox LX, unlikethe previousMinoxC, needsno
   manualexposuresettingsfor flash shots as the LX pro-
'   vides automaticflash exposurecontrol(set the dial to
   the flash gymbol,see page 23).
   1 3      /                          www.orphancameras.com          /
View original page 18Page 19 · Read text
Focusing and depth of field
                                         The distance scale is calibrated in feet and inches
                                                        (e.g. 1'6" :  1 foot 6 inches) or in metres. For spe-
                                                                cific distances set the distance scale to the large
                                                 black dot.
                                          The two smaller dots indicate the extent of the
                                              depth of field on the distance scale. For instance
                                                   with the snapshot setting to the red dot (approx. 12
                                                        feet or 4 metres) the depth of field extends from 6
                                                        feet (2 metres) to infinity (*).
                                              For views with no significant item nearer than 12
                                                        feet or 4 metres from the camera, shoot at the infi-
                                                          nity  (*)  setting. The sharp zone then extendsSnapshot setting: depth of field from 6 feet to infinity                                            backwards from 12 feet or 4 metres (the red dot(above) resp. from 2 metres to infinity (below).                                                mark).


                                              For mediumdistancesyou can use not only the snap-
                                                shot setting(6 feet or 2 metresto infinity)but also other
                                                   settingsof extendeddepth of field.Thus at 6 feet or 2
                                             metresthe depth extendsfrom about 4to12feetor 1.3
                                                        to 4 metres(usefulfor flashshots).Halfwaybetween3
                                           and 6 feet (1 and2 metres)you get a sharp zonefrom3
                                                        to 6 feet (1 to 2 metres).For close-upsbetween8 and
                                             24inches(20 and 60 cm) usethe measuringchain(see
                                                next page).
                                www.orphancameras.com              1 4
View original page 19Page 20 · Read text
Close-ups with the measuring chain
At close range between I inches and2 feet (20 to 60
cm) you have very little depth of field. So use the
measuring chain on the ever-ready case to estab-
lish the exact distance. Wth the chain held taut,
each bead matches an engraved distance setting
on the scale:first bead forS inches, second bead 10
inches, third bead 1 foot, fourth bead 11/zfeet, full
chain length 2 leet (on metrically scaled cameras
20,24,30, 40 and 60 cm resPectivelY).


Measurethe distancewith the chain and set the di-
stance scale, then hold the appropriatechain bead
once more againstthe subjectto be sure of the correct
distance.As you then removeyour handwith the chain,
shootwithoutchangingthe distance.
 lf you use a ruleror tape measureinsteadof the chain,
measurethe distancefrom the front of the camera'
To mountthe measuringchaindirectlyon the MinoxLX
without the camera case you need the tripod bush
adapterfor the LX measuringchain(OrderNo. 18160)
 1 5                            www.orphancameras.com
View original page 20
Page 21 · Read text
No aperture settings
  The aperture of the 15 mm Minox t13.5lens is fixed
  at its full opening. So the camera has no aperture
  scale.

  The exposureis controlledonly by the shutterspeed. In
  view of the full aperture this is always comparatively
   fast. Yet you have plentyof depth of field- for instance
  from about 6 feet or 2 metresto infinityat the snapshot  'setting.


  The ultraviolet filter
  The glasswindowin frontof the lensis an ultravioletab-
  sorbingfilterto preventloss of definitionin colourand
  black-and-whiteshots -  also colour casts in colour
  transparencies- when the prevailingdaylightcontains
  a lot of UV radiation.
  The UV filter does not increasethe exposuretime.
www.orphancameras.com             1 6
View original page 21
Page 23 · Read text
The exposure counter
  The exposure counter or frame counter indicates
  the number of exposures you have left on the film.


 When you load the film set the counterto the appro-
  priatestartposition.Thereare Minoxfilmsfor 36 expo-
  sures and for 15 exposures.The counterscale for the
  short 1S-exposurefilm is markedin white on black.
www.orphancameras.com             1 8
View original page 23
Page 25 · Read text
Loading the film
Always load (and unload) the film in subdued light-
the shade of your body if necessary- and never in
sunlight.
Keep opening, releasing and closing the camera
until the exposure counter arrives at the load set-
ting.
The load setting for 1S-exposurefilms is the red
mark at No. 17 (illustration far left).
The load setting for 36-exposuref ilms is the red dot
between 0 and 36 (left).
Depress the back cover snap lock in the camera
base and fully pull out the sliding cover (bottom
 left). The film compartments are now accessible.
Drop the Minox cartridge into the camera, push
down and slide the cover over it, then close the co-
ver to engage.
Open the camera, release and close the camera
twice in succession.
This moves the exposure counter to its start posi-
tion: No. 36 for 36-exposurefilms and No. 15 (at the
beginning of the black-and-whitescale) for 1S-ex-
posure films.
Rememberalso to set the ASA speed of your film on
the film speed dial (page 9).


www.orphancameras.com
View original page 25
Related documents and language editions
From the M. Butkus archive. Original publisher and archive notices are retained.
Check the model and edition against your equipment.
PDF verified 2026-10-10.