Film cameras
National PE-280c User manual
User manual for National PE-280c. 36 pages in German. Read the original PDF, download or print a copy without registration.
36 pagesGerman3.0 MB PDF
Loading your manual…Open PDF directly
Document details
- Brand
- National
- Model / document
- National PE-280c
- Document type
- User manual
- Language
- German
- Pages
- 36
- File size
- 3.0 MB
- Category
- Film cameras
- Document date
- Not specified in catalog
Search available document text
Find a term, then jump to its page in the original PDF. Image-only pages may not be searchable; check the PDF for exact wording and diagrams.
Page 1 · Read text
www.butkus.us
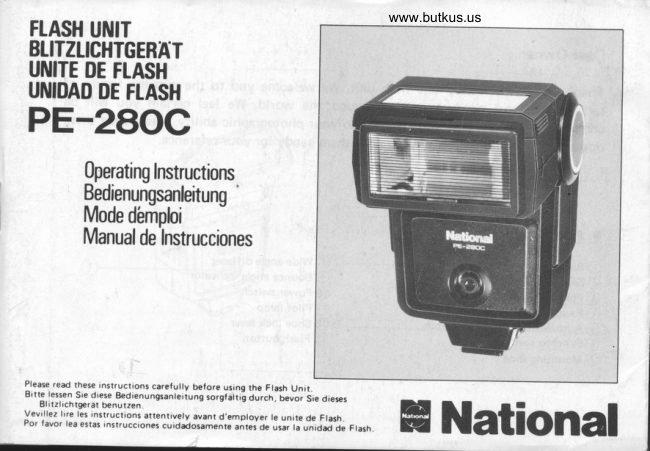
 FTASH UTIIIT
 BTITZTICHTGERAT
 UNITE DE FTASH
UNIDAD DE FTASH
PE-2goC

         Operating Instructions
        Bedienunqsanleituno    '
      Mode dbirploi
       Manual de Instrucciones


Please read these;nstructrons  carefully b€fore usin0 the Flash Unir_
Sitle.lessen Sie d'ese 8€dienungsantertung sorgtattii aurctr, b"*.  S," o,"*,    UrtzrrChtgerat tpnulzen.
Vevillez               les           lire                inslruclions                              attentively                                      avant d'employer                                                                     le                                                                 unite                                                       de Flash.Por    favor           lea              estas                   instruccionei                             cuidadosamente                                                   antes de                                                            uiar                                                                           la unidad                                                             de Flash                HNational
View original page 1Page 3 · Read text
www.butkus.us
FLI
Btl
UNI
uNl
PI


        Mike Butkus         Digitally                                                                                        DN:org,Date:cn=Mikeemail=mike@butkus.org,2024.05.31signedButkus,by21:50:00Mikeo=ButkusButkus-04'00'c=UScamera manuals, ou=butkus.
View original page 3Page 6 · Read text
I  Loading batteries
1. Open the battery compartment cover by sliding it in
    the direction of the arrow.
2. Insert four 1.5V standard penlight batteries (optional)
   or Ni-Cd batteries (optional). Make sure polarities are
    properly aligned as shown.
3. Close the cover.

CAUTION:
a  Four batteries must be of the same type.
o   lt is important that the batteries are inserted with
    correct polarities (+, -). Otherwise, the flash unit will
   not work and the batteries may leak, causing damage.
o When using Ni-Cd batteries, recharge with charging set
   PW-I103 (optional) before loading into the flash unit.
    Eatteries cannot be recharged when loaded in the unit.


                                  't t\
View original page 6Page 7 · Read text
www.butkus.us
 I  Attaching to the camera                                        Hot shoe type

 There are two basic kinds of camera accessory shoes, one.
 hot and other not.
O On a camera with a hot shoe:
 1. Insert the mounting shoe all the way into the acces-
    sory shoe.
 2.  Lock the shoe lock lever by turning  it in the direction
    of the arrow. No synchro cord is necessary.
o  On a camera without a hot shoe:
 1.  Insert the mounting shoe into the accessory shoe.
2.  Lock the shoe lock lever.                                        Non-hot shoe type
3.  Insert the flash end of the synchro cord into the
    synchro cord socket.
4. Connect the camera end of the synchro cord to the                                                    Synchro cord   camera's X-terminal.
                                                                         F lash end   * On a camera having a contact changeover lever, set                                 c
       the lever on "X".                                                               lnsert
   * On a camera without a contact indicator, the flash          is ready to use.                   d
CAUTION:
O Be sure to lock the shoe lock lever or the unit will not                                                                                            I nsert
    operate.                                                                 Insert @    Synchro cord
O Be certain to use only National brand synchro cords               (X-terminal)
   with this flash unit, as other makes may damage the
    u n it.                         _4_
View original page 7Page 9 · Read text
Bitte spenden Sie 2,50 Euro, um diese Website über E-Bay zu unterstützen ... www.PayPal.me/butkusView original page 9
Page 10 · Read text
www.butkus.us
I  Testing the flash

 1.  Lock the shoe lock lever.
2. Turn the power switch on.3.  Confirm whether pilot lamp lights up.       NN\NN\N
4.  Push the  f lash button.
5. When finished taking pictures, turn the power switch
    off.    N
O Double check on-off battery switch     W  The power circuit is automatically turned off by
    releasing the shoe lock lever when detaching the flash
   unit from the camera. Therefore battery waste is
   prevented even if the power switch is lef t on.
o  Flash stop device
   Daylight shooting without the flash is possible without
   dismounting the flash unit. Simply turn off the power
    switch.


                 |.:-l -
View original page 10Page 11 · Read text
I How to use the wide-angle diffuser

The angle of coverage can be increased by using the built-                                                                            Installing the wide-angle diffuserin wide-angle diff user (W). Guide number changes accord-                                                 Hold the raised portions on theing to the angle of coverage. Use is determined by the                                                                     sides of the panel and slide it outfocal length of the lens on the camera.                                                                          (1) and over (2) the  f lash head.
                                   Guide number
 Flash head   Angle of coverage
                            ASAl OO    AS4400
 With      28mm lens cover
 wide-angle     (vertical: 53"          20         40
 diffuser (W)  horizontal: 70"  )                        {€e
 Without    35mm lens cover
 wide-angle     (vertical: 45"         28          56
 diffuser (N  )  horizontal: 60"  )
                                                                        www.buktus.us
    Film size and flashing angle
  \     Zoom   With wide          Without wide    \idex      angle diffuser (W)   angle diff user (N)
  Film size \
    35 mm     28 mm lens cover   35 mm lens cover
    6x4.5      45 mm lens cover   55 mm lens cover
   6x6       60 mm lens cover   80 mm lens cover
   6x7       60 mm lens cover   B0 mm lens cover
View original page 11Page 13 · Read text
Automatic operating range

Auto/manual              Film speed             Without wide-           With wide-
   switch                                            angle diffuser            angle diffuser
  position       ASAlOO       ASA4OO              (N)                    (w)
Orange             F2.8            F5.6        approx. 1 .5- 10 m    approx. 1-7.1 m
Green              F5.6                    F1',l       approx.0.7-5m     approx. 0.7-3.5 m
Range of automatic operation does not vary with film speed (ASA). You need change only the
F-stop setting.

     Max. shooting distance with
     the wide-angle diffuser                              Min. shooting distance in
                                                      automatic operation


                                                Max. shooting distance
                                                   without wide-angle diff user
View original page 13Page 14 · Read text
www.butkus.us
r  Notes on automatic operation
o When the background is extremely dark and its reflectivity is much lower than that of the
    subject, close the aperture by half a stop. Conversely, where the background has especially high
    reflectivity (for example, when the subject is standing before a white wall), open the aperture
    half a stop.
o When shooting outdoors in daytime, intense illumination may cause malfunction of the auto-
    crrcurt.
  When taking a picture immediately after the pilot lamp lights, sufficient  light may not reach the
   subject in auto mode due to the low guide number setting.
   For cameras with automatic flash mechanisms,  set the flash unit to manual operation (depending
   upon the type, some cameras can be used with the  f lash unit in automatic. Therefore, please read
   the camera manual caref ully).
   For diffused light, soften the brightness by screening the  f lash head with a handkerchief  etc., but
   be sure not to cover the light sensing window.
  When something intervenes between you and the subject, the light reflected from it, not from the
   subject, may actuate the automatic circuit, resulting in under-exposure of the subject.


                  i-
              ".t

                               -10-
View original page 14Page 15 · Read text
I  Aperture for manual operation

1 . Turn the inner dial of exposure meter to center N (W
         f or wide-angle  dif  f user attached ) in the indicator    IExample]                                                                                                 lf shooting at a distance of   window.
2. Turn the outer dial of exposure meter to set the film    5 meters with a 28 mm lens,                                                                  film speed ASA400 (27 DIN),   speed (ASA) to N.
3. Set auto/manual switch to M position.                     (With wide-angle diff user)
4. Set the camera to the suitable F-stop agreeing to the
   shooti'ng distance, and the correct exposure can be
    obtained.
a How to calculate  the correct F-stop without the         icator
   exposure meter.
                     Guide number (GN)       F-stop (F) =                      Shooting distance (m)
  Guide number         V  Film speed (ASA)    25    50   100 200 400 800                                   Set F-stop at F8.
  Without wide        14    20   28  40  56   110  angle diffuser
  With wide                      10    14    20  28  40   80  angle diffuser
View original page 15Page 16 · Read text
www.butkus.us
r  Bounce photography

The convenience of automatic operation can be applied to                                                                                         Ref lectionbounce lighting which involves "bouncing" the light off
a ceiling or other ref lective surfaces to obtain soft illumi-
nation.
1 . The auto mode can be used for bounce lighting.
2. After determining the position of your subject, adjust
   the bounce angle. (The flash head is variable from Oo                        tr   to 90" and there are click stops at 0o,45o,60",75o
   and 90" as desired.)
3. Before taking the picture, test the flash and confirm                     tu
   the auto check lamp.
* When using bounce lighting, it is advisable to use a
   high speed film (ASA400) and set the auto/manual
   switch to the orange mark.
View original page 16
Page 17 · Read text
r  Daylight synchro photograPhY
                                                                     Without flash
When shooting in daylight, unwanted shadows can be eliminated with
the flash. This is also a good method for creating a balance between
background  lighting and brightness of the subjeut. lt is important that
the auto/manual  selection dial be set on (M) for daylight shooting uses.
a On a camera with a between-the-lens shutter:
IExample] Backlit subject
   With .a 35 mm camera, 35 mm lense, and ASAl OO film, exposure in
   sunlight is F11 ,11125 (F8, 1 l250l, shooting distance is 3.5m.
1. Compute the proper F-stop setting for use with the flash unit:
             Guide number (GN)   28                       =8                 Distance (M)         3.5
2. Set 8 on the camera.                                               With flash
3. Exposure in sunlight calls for a shutter speed at 11250 sec. if the
   aperture setting is F8. Set the shutter speed at 1 /250 sec.4. The light contrast between subject and background will now be  ri\
    balanced.                      vr:o On a camera with a focal plane shutter                            >>                                                                                                   ;1';'1,   Proper shutter speed and aperture setting are calculated as with                                                          Y.l' .  between-the-lens shutter cameras, but since most shooting condi'          lo   tions call for shutter speeds faster than 1 /60 sec.,  i'  is often too
    difficult to achieve proper exposure for both background and
    subject. Consult the camera instructions.
View original page 17Page 19 · Read text
Number of Flashes
             Power source                          Number of  f lashes
    AA size Alkaline batteries                               approx. 200
    AA size Ni-Cd batteries                             approx. B0
Angle of Coverage (35 mm camera)
         Flash head                      Vertical         Horizontal            Focal length
   Without wide angle diffuser              45"               6oo         Can cover 35 mm lens
   With wide angle diffuser                 53"               70"         Can cover 28 mm lens
Bounce Angle:             0' to 9o' (Click stops: O', 45", 60', 75' and 90"  )
Power Source:           Four 1.5V size AA Alkaline batteries or Ni-Cd batteries
Color Temperature:         ldeal for color and black & white film
Size:                  1OO (H) x B0 (W) x 78 (D) mm
weight (without batteries) 220 g (approx.)
Ftash Unit Set:         Model 280C, 3O cm synchro cord (PP-SA/P3)
Optional Accessories: 3 m synchro cord (PP-SC3OA), Charging set (PW-1103)
Note: rhe             .[il:";tJ:*:::1t'i];33[ithe  normar temperature (20"c).
*     "Recycling"r,,.."fi",i,t,",time" is the time required for the pilot lamp to light using new batteries.
t*    "Number of flashes" represents the number of  ti mes the unit flashes at intervals of 30 seconds
        until the pilot lamp no longer lights up within 30 seconds.
View original page 19Page 21 · Read text
Lieber Kamerabesitzer!

Wir danken lhnen, daB Sie sich fur dieses Blitzlichtgerdt entschieden haben, und heiBen
Sie in der Familie zufriedener Besitzer von National Produkten auf der ganzen Welt
willkommen. Wir sind 1iberzeugt, daB lhnen diese neueste Ergdnzung lhrer Fotoaus-
rListung gute Dienste leisten und volle Zufriedenheit schenken wird. Lesen Sie diese
Bedienungsanleitung  sorgfSltig durch, und bewahren Sie sie auf, falls Sie spdter etwas
nachsehen mochten.


t  Bezeichnungen der Teile
@ Batteriefachdeckel                                                       i8', Weitwinkel-Diffusor
@ Sensor                                                           S'r Winkelgrad-Anzeiger  fiir den Schwenk-
@ Schwenk-Blitzref lektor                                 reflektor bei Indirektblitz
(1) eelicntungskalkulator (Blende, Entfernung      60 t-tauptschalter und Wahlschalter  f i.ir die
    usw.  )                                          A ku sti k kontrol    I e
                                                                                                                                    | /AUTO)     (J a  t itzoereitschaftsanzeige@ Betriebsarten-Wdhlschalter (Manuel
                                                                                                                                                                                  lt hebel  f iir Auf steckf u B@ Synchron kabelanschlu B                                          (?-l r estste                                                                  (t! BtitzausloseknopfC, BlitzgeratefuB
View original page 21Page 23 · Read text
I  Einsetzen der Batterien

1 . Off nen Sie das Batteriefach durch Schieben des
    Batteriefach-Deckels  in Pfeilrichtung.
2. Setzen Sie vier Mignon-Batterien e 1,5V (Typ AA)
    ein. Achten Sie dabei auf die richtige Polung.          o
                                                                                                                                                                                                                                                                         i3. SchlieBen Sie das Batteriefach wieder wie in Skizze          E
       angegeben.                                                                       nsetzenI                                                      Q) Off
ACHTUNG!
a Achten Sie auf die richtige Polung der Batterien                                                                    Sc hl   i e8ennenot   (+/-) und prijfen Sie nach dem Einsetzen der Bat'
   terien die Blitzbereitschaft lhres Blitzgerdtes. Bei
   falscher Polung arbeitet das Blitzgerat nicht, die
    Batterien werden aber dennoch kurzf ristig entladen,
    sie konnen dazu auslaufen und damit lhr Blitzgerdt
    beschiid igen.                                                        www.butkus.us
  Wenn Sie NC-Batterien verwenden, laden Sie diese
   vor dem Einsatz auf, mit Hilfe des Aufladegerdt
   PW-1103 (Zubehor); bereits in das Blitzgeriit ein-
    gesetzte Batterien konnen nicht aufgeladen werden.
   Es muB jeweils ein ganzer Satz Batterien des glei-
   chen Typs verwendet werden. Auch eine Teilaus-
   wechselung ist nicht vorteiltaft.
View original page 23Page 24 · Read text
www.butkus.us t  Befestigung an der Kamera                                                                                 B litz-M itten kontakt
 Es gibt generell zwei Arten von Kamera-Zubehcjrrschuhen-
 solche mit und ohne Blitz-Mittenkontakt
a  Kameras mit Aufsteckschuh plus Mittenkontakt
 1. Schieben Sie das Blitzgerdt vollstdndig in den Zubehor-
    schuh der Kamera ein.
 2. Yerriegeln Sie den Blitzgerdt-Kontaktschuh mit seinem
    Verriegelungshobel * in Richtung des roten pfeils.
    Es wird kein Synchronkabel benotigt.
a  Kameras ohne Mittenkontakt, mit Kabelkontakt
 1. Schieben Sie das Blitzgerdt vollstdndig in den Zubehor-
   schuh der Kamera ein.
2. Verriegeln Sie den  Blitzgerdt-Kontaktschuh  mit
   seinem Verriegelungshebel*  in  R ichtung des roten            Ohne B  I itz-Mittenkontakt
     Pf e ils.
3. SchlieBen Sie das Synchronkabel mit seinem Spitz-
    stecker-Ende an das Blitzgerdt an.
4. Verbinden Sie das Synchronkabel ober sein Kontakt-
                                                                                                  ron                                                                                                              kabel.
                                                                    Ende                                                                                                             Iur                                                                                                    das                                                                                                          (t)
                                                                                                 Blitzgeral   buchsen-Ende*  bei KamerasmitmitdemSynchronkontakt-UmschalterX-Kabelkontakt der Kamera.stel-        Synch                                                                                                                       Blitzgerate-        len diesen auf die Position "X ".                                                  AnschluB    *  bei Kameras ohrre Synchronkontakt-Umschalter  ist     /4,                                             (#,t   )      das Blitzgerdt ohne weiteres aufnahmebereit.
Achtung!                                  \g/O Der Verriegelungshebel  fijr den Blitzger6t-Kontakt-        Synch ron kabel   -
   schuh muB unbedingt in Position "Lock" (Verriege-       Ende  f ur die
   lung) stehen, andernfalls arbeitet das Blitzger6t nicht.
   Der Hebel fungiert als zusbtzlicher Hauptschalter.                         KameraAnschlug   Synchronkabelso  Verwenden Sie nur ein Synchronkabel der Marke                                                                          ( X-Kabel kontakr   )
   National an diesem Gerdt. Synchronkabel anderer
   Fabrikate konnten das Blitzgerdt beschddigen.
                               -20-
View original page 24Page 26 · Read text
www.butkus.us
             I   Blitztest (Ausleuchtkontrolle  bei Automatik-Betriebl
          1. Den Verriegelungshebel  f iir den Kontaktschuh  auf
               Position "Lock" stellen.
         2. Den Haupt-schalter einschalten. Das Blitzgerdt  ein_
               schalten (Hauptschalter auf Position ,,ON,,
         3. Uberprtifen Sie, ob die Blitzbereitschaftsanzeige  auf-
                 leuchtet.
         4. Den Blitzausloseknopf  drijcken.
         5. Nach beendeter Aufnahme den Haptschalter auf posi_
               tion Off stellen.
     O Erhiite  Sicherheit und Batterieschonung dank
              doppelter Hauptschaltung.
I         Der Stromkreis wird automatisch unterbrochen,
           wenn Sie das Blitzgerdt am Kontaktschuh entriegeln.
            Dadurch wird auch dann vollstiindige Batterieschon-
            ung gewdhrleistet, wenn vergessen wird, den Haupt-
                schalter auf die Position ,,OFF., zu stellen.
       o  Ausschalten der Blitzfunktion
          Es ist mciglich Tageslichtaufnahmen ohen Blitz zu
            machen, ohne da8 dazu das Blitzlichtgerdt von der
           Kamera abgenommen werden muB. Umstellen des
              Hauptschalters auf Position,'OFF, genilgt.
View original page 26Page 27 · Read text
r  Gebrauch des Weitwinkel-Diffusors

Der Blitzwinkel kann durch den Gebrauch des im
Reflektorkopf eingefugten \Aleitwinkel-Diffusors  (W-1)      Anbringen des Weitwinkel-
erweitert werden. Die Leitzahl 6ndert sich dann entspre-       Diffusors
chend dem erweiterten Blitzwinkel. Der Gebrauch richtet      Fassen Sie den Weitwinkelvorsatz
sich nach der Brennweite des benutzten Objektivs.          an den geriffelten Seiten (links
                                             und rechts), ziehen Sie ihn vom
     Ref lektor                                            Leitzah    I                Ref lektorkopf ab  (1)  und
        des            Leuchtwinkel      ASAl OO/    ASA 4OO/        schieben Sie den Vorsatz uber die
    B  I itzgeretes                         21 DIN      27 DIN          Ref lektorf rontscheibe l2l. Nach
    Mit                identisch mit                      Gebrauch  verfahren   Sie
                 28mm-Oblektiv    Weitwinkel-                                   20        40          umgekehrt.                         {vertikal 54"      Dif  f usor
     (w-1)             horizontal 70")
                                 mit                       indentisch    Ohne                                                                        {rrrr:}  O                   35mm-Obl^ektiv    Weitwinkel-                                  2A         56                         (vertikal 45"    D iffu so r
     (N)               horizontal 60"  )
o  Filmformat und Bitzbeleuchtungswinkel
  Reflektor     Mit Weitwinkel-Dif     f usor   Ohne Weitwinkel-Dif     f usor ,                         (w-1)                          (N)
 tt--;J
             Leuchtwinkel identisch mit  Leuchtwinkel identisch mi1
   35mm       Bl idwinkel 28mm-Obiektiv   Bildwinkel 35mm-Obiektiv
             Leuchtwinkel identisch mit  Leuchtwinkel identisch mit
 6x4,5cm   Bildwinkel 45mm-Obiektiv    Bi ldwinkel 55mm-Obiektiv
             Leuchtwinkel identisch mit  Leuchtwinkel identisch mit
 6x6  cm   Bildwi nkel 60mm-Objektiv   Bildwinkel SOmm-Obiektiv
             Leuchtwinkel identisch mit  Leuchtwinkel identisch mit
 6x7  cm   Eildwi nkel 60mm-Objekt  iv  Bildwinkel 80mm-Objektiv
View original page 27Page 28 · Read text
www.butkus.us
 r  Blende und Entfernung ftir automatischen Betrieb

 Bei diesem Blitzgeriit sind bei automatischem  Betrieb zwei
 Bfenden-Einstellungen moglich: Bei ASA 1OOl21 DIN-      Einstell-Beispiel  fiir Auf nahme
 Filmen Blende 2,8 (Orange-Position) und Blende 5.6 (Griin-      eines Objektes in 1.2 Metern
 Position). Der automatische Arbeitsbereich ist zweifach      E ntfernu ng.
 w6hlbar. durch farbige Markierungen  angezeigt. Wenn der     Filmempf indlichkeit
 Betriebsarten-Wahlschalter auf Position Orange steht, ist    ASA 1OO/DIN 21
 der Bereich ungefdhr 1,5 bis 10 m, angezeigt durch eine    Objektivf=28mm
orange farbene Kurve. Die Markierungen  bei den farbigen
 Kurven zeigen die Maximalentfernung beim Gebrauch des
Weitwinkel-Diffusors an. Der Bereich rechts von der
Markierung bezeichnet den Arbeitsbereich.  (Siehe die
Tabelle  f ijr den automatischen Arbeitsbereich).
1. Drehen Sie den inneren Ring des Kalkulatos mit seiner                                              F ilmempf ind lichkeit   Entfernungsskala und den Buchstaben-Code auf die                          ASA 1OO   Position "N" (auf W. wenn der Weitwinkwl-Diffusor
   benutzt wird) im Anzeigefenster.
2. Drehen Sie den duBeren Ring, zur Einstellung der
    Filmempfindlichkeit  (ASA) auf N.
3.  Stellen Sie den Betriebsarten-Wiihlschalter (Manuell/                                           De. effektive Auf-
  AUTO) auf die orange oder griine Markierung  ein.                                                  nahmebereich  wird
4.  Stellen Sie die Blende bn der Kamera ein. welche der                                        durchM ar k ierudienggriine
                                                                                                                                            angezeigt          "Automatisch   Tabelle                         nutzbare Entfernung"                                                    in Ubere-                                                                                                                                                   lO.7 m - 4.2mI                                    (ASA)   instimmung                                              und              mit der Filmempfindlichkeit
  der  Einstellung des  Eetriebsarten-Wdhlschalters
  entnommen werden kann. Solange sich das Aufnahme-
   objekt innerhalb des gewiihlten Arbeitsbereiches
   befindet, konnen nun korrekt belichtete Aufnahmen
  gemacht werden, ohne daB die Blendeneinstellung
   gedndert werden muB.
                                  -24-
View original page 28Page 29 · Read text
Arbeitsbereich bei Automatikbetrieb

 Position des            Filmempfind  lichkeit       Ohne Weitwinkel-      Mit weitwinkel
 Betriebsarten   -       ASAl OO      AS44OO               Dif fusor                  Dif  f usor
 W6hlschalters         (DrN21)         (DrN27)               (Nl                  (w)
    Orange             F2,8            F5.6           ca. 1 ,5- 10 m         ca. 1 -7.1 m
    Grtin               F5.6            F11            ca. 0.7-5 m            ca. O,7- 3.5 m
Der automatische Arbeitsbereich  verdndert sich nicht mit der Filmempfindlichkeit  (ASA).
Sie mtissen nur die Blendeneinstellung verdndern.


 Max imale Auf nahmerd istanz bei
 Gebrauch des Weitwinkel Diffusors
                                                 M inimale Aufnahmedistanz
                                                                   bei automatischem  Betreib


                                                   Max imale Aufhahmed istanz
                                                  ohne Weitwinkel Diffusor
View original page 29Related documents and language editions
From the M. Butkus archive. Original publisher and archive notices are retained.
Check the model and edition against your equipment.
PDF verified 2026-10-10.