Film cameras
Olympus OM 77AF User manual
User manual for Olympus OM 77AF. 83 pages in English. Read the original PDF, download or print a copy without registration.
83 pagesEnglish6.3 MB PDF
Loading your manual…Open PDF directly
Document details
- Brand
- Olympus
- Model / document
- Olympus OM 77AF
- Document type
- User manual
- Language
- English
- Pages
- 83
- File size
- 6.3 MB
- Category
- Film cameras
- Document date
- Not specified in catalog
Search available document text
Find a term, then jump to its page in the original PDF. Image-only pages may not be searchable; check the PDF for exact wording and diagrams.
Page 3 · Read text
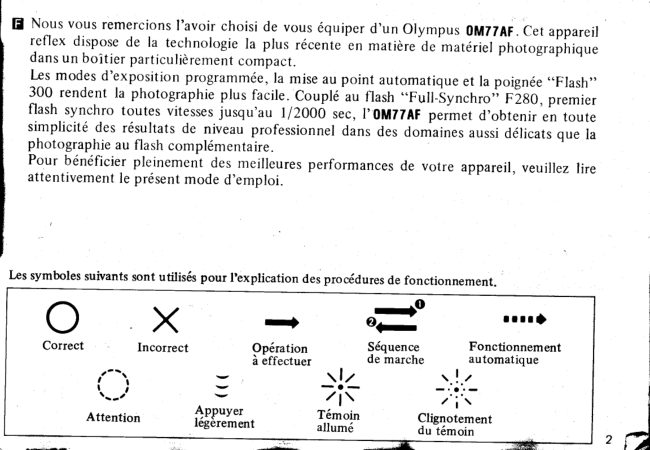
E Thank you for purchasingthe Olympus 0M77AF.The 0M77AFis a fully automaticSLR
        camerawhich incorporatesthe very latestin photographictechnologyin an incredibly
         compact form. Autofocus, programmedexposuremodes and an optional Power Flash
          Grip 300 all facilitateproblem-freephotography.In addition,connectedto a Full-
         Synchro Flash F280, the world's first flash unit capableof synchronizingwith any
           shutterspeedup to 1/2000 sec..the 0M77At offers the user a simple,error-freemethod
           of attainingprofessional-levelresultsin areassucha fill-inflashphotography.
         Beforeusingthe camera,pleasestudy this instructionmanualcarefullywith the 0M77AF
             in front of you, so that you can get the very bestperformanceand servicelife from your
        new camera.


         The following symbols are used during explanation of operating procedures.

                                                              -                                                 r r r r f         X                                                 Operation                             Autdmatic                                                                   I ncorrect
                                                                                               operation
                                                                                      r. !.,
                                                                            , t                                                                                                                                                                - . 4 . -
                                                                            t ,                                                                              / ' ;  .
                            Attention        Press lightly        Lamp on        Lamn blinking
                               www.orphancameras.com
\
View original page 3Page 5 · Read text
ornTThr
                       Preparationsbefore Taking Pictures
                       Pr6paration aux prisesde vues
                      Preparacionespara fotograf iar
                       Vorbereitungen zum Fotografieren


t- q                            www.orphancameras.com
View original page 5Page 6 · Read text
coloeaci6nde pilas on le Ernpufrdura de Alimdntmi,6;1y.,Ftash3o0    ,
Einstzen der Batterien in den Satteriegriff S0Omit eingebaummniiti


                                  Remove the battery cover on the bottom  of the
                                                    gflp.
                                                Retirer   le  couvercle  des  piles  situ6  sous  la         IEpoign6e.
                                         Ouite la tapa de las pilas en la parte infer.iorde la                                    tr                                  empu fradura.
                  G Die Batteriefachabdeckung von der Unterseite des
                                                      Griffs abnehmen.


                                                                                1 0
View original page 6Page 8 · Read text
E   fo  replace the grip, align with the indicarors C


   Note: slidethe power switch oFF when loading batteriesor replacingthe grip.trE Remarque: Pousser llnterrupteur  d'alimentatioir rui-orFloui    mettie reJpiies en place ou d6monter
tr Nota: Deslicela poign6e.el conmutadorde alimentaci6n haciaoFF cuando coloque pilas o cambie la empuffadura.G Hinweis:  Bei Laden der Batterien oder Austausch des Griffs aenpinTe"r-S"ir"rt*    auf oFF  stellen.


                                                                                      1 2
View original page 8Page 9 · Read text
Remove the battery cover on the bottom  of the
               gnp.
                   Retirer   le  couvercle  des  piles  situd sous l^  IEpoign6e.
                            la tapa de las pilas en la parte inferiorde la            tr Ouite
               empuffadura.
      G Die Batteriefachabdeckung von der Unterseite des
                    Griffs abnehmen.


                  Insert the batteries in the correct directions and            tr                replacethe cover.
       E  Introduire  les piles dans les bonnes directions et
                 remettre le couvercle.
                 Inserte las pilas en las posicionescorrectasy vuelva            tr                a colocar la tapa"
         GI Die  Batterien  seiten- und  polrichtig  einlegen und
                   die Batteriefachabdeckung wieder aufsetzen.
              tr 4 LRO3 (AAA) batteries
                     Etr 44 pilespilas LR03LRO3 (AAA)(AAA)
        G 4 LR03 (AAA)  Batterien
www.orphancameras.com
View original page 9Page 11 · Read text
Mountingan AF Lens
     Montaged'un objectif AF
     Monaje del objetivoAF
      Ansetzender AF{bjektive


   To mount  an OM  lens, refer to page 43.
                                              page                                         reporter                                                             43,                                       A la                                  se
                                              pAgina                                       refi6rassEg  PourPara montarmonter unun objetivoobjectif  OM,OM,                                             a la                                                            43.
G Zum  Anbringen   des AF-Objektivs   siehe Seite  41.


               rtr   Remove the rear lens cap and the body cap.
                            Retirer  le bouchon  arridre dc  I'ob.yectif et  le
                       bouchon du boitier.                            lEr;]Lal Ouite la tapa posterior del objetivo y  ia tapa del
                        cuerpo de la c5mara.
                 GI Die hintere Objektivkappe und die Gehdusekappe
                       abnehmen.


       www.orphancameras.com
View original page 11Page 12 · Read text
Align the red dots and slowly rotate the lens until tr

E

 tr


E Remove the front lens cap.
 [f  Retirer le bouchon avant de I'objectif.
 lSl Retire la tapa f rontal del objetivo.
@ Die vordere Objektivkappe entfernen.

E Removing the [ens:
   Press the  lens release button and turn the lens
   cou nterclockwise.
ll  D6montage de I'objectif:
   Ap-p-uyer- sur   le  bouton  de  d6verrouillage  de
    I'objectif  et tourner  I'objectif dans le sens i-nverse
_  des aiguillesd'une montre.
lgj Extracci6n del objetivo:
   Presione  el bot6n  para  soltar  el objetivo   y  girelo
   hacia la izquierda.
G Abnehmen des Obiektivs:  Den Objektiv-Entfiegelungsknopfdriicken und das
   Objektivgegenden Uhrzeigersinhdrehen.        16
View original page 12Page 13 · Read text
svIThF

   H

   E


   H

   E Mit demAutorocus-sys,.*                            I",  irrrn, beher$chensiedie         faszinierendeWelt der Spiegelreflexfotografie"ottPr*#31lf"".}H-?dureh einen Druck auf dst Au$ser:  Perfekto
       Aufnahmen bei einfachsterHandhabung.

1 7                          www.orphancameras.com
View original page 13Page 15 · Read text
Make sure film is DX type.
                                    S'assurerque le film est de type DX.
                                Cerci6neseque la pel.icula sea del tipo DX.
                                   Darauf achten, dafJ es sich um einen Film mit DX-       IEG                                 Kodierune handelt.


                              To open the back, press the locking button and\ o - - f                          tr
                                               sl ide the releaseknob.
                 E Pour ouvrir le dos, appuyer sur le verrou de ferme-
                                       ture et pousser la commande de I'ouverture du dos.
                E Para abrir la tapa posterior de la c5mara,presioneel
                                 bot6n de seguroy deslicela perilla de desbloqueo.
              G Zum Offnen der Kamerariickwand den Sicherunss-
                                    knopf  driicken und den Riickwand-Entriegelun"gs-
                                   knopf in die Freigabeposition schieben.
             www.orphancameras.com
View original page 15Page 16 · Read text
Avoiding direct sunlig,ht,insert the film cartridge.
    Introduire le film en 6vitant d'6tre en plein soleil.
    Evitando la luz solar directa, inserteel cartucho de  trEtr     la pelicula.
G Die  Filmpatrone   beim  Einlegen  vor   direkter
    Sonneneinstrahlu ng schiitzen.

  lE l Ta ke ca re n ot to touch the shutter cur tain with
      yo u r  f in g e r or the  f ilm leader .
  B   Eviter de toucher au rideau de I'obturateur  avec
  _   les doigts ou avec I'amorce du film.
    ffl  Tenga  cuidado  de  no  tocar  con  los dedos  la
  a   co rtin a d e l obtur ador o la guia de la pelicula.
  19  Dabei   weder   Verschlu0vorhans    noch   Film-
       fiihrung  mit den Fingern  beriihrei.


@ Align the film leader with the mark and gear the
_  sprocket teeth to the film perforations.
 ll  Aligner I'amorce du film avec la marque et engager
_  les crantagesdans les perforations du film.
lSl Alinee la guia de la pelicula con la marca y engrane
    los dientes de  la rueda dentada con las perfora-
   cionesde la pelicula.
Gl Oen Filmanfang  an die rote  Markierung  anlegen
   und  die Perforationen im Film  auf die Zahnrolle
   auflegen.


   Close the camera back and . . . .
   Refermer le dos de I'appareil et . . . .
   Cierre la tapa posterior de la c6mara y  . . .trEsGNDie Riickwand schliefien und  . . . .
                                       20                                                                               ,]
View original page 16Page 17 · Read text
The  film  is automatically wound on  until the exposure counter                     tr                         reads1.
            E  Le film  est automatiquement enroul6 jusqu'd la premidre vue indi-
                         qu6e sur le compteur d'images.
                         La pelicula se bobina automSticamente hasta que el contador de                     tr                          exposicionesindique 1 .
           G Der Film  wird  automatisch  vorgespult, bis eine "1-" auf dem Bild-
                            zdhlwerk erscheint.


                                                                 -       +


  When the f ilm is incorrectly loaded, O  Utints. Reload the film.
    Si le film n'est pas correctement charge, Q  clignote. Recharger le film.
   Cuando se car,giincorrectamentela pel icula, O  destella.Vuelva a colocar la pelicula.
                                             -Anzeige. Den Film erneut einlelen.trEEG Bei falsch eingelegtem Film blinkt  die Q

                     @  Film  type  confirmation  is possible through the
                                     window in the camera back.
                                 E   I-u confirmation  du type de film  utilis6 est possible
                                                                                                           i  travers la fendtre  d'identification   sur le dos de
                                                   I'appareil.
                                 E  es posible confirmar el tipo de pelicula a travds de
                                                      la ventanilla de la tapa posterior de la c5mara.
                            G  Der Filmtyp  kann jederzeit durch das Sichtfenster
                                                         in der Kamerariickwand eingesehen werden.

                    www.orphancameras.com
View original page 17Page 18 · Read text
Press the shutter release halfway  to activate the
        viewfinder display.
        Appuygl                 ^l6gdrement  sur  le  d6clencheur pourIEactiver I'affichage du viseur.
   E pO,lima ligeraminte et diiparador para activar la
        indicacionesdel visor.
  G Den  Auslciser  leicht  beri.ihren, um  die  Sucher-
         anzeige zu aktivieren.

       E (Tne d isplaycontinuesfor 30 sec.)
                 ll  (L'affichage dure 3O secondes.)
       LU (Se presentan durante 30 seq.)
                tl  (Die Anzeige erscheint 30 S6kunden lang.)


       Frame your subject.
       Cadrer le suiet.
       E ncrradre el-objeto fotograf iado.
       Den Bildau sschnitt wiihlin.2EGI
         Do not touch  the  f ront-most  part of the  lens.
        Ne pas toucher  d I'extr6mit6  avant de I'objectif.
         No_to.que la parte delantera del objetivo.
          Dabei  die Objektvtiffnung    nicht  verdecken.
                                            2 2 t
View original page 18Page 20 · Read text
Th e -f ilm  is a u tom atically advanced one  f r am e.
    Le film  est automatiquement    avanci dLne  vue.
    La pelicula avanza automaticamente  un cuaOro.trEtrG Der Film wird automatisch um ei;  nitA weiter-   transportiert.


                                          24
View original page 20Page 21 · Read text
E   tn poor light conditions, the autofocus illuminator  is autonntically activated to determine the correct
       distance. However, there are some casesdepending on the type of lenses used in which  it cannot be
      -   used. Even in these conditions the subject distance can be determined when using the F280.
        lil  Dans des conditions de faible  lclahage,l'illuminateur   autofocus entre automatlquement  en fonction
       pour.d6terminer  la bonne distance. Cependant,  il existe certains cas en fonctioh du type d'objectif
         utilise dans lesquels I'illuminateur autofocus ne peut pas 6tre utilis6. Mdme dans ces cbnditions, la
   _   distance du sujet peut 6tre utilis6e en utilisant le F280.
    l9J Cuando las condiciones de iluminaci6n son insuficientes,se activa automdticamente el iluminador de
      enfoque automdtico para determinar la distancia correcta. Sin embargo, existen algunos casos,seg0n
         el tipo de objetivos utilizado, en los cuales no puede utilizarse este iluminador. Aun en estas condi-
   _  ciones la distanciaal objeto puede determinarsecuando se usa el F28O.
    [9  Bei schwachen Lichtbedinggngen  wird  der Me8blitz automatisch zur Entfernungsmessung ausgelcist.
        In einigen_(e_nach verwendetem  Objektiv)  Feillen kann der Mefiblitz jedoch  nicht eingesEtzt werde.
      Jedoch ist bei Verwendung des F280 Entfernungsmessung m<iglich.

      p  When battery power falls below 50yo,  fl  Utintcsafter each shot,and charge time  is increased
        when using the Power Flash Grip 3O0; therefore, changilg the batteries is recommended.
            I  Quand l'6nergie des piles tombe en dessous d,e 50%,fr   cfignote aprds chaque prise de vue et
             la dur6e de charge est augmeint6e en utilisant la poign6e-"Flash"  300; par coni6quent,  le change-
         ment des piles est recommandd.
     S  Cuando la carga de las pilas disminuye por debajo del 50 %,  fl parpadea despu6s de cada
         disparo y  el tiempo de carga aumenta cuando se utiliza la Empufiadura de Atimentaci6n y
         Flash 300; por lo tanto, se recomiendael cambio de pilas.
    G  gei  einer Batterieleistung unter 50 % blinkt  Anzeige   l]l nach jeder  Ausliisung und bei Ver-
        wendung von  Batteriegriff  300  mit  eingebautem  Blitz- erh<iht sich die I-adedauer. Batterie-
         wechsel wird empfohlen.


25                           www.orphancameras.com
                                                                                                                              :   *    :,  _.   ,.,:1i.
View original page 21Page 22 · Read text
E  Confirm that you have reachedthe end of the film.I
       rour.conllrmer que vous avez atteint la fin du film.  I  _E
 I   lg uonttrme que se haya terminado la pel icula.
     8l Sicherstellen,dafJ das Filmende erreicht ist.

                 118-rel
            4ql                                            fl@ RR bclignote.l i n k s .
                 I                  Gp DestellaR blinkt. R.
                                              l - l
                                     t t :

     lll  While sliding locking knob @,  press the rewind
      button O  -
     I   Pousser-ie bouton  de d6brayage C  tout en appu-
   _      yant sur la touche de rebobinage @ .
   lS Mientras desliza la perilla del sEguio @, presioneel
   _  boton de rebobinado @.
 @ Den Rticksp.u.lsicherun-gsknopfO  in die Freigabe-
       position  schieben und  deh  Riickspulknopf @       driicken.
                                             26
View original page 22Page 23 · Read text
E  On co mp le tio n  o f re win d , the shutter  is r eleased, Q     f lashesand the
                   fra me co u n te r re a d s "O".
           E   a  la fin du rebobinage,  le d6clencheur  est rel6ch6,Qs'allume    et  le
             _   compteur  de vues indique  "0".
                 l$j  Al  finalizar  el rebobinado,  se libera  el disparador,  destella O   y  et
             _   contador de fotogramas  indica "O".
         G   4-   Ende  des Rii-ckspulvorgangs   wird  der Verschlufi   freigegeben,   die
               Q-Anzeige    blinkt  und das BildZahtwerk   zeigt "O".


                              Ei Open the camera back and remove the film.
                                                             ll   Ouvrir le dos de I'appareil et  retirer le film.
                           p  Abra  la tapa posterior de  la c5mara y  retire la
                                 pel icu la.
               @  Die Kamerartickwand  <iffnen und den Film  ent-
                           nehmen.


F   T h e  f i lm  is co mp le te ly  re wo u n d  in to th e car tr idge.
   Le film  est compldtement  rentre dans sa cartouche.lllEtr La pel icula est6 completamente  rebobinada en el cartucho.
G  Der Film  ist vollstiindig   in der Patrone  aufgewickelt.
            www.orphancameras.com
View original page 23Page 24 · Read text
ar7hF
                            Photographs                       Taking                                                                                  f l
  lTFIr     I With a Continuous AF mode, and                                     a Program                                                       Shift that lets                                                        you choose at any time to shift
    within the program in an aperture or shutter-preferredmanner, the 0M7?AF provides for the
    expressionof every photographic idea.
                             Prisede vuesII
E    t u mi.se au  point AF  continue  et  le d6calage de programme permettent au photographe
    d'exprimer totalement son idde photographique.
                  Toma de fotografiasll
E  Con un modo de enfoque automdtico continuo y-un Cambio de Programa que le permite en
   cualquier momento cambiar dentro del programa la abertura o velocidad de obturaci6n, la
   0M77AFproporcionala expresionde cada idea fotogrdfica.
G Durchcliewahlmoglichkeit'.'13f,1*ffit:fffhff[?il,rll-e.ri*u    und derF'lexibilitdt<ies
   Programm-Shifts mit beliebigem Zugriff  auf Zeit- und Blendenautomatik erlaubt die 0M77Af
    die Realisierung aller fotografischen Einf;ille und Vorstellungen.

                                                                               28
View original page 24Page 25 · Read text
E  Press the  DRIVE  button  to  enter  thsrcrnTt
             mode.
              Pressthe shutter release.
                       fl  Appuyer sur la touche DRIVE  pour entrer dans le
             meds   rc.ffiil.
              Appuyer sur le ddclencheur.
          S  Presioneel boton DRIVE para establecerel modo
                             l.r.Tlr|   .
               Presioneel disparador.
       @ Den Filmtransportknopf (DRIVE) driicken, um auf
               Serienaufnahmen ( r.rrlfr  ) umzu schalten.
             Den Auslclser driicken.

www.orphancameras.com
View original page 25Page 26 · Read text
Usingthe Fower Focus             Usodel enfoquemotoriaado
Utiliiation OeIa mise au point manuelle  ManuellesScharfstellenmit


                                          Press the AF/PF  selection button  to  enter the
                                           "PF" modg.
                                         Appuyer  sur la touche AF/PF pour entrer dans le         IEmode "PF".
                                                                   el bot6n AF/PF para establecerel modo                                      tr Presione,'PF".
                   G Die  AF/PF  -Taste  driicken. um  auf  manuellen
                                                  Betrieb (POWE R-F OCUS) umzu schalten.

                                      tr
                                                  EtrCN
                                     G r e e n L E D    i n  t h e v i e w f i n d e r b l i n k s d u r i n g p o w e r -                                      tr
                      E  focuLa diodesi ng. LED  verte da-ns le viseur clignote pendant
                                                          El LED  verde del visor destella durante  el enfooue                                      tr  la mise au point  manuelle.
                   G Diemotorizado.griine  LED  im  Sucher   blinkt   solange,  wie  der
                                                     Motorfocus    aktiviert    ist.                         30
View original page 26Page 27 · Read text
@ Wn e n th e kn o b  is sh ifted to the  r ight, the lensfocuseson  closer
                                            subjects- When  shifted  to  the  left,  the  lens focuses on  farther
                                          su bi ects.
                                 E   Bt  poussant  le curseur vers la droite,  la distance de mise au point
                                          se rapproche  du minimum.  En poussant  le curseur vers la gauche,
                                        _    la mise au point  se dirige vers I'infini.
                                                     l9l Cuando  se desplaza la perilla hacia la derecha, el objetivo enfoca
                                                los objetos m6s cercanos. Cuando  se desplaza hacia la izquierda,
                                                                  -    el objetivo  enfoca  los objetos m5s lejanos.
                            G   Wira'der   Knopf  nach  rechts  geschoben,  wird  das Objektiv   auf
                                                      kiirzere  Entfernung    einsestellt.   Durch  Verschieben   des Knopfes
                                         nach  links  wird  das Objdktiv   auf gr<i$ere Entfernung    eingestellt.


  E  e e s u r e n o t t o p r e s s t h e l e n s t o c k i n g b u t t o n @ w h i l e u s i n g t h e p o w e r f o c u s a s t h i s w i l l p u t t h e
     Grmera into autofocus mde.
     fl   S'assurer de ne pas appuyer sur le bouton de verrouillage d'objectif O  en utilisant  la mise au
  _  point assist6esinon I'appareil sera mis en mode autofocus.
  $  Tenga cuidado de no presionar el bot6n de seguro del objetivo @ mientras utiliza el enfoque
     motorizado va oue esto colocaria la cSmaraen el modo de enfooue autom5tico.
 @ Bei Verwendung des Motorfocus  nicht Objektiv-Verriegelungsknopf @ driicken, da hierdurch
      die Kamera auf Autofocus  geschaltet wird.


31                        www.orphancameras.com
View original page 27Related documents and language editions
From the M. Butkus archive. Original publisher and archive notices are retained.
Check the model and edition against your equipment.
PDF verified 2026-10-10.