Film cameras
Olympus OM2000 User manual
User manual for Olympus OM2000. 36 pages in French. Read the original PDF, download or print a copy without registration.
36 pagesFrench2.9 MB PDF
Loading your manual…Open PDF directly
Document details
- Brand
- Olympus
- Model / document
- Olympus OM2000
- Document type
- User manual
- Language
- French
- Pages
- 36
- File size
- 2.9 MB
- Category
- Film cameras
- Document date
- Not specified in catalog
Search available document text
Find a term, then jump to its page in the original PDF. Image-only pages may not be searchable; check the PDF for exact wording and diagrams.
Page 4 · Read text
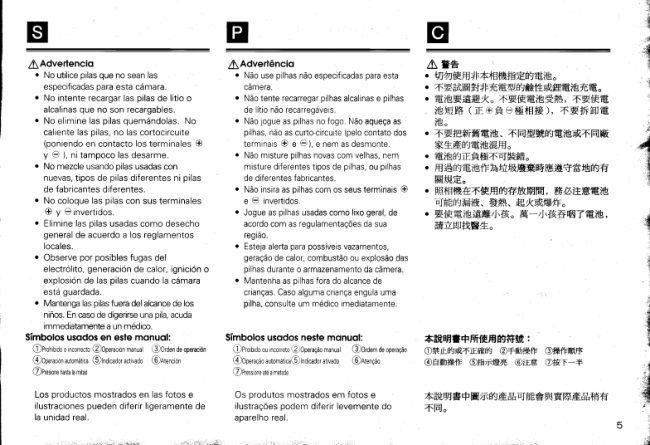
A worning                                                   I  Avertissement
                                             o Do not use batteries not specified for                   . Ne pas utiliserdes piles non specifiees
                                                     this camera.                               pour cet appareil.
                                             o Do not try to rechargenon-rechargeable           . Ne pas essayerde rechargerdes piles
                                                alkalineand lithiumbatteries.                  alcalinesou lithiumnon rechargeables.
                                                                                         . Do not dispose of batteriesin a f ire. Do         o Ne pas jeter les piles au feu, ne pas les
                                                 not heat batteries,short-circuitthem (by         chauffer,ne pas les court-circuiter(en
                                              contacting@ and Q terminals),or                reliantles bornes O et Q  ni les
                                         disassemblethem.                         demonter.
                                             o Do not mix new and old batteries,            o Ne pas melangerdes piles neuves avec
                                                        different Vpes of batteries,or batteries          des piles usagees,differentstypes de
                                                                                             f rom different manufacturers.                      piles,ni des piles de differentesmarques.
                                                                                         . Do not load the batterieswith their @ and            . Ne pas installerles piles avec leurs
                                 Q terminalsreversed.                         b o r n e s O e t Q i n v e r s 6 e s .
                                                                                         . Disposeof the used batteriesas general            .  Respecterla reglementationlocalerelative
                                          waste accordingto local regulations            a I'abandondes piles usag6es.
                                             o Be on the lookoutfor possrbleleakage,       o Surveillerles risquesde fuite, incendieou
                              o\\-/          (e                heat generation,ignition,or explosionof         explosionet proximite de source de
                                                                                                                      I'appareilest range.             oF                the batterieswhile the camera is stored.        chaleurlorsque                  -                                                         . Keep the batteriesout of the reach of                   . Conserver les piles hors de la portee des                   -ooo                                           children.lf a child swallows a battery,           enfants.Consulterimmediatementun
                                                                                                                                                                                                      /  -   \                                                                                                                                                                                      / n             \                  contact a doctor immediately.               m6decin si un enfant avaleune pile.
@                          tc,                                  \!,
 rrr)              :':              r'--'!t - - r t
                                           / l \I                       Symbols used in lhis monuol:               Symboles utilis6s dons ce monuel:
                                              OProhibitedorincorrect@Manualoperation@Operationorder     O)l nterditouincorrect@Fonctionnementmanuel@o,o',deloncronnemenl
v)/-\                                            G)Artoruticoperation[5)lndicatoron @Attention        @Fonrr,orlrlrrentautomalqtle@Temoinallume @Attention
                                                                        a1/  r^U E P T C S SN A I I W A V                                  @Appry.ra mi-course

                                          Productsshown in picturesand illustrations     Les produits montres dans les images et
                                   may differ slightlyf rom the actual unit.            illustrations peuvent legerement differer de
                                                                                                                                                                                                                 I ' a p p a r e i l r e e l .
View original page 4Page 9 · Read text
q                          LoodingtheBotteries     Miseen plocedespiles                                       tr                                 tr
                                           Use two LR44 alkalinebatteries or two SR44      UtiliserdeuxoilesalcalinesLR44ou deux
                                                         silver-oxidebatteries.                          pilesd I oxyded argentSR44.
                                                1 . Turn the battery compartment cover         1. Tournerlecouvercleducompartimentdespilesdans
                                                 counterclockwisewith a coin or similar           lesensinversedesaiguillesd'unemontreavecune
                                                         object.                                  piecedemonnaieouquelquechosedesimrlaire.
                                                           2. CPlace the batteriesone on top of the other    2. OPlacerles pilesI'unesur I'autredansle
                                                                   in the battery compartment cover as indicated     couvercledu compartimentdes piles
                                              on the side of the cover. @ Screw the       comme indiou6sur le c6t6 du couvercle.
                                                   cover into the compartment clockwise until     @Visserle couvercledansle compartiment
                                                                                             it is securely in place.                    dansle sensdes aiguillesd'unemontre
                                                    Note: Read "Battery Handling" on Page 52.      jusquir ce qu il soit bienen place.
                                                                         Remarque:Bienlire Manipulationdespiles
                                                                                            d la page52.
                          Checkingthe Botleries      Contr6ledes piles

                                          1. OPullthefilmadvanceleverslightly.(Whenthe    1. CTirerl6gerementsurle levierd'armement
                                                 leveris pushedinalltheway,theshutterrelease   (lorsquele levierestcompldtementpouss6,le
                                              buttoncannotbe pressed.)@ Whilelooking       d6clencheurne peutpasOtreenfonc6.)@Tout
                                             throughtheviewfinder,presstheshutterrelease   en regardantdansle viseur,appuyera mi-course
                                               buttonhalfway(pressgently).Theexposure       surle d6clencheur(appuyerl6gdrement).Le
                                                     levelwillbedisplayedin theviewfinder.         niveaud'expositionseraaffich6dansle viseur.
                                                           2.lf anvof the four LEDlamps( #  , O,  :    ,      2. Si l'undes quatret6moinsLED(+  , O,  :   2.                                        and o ) in the viewfinder(leftside)lights,      ou o ) dansle viseur(surle c6te gauche)
                                               thereis sufficientbatterypower.lf noneof      s'allume,c'estque I energiedes pilesest
                                       them lights,the batteriesare eitherloaded     suffisante.Si aucunt6moinne s'allume,              &                                                    ffiw#                           incorrectlyor the batterypower is low.          c'estque les pilesne sont pas misesen
                                                                                    placecorrectementou que l'6nergiedes
                                                                                               ,oilesest faible.
1 4                           www.orphancameras.com
View original page 9Page 11 · Read text
il                                  tr
                                                         5. Turn the f ilm rewind knob clockwise to         5.Tournerle boutonde rembobinagedu f ilm
                                                   take uo the film's slack.                  dansle sensdes aiguillesd'unemontre
                                                                                  pourrattraperle jeu du film.


                                                         6. Close the back cover.                        6. Refermerle dos.


                                                    7. Pressthe shutterreleasebuttonuntilthe      7. Appuyersur le d6clencheurjusqu'dce que
                                         exposurecounterreads"1". (Thefilm             le compteurde vues indique1".(Lebouton
                                             rewindknob rotateswhen the film           de rembobinagedu film tournelorsquele
                                        advancescorrectly.)                          film avancecorrectement.)
                                             Note:Keepthe film advanceleverpulled      Remaroue:Maintenirle levierd'armement
                                                           slightlywhen pressingthe shutter               l6gerementti16en appuyantsur
                                                  releasebutton.When it is oushedin                   le d6clencheur.Lorsquil est
                                                                     all the way, the shutterlocks.                  compldtementpouss6,
                                                                                                       l'obturateurest verrouill6.

            ilr). <j;:?i-l?ir.

1 8                           www.orphancameras.com
View original page 11Page 13 · Read text
fo"rsing on the Subiect      rvriseou pointsurle suiel                                              f,                                            fl

                                               While lookingthrough the viewf inder,turn      Tout en regardantdans le viseur,tourner la
                                                    the focus ring of the lens to focus on the       bague de mise au point de l'objectifpour
                                                   subject                                           faire la mise au point sur le sujet


                                                                                                     . When using the split imoge spot:                        . En utilisont le sligmometre:
                                                Turn the focus ring untilthe horizontally        Tournerlabaguede miseaupointjusqu'ace que
                                                                 split imagein the centerof the viewfinder          lespartiesde I imagecoup6ehorizontalementau
                                                                     is broughtinto alignmentWhen out of            centredu viseurviennents alignerLorsquelamise
                                                      focus,the upperand lower halvesof the         aupointestincorrecte,lesmoitiessuperieureet
                                                               splitimagewill not be aligned.                   inferieurede I imagecoupeene sontpasalignees
                                                                                              lf the split image is shadowed,focus on            Si I imagecoup6eestdansI ombre,fairela miseau
                                                      the subjectusingthe mat surface                 pointsurle sujeten utilisantlasurfacemate,

                                                                                                     . Whenusinglhe microprismcolloror themotsurfoce:            . Enulilisontlo boguemicroprismeou lo surfocemote:
                                                     Adlustthefocusuntilthe imageviewedthrough         AjusterI objectifjusqua cequeI imagevuea traversle
                                                       themicroprismcollararoundthesplitimagespotor       microprrsmeautourdustigmometreoua traverslasurface
                                                    throughtheentirematsurfacelookssharp.When        mateentieresemblenetteLorsquelamiseaupointet
                                                       outof focus,the imagelooksroughthroughthe            incorrecte,I imageapparaitcommegrossierea traversle
                                                  microprismcollaror blurrythroughthematsurface      microorsmeouflouea traverslasurfacemate
                                                  Note: lf youarenearsightedor farsighted,usethe       Remarque:Sivousetesmyopeoupresbyte,utiliserlalentille
                                                           optionalDioptricCorrectionLens2 (+2- -5),             decorrectiondioptriqueenoption(+2a -5)


22                            www.orphancameras.com
View original page 13Page 17 · Read text
22 1611 8 s,63,51 3s-7omm           When Selecting the Apedure  Firsf          Avec prioilf6 d I'ouvedure
                                                    Select an F stop accordingto the shooting      S6lectionnerune ouvertureF en fonction
                                                  requirement.When the aperture is opened,    des exigencesde votreprisede vue.
                                                     the depth of field is reduced, and            Lorsquele diaphragmeest ouvert,la
                                                     everything other than the in-focus subject       profondeurde champest r6duite,et toute
                                                                   will appear blurred.When the aperture is      choseautreque le sujetmis au point
              x l          * 2         * 3          closed, the depth of field is increased,         apparaitrafloue.LorsqueI'ouvertureest
                                                  enablingthe entire field of view to look          reduite,la profondeurde champest
                  d      -F2     -F2.8     -F4          snaro.                               augment6e,permettantd avoirtout le
                                                  Refer to the table on the left for aoerture      chamode vue semblantnet.
                                                        setting guidelines.                    Se r6f6rerau tableausur la gauchepour      o    F2-5.6  F2.8-8  F4-11                                                                            * 1. Wide-angle                      des conseilssur le r6glagede I'ouverture.
           F5.6-    F8-    F r I -                ** 3.2. TelephotoStandard                                        *x 2.1. Grand-angleStandard
                                                            a. To blur objects other than the subject           {<3. Teleobjectif                                                                  ,                                                            b. For ordinaryshooting                        a. Pourrendreflousdes objetsautresque
                                                                c. To focus on the entire field of view.              le sujetprincipal
                                             Note:The depth of field and blurrinessvary         b. Pourla prisede vue ordinaire
                                                 depending on the focal length of the          c. Pourla mise au pointsur tout le champ                I
                                                                                                    .    lens and the camera-to-subiect            de vue.                                                      distance.                        Remarque:La profondeurde champet le flou            iI
                                                                                                    varientavecla longueurfocalede
                                                                                                                  I'objectifet la distanceentre
                                                                                                        I'appareilet le sujet.


30                             www.orphancameras.com
View original page 17Page 18 · Read text
I '--n          a>                t".                       RewindingtheFilm       Rembobinogedu film                                   tr                                  tr =7=',ig*1 ffin$@
                                             1. Makesurethe film is allthe way to the end.   1. S'assurerquele filmest compldtementd lafin.
                                         Note:lf the film advanceleverwill no longer    Remarque:Sila commanded'avancedu film    @         ffi'o             move,the film hasreachedthe end.              ne peutplusavancer,c'estque
                                                                                                                 le film est arriv6a la fin.       6Q          ffi',1
                                              2. Pressthe film rewindbutton.                 2. Appuyersur le boutonde rembobinagedu film.

                                                         ll-------'l@l  O
 @     ^-@        l.
                                              3. Foldout the film rewindcrankandturn it       3. Sortir la manivellede rembobinagedu film      {-
                                        clockwiseuntilno resistanceis felt.               et la tourner dans le sens des aiguilles
                                                                                      d'une montre jusqu d ce qu'il n'y ait plus de                                                                                           16sistance.        1


                                              4. Lift up the film rewindknob.Openthe back   4. Releverle boutonde rembobinagedu film.
                                        coverand removethe film.                   Ouvrirle dos de I'appareilet retirerle film.
View original page 18Page 19 · Read text
UsingSpotMetering         Uillisotiondelo mesurespol                                         tr                                     tr

                                              By meteringthe availablelight on the subject,      En mesurantI'eclairagedisponiblesur le
                                                you can obtain correctexposureof the subject       sujet, vous pouvezobtenir une exposition
                                                       without being affected by the brightnessof the      correcte du sujet sans 6tre affecte par la
                                                 background.                                luminositede l'arriere-plan.
                                                                             'SPOT'.                                                 1 . Set the spot metering selectorto             1 Reglerle selecteurde mesurespot sur'SPOT.
                                                          2. Positionthe part of subject where you want    2 Placerla partie du sujet ou vous voulez
                                                           to measurethe light insidethe spot circle       mesurer I eclairagedans le cercle spot @
                            @ in the center of the frame                 dans le centre de I'imaqe


                                                         3. While lookingthrough the viewf inder,          3. Tout en regardantdans le viseur,appuyera
                                                 press the shutter release button halfway.       mi-coursesur le declencheur Le temoin
                                          The orange " o " LED lamp @ will light.       LED " o " orange@ s'allumera.


                                                   4.furn the aperturering or the shutter dial      4 Tourner la bague d'ouvertureou la molette
                                                             until the green lamp insidethe viewf inder      de vitesse d'obturationjusqu'a ce que le
                                                          lights Then press the shutter release          temoin vert dans le viseurs'allume.Puis,
                                                   button down all the way to take the            appuyercompletement sur le declencheur
                                                     prcture.                                   pour prendre la photo.


34                            www.orphancameras.com
View original page 19Page 22 · Read text
BulbExposure            Pouse                                         lJ

                                              The shutter is kept open as long as the          L'obturateurest laisseouvert aussi
                                                        shutter releasebutton is pressed Use the      longtemps que le declencheurest press6      .l,Iffi?       Bulb mode to shoot night scenes which          Utiliserle mode Pause pour prendredes
                                                         require extended exposure                  scenes de nuit qui necessitentune duree
                                                    Set " 8 " on the shutter speed dial at the         expositionprolongee.
                                                           indicator Press the shutter release button       Reglerla molette de vitesse d'exposition
                                                                to take the picture                            sur "B".Appuyersur le declencheurpour
                                                    Notes:                                    prendre la photo.
                                                        o Remove the batteriesfrom the camera    Rema rq ues:
                                              when using the Bulb mode for an                          . Retirerles piles de l'appareilen
                                                    extended period.Otherwise, light from            utilisantle mode Pause pendant une
                                                           the LED lamp insidethe viewf inder            longueduree.Sinon,la lumieredu
                                              may be exposed on the frame.                temoin LED dans le viseur peut etre
                                                        o When shooting in the Bulb mode, use         exposee sur la vue.
                                                          a tripod and cable release,or similar          o En prenanten mode Pause,utiliserun
                                                   equrpment                                  pied photographiqueet declencheur
                                                                                              soupleou du materielsimilaire.
D


   4U
View original page 22Page 24 · Read text
FloshPhotogrophy       Photogrophieou floshtr                                  tr

1 Mount a flash on the camera.                 1. Monterun flashsur l'appareil.
  Note: Onlv a flash with a hot shoe can be used.    Remarque:Uniquementun flashavecun
                                                 sabotd contactDeutOtreutilis6.


2. Setthe shutterdialat "125" (1/125sec.).     2. R6olerla molettede vitessed'obturation
  Note:Thef lashcan be usedat a shutter       sur""125"(11125sl.
      speedof 1/60sec.or slower.          Remarque:Leflashpeut 6tre utilis6d une                                                                              'l160     Rememberto watchout for camera-              vitessed obturationde     s
      shake.                                  ou pluslente.Maisfaire
                                                       attentionau risquede bougede
                                                                                                    I appareil.


3. Selectthe aperturesuitablefor the mounted   3. 56lectionnerl'ouvertureconvenableavecre
   f lash.                                      flashmont6.
  Note:Referto the flash'sinstruction         Remarque:Ser6f6rerau moded'emploidu
      manualfor informationon selecting                flashpourdes informationssur
       the aperture.                                         la s6lectionde I'ouverture.


4. Makesurethe flash'schargelamplights.     4. S'assurerque le t6moinde chargedu flash
  Thenpressthe shutterreleasebuttonto         s'allume.
  takethe oicture.                          Puisappuyersur le d6clencheurpourprendre
                                                      la ohoto.


                                                                                                                     I4
                                                                                                                       ls
View original page 24Page 26 · Read text
Depthof Field            Profondeurde chomp                                       tr                                    tr

                                       Whena certainpointisfocusedon,thereisa rangein        Lorsquelamiseaupointestfaited unecertainedistance,
                                                            frontof andbehindthatpointwheresharpfocuscanbe               il existeunezonedenettetedepartet d autredusulet
                                                   obtainedThisrangeiscalleddepthof field               Cetteplageestappel6elaprofondeurdechamp,
                                             Thedepthchangesasfollows                      Laprofondeurdechampchangecommesuit.
                                                   1 Themorestoppeddowntheaperture,thegreaterthe      1 Plus I'ouvertureest fermee, plus la
                                                    depthof field                                 profondeurde champ est grande
                                                              2. Ihe shorterthefocallength,thegreaterthedepthoffield     2 Plus la longueurfocale est courte, plus la
                                                             3. Depthof fieldis smallerinfrontof thesubjectand          profondeurde champ est grande.
                                                        greaterbehindthesubject,                      3 La profondeurde champest pluspetite
                                                             4. Depthof fieldis greaterwhenthesublectisfaraway        devantle sujetet plusgrandederrierele sujet,
                                               andsmallerwhenit isnear,                           4. Laprofondeurde champestplusgrandequandle
                                             Theactualeffectof aperturesettingcanbeconfirmedin         suletest6loign6et pluspetitequandil estproche
                                                      theviewfinderwhentheoreviewbuttononthelensrs        L effetreeldureglagedeI ouverturepeut6treconfirm6dans
                                                 presse0                                                leviseurlorsqueleboutondeprevuesurI objectifestpresse
                             Preview Button             Bouton de pr6vue

                                                Press the preview button on your lens The     Appuyer sur le bouton de prevue sur votre
                                                    lens diaphragmwill stop down to the             objectif. Le diaphragmede l'objectifse
                                                  selected F stop This will allow you to see       fermera sur la positionF selectionnee.Ce
                                                    the depth of field in the viewf inder              qui vous permettrade voir la profondeurde
                                           The viewf inder will get dark when the         champ dans le viseur
                                                   aperture is stopped down to the selected       Le viseur deviendrasombre quand
                                                           sett rng                                        I'ouvertureest f ermee sur le reglage
                                                                                                selectionne.


4B
View original page 26Page 27 · Read text
Depthof FieldScole          fchelledeprofondeurdechomp                                          tr                                       tr
        ryt-rt@

                                                                                     -  are inscribedon the lens mount ring         est inscritesur la baguede monturede   4i@!=                      The double series of numbers -  4, B, and 16     La s6riedoublede nombres- 4, B et 16 -           {,g3                                                                                                                                                                                                                                                                                                                                                                                                                                                                          -5I
                                                  symmetricallywith the pointer at the                     I objectifsym6triquementavecl'indexau
                                                      center (except on some lenses).When the       centre(saufsur certainsobjectifs).Lorsque
                                              F stop is selected and the subject is            I'ouvertureF est s6lectionn6eet que le
                         50mm/F1.8   focused on, the range of the distance scale      sujetest au point,la plagede I echellede
                                               between the corresponding numbers of the     distanceentreles num6roscorresoondant
                                                 depth of field scale is the range within         de l'echellede la profondeurde champest
                                                 which the subject can be brought into focus.       la plagedanslaquellele sujetpeut 6tre mis
                                                                            au point.


                                  Infrored Photogrophy        Photogrophieinfrorouge

                                        When shooting infraredpictureswith infrared     En prenantdes photos infrarougesavec un film              ffi        ;==ffi|,=ffi1fr                           film and an infraredfilter,the point of focus         infrarougeet un filtre infrarouge,le point de     m     ,rl]16[5ll             -tr-r7-                                               will differ slightlyif you focus visually.The         mise au point diff6reral6gdrementsivous
                                              amount of shift varieswith the lens.To              faites la mise au ooint visuellement,Le
                                                compensate for this, a red line or red dot is        d6calagevarieavec I objectif. Pourcompenser
                                                       usuallymarked on the lens's depth of field          cela, une ligne rouge ou un point rouge est
                         50mm/F1.8    scale. lnfraredoicturescan be taken in the         96n6ralementmarqu6sur | 6chellede
                                                        following way: @ Focus the lens without an        profondeurde champ de l'objectif.Des photos
                                                          infraredfilter on. @ Read the distanceon the       infrarougespeuvent6tre prisesde la faqon
                                                     distancescale and shift it oppositethe            suivante:C Fairela mise au pointsur I'objectif
                                                          infraredmark. @ Put on an infraredfilter ano       sans le filtre infrarougeinstalle.@ Lire cette
                                                         shoot. fihe oicture shows the distance is at oo      distancesur l'6chelledes distanceset la
                                                                      (infinitv).)                                      decalercontre le repereinfrarouge.@ Puis
                                                                                                                      installerun filtre infrarougeet prendrela photo.
50                                                                                               (L'imagemontre la distanced    (infini).)                             www.orphancameras.com                                                ""
View original page 27Page 28 · Read text
BoileryHondling         Monipulotiondespiles                                       tr                                  tr
                                                 o When replacing,never mix old and new             . Lorsdu remplacement,ne jamaism6langer
                                                              batteries, or batteries of different types.         une pileneuveavecune pileusag6e,ni des                                                                                                                                                                                '*                                          Make sure both batteries are new and of the      pilesde typesdifferents.S'assurerque les
                                         same brand and same type (LR44 or SR44).    deuxoilessont neuveset de la m6me                                                 o Batterv performance will drop temporarily      marqueet du mdme type (1R44ou SR44).  T
                                                            at lower temperatures. In cold areas, keep    o Les performancesdes pileschuteront
                                                     the camera warm by using protective gear     momentan6mentd bassestemp6ratures.
                                                         or placing it inside your clothing. Even        Dansles 169ionsfroides,garderl'appareil
                                          when performance drops due to low          au chauden utilisantdu mat6rielde
                                                  temperature, it will be restored at normal        protectionou en le plagantdansvos
                                                  temoeratures.                           v6tements.MOmesi les performances
                                                 o Sweat or oil on the plus @ and minus Q        chutentd caused une temp6raturebasse,
                                                    terminals can cause poor contact. Wipe          ellesserontrestitu6esd des temoeratures
                                                         batteriescarefullywith a dry cloth before use.     normares.
                                                 o we highly recommend that you carry spare   o De l'humidit6ou de la graissesur les
                                                       batterieson long trips, especiallyin foreign     bornesplus@ et moinsQ peut causerdes
                                                    countries where availabilityis questionable.    mauvaiscontacts.Bienessuyerles piles
                                                                              avecun chiffonsec avantutilisation.
                                                                                  o Nousvous recommandonsde toujours
                                                                                            avoirdes pilesde rechangesous la main
                                                                              pendantde longsvoyages,en particulierd
                                                                                              l'6trangeroir la disponibilit6de tellespiles
                                                                                    peut otre un probldme.


52
                                                                                                            iJ
View original page 28Page 31 · Read text
QueslionsondAnswers- I     Questionsel r6ponses- I                                        tr                                   tr
                                                O. Can OM System products be used with this   O. Estcequedesaccessoiresdu systemeOM    d
                                              camera?                                peuvent6treutilis6saveccetappareil?                                                   il{
                                                    A. o Lens, macro-photo,and photo-micro       R. . Groupesobjectifs,photomacroet microphoto:           I,
                                                    groups: The macro lenses and some of        Lesobjectifsmacroet certainsobjectifs(d         ,3
                                                       the lenses with high F numbers create a       grandeouverture)cr6entuneombredansla                '3,{
                                             shadow in the orism section. This makes        sectionprisme.Cequirenddifficilela miseau             5i!..{                                                                                                  it difficult to focus on the subject. (The          pointsurle sujet.(Leverredevis6en'estpas       '.
                                                     focusing screen cannot be changed with        interchangeablesurcetappareil,)
                                                               this camera.)                           o Groupeflash:Desflashesd fonctionnement               it
                                                   o Flash group: Standard automatic shooting       automatiqueet manuelstandardpeuvent6tre
                                               and manual shootingflashescan be used.        utilis6s.
                                                   o VieMinder group: Accessoriesthat can be      o Groupeviseur:Desaccessoiresquipeuvent
                                              mounted on the eyepiece can be used.          6tremont6ssurI'oeilletonpeuvent6tre
                                                  Consult your nearest Olympus service             utilis6s.
                                                    center for details.                         Consultezvotrecentrede serviceOlympusle
                                                                                         plusprochepourdesd6tails.
                                                Q. The picture was taken with the F stop set at
                                                an intermediate oosition. ls it OK?           O. Laphotoa 6t6priseavecl'ouvertureF r6gl6esur
                                                     A. Intermediatepositions between F stops can      unepositioninterm6diaire.Est-cecorrect?
                                                      also be used.                           R. Despositionsintermediairesentreles
                                                                                        ouverturesF peuvent6galement6treutilis6es.
                                               Q. Can I take pictures when the batteriesrun
                                                        out of power?                         O. Est-cequeje peuxprendredesphotosavecles
                                                    A. Yes, you can. But none of the LED lamps        pilescompldtementus6es?
                                                                    will light in the viewfinder.                R. Oui,vouspouvez.Maisaucundest6moinsLED
                                                                              nes'allumeradansle viseur.
                                               O. How should I clean the lens?
                                                    A. Wipe it gently with lens cleaningtissue that   O. Commentdois-jenettoyerI objectif?
                                                has been moistenedwith a smallamount of    R. L'essuyerdoucementavecunchiffonde
                                                      lens cleaningfluid.                         nettoyaged'objectifquia 6tehumidifieavec
                                                                              unepetitequantitede liquidede nettoyage
                                                                                                        d'obiectif.
58                            www.orphancameras.com
View original page 31Page 34 · Read text
Specificolions- I          Fichelechnique- Itr                                  tr
Type:                                  Type:                                              {
  35 mm SLRcamerawith focal-planeshutter.     Appareilreflex35 mm avecobturateurplanfocal.

Film format:                           Formatde film:
  24 mm X 36 mm.                       24 mm x 36 mm.

Lensmount:                          Monture d'objectif:
  OlympusOM mount.                   MontureOM Olympus.

Shutter:                       O btu rateur:
  Mechanicallycontrolledfocal-planeshutter     0bturateura planfocalcommand6m6caniquement
  (verticalaction).                              (translationverticale).

Shutterspeed:                           Vitessed'obturation:                            {  B'1 - 112000sec.                     B ' 1s d 1 / 2 0 0 0 s

Flash-shuttersynchronizationspeed:        Vitessede synchronisationflash-obturateur:
 X contactonly.Synchronizesat 1/125sec.     ContactX uniquement.Sesynchronised 1/125                    J  or slowershuttersoeed.                     s ou d unevitessed'obturationoluslente.                 l
                                                                                                                                                                     .'
Light meteringsystem:                 Systdmede mesurede la lumiere:
  SPD.Center-weightedaveragelightmetering.    Cellulesilicium.Mesuremoyennea
  Spotmetering.                           pond6rationcentrale.
                                    MesureSpot.
Light meteringrange:
  + 2 E Y - 1 9 E V( l S O1 0 0 ) .           Gammede mesurede la lumidre:
                                       + 2 l L i t 1 9 l L ( l S O1 0 0 ) .
Exposure control system:
  Obtainedby matchinggreenLED.          Cont16led'exposition:
                                          Expositioncorrecteobtenueparaccorddu
                                        t6moinLEDvert.


                                                                                                                                                                                                                                                                           .!:n:k;U::irl            ,,,
View original page 34Page 35 · Read text
toecificotions- 2          Fichetechnique - 2El                                 tr

Connectionto flash:                    Raccordementau flash:
  Hot shoeonly.                          Surgriffeporte-accessoiresuniquement.

Film speed:                                Sensibilit6du film:
  ISO25 -3200 (1/3increment;manually      ISO25 A 3200(pasd'1L;r6glagemanuel).
  controlled).
                                   Avancedu film:
Film advance:                           Parlevierd'armement(verrouillele
  Filmadvancelever(locksshutterrelease      d6clencheurquandil est pouss6;ne
 when pushedin; doesnot allowseveral      permetpas I'avancepartielledu film).
  short strokes).
                                 Rembobinagedu film:
Film rewind:                          Entournantlamanivellede rembobinaoedufilm.
  By rotatingfilm rewindcrank.
                                  Compteurde vues:
Exposurecounterl                       Type progressifavecremised z6ro
  Progressivetype with automaticreset by      automatiqueen ouvrantle dos de I'appareil.
  openingbackcover.
                                        Expositionmultiple:
Multi-exposure:                       Enutilisantla commanded expositionmultiple.
  By operatingmulti-exposurelever.                                                                                 !I                                        Viseur:
Viewfinder:                               Verrede vis6efix6e.Systememicroprismeet
  Fixedfocusscreen.Split-imagemicroprism    stigmomdtre.R6glagedioptrique- 1t 0.4                                                                                                        {  system.Diopter:-1 + 0.4 m-l (diopter).         dioptrie.Champde vuedu viseur- 93%du
  Finderview field:93o/oof actualoicture      champde I imager6elle.Grossissement-
  field.Magnification:0.84Xwith 50 mm        0,84Xavecun objectifde 50 mm.
  lens.
                                       Informationdans le viseur:
Viewfinder information:                    Activ6elorsquele d6clencheurest press6
  Activatedwhen shutterreleasebutton is       a mi-course.
  pressedhalfway.
www.orphancameras.com
View original page 35Related documents and language editions
From the M. Butkus archive. Original publisher and archive notices are retained.
Check the model and edition against your equipment.
PDF verified 2026-10-10.