Film cameras
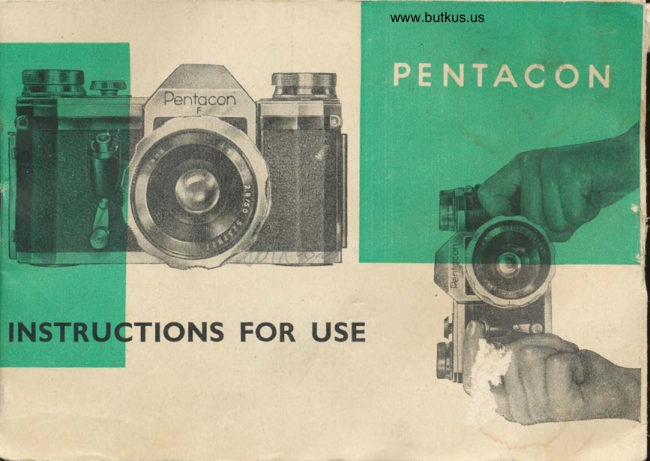
PENTACON 35mm User manual
User manual for PENTACON 35mm. 27 pages in English. Read the original PDF, download or print a copy without registration.
27 pagesEnglish3.1 MB PDF

Loading your manual…Open PDF directly
Document details
- Brand
- Pentacon
- Model / document
- PENTACON 35mm
- Document type
- User manual
- Language
- English
- Pages
- 27
- File size
- 3.1 MB
- Category
- Film cameras
- Document date
- Not specified in catalog
Search available document text
Find a term, then jump to its page in the original PDF. Image-only pages may not be searchable; check the PDF for exact wording and diagrams.
Page 4 · Read text
www.orphancameras.com

                                                                                              I ntr'.rd uc&iorr
The  Pentacon   is  a one-lens  reflex  caurera  yieltling  pictures  24X26  mm   (ls/sXLllra,,)    in  size,
 which,  owing   to  its  prismatic   telescope-fincler  can  be used  for  photographing   from   eye-level.
When  viewed  through   the  pentagonal   roof-shaped   prism,  the  finder  image  appears  upright,
 eorrect-sided  and, with  the standard  lens  in the camera,  in  the  natural  size of  the  picture.  The
compact  build  of  the  prismatic   telescope-fintler   fat,ilitates  selecting  and  focusing  the image.
Besides,  the  Pentacon  possesses  all  the  advantages   of  a modern   precision  miniature   camera,
 such as focal-plane   shutter,   calibrated    in  speecls from     I  secontl  to  t/roo,, second,  coupled  shutter
winder   and  film  advancement,    lock  against  double   exposures,   interchangeability      of  the  lens,
 synerhronized flash'light   contact,  and  built-in   self-release  with  delayecl  action.
Successful  photographic   results  with  the  Pentacon  depend  by   all means  on  careful  operating
and  thoughtful   handling.    It   is  therefore   advisable   first  to                                                                                     rrsing  the  camera  without                                                                        ,practise
a film  in   it  precisely  as described   in  the  fnstructions.    After    full  knowledge    of  the  camera  has
been  gained   in  this  manner,     it  can  be  loaded  with   film  for  practical   work.
The Pentacon takes the ordinary  daylight  film-cartridge  for 36 exposures, all other  standard
miniature  film-fillings and 35 mm perforated film  in cut lengths up to 1.60 meter  (S'4,,\.
View original page 4Page 6 · Read text
www.orphancameras.com
Explanation of Signs
                                              $                                                                                                                                                                       r
  I   Mitled knob  for  self-timing releise          13  Interchangeable  lens,  mounted  with
                                                     distance-meter and diaphragm rings and
 2  Lever  for  self-timing release
                                               hragm and depth'of'field
 lJ  sh'tter-release k'ob
                                              14  Screw-in thread for the eamera lens
 4  Latch for camera back
                                                           rs  camera support
 5  Picture-counting disc                                              16  Tripod_bushing
 6  Shutter-winding and filmtransport knob      L7  Release-knob for rewinding the film
 ?  I(nob  for  setting the shutter speeds          lB   Film'transporting  drum                             '1
                                              19  Knob  for  setting the speed gro*ps B  Disc showing sh'tter  speeds
 g  Flash_light contact                         20  Eye-lens (ocular) of the prismatie teles-
                                                       cope-finder
10  Film-marking  disc                                                  n   Focal plane
ll   Film rewind-knob                          22  Camera back

12  Eyelets for holdiug the eamying-strap      2g  Film-pressure plate
View original page 6Page 7 · Read text
www.orphancameras.comru.r


                                                                                                                                                                                                                                                                  ,                                      i       i

               The  shutter   is wound  by a full  turn   of  the  knob  (6)
                          (ilI.  f)  as  far  as  it  will  go  in  the  direction   of  the

                 arrow. This  manipulation   simultaneously  moves the
                   frlm  and  the  picture   counter  on  to  the  next  pic-

                    ture,  and  swings  the  mirror    into  position   for  the
                observation   of  the  image  in  the  finder.


              The  speeds are  set  in  the  speed-setting  disc  (S) by
              means  of  the  speed-setting  knob   (7) and  the  knob
              (re) (Ill. 2).
             On  the speed disc  (B) are black numbers  indicating
                  the  short  speeds  of  t/tooo sec. to  Llro sec. and  red
              numbers  indieating  the  long  speeds of  tlro sec. to
                                           l  sec. and  "Ba  exposures  running   for  any  desired
                Iength  of  time   (Ill.   l).


                    Iil.  2
View original page 7Page 8 · Read text
www.orphancameras.com

I'-irst set thc shutter to tLe short (black) or long(red)speed group by movinp; the knob(19)larerally.
and. accordinslv. the black or red pointer must appear in the window  of the speed disc (B).                      -
.i\ow adiust the exposure time  to the pointer  of  the corresponding color (black or  red) by
pressing down, and at the same time rotating, the knoh  (?). The knob can be turned  in both
directions  as long as the  shutter  is wound  up, but  only  in the  direction  of  the arrow when
the shutter  is run down (see Ill.  I).


The shutter  is released by  actuating the release knob  (3). In  order  to avoid blurring  the
picture by unsteadinessthe knob must be pres-
sed in smoothly and not  jerkily.  This  is achie-
                                                                                                                                                     'iilri':'ffi
ved  best  by  putting   the  forelimb   of  the  finger                                    fii.iiffi*tl,il                                         3
on  the  front  edge  of  the  release  lcnob  (3) and
pressing  the knob  down  like  a lever   (Ill.3).
Vlren  using  the  "8"   setting  of  the  shutter,  the
knob  has  to  remain  ;rressed down  as long  as
the  exposure   is  to  last.  For  long  time  expo-
sures, the  special  wire  release  described  later

has to be used.


                                                                                                              Ill.  3
View original page 8Page 9 · Read text
www.orphancameras.com
                                                                    TII. 4


                                                   For  long  time  exposures, there  is a special wire
                                                   release  rvhich can be  screwed  into  the  release
                                               knob   (3)  (Ill.  1).   If  the  shutter   is  set  at  "8"
                                                     ancl  released   lry  pressing   the  knob   (u),  the
                                                        shutter   will  rernain  open  until  the  plate  (b)  is
                                                pressed clown. For  short  time exposures and  in-
                                                       stant  shots,  the  plate   (b)  has  to  be  pressed
                                                      against  the neck  (") and locked  by  turning    it  to
                                                      the  right.   In  this  manner  the  catching  device
                                           becomes  ineffective.

The  built-in  delayed-action mechanism releases the shutter automatically; The mechanism is
set by pressing the lever  (2) to the  left  as far as  it  will go  (Ill.  5). The shutter can be set
and wound up  in the usual manner either before or  after thb delayed-action medranism has
been set. The delayed action  is released by pushing the milled knob  (1) to the right. Do not
actuate the shutter-release knob  (3). As soon as the delayed action  is released, the lever  (2)
moves slowly upwards. After  the elapse of  about 11 seconds the  shuttero whidr  had been
wound  up,  is automatically  released.
Shoulil it hedesirablefor certain reasonstolet thedelayed action mn  for less thanll  seconds,
View original page 9Page 10 · Read text
Ilt. 5                       www.orphancameras.com

the  lever  (2) must   first  be  pressed  to  the  left
until    it  stops. Then   let   it  run  down   to  an  ap-
pointed oblique  position  (45 degrees means about
:l  seconds  delay)  ancl  stop  the  delayed-action
mechanism  by  turning   the  knob   (t)  to  the  left
again. The  delayed-action mechanism   is released
in this  position   for  taking  the  picture.  In  such a
case the  shutter  has  to  be wound  up  before-
hand.
Wlren  set  at  "8",   rhe exposure  time  in connec-
tion  with  the delayed  action  is 2  to  3 seconds.
In  order  not  to  overstrain   the  spring   of  the
delayed  action,  the mechanism  must  not  be  in
a wound-up  position  for  too  long  a time.


The   contact   synchronizecl   to  the     f o"ot-ptur."
shutter  permits  instant  exposures  to  be made
with    electrically    ignited   flashes,  electronic
flashes, or  flash powder.
For  connecting   the  flash attachment,   there   is a


                                                                                        Ilr. 6
View original page 10Page 11 · Read text
www.orphancameras.com

 one'pole  contact  nipple   (9)  in  the  top  of  the  camera?  nexr   to  the  rewind-knob     (If)   (m.  6).
A  wireo  with  a plug  to   fit  the  nipple   (9)  is  available   for  connecting   the  camera  to  the  flash
 attachment.
Take  care  that  ordinary   flashes  to  be used  with  the  camera  do  not  have  more  than  24  volts
and  noi more  than  2 amperes.  There  are no  restrictions   with  regard  to  electronic  flashes which
develop  no  considerable   ignition   currents.
'V'e
     would  recommend   the  flashgun  designed  especially   for  the  Pentacon,   adaptable   to   all
kinds   of  flash lamps  and  which  can  conveniently   be  employed   in  various  combinations   with
the Pentacon.

Below  are the shutter  speeds to be used  in connection  with  the most common  types of flash lamps.
                t -
               l o s r a m :      5 2
                PF lt0, pF 45                              I!       ''      ' .          ....  ,/ro sec.            I  l_!tlto:' _
      USA flashes:FP 6, Fp  26, Sylvania 2 A        |            I
         AII orher flashes                                                                                . . t/ro se".            I
                              without                                     delay                                                                                                                     I                                                                                                   t/zo         Electronic flashes                                                                                                               s"".                                with                                   delay                                     up to I0  millisec.                                                                                                                      /

Shutter speeds cannot be given for  electrically ignited flash powder. The most .suitable,speed
has to be ascertained individually  for each exposure.
View original page 11Page 12 · Read text
www.orphancameras.comIII. ?


The  lens  is screwed  into  the camera body  by means
o f  a  n o r m a l     t h r e a d   ( 1 4 )   ( I l l . 7 ) ,  a n d m a y  e a s i l y  b e
exchanged  for  any  other  Pentacon  lens.  It  is screw-
ed  out  lry  turning  the  lens mount   to  the  left  (anti-
clockwise).  Should  the camera  be  loatied  with  a film,
the  opening  must  he shielded  from  glaring  light.

Never  touch  the  unprotected   surf ace  mirror   with
your  fingers. Lenses and supplementary  rings  are  inserted  by  screwing  them  to  the  right
{clockwise) into the threaded opening. The index points for diaphragm and distance must be
visible from above when the mount  is screwed   tightly.
The Pentacon lenses have the so-called "T"  (transparent) coating, a violet-blue filmy  layer,
on each one of  the glars surfaces. This coating reduces the loss of  light  extremely, besides
enhancing the brilliance of the lenses.
This layer does not preclude the lenses from being cleaned in the same careful manner as any
other lenses without a coating.
View original page 12Page 13 · Read text
www.orphancameras.coml l t . B


                                             The  lens  of  the  Pentacon   is equipped  with  a
                                                       pre-setting  device  bearing  the  following   scales:
                                            On  the  frou   t  rirrg,  the  diaphragm   scale. The           www.orphancameras.com
                                                 second  ring  (u)  is rnilled and somewhat  high-
                                                                  €r, and  bears  an  inclex  point  (b)  (see  ill. B).
                                                   on  the  micldle  ring   is  the  distance  scale   i'
                                                   meters  or  feet, and  finally,  there   is the  ring
                                                          with  the diaphrag-m scale, showing  the depth-
                                                                of-field  fgr  every  distance-setting.
                                                 According   to  this  scale, for  instance,  the Biotar
                                                       lens   f 12, with  i-r8 mm  focal  length,  at a distance
setting  of  13'4"   (.4 meters)  and  an  aperture   of/11,  gives  a sharpness  reaching  from  g'A"   to
33'1"  (2.5  to 10 meters).


Sharptressand outline of the picture are viewed through the prismatic telescope-finder.
The camera must be held with  the ocular lens (20) close to the eye. The image is visible only
as long as the shutter is wound up. (Refer to section I, l,) The image is focused on the gronnd-
glass screen by turning the rear milled ring on the Iens mount, Vhen  making exposures under
utrfavorable light conditions or exposures requiring  a very small aperture, the image should
View original page 13Page 14 · Read text
www.orphancameras.com

       be viewcd carefully with regard to outline and sharpness beforehando using the largest aperture
        (smallest diaphragm number).
         After  having  focused the image, stop down  to  the desired aperture. The diaphragm  ring  on
   f,       the lens with  the ,,pre-set'' mount can be readjusted without  removing the camera from  the
 I,,-'-i a t .       eye. For  this purpose there  is a thicker  milled  ring  (a) behind the diaphragm  ring on the lens
t 6 L      mount, marked  with  an index  dor  (b).
                    the desired aperture,  first  set the diaphragm  ring  accordingly, then draw the riug (a)  j     To pre.set
       backwaid, catching hold  of  the pre-set diaphragm ring with  the other hand, and set the red t        dot  (b) against  the  drosen  diaphragm  number.  The  milled  ring, when  springing  badr  into
         position,  will  get coupled with  the diaphragm  ring. For  focusing,  this diaphragm  ring can now
        be  rotated   to  the   full  aperture  and? to make
         the exposuree  back  again   to  the  pre-set   dia-
       phragm   s top?  without   removing   the  (:amera
           frorr  the  eye.t     The  outline  of  the picture   is derermined  by  the
 *             I ight    f rame   in  the  finder.  The  field  of  view   in
         the  finder,  showing  the  size  o f  20 X 30 mm,   is
.*     somewhat  smaller  than  the  actual  picture.   It  is
         therefore   certain  that  the  whole  of  the  finder
       image  will  appear  in  the picture,  thus rendering
               it  possible  to  utilize  the  whole   of  the  screen


                                                                                                       Ilr. 9
View original page 14Page 15 · Read text
www.orphancameras.com

image up to  its outermost edges to  full advantage. Persons wearing spectacles should perform
focusing with  rheir distance-glasseson. But a correctiv lens, corresponding to the spectacleso
can also be fixed to the eye-piece if so desired (refer to section II, 4).


In order to avoid the penetration of sidelights into the finder, a lighthood  (Ill.9) can be sup-
plied which renders it easier for the eye to become adapted to the brilliance of the finder, thus
giving greater accuracy and rapidity  in focusing. Persons who are obliged to wear spectacles
when focusing may have a suitable  corrective  glass made  in a special mount  to  fit  the eye-
                                                     piece,  so  that  the  eye  can  approacch  the  finder
                                            more   closely.  The  aukward   chan ging   of  spec-
                                                     tacles between  focu sing and  setting  the  shutter

                                                                     is hereby   eliminated.

                                             These  parts  can conveniently   be fixed  to the  hol-
                                                    ding  device  in  the  ocular-lens  mount.


                                              There   is  a  little  collapsible  support  (15)  in  the

                                                         front   of  the Pentacon  camera.


                                                n t .  l 0
View original page 15Page 16 · Read text
www.orphancameras.com
                                                                                                                                  Iil.  IT


                I.  Hold   the  camera,    f acing  the  bad<,  push  the
           bolt  (4) on  the  right-hand   side upwards,  and  pull
        open  the  camera  back  (22) by  slight  pressure  on

          the  edse   (Ill.  f0).

           2. To  load  the camera  by  daylight,    it  is advisable

           to  use  a  film-cartridge   whieh,   after  the  shuttertw
         has been wound  up  by  turning   the knob   (6),  is

          inserted   into  the  left-hand   spool  chamber,  with

          the  beginning   of  the  film  pointing   in  the  direc-

           tion  of  the  picture  level.  Introduce   the  project-

           ing tongue  of  the  film  into  the  slit  of  the  taking-,t
         up  spool. Bend   in  a few  millimeters    of  the  film-
         tongue   -   coating  outwards      and  roll  as muchI        of the film  onto the  spool as to  allow  the  sprocket
           to  catch both  perforations    (Ill.   If).

           3. Vith   the  film  in  the  right  position  on  the  film


                                                                                                                                   Ill. l2
View original page 16Page 17 · Read text
www.orphancameras.comIu. 13
                 track and the sprocket  (Ill.  l2),  the camera back
              can be closed down and locked.

                  4. Set the counting disc (5) two strokes hefore 0
                         (ilI. 13), and  make  two  blank  exposures  l,y
               actuating the shutter release (3) and the trans-
                porting knob  (6). The rewinding knob  (I1) must
                 turn  in the opposite direction of the arrow  if the
                   film  is being properly  transported.
               With the counter at stroke No  1, the camera is
               ready for the first exposure.

                  5. The film-marking disc (f0) records the species
                ancl sensibility of the film  in the camera in DII\
                 or ASA values. as  f olows:

                            Black-and-white lilm
                                  ;    Daylight  color-film

                                     Artificial  light color-film            ?


                      lll.  r 4
View original page 17Page 18 · Read text
www.orphancameras.comIlr. l5

 6. vhen   working   with  loose  cine  film  which   is
 loaded  into an empty  cartridge  in the dark-room.
 the  end  of  the  film  should  be  inserted  into  the
 spool so that   it  can  easily  slip  out.
 It  saves rewinding   the  film    if   it  i,s rolled  into  a
second  cartridge.  The  heginning   of  the  film  has
to  be    f ixed   into  the   slit   of  the  empty   spool
    coating  outward      and  this  spool,  like  the
spool  in  the feeding  cartridg",   is placed  into  the
reeeiving  cartridge.  The  cartridge  must  now  be
so placed  into  the  right-hand   sirool eharnber, that
the  film   will  nrn  smoothly  over  the  sprocket  into
the  opening   of  the  cartridge,  which  means  that
t h i s o p e n i n g m u s t  p o i n t   r r p w a r d s   ( I l l .    l 5 ) .


Vhen   using   the  standard   film   cartriclge   for
36  exposuies,  a  certain  res,istanee, due  to  the


                                                                                                         Ill.    i 6
View original page 18Page 19 · Read text
www.orphancameras.com

film  being fixed  to the core of the spool, will be noticed  after  the 36th  picture.   If exdranged
in  daylight,  the  film  must  first  be spooled badr  into  the  cartridge.  This  is done by pressing
the kuob  (l?)  in the bottom  of the canera body and at the same time  rotating  the rewind
knob  (ll)   in the direction  of the arrow   (Ill. 16), until  the beginning  of the  filn  ie Ioosened and
slips  off  the  taking-up  spool.   At   thig  point,  the  rewind-knob,   after  overcoming  a  slight
resistance, will suddenly rotate quite  easily.
The camera bad< can nolv be opened and the film-cartridge  removed.

                                                      It   is  not  necessary  to  rewind   the  film  on  to  the  feeding  spool
                                                           if   it   is taken  out   in  the  dark-room   or   if  the  receiving   spool   is
                               protected  by  a cartridge   (refer  to  section   III,  7).

                          Do  not  change the  film   in  bright   sunlight  but  rather,    if  possible,
                                        in  the  shade.  After   having  been  taken  out   of  the  camera,  the
                                 film-cartridge   must  be  kept   in  a  light-proof   receptacle.

                                                \                                                       I 4 { i $ + {i + r                         ;L ;-1;1;  , \ "      i.f i             c.fssr.i l'ri,{ Lfl-{: ij'u*                                         "
                                                                                                              i { ' F f , F * r i i - i i ' r -

                            The  manner   in which  to  hold  the camera  depends  on  the  kind  of
                                 lens being  used. The  Pentacon   is designed  both   for  horizontal   as
                                   well  as for  upright   pictures.   \[e  recommend   the  following:


                                                 Ill.  r 7
View original page 19Page 20 · Read text
www.orphancameras.com                                                                                                                                    ilt.  Ir]

 I. Take  hold  of  the camera  firmly   with  both  hands. The  shutter
 is wound  up  and  set  with  the  thumb  and  the  forefinger   of  the
right  hand,  while  focusing  and  diaphragm-setting   are  performed
rvith  the  middle,fingers    of  the  left  and  right  hands. When  the
image  is  in  sharp  focus,  the  shutter   is  released  with   the  fore-
finger   of  the  right  hand   (Ill. l?).
2- The  camera   is  held    f irmly    in  the   lef t  ha'd,
while  the  manipulations   are  Performed   with  the
right  hand.  Thumb  and  forefirrger  wind  the  shur-
ter,  the  middle     f inger  sets  the  diaphragm   and
distance  and  the  forefinger   releases  the  shutter
(ilI. IB).
3. The  right  hand  holds  the  camera,  thumb,   fore-
finger, and middle  finger  of  the  right  hand  actuate
the  shutter  and  film-transport   mechanism,  while
the thumb  and  forefinger   of  the  left  hand  set the
focusing and the diaphragm.  The camera  is suppor-
ted  by  the  ball  of  the  left  hand   (Ill.  f9).


                                                                                                                                    nl. 19
View original page 20Page 21 · Read text
I l t . www.orphancameras.com2 0

                            Vhen   held   in   this  position,   the  camera   will  take  upright   pie-
                                                                   I ures  (Ill. 20).

                                       4. The  camera  can  al,so be  held  with   the  back  resting  against

                               your  forehead.   In  this  case the  shutter   is released  with  the  left
                               hand,  and  focusing   is pe,rformed   with   the  right  hand   (Ill.21).

                                      5. For  working   with  a  tripod,  the  camera  has  to  be screwed  to
                                                    the  tripod   by  means   of  the  tripod-hushing     (f6).
                                             Never  use tripods  with  a longer  head  than  4r5 mm.

                                                          6. The  camera  should  be  protected  hy  an  ever-
                                               ready  case? into  which  the  tripod  bushing   (16)  of
                                                    the  Pentacon   can  be  screwed.   For  carrying   the
                                           camera  without   a case? a strap  can be  linked   into

                                                    the  eyelets  (12).


Ill.   :  I
View original page 21Page 22 · Read text
www.orphancameras.comIn.22


For  pictures   to  be  taken   at  a  closer  distance

than  the    f ocusing  of  the  lens  permits,  supple-

mentary   rings  have   to  be  used  according   to

requirement.   These  rings  are  motrnted   fs[r,rrssn

 the  lens and  the camera body  (see section  II,  1).

In   this  casee sharpness,  picture   outline,   and

depth-of-field   are  viewed   in  the  prismatic   tele-

scope-finder  in  the same manner  as long-distanee

objects.  Close-ups  nearer  than  50 cm  need  two
rings 208/05 (9 mm) with  pre-set diaphragm lenses. Depending on the  ratio  of  the pictureo
one or two rings have to be screwed betwen the lens and the camera.
The ranges of focusing in connection with  the rrse of supplementary rings are shown in the
Cbarts  I and  II.

Intermediate tuhes for larger-scale pictures, 1  : I and 2  : 1, are being prepared.
View original page 22
Related documents and language editions

From the M. Butkus archive. Original publisher and archive notices are retained.
Check the model and edition against your equipment.
PDF verified 2026-10-10.