Film cameras
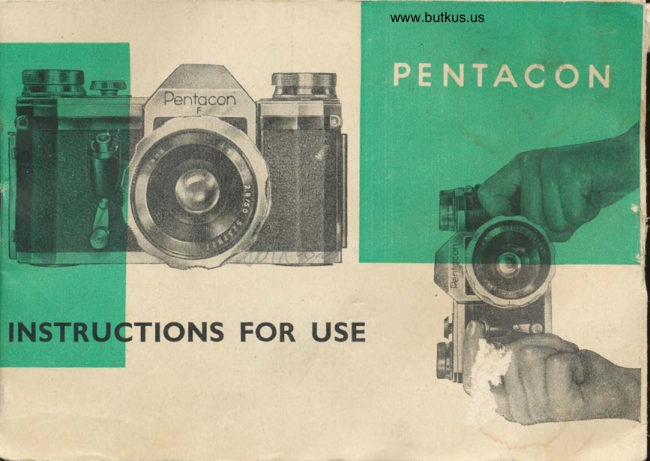
Pentacon - F User manual
User manual for Pentacon - F. 32 pages in English. Read the original PDF, download or print a copy without registration.
32 pagesEnglish2.7 MB PDF
Loading your manual…Open PDF directly
Document details
- Brand
- Pentacon
- Model / document
- Pentacon - F
- Document type
- User manual
- Language
- English
- Pages
- 32
- File size
- 2.7 MB
- Category
- Film cameras
- Document date
- Not specified in catalog
Search available document text
Find a term, then jump to its page in the original PDF. Image-only pages may not be searchable; check the PDF for exact wording and diagrams.
Page 2 · Read text
This Instruction Booklet contains a Summary Chart with indication
numbers. Unfold this page, and you will be able to study the Instructions
with the greatest easeo for you will have the Summary Chart with
                       the numbers before you.
View original page 2Page 3 · Read text
www.butkus.us


Mike Butkus  Digitally                                             DN:email=mike@butkus.org,Date:cn=Mike2025.03.02signedButkus,by00:04:25Mikeo, ou=Butkus.org,Butkusc=US-05'00'
View original page 3
Page 4 · Read text
Explanalion of Signs
 I  Milled knob for self-timing release               t3  fnterchangeable lens, with automatic
                                                 diaphragm releaseo and with scales for 2 Lever for self-timing release                                                             setting distance, diaphragm and depth-
 3  Shutter-release knob                    ,,                               of-field
                                                    t4  Screw-in thread firr the interchaneeable 4  Latch for camera back                                  lenses
 5  Pieture-countingdise                 15 Camera support
                                16 Tripod-bushing 6  Shutter-winding'and  film transport knob
                                17 Release-knob for rewinding the film 7 Knob for setting the shutter speeds                                18 Film sprocket        'e
 8  Disk showing shutter speeds                                19 Knob for setting.the speed groups
 g  Flash-light contact                                                  Eye-piece (ocular) of the prismatic                                                                    _,                20                                                             telescope-finder
l0  Film-marking disk   '                                                                                    "                      2l  Film gate
ll   Irilm rewind-knob.  i               zz camera back              ''                                             B'/tX    S
L2 Eyelets for holding the carrying-strap       23 Film-pressure plate
View original page 4Page 5 · Read text
Venmo @mike-butkus-camera  Ph. 2083
PayPal Name  Lynn@butkus.org      www.PayPal.me/lynnbutkus
View original page 5
Page 6 · Read text
www.butkus.us

                                                          Inlroduclion
The Pentacon F is a one-lcns reflex camera yielding pictures 24x36 mm (1 xlrl;')  in sizeo whicho
owing to its prismatic telescope-finder can be used for photographing from eye-level. 'W.hen
vielved through the pentagonal roof-shaped prism, the finder image appears upright, correct-
sided and, with the standard lens with automatic diaphragm in the camera, in the natural size
of the picture. The compact build of the prismatic telescope-finder facilitates selecting and
focusing the image. The image fields lenso arranged within the light beam of the finder, assures
a ground-glass image of corner-to-corner brilliance. Besides, the Pentacon F possesses all the
advantages of a modern precision miniature camerao such as focal-plane shuttero calibrated in
                                                                                                                                     "ispeeds from I seconcl to 1/rooo second, coupled shutter winder and film advancement, lock against
double exposures, interchangeability of lenses, automatic diaphragm releasee synchronized
flash contact, and built-in self-release rvith delayed action.
Successful photographic results with the Pentacon F depend by all means on careful operating
and thoughtful handling. It is therefore advisable first to practise using the camera without
a film in it precisely as described in the Instructions. After full knowledge of the camera has
been gained in this manner, it can be loaded with film for practical work.
The Pentacon F takes the ordinary daylight film cartridge for 36 exposureso all other standard
miniature film fillings and 35 mm perforated film in cut lengths up to 1.60 meter (S'4').

I
View original page 6Page 7 · Read text
Fig. 1

                                                                                                   I ",,$h u  f ir,rr" *':ut{tr tJilIIl-,.fr:*rrl.s#t{}rf

                                                    1. Wlndtng the rhutter
                                The shutter is wouncl by a full turn of the knob (6)
                                                 (Fig. 1) as far as it will go in the direetion of the
                                    arrow-red mark on the milled knob and red dot
                                  must now meet again. This manipulation simult&rt-
www.butkus.us                                 eouslv moves the film and the picture counter on to
                                          the next frame and swings the mirror into position for
                                                        tlre observation of the image in the finder.

                                               2. Setting the shutter speecls
                               The speeds &re set in the speed-setting disc (B) by
                                    means of the speed-setting knob (?) and the knob (19)
                                                 (FiS. 2).
                            On the speed clisc (B) are black numbers indicating
                                               the short speeds of t/ro6s s€c. to l/so sec. and red numbers
                                              indicating the long speecls of t lro sec. to I sec. and 368"
                                             exposures running for any desired length of time (Fig. l).

                                                    Fig. 2
View original page 7Page 8 · Read text
www.butkus.us
First eet the shutter to the short (black) or long (red) speed group by moving the knob (19)
laterallyo and, accordingly, the black or red pointer must appear in the window of the speed
disc (S). Now adjust the exposure time to the pointer of the corresponding color (blaek or red)
by pressing down, and at the same time rotatingo the knob (7). The knob can be turned in both
directions as long as the shutter is wound up, but only in the direction of the arrow when the
shutter is run down (see Fig. l).

3. Releasing the shutter
Shutter and automatic diaphragm are released by actuating the release knob (3). In order to
avoid blurring the picture by unsteadiness the knob must be pressed in smoothly and not jerkily.
This is achieved best by putting the forelimb of
the index finger on- the front eclge of the release
knob (3) and pressing the knob down like a lever
(Fig. 3).
                668"When using the      setting of the shutter, the
knob has to remain pressed down as long as
the exposure is to last. For long time exposures?
the special wire release described hereafter has
to be used.


                                                 Fie. 3
View original page 8Page 9 · Read text
tr'ig.  -t

                                               4. The wire release
                                 For long time exposures? there is a,speeial wire
                                          release which can be screwed into the release
                                  knob (3) (Fig . 4'). If the shutter is set at ooB" and
                                           released by pressing the knob (a), the shutter will
                                    remain open until the plate (b) is pressed d own.
                                  For short time exposures and instant shots, the
                                        plate (b) has to be pressed against the neck (")
                                        and locked by turning  it to the right. In this manner
                                        the catching device becomes ineffective.
5. Self.timing release with ilelayed ection
The built-in delayed-action mechanism releases the shutter automatically. fhe mechadsm
is set by pressing the lever (2) to the left as far as it will go (Fig. 5). The shutter can be set and
wound up in the usual manner either before or after the delayed-action mechanism has been
set. The delayed action is released by pushing the milleil knob (l) to the right. Do not actuate
the shutter-release knob (3). As soon as the ilelayed action is releasedo the lever (2) moves slowly
upwards. After the elapse of about I0 seconds the shirtter, which hail been wouncl upo is auto-
matically released.
Shoulil it be desirable for cirtain reasons to let the delayed action run for less than l0 secondso
the lever (2) must firet be pressed to the left until it stops. Then let it run down to an appointed
View original page 9Page 10 · Read text
tr'ig. 5
                                                 www.butkus.us
oblique position (45 degrees means ahout 3 seconds
delay) and stop t,he delayed-action mechanism by
turning the knob (1) to the left again. The delayed-
action mechanism is' released in this position for
taking the picture. fn such a case the shutter has
to be rvound up beforehand.
\fflren set at ooF" , the exposure time in connection
with the delayed action is 2 to 3 seconds. In order
to avoid overstraining the spring ofthe delayed action,
the mechanism 'must not be in a wound-up posi-
tion for too long a time.

6. The Synchronized Flash Contact
The contact synchronized to the focal-plane shutter
permits instant exposures to be made with elec-
trically ignited flash bulbs and electronic flashes.
For connecting the flash attachemento there is a
one-pole contact nipple (9) in the top of the ca-
mera? next to the relvind-knob (Fig. 6,, Ll). A wire,
with a plug to fit the nipple (9) is available for
connecting the camera to the flash attachment.

                                                    Fig. 6
View original page 10Page 12 · Read text
I'ig. 7                                                 www.butkus.us
!*,  {',itg:t,rr{''r';[]  $i {,"1.t.", ;}r',}ri $l{ltHr.l'

1. Changing the lens
The standard lens with automatic diaphragm is screwed
into the camera body by means of a norrnal thread (14)
(Fig. ?), and may easily be exchanged for any supple-
mental Pentacon lens. It is screwed out by turning the
lens rnount to the left (anticlockwise). Should the camera
be loaded with a filmo the opening must be shielded from
glaring light.
Never touch the lnprotecteil surface mirror with your fingers. Lenses and supplementary  rings
are inserted by screwing them to the right (clockwise) into the threaded opening. The index
points for fiaphragm and distance must be visible from above when the mount ie screwed tightly.
                                       o'T"                                               (transparent) coating, a violet-blue filmy layer,The Pentacon lenseg have the so-called
on each one of the glass surfaces. This coating reduces the loss of light extremely' besides enhan-
cing the brilliance of the lenses.
This layer does not preclude the lenses from being cleaned in the same careful manner as any
other lenses without a coatinq.

n
View original page 12Page 13 · Read text
Fis.8

                                              2. Lenses and lens scales
                              The standard lenses for the Pentacon F are equipped
                                    with automatic diaphragm release.
                                They bear the following scales:

                          On the front lens rim is the setting ring (u) for the
                                   automatic diaphragm, cngraved with the fiaphragm
                                 numbers. This ring can be pushed along the lens
 www.butkus.us                     mount toward.s the camera body and then turned to
                                     the right or left. After having moved. the ring to the
desired diaphragm number? you let it spring back to its original position, where it will click in.     f
The second rotatable milletl ring (b) is engraved with the distance scale for focusing. Next to
the distance scale is the third scaleo the one which helps to determine the depth of field for any
diaphragm or distance setting.
Accorfing to this scale, for instance, the 58 mm Jena B, fl2, at t distance of I3'4- (4 meters)
and an aperture off/11, yields a sharpness reaching frornS'4" to 33'4" (2.5 to 10 neters).

The Pentacon F takes the eame supplementary  pre-set lenses as the Pentacon D.
View original page 13Page 14 · Read text
www.butkus.us
 3. Focusing the image rvith regard to sharpness and outline

 a) on the ground glass
 Having prepared the automatic lens diaphragm for the exposure by turning the setting ring
 (a), you determine sharpness antl picture outline in the prismatic telescope finder by holding
the finder eyepiece (20) close to your eye. The finder image is visible only as long as the
 shutter is wound. up (refer to section I,  I).
By turning the second milled ring (b), you focus the image on the ground glass. The diaphragm
in the taking lens not being stopped down, the field lens reveals a ground-glass image of corner-to-
corner brilliance, which greatly facilitates focusing. On pressure of the shutter release knob (3),
immediately before the exposure takes place, the diaphragm automatically jumqs back to the
pre-set value. No other manipulation  is necessary; the camera remains in its position at your
eye, thus allowing for shortest possible intervals between focusing and exposing.
Should you wish to judge the depth of field with the lens stopped downo you either omit rotating
the setting ring (a) beforehand or, if it has already been rotated, you depress the shutter release
knob (3) so very lightly that only the automatic diaphragm  is released. It is, of course, possible
to reset the automatic diaphragm after this.
Also in the pressure release lenses of Meyer-Optik  Giirlitz the diaphragm closes down automati-
cally to the pre-set value on pressure of the shutter release knob.

9
View original page 14
Page 16 · Read text
www.butkus.us
 these lenses is set after the focusing performance, Pre-setting fiaphragms can be selected prior
 to focusing and conveniently closed down before thb exposure is made.

 4. Eyecup and corrective glasses
In order to avoid the penetration of sidelights into the frnder, an eyecup (Fig. 9) can be supplied
which renders it easier for the eye to become adapted to the brilliance of the finder, thus giving
greater accuracy and rapidityin focusing. Persons who are obliged to wear spectacles when focusing
may have a suitable corrective glass made in a special mount to fit the eye-piece' so that the
eye can approacch the finder more closely. The
arvkward changing of spectacles between focusing
and setting the shutter is hereby eliminated.
These parts can conveniently be fixed to the holding
device in the ocular-lens mount.


5. The camera support
There is a little collapsible support (15) in the front


                                                                                                                                                                                                                                ,of the Pentacon F camera.


                                                   Fig. 10
View original page 16Page 18 · Read text
f ig. 13                                                 www.butkus.us
rewincl knob (1 1) in the direction of the arrow
you tighten the film carefullyo thus making
it possible to watch the knob turn as soon as you
start winding up the film.
4. Se[ the counting disk (5) on€ stroke before 0
and make two blank exposures by actuating the
shutter release (3) and the transporting knob (6)
(Fig. 13). The rewinding knob (11) must turn in
the opposite direction of the arrow if the film is
being properly transported. The counter now
stands at 0, ancl after one more rotation of trans-
port knob (6), with the counter at stroke I\o  1,
the camera is ready for the first exposure.
5. The film-marking disk (10) records the species
and sensibility of the film in the camera in DIi\
or ASA values, as follows (Fig. 14):
      oO Black-and-white film
         *   Daylight color-film
       €    Artifical light color-film

                                                                    fig.  14
View original page 18Page 19 · Read text
l'ig. 15

 6. Rewinding of the exposed film can be avoidecl
 by the use of an empty eartridge on the receiv-
 ittg side. The beginning of the film has to be fixecl
 to the spool core of the empty cartridge, whereupon
 the core is placed into the cartridge, and the
 cartridge is then inserted into the camera with its
 film opening pointing upwards (Fig. 15).
To keep the film from being scratched, the cartridge
must be in perfectly good condition.
When working rvith two eartridges make sure that
the end of the film on the feeding spool is inserted
                                                          *'so that it can easily slip out.
In ready-packed film fillings for 36 exposures the
end of the film is securely fastened to the spool
core? for which reason this type of film is not suitable
for  cartridge-to-cartridge winding. These films
have to be rewound as described in Section IV.


Fig. 16
View original page 19Page 20 · Read text
www.butkus.us
lV. Chunging the l'ilnr
When using the standard filrn cartridge for 36 or 20 exposures, the film has to be rewound into
the cartridge after the 36th or 20th exposure respectively if it is to be gxchanged in ilaylight,
This is done by pressing the knob (1?) in the bottom of the camera body and at the same time
rotating the rewind knob (11) in the direction of the arrow (Fig.16), until the beginning of
the film is loosened and slips ofr the taking-up spool, At this point, the rewind-knob, after over-
coming a slight resistance, will sudilenly rotate quite easily'
The camera back can now be opened and the film-cartridge removed.
It is not necessary to rewind the film on to the feeding spool if  it  is
taken out in the dark-room or if the receiving spool is protected by a
carrridge (refer to section III,  6).
Do not change the film in bright sunliglrt but rather, if possible, in the
shade. After having been taken out of the camera, the film-cartridge
must he kept in a light-proof receptacle.

V. llnny {o huld the {lirnrerfi drrrirrg the lixp{}$ur{!
The manner in which to hold. the camera depends on the kind of lens
being used. The Pentacon F is designed for horizontal as well as for
upright pictures. We recommend the following:

15                                                                        Fig. 17
View original page 20Page 21 · Read text
Fig. 18
 I. Take hold of the camera firmly with both hands. The
 shutter is wound ,rp and set with thumb and forefinger of the
right hand, rvhile focusing and diaphragm-setting  are performed
with the middle fingers of the left and right hands. When the
image is in sharp focus, the shutter is released with the forefinger
of the right hand (Fig. 1?).

2. The camera is held firrnly in the left hand,
while the manipulations are performed with the
right hand. Thumb and forefinger wind the
shutter, the middle finger sets the diaphragm
and distance and the forefinger releases the
shutter (Fig. 1B)"

3. The right hand holds the camera, thumb,
forefinger, and middle finger of the right hand
actuate the shutter and film - transport me-
chanism, while the thumb and forefinger of the
left hand set the focusing and the diaphragrn.
The camera is supported by the ball of the left
hand (Fig. 19).

          t6                                 Fig.  1.9
View original page 21Page 22 · Read text
Ii'ig. 20                www.butkus.us                                                     ,   . _,  ;,r..r,,,,,,:.i,,
This position, is  especially suitable for upright pictures
(Fig. 20).
4. The camera can also be held with the back resring against
your forehead. In  this case the shutter is released with
the left hand, and focusing is performed with the right hand
(Fis. 2L).
5. For worlcing with a tripod, thc camera has to be screwed to
th* tripod by means of rhe tripod-bushing  (16). Iyever use
              tripods with head longer than 4.5 mm.
                 6. The camera should be protected by an everready
                case? into which the tripocl bushing (16) of the
            Pentacon F is screwed. When used without an
             everready easeo the camera may be held by a
              neckstrap which is linked into the eyelets (12).


                Fig. 21
View original page 22Page 23 · Read text
Fis. 22
                                                           \  l.  t.lrfrt'   ttJt l'rgtr}\*f  f'{*s

                                      For pictures to be taken at a closer distance than
                                              the focusing of the lens permits, intermediate rings
                                     have to be used according to requirement. These
                                                 rings, three of which having different lengths form
                                    one seto .are mounted between the lens and the
                                      camera body (see section II'  1). Sharpness, picture
                                             outline, and depth of field are viewed in the
                                           prismatic telescope-finder in the same manner as
                                          for long-distance exposures. Insertion of  the
                                            intermediate rings puts the automatic diaphragm
                                      mechanism out of action.
You stop down the fiaphragm-setting ring by pushing it towards the camera body and letting
it click in at the desired diaphragm number.
Shoulil yo1, howevero positive\ wigh to use the automatic diaphragm you will need a special
inlermefiate ring with cable release connection. Camera shutter and automatic diaphragm
can then be released by means of a double wire release. Also lenses with the pressur:e release
diaphragm may be used in this way. Details are to be found in the instructions accompanying
the intermediate rings.
For larger picture ratios we recommend. using the Intermediate Ttrbes or the Bellows Attachment.

                                                                                                1B
View original page 23Page 24 · Read text
www.butkus.us
Vll. Maintenan(:(' of the Camera
From time to time it will become necessary to remove dust or remains of film which may have
penetrated into the film track, the spool chambero film-pressure plate, or camera back. Only
a soft camel's hair brush must be used for this. Also the mirror, if at all necessaryo has to be
cleaned with a soft camel's hair brush, but never with a cloth. The coated surfaces of the lenses
may be cleaned carefully with a soft linen cloth after having been d.usted u'ith a clean brush.
The same pertains to the eye-piece of the viewfinder (20).-Finger prints on the lens not only
cause unsharp pictures but also spoil the T-coating and the polish.


l9
View original page 24Related documents and language editions


From the M. Butkus archive. Original publisher and archive notices are retained.
Check the model and edition against your equipment.
PDF verified 2026-10-10.