Film cameras
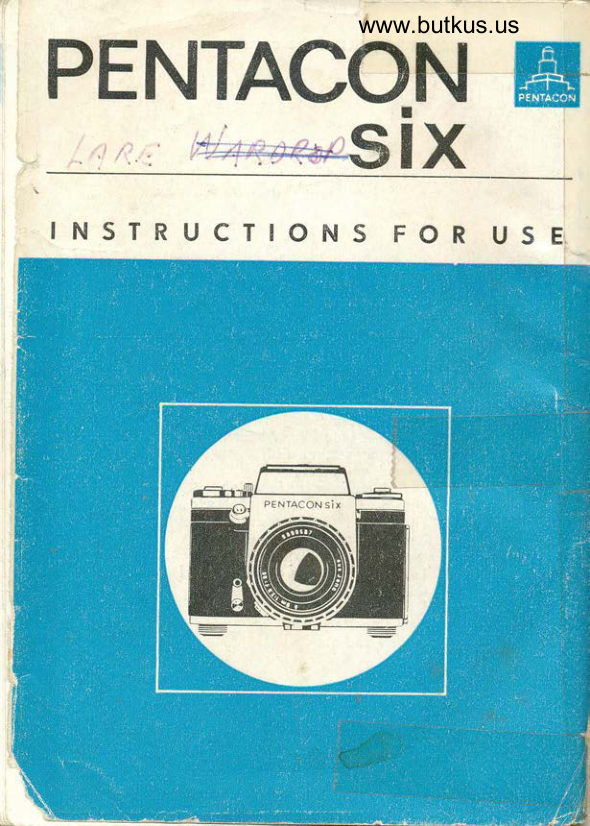
PENTACON SIX User manual
User manual for PENTACON SIX. 28 pages in English. Read the original PDF, download or print a copy without registration.
28 pagesEnglish2.5 MB PDF
Loading your manual…Open PDF directly
Document details
- Brand
- Pentacon
- Model / document
- PENTACON SIX
- Document type
- User manual
- Language
- English
- Pages
- 28
- File size
- 2.5 MB
- Category
- Film cameras
- Document date
- Not specified in catalog
Search available document text
Find a term, then jump to its page in the original PDF. Image-only pages may not be searchable; check the PDF for exact wording and diagrams.
Page 4 · Read text
There ore ports of your PENTACON.six which ore not to be touched'
To prevent on opp|.ooch, they ore inoccessib|e without opplicotion
of force, Yet it is u.ry informotive to hove o look into this hidden
;;r;i"   which is moie possible by the cross-sectionql view givgl
h;;;.'W" ore thus r"uuoiing the secret to which this comero model
      itt-i"alputoble singuiority. We see the finder system control-
","*linq the comero, *nlcn  ii pre-eminently oble to moke the compl.i-                                                                  which,                                                 system                                 A                           so                                 uncomplicoted.                 pn.togrbphy        r" ..J"i"."i"",                            "'-nonnu',                                                                  oc-                                             ond                                                            lens'                                      comero'                             combines                 simplei;'.;;;"zingly
.*ti.ri.l    i" .o-rlnttur]-utrionts to form on orgonic who.le ond whichoroduces picture-toking possibilities greotel in -number ond de-        perfection thon those of ony other type of comero';;;;       "l


                                                                                                                                     1
                                                                                                                                                                   !)I
View original page 4Page 5 · Read text
www.butkus.us Regording. the exterior of the comero: you                                            unfold the two inner    -i. poges of the front ond bock covers ond look ot the comer. itr.ir i"     l: the            position     sorne                  os                               illustroted                                   it i.s                                         in the instruction,                                                              tor-"i..                                                         rn"    LtI most                  ports       importont                       morked                     ore                             by numbers                                      ond exploined                                                olong-


    The following Abridged Instructions ore o summory of the most
    importont sections of this lnstruction Booklet. These sections-by    deserve porticulor ottention. Yet the knowredge ocquired
    reoding them olonb connot compensote for t6e voluoble inl
    formotion to be obtoined by studying the complete instruction
    monuol,

 1. Pull lqtch (7t downwqrd ond open comero bock.
    Exposure counter (l7f jumps io storting.point.
2. Plqce film into left-hqnd spool chomber.
3. Remove. gumstrip, pull poper lesder qcross picture gote ond
   push it into the longer slit of the receiving spool.
4. swing ropid wind                              (2f oround os fqr os it wiil go ond con-                        -lever    tinue qdvoncing the film by smoll rocking movemeits until the
    reference mork imprinted on the poper teoder stonds ogoinst
   the white dot on the picture gote. Now move the ropid-wind
    lever (2| bqck to its initiql position ond close the comero bock.
   The short rocking movements of the ropid wind lever moy be                                                                 i9   performed only while the film is being inserted,  i. e. os loni os
   the comerq bock is open!
5. Set film reminder diols (12 ond t6t.

2
View original page 5Page 7 · Read text
www.butkus.us


Inserting the film storts, of course, with the unlotching ond opening
of the comero bock. Any type of commerciolly ovoiloble roll film 120
f or 12 exposures 6 x 6 cm (21/+ x 21/n"l ond roll tilm 220 for 24 expo-
sures 6x6cm (2Llsx2r/+") moy be used in the comero, The film is
inserted os follows: Retroct the two spool supports (B), rotote them
to fixed position, ploce on empty intoct film spool into right-hond
spool chomber, moking sure thot the corrier mechonism cotches the
spool core, unlock the spool support ond let it spring bock, oqgl-tKJ
pivot pin will engoge in the spool core. The full film spool-is in-
serted into left-hond spool chomber in exoctly the some monner.
Removing the film will be referred to loter on, Once more with
regord to inserting it: Swing ropid wind lever (2) oround os for os
it will go ond continue odvoncing the poper leoder until the
reference mork imprinted on it stonds ogoinst the white dot on the
picture gote. Tout ond even winding of the poper leoder is neces-
sory to ovoid foulty film feed periods. After this, move the ropid
wind lever bock to its initiol position. lt is of speciol importonce to
note thot the short rocking movements of the ropid wind lever moy
be performed only while the film is being inserted. i. e. only os long
os the comero bock is open. With the connerq closed - even with-
out o film in it - they ore not permitted. Closing ond locking thecomero bock concludes the procedure of inserting the film.
View original page 7
Page 9 · Read text
www.butkus.us


Theexposurecounter(17)jumpsbocktoitsstortingpointwhenthe
comerq bock is opened ond is outomoticolly set when the comero
bock is closed. The shutter hos to be releosed ond cocked ogoin
four times, whereupon the mork for picture 1 will oppeor in the     :;exposure counter. Do not let the winding lever jump bock but move
it bqck smoothly. At every subsequent cocking of the shutter, the
counting mechonism odvonces to the next number.
After the 12th ond, in cose of roll film 220, ofter the 24th exposure,
the winding mechonism is locked. lt is releosed ogoin by meons of       I
disconnecting lever (3), so thot the ropid wind lever con be qctlu-
oted ogoin steodily ond without interruption.


Film Reminder Diol (12) beoring the symbols for block-ond-white
ond color film, is mounted,obove the speed setting diol (13)' The
symbol required is set for roll film 120 ogoinst the numerol 12 ond
for roll {ilm 22O ogoinst the numerol 24 on the speed setting diol'
A second Film Reminder Diol (16) morking the film speed in DIN
ond ASA reodings is positioned obove the ropid wind lever.


The Finder Hood (1) opens ond springs into operoting position'ss
soon,os you push [nob'(9) in the direc-tion o{ the ottoti,'lt is clos<*l
by finger-tip pressure on the cover.
The finder hood is outomoticolly locked onto the comero. To re-
move it, depress unlocking knob (11) on the comero top' The hood
con then be pushed towords the bock ond lifted off.
View original page 9Page 11 · Read text
www.butkus.us


The Mognifier in the finder hood is designed for criticol,focusing
ond to-focilitote picture composition. The mognifying lens (14)
yielding o fourfold enlorgement moy be swung into position po-
rollel with the imoge field lens.

                              into working..position                    is moved           FinderThe    Sports                                                                ,by.lifting.!i."                                                 frome (10).                           ond putting out the                   hood cover             the finder           ofi;;r-ilri


The Pentoprism permits viewing the imoge.ot eye level' lt is in-           'pto..               of the finder Food. The-prism. reveols the reflexr"rt"a-i"
i;;;;             opproximo.tely 2.5 times ond with sides unreversed.
F;;;;t ""fJrg"Jwith"fouliy'eyesight moy insert o corrective lens into the
          of the viewfindei to reploce their specto.cles. Pull the two
"V"pi.i.loterol cotches simultoneously towords the bock ond ploce the
pentoprism on to the four connecting pins on top of the comero'
 [;i;;;;   th.-.oi.nur, ond the pentp]ism snops in. Removing the
 prism is performed occordinglY.
View original page 11Page 13 · Read text
www.butkus.us


Focusing tokes ploce with the mirror swung into viewing position,
 i. e. with the shutter wound up, Rotote focusing ring (22) on th,e
lens mount until the imoge of the subject oppeors shorp on th,e
field lens. Distonce ond deiinition moy olso be set by meons of the
scole on the lens mount, in which cose the field lens serves only
for determining picture composition, The depth of definition con be
reod from the focusing ring with the help of depth-of-field scole
(21).Engroved on the left ond right of the index mork on thedepth-
of-field scole ore diophrogm numerols. At the f/8 setting the depJF
of shorpness con be reod from the focusing ring obove the two
diophrogm numerols on the depth-of-field scole,
 lll.: Distonce 5 meters (15'), diophrogm setting f,r8, depth of shorp-
ness from 3.50 meters to opprox.9,50 meters :  10'to opprox.32',
When using the sports finde:', focusing hos to be performed be-
forehond, either on the imoge field lens or by the scole of the
focusing ring.


The Diophrogm is set by rototion of the diophrogm ring (20) o"n the
lens mount. The diophrogm numerol required for the exposure hos
to'be brought to meet the red index mork, Lenses with outomotic
spring diophrogm ollow for full operture focusing. Not until the
shutter is releosed, does the diophrogm close down to the pre-seg
operture. To check the dep'ih of field during focusing, you simply
depress lever (19) on the lens mount. This couses the diophrogm to
close down to the volue preselected by meons of setting ring (20).


10
View original page 13
Page 15 · Read text
www.butkus.us


6 Different lmoge Field Lenses ore ovoiloble for the PENTACON
six (see olso the lnstructions for using "Close-up Equipment for
PENTACON six"). The field lenses ore exchonged os follows: Remove
the finder element from the comero ond then loosen the screws on
the three retoining springs with o screw driver. Swing the springs
oside,,toke out the spring ring, ond tip the im,oge lens out of the
comero. Fixing ony one of the other field lenses is performed in
reverse order. lt is importont to note thot the thinner port of the
lens must lie towords the bock of the comero.


The Rongefinder Lens forms two port imoges. These ore moved to-
words oi owoy from eoch other by rototion of focusing'rirtg (22).lf the outlines join precisely where the two sections 'meet, the
iinoge is in correct focus. This con be observed best on stroight
verticol lines.
                                                      I
View original page 15Page 17 · Read text
www.butkus.us


The Focol-plone Shutter of the PENTACON six gives exposure
speeds r.onging from 1 sec. to 1/1000 sec. ond B (ony desired length
of time). For exposure speeds of longer thon 1 sec. it is odvisoble
to use o speciol wire releose with locking device. The speeds ore
groduoted so thot eoch figure indicotes double, or one holf of the
speed morked by the next figure on the scole. The diophrogm
scole works onologously.  lf the light volue is to be mointoined,
the next smoller operture hos to be employed for twice the ex-
posure time, or vice verso.


The Exposure Speeds moy be set either before or ofter the shutter
hos been cocked. The speed setting diol (13) is rototoble in either
direction. The desired exposure speed figure must come to stond
ogoinst the red triongulor mork. The speed settings click in os o
sofeguord ogoinst unintentionol displocement,


The Ropid Wind Levelruru", not only to cock the shutter but simul-
toneously to tronsport the film. By this some performonce the dio-
phrogm is set to its widest operture, the exposure counter switched
to the next number, ond the mirror swung owoy to ollow the light
roys to reoch the imoge field lens.


14
View original page 17
Page 19 · Read text
www.butkus.us


The Deloyed-Action Mechonism is octuoted by swinging the wind-
ing lever (5) through obout 900 ond operoting the shutter releose
(+1. The shutter must be cocked beforehdnd' The self-timer runs for
opprox. 10 seconds. lt moy be employed with oll shutter speeds.
The winding lever returns to its normol position ofter the shutter
hos been releosed.
Locking the Shutter Releose is ochieved by turning the lower milled
ring (15) on the releose knob (4) onti-clockwise os for os. it will go
(the red dot must be ot the top)' Inodvertent tripping of the shuttel'
is thus mode impossible. The shutter mechonism is unlocked'by
turning the milled ring bock ogoin.


Synchronizotion with electronic flosh ond bulbs is effected by
meons of the X contoct. The flosh socket (6) is built into the lower
port of the comero front. Clockwise rototion of the milled.ring on
ihe flqsh socket keeps the flosh plug locked in position. When in-
serting or removing the flosh p-lug moke sure thot the red dot on
the milled ring stonds opposite the red dot on the front of the flosh
socket. For the use of electronic flosh, the speed diol must be
moved to the I setting, for short-burning bulbs to llts sec. orlonger.For deloyed-oction exposures the shutter releose hos to be de-
pressed until the flosh lights up. (Use coble releose with locking
device.) The correct diophrogm setting is found by dividing the
guide number of the flosh by the flosh-to-subject distonce figure'


 16
View original page 19
Page 21 · Read text
www.butkus.us


Remove the film ofter exposing the 12th frome (on film 120) or the
24th frome (on film 220) ond subsequently winding up the poper
troiler. After monipulotion of disconnecting lever (3) the troiler
hos to be wound by f u I I swings of the ropid wind lever followed
by octuoting of the shutter releose until the winding of the lever
becomes noticeobly eosier. Do not odvonce the troiler by short
rocking movements os were used when inserting the film (see
poge 3 ond poge 4)! Now open the comero, bock, pull out the
spool support ond lock it. Tip the comero slightly, let the film spool
foll into your hcnd ond fosten the gumstrip to the poper troiler,
Also (in cose comero is fixed to tripod) the film spool con be lifted
out by its lower spool flonge, in which cose it must rest ogoinst
the upper p,ort of the spool chomber with the corrier mechonism
still engoged,


Exchonging lenses is o quick ond simple motter. Turn milled ring
(18) of the boyonet fitting onti-clockwise until it stops ond remove
the lens from the comero. The red mork on the scole of the lens to
be inserted must be of the top, ond the screw, or pin, on the
inner edge of the lens mount hos to engoge in the recess in the
lens seot of the comero (see illustrotion). To fosten the lens tighten
milled ring (18) by clockwise morrement.


18
View original page 21
Page 23 · Read text
www.butkus.us


The Stondord Lens, Jeno Bm 80 mm   f l2.B is equipped with outo-
motic spring diophrogm control (ASD). No specific hondling of the
lens is necessory except setting the operture required for the ex-
posure. The diophrogm is outomoticolly controlled by the comero,
Duri.ng the focusing procedure it is completely open.
Supplementory Lenses with Automotic DlophroEm
ore operoted in the some monner os described obove for stondord
lenses. This opplies both to setting the diophrogm stop ond to
checking the depth of field.


Supplementory Lenses without Automotic Diophrogm
(e, g, Telemegor 300 mm f/4.5 with nronuol pre-set diophrogm) ore
set by pressing the setting ring directly behind the diophrogm scole
bockwords ond odjusting it to bring its mork ogoinst the desired
diophrogm numerol, where it clicks in. This mokes  it possible olso
with these lenses to focus ot full operture. Inmediotely before
moking the exposure, you turn the diophrogm ring bock to the
preselected stop.
With lenses of o longer focol length (exceeding 300 mm) the outo-
motic diophrogm lever in the comero moy project into the poth of
roys ond con, therefore, be moved owoy from its normol working
position towords the comerq body. To ochieve this, remove the lens
from the comero ond swing the lever, which becomes visible on the
left inside the opening, just for enough thot it will not touch the
comero body when the shutter is cocked. Swing the lever bock into
operoting position when lenses with outomotic diophrogm ore to
be used.


20
View original page 23
Page 25 · Read text
t:
  III                            www.butkus.us
+
 I

   The following Interchongeoble Lenses ore ovoiloble for the
   PENTACON six:
    Stondord lens:
   ous Jeno Bm                            80 mm f/2.8 outomotic
   Supplementory lenses:
    ous Jeno Flektogon                      50 mm fi4  outomotic
    ous Jeno Flektogon                      65 mm f/2.8 outomotic
    ous Jeno Bm                             120 mm f/2.8 outomotic
    ous Jeno S                             180 mm  f /2.8 outomotic
    ous Jeno S                            300 mm  f i4  outomotic
    Meyer Telemegor                       300 nrm  f '4.5 pre-set
    Meyer Orestegor                       500 mm f/5.6 pre-set
    ous Jeno Spiegelobjektiv (Mirror Lens)   1COC mm f/5.6
   One finol hint with regord to setting up the comero on o flot sur-
     foce, A screw (lndex rujmber 223650), to be threoded into the tri-
    pod socket of the comer"o, moy be used os o third supporting point'


   The detoils given in this boo!<let ore subject to -olterotions which   moy result  f rom  f urther development in the rnonufocturi ng process'

     Pleose reod these instructions for use corefully, since we con occePt
    no liobility for domoge coused bY improper hondling of the comero,

     22
View original page 25Page 28 · Read text
lmportont ports of the cqmero


                                           )


 1  Finder hood
 2  Ropid wind lever
 3  Disconnecting lever
 4  Shutter releose
 5 Winding lever for deloyed-oction mechonism
 6  Flosh socket
 7  Lotch for comero bock
 8  Spool support
 9  Knob for opening the finder hood
10 Frome finder (sports finder)
11 Knob for unlocking finder hood
12 Film type setting diol
13 Speed setting diol
14 Mognif ier lens for focusing
15 Locking ring for shutter releose
16 Film speed setting diol
17 Exposure counter
18 Milled ring for fixing the lens
19 Lever for checking depth of field
20 Diophrogm setting ring
21  Depth-of-field scole
22 Focusing ring
23 Tripod socket
View original page 28Related documents and language editions

From the M. Butkus archive. Original publisher and archive notices are retained.
Check the model and edition against your equipment.
PDF verified 2026-10-10.