Home/Butkus archive/Pentax
Camera accessories

PENTAX Fb DATA BACK User manual

User manual for PENTAX Fb DATA BACK. 9 pages in English. Read the original PDF, download or print a copy without registration.

9 pagesEnglish1.0 MB PDF
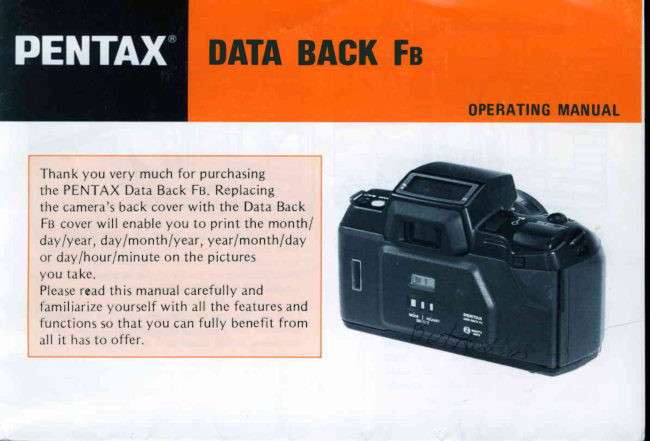
PENTAX Fb DATA BACK manual cover
Read the manual Original PDF
Download PDF
Loading your manual…Open PDF directly

Document details

Brand
Pentax
Model / document
PENTAX Fb DATA BACK
Document type
User manual
Language
English
Pages
9
File size
1.0 MB
Category
Camera accessories
Document date
Not specified in catalog

Search available document text

Find a term, then jump to its page in the original PDF. Image-only pages may not be searchable; check the PDF for exact wording and diagrams.

Page 2 · Read text
DATABAGKFg

                                       OPERATINGMANUAL


Thank you very much for purchasing
the PENTAX Data Back Fs. Replacing
the camera'sback cover with the Data Back
F u c o v e rw i l l e n a b l ey o u t o p r i n t t h e m o n t h /
dayf year, day/month f year, year/month ldaV
or day/hour/minuteon the pictures
you take.
Pleaseread th is manual carefu I ly and
familiarizeyourselfwith all the featuresand
functionsso that you can fully benefit from
all it has to offer.
View original page 2
Page 3 · Read text
:.SPECIFTCATIUNS

Camera                       .....PentaxSF7/SF10, SFX/SFI and SFXru/SF1N
Mounting                      ..Used in place of camera's back cover
Data printout..................:.................Onback of film with 7-segment,6-digitliquid crystal display (LCD)
Data modes              ..............:....Fivemodes: yearlmonthldav,daylmonth/year, month/daylVear,dayl
                              hour/minute and "            --"   (blank) by MODE button switching. Also
                                provided with auto-calendar function (automatic correction of year, leap
                                 year, long and short months.
                          Y e a r ( 8 7 - 1 9 )   =  1 9 8 7 - 2 0 1 9              H o u r   =  o - 2 3
                                  (1 - 12| =         to December      Minute = , 0o - 59                                y:;.n                                                        i":Ti
Size of printed-out dbta.............:....Height0.7Smm and width O.45mm
LCD (data display) panel ...............Uses7-segment,6-digit LCD
Confirmation of printout..............."-"  indication blinks for a few secondsin LCD panel.
Applicable range of film speeds....lSO 25 -  1600 (automatically set)
Number of flashes
Power source...........1...........i............One3V lithium battery (CR 2025)
Size.........,.
Wei9ht........             ..................;.68.5g.12.4 oz.l without battery            j
Accessory..                      Special case
o The Soft Case FB Ouartz Date for keeping the camera with this Data Back attached, is optionally available.
SPECIFICATIONSARE SUBJECT TO CHANGE WITHOUT ANY OBLIGATION ON THE PART OF
T H E M A N U F A C T U R E R .

             r*$&i'"
                            www.butkus.us
View original page 3
Page 4 · Read text
II xow ro Frr DATABAcK covER oN                                                                                             I


When replacingthe back cover with the Data Back,      order to keep  it from damaging. When  f itting the
 f irst remove the back cover by flipping it open and      Data Back on,  f irst  f it the lower shaft stem into
 incliningit outward while pushingon the f ittingi         the camera, and then   f it the upper shaft stem  in
detachingpin shown by the arrow. Store the          wh ile p u shing on the  f itting/detaching pin, then
 removed back cover into the accessorycase in             re le a se th e  f itting/detaching pin.

                                               Ca u tio n : Do not tam per with the data  r ecor ding
                                                        win d o w. Blow  off any dust with a blower , and
                                               wh e n e ve r soiled, clean with a soft cloth.
View original page 4
Page 5 · Read text
INSERTING BATTERY


                                                                          PENTAX
   - n n
 tE!![ J U U                                             @::r:
   mcioeI aoiusr


1 . Remove the battery holder f rom the Data Back      3. The LCD panel will display the yearlmonth/
   by pulling it down.                                day data. Adjust the data to your local ones
2. Placeone 3V lithium battery (CR 2025) on            by following adjustment proceduresto be
   the holder, with its (+) side up. Replacethe            explained later.
   holder, making sure that it is locked in place                      lf the battery is not properly loaded, nothing
  w i t h a c l i c k .                                    appearsin the LCD panel.


                            www.butkus.us
View original page 5
Page 7 · Read text
Data adjusting                                       Adjusting the date
1. Each time you pressthe SELECT button O,           1. Pressthe SELECT button (D, and make the
   the numeral indicationwill blink in the                 year, month or day blink.
   order as shown below. Selectthe numeral           2. Repeat or keep pressingthe ADJUST button O
    indication you wish to adjust and leave it                   until the desired numeral indication appears.
   b l i n k i n g .                                          3. Pressthe SELECT button O  , and the indication
Order of blinking                                  chosenwill stop blinking.
    ln the date mode:          Year -+ month  -+ day
    In the hour/minute mode: Hour + minute --+:       Adjusting the hour/minute
2. Repeat pressingthe ADJUST button O until          1. Pressthe SELECT button (O , and make the
   the desired nuineral indication appears.                hour, minute or second(:  l blink.
o  Each time you pressthe ADJUST button (D,        2. Repeat or keep pressing the ADJUST button @
   the numeral indication increasesby one, and               until the desired numeral indication appears.
   as you keep it depressed,the indication              3. To adjust the second ( : ), press the ADJUST
   increasescontinuously and rapidly after a few           button O while ( : ) is blinking, then release
   seconds.                                           your fingernail in sync with a time signal.
                                                              4.  After adiusting the hour/minute, pressthe
                                          SELECT button @, and the indication adiusted
                                                                     will stop blinking.


                            www.butkus.us
View original page 7
Page 8 · Read text
MODE S:UI'ITCHING

As shown in the preceding page, each time you
press the MODE button O, the mode in the LCD
panel switches from "Year/month/day"  to "DavI
month/year"  to "Yearlmonth/day"   to "Dav lhour/
minute" to "--    --    --."  Stop pressing the
MODE button when the mode you desire is shown
in the LCD panel. lf you want no data imprinted
on your picture, choose the "--    --   --"  mode.


                       Day/month/year                         Day/hour/minute
    (American use)     (European use)      (Japaneseuse)


   "M"  that appears in the LCD panel indicates
    that the numeral below is "Month."
     "-"   that also appears in the LCD panel keeps
   blinking as you releasethe shutter, indicating
    that data have been imprinted on film.


 PRECAUTIONS}VHENTAKING PICTURES

                                                      The data  is printed  on the lower  right-hand  corner
View original page 8
Page 9 · Read text
b  printed on the picture simuftaneously.               of the pacture, as shown In the photograpn.  I nls
  The working temperature for data printing is        data will be hard to see if this part of the photo-
   0 -  50"C.                                      graph is whitish or yellowish in color, so try to
  The f ilms that can be used are those with ISO        take pictures in such a way as to make this part of
   25 -  1600, and the camera is automatically          the picture have a dark background whenever
   set for the ISO f ilm speed. Using high-speed         possible.
   films (lSO 1O0O-  1600) may blur the printed
   characters,while using films with speedsthat
   are lessthan ISO 5O may result in the characters
   and numerals coming out dim.
     lf you pressthe MODE button O during data
   adjustment with a numeral indication blinking,
   the adjustment will be completed at that
  moment. Also, even if you releasethe shutter
   during data adjustment with a numeral
   indication blinking, data will not be imprinted.
  The Data Back Fg works on 3V lithium battery
  CR2O25,which will last approx. 3 years. lf the
   data on a picture becomesdim or hard to see,
   replace the battery with new one.

                                                          Photographedon September 1, 1988


56969 ENG                       www.butkus.us              O2-9OO8 Printed  in Japan
View original page 9

From the M. Butkus archive. Original publisher and archive notices are retained.
Check the model and edition against your equipment.

PDF verified 2026-10-10.