Camera accessories
PENTAX Fe DATA BACK User manual
User manual for PENTAX Fe DATA BACK. 5 pages in English. Read the original PDF, download or print a copy without registration.
5 pagesEnglish0.9 MB PDF
Loading your manual…Open PDF directly
Document details
- Brand
- Pentax
- Model / document
- PENTAX Fe DATA BACK
- Document type
- User manual
- Language
- English
- Pages
- 5
- File size
- 0.9 MB
- Category
- Camera accessories
- Document date
- Not specified in catalog
Search available document text
Find a term, then jump to its page in the original PDF. Image-only pages may not be searchable; check the PDF for exact wording and diagrams.
Page 2 · Read text
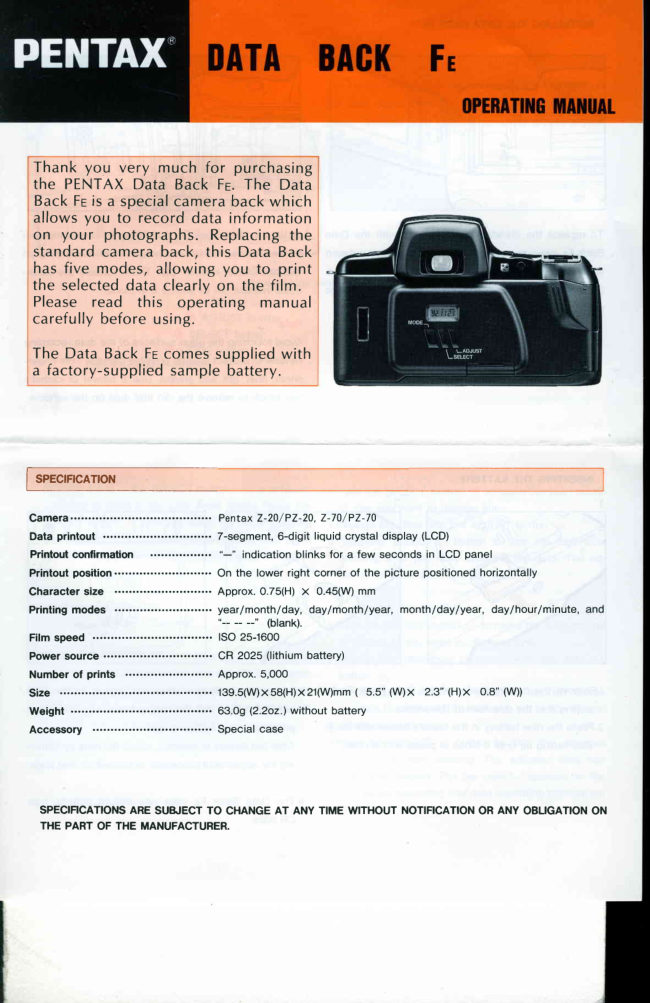
Thank you very much for purchasing
 the PENTAXData Back Fe. The Data
 Back Feis a specialcameraback which
 allows you to record data information
 on your photographs.Replacingthe
 standardcameraback, this Data Back
 has five modes,allowingyou to print
 the selecteddata clearlyon the film.
 Please read this operating manual
 carefullybeforeusing.

 The Data Back Fr comessuppliedwith
 a factory-suppliedsamplebattery.


i specrprcaroru                                                                                                                                          i

 Gamera......                   PentaxZ-20/ PZ-20,Z-70/ PZ-70
 Data printout ..............          7-segment,6-digit liquid crystal display (LCD)
 Printout confirmation                    "-"  indication blinks for a few seconds in LCD panel
 Printout position              On the lower right corner of the picture positionedhorizontally
Character size                   Approx.0.75(H) X 0.45(W)mm
 Printing modes                   yearlmonth/day, daylmonth/year, month/daylyear, day/ hour/minute,
                                              (blank).
 Film speed                         tso 25-1600
 Power source               CR 2025 (lithium battery)
Number of prints                 Approx. 5,000
 Size                        139.5(W)x58(H)x21(W)mm( 5.5" (W)x  2.3" (H)x O.8"(W))
 Weight                          63,0g (2.2o2.)without battery
 Accessory                        Special case


  SPECIFICATIONSARE SUBJECTTO CHANGE AT ANY TIME WITHOUT NOTIFICATIONOR ANY OBLIGATIONON
  THE PART OF THE MANUFACTURER.
View original page 2Page 3 · Read text
INSTALLINGTHE DATA BACK Fe


To replace the standard camera back with the Data     Install the Data Back Fe, first fitting its lower hinge pin
Back Fe, open thecamera back and'thentiltitoutward    to the camera, then its top hinge pin while pressingon
while pressing the back-cover-release pin to remove it.    the back-cover-releasepin. Then, release the back-
Store the removedcamera back in the supplied case to    cover-releasepin to secure it in place.
protect it from being damaged.
                                                    Note:
                                                  Avoid touching the glass surfaces of the data recording
                                             window to protect against possibledamage from finger-
                                                              prints, dust, grit and grease. Use a blower or camel's
                                                           hair brush to remove the dirt and dust on the window.


 INSERTINGTHE BATTERY
                                                           3
                                                                                                   \                                                                                                    \            lzr(                                 t(o)l   /


l.Remove the battery holder of the Data Back Fe by     3.lf the data indication does not appear in the LCD
  pulling it in the direction of the arrow.                   panel, it means that the battery has not been inserted
2.Place the new battery in the battery holder with its @      properly or the battery is low.
  side facing up until it locks in place with a click.         After the battery is inserted, adjust the data by follow-
                                                          ing the adjustmentproceduredescribedon next page.

                                             oThe Data Back Fe uses one lithium battery, type
                                             cR 2025.


                           www.orphancameras.com
View original page 3Page 4 · Read text
SETTING THE DATA


                                            The correct time is entered via three buttons located on
                                                     the Data Back. The time setting appears in the LCD
                                                     panel. Cdrefullypush these buttons with a coin or your
                                                                                                   f ingernail.


                            LCD panel
                                      (Data-displaywindow)
                                Battery holder
                  O ADJUST button
                 O SELECTbutton
              O vooe button
          Film-informationwindow


Correctingthe data                                  Adjustingthe data
1.At each press of the SELECTbutton  O, a different   l.Pressthe SELECT button @ to make the year, month
  category of digits in the LCD panel blinks.Press the     or day you want to change blink.
 SELECTbutton €) until you reach the blinkingdigit(s)  2.Changethe data with the ADJUST button @.
  you want to change. The digit(s)will repeattheir cycle   3.Press the SELECT @ button to stop the digit from
  in the followingorder as you pressthe SELECTbutton     blinking, after you have changed the data. The ad-
 o.                                                   justed data has now been entered.

Date:Year- Month-Day                            Adjustingthe hour/minute
Time:Hour- Minute- :(Second)                       l.Pressthe SELECTbutton @ to make the hour,minute
                                                           or second (:) you want to change blink.
2.Pressthe ADJUST button @ to change digits of the  2.Change the data (hour or minute)with the ADJUST
  specifiedcategoryyou chose with the SELECTbutton     button @.
  @. Digits increase by one each time you press the    To change the second (:), press the ADJUST button
 ADJUST button €). Holding down the button will  @ while (:)is blinking,then releasethe buttonin sync
  bring on continuousdigit advance.                    with a time signal.
                                                  3.Press the SELECT O button to stop the adjusted
                                                  hour/minutefrom blinking. The adjusted data has
                                           now been entered. The bar mark"-"appears on the
                                        LCD panel, indicatingthat data imprintingchoices are
                                                      oossible.
View original page 4Page 5 · Read text
rHEMoDE                                                                                                                                                  IIl_swrrgrunc

 At each press of the MODE button $,  the mode in the
LCD panel switches as shown in the chart. When the
 desired data mode appears in the panel, release the
 button.       indicates no data will be imprinted.


Notes:
o "M" on the LCD panel indicates "Month" .
oAs the shutter is released,the bar mark "-"   in the
  display blinks for a few seconds, indicating that the
  data has been imprinted.


T
LI , -oPERATTONALPRECAUTTONS
 o The data on the LCD panel is imprintedon each frame  a Never try to break up or rechage the battery.Also, do
  you expose.                                          not dispose cf the battery in fire, as the battei'y may
 o "Year-Month-Day" and "Day-Hour-Minute" cannot    explode.
  both be imprintedat the same time.                oAlways keep the battery out of the reach of children.
 oThe working temperaturefor data printing is 0-50'C.   o lf the corner of the picture where the data is imprinted
 oUse DX-coded films with ISO ratings from 25-1600.   has a white or yellow object, the data may be difficult
  When such film is loaded,the film speed is automati-    to see. When composing your photographs, try to
   cally set by the camera.                             avoid brightly-coloredsubjects in that corner.
 o lf high-speedfilm with an ISO rating of 1000-1600is
  used, the imprintedcharacters may blur.
 o lf film with an ISO rating of 50 or lower is used, the
   printed characters may be dark or dim.
 o lf you release the shutter while the blinking data is
  being corrected,the data cannot be imprintedeven if
   the shutter is released.
 oThe Data Back Fe operates on a 3V lithium battery,
   type CR2025.The battery will last for approx.3 years.
     lf the data on a picture becomes invisible,replace the
   battery.                                                                  Photographed on November  1, 1992

                   Asahi   Optical   Co.,  Ltd   11-1, Nagata-cho   1-chome,   Chiyoda-ku,    Tokyo  100, IAPAN
                 Fenh   Euope    n.v.  Weiveldlaan    3-5, 1930 Zaventem,   BELGIUM
                Penh   cmbH     Julius-Vosseler-Strasse,     704, D-22527  Ha    burg,  GERMANY
                  Fentu  U  K.  Limit€d.   Pentax  House,   Heron   Drive,   bngley,    Slough   Sl3  8PN,  U K
                    kntd    FEne    S.A.  Z   I  Argenteuil,    12, rue  Anbroise    Croizat,95100     Argenteuil,   FRANCE
                      ftntax   Benelux  B V   (for  Netherlands)     Spinveld    25, 4815 HR  Breda,  NETHERLANDS
                                                        (for  Belgium   & Luxemburg)    Weive)dlaan    3-t   1930 Zaventem,   BELCIUM
                Rnh     (Schweiz)  AG  lndushieshasse      2, 8305  Dietlikon,   SWITZERLAND
                  Rntex   Scandindia    AB  Falhagsleden   5Z 75127  Uppsala,  SWEDEN
                  Fentax  Corporetion    35 lnverness   Drive   East,  En8lewood,    Colorado   80112, U S A
                   Pentar  Canada  Inc.3131   Universal    Drive,   Mississauga,    Ontario   LIX  2E5, CANADA                                   Copyright O  Rsatri Optical Co, Ltd. 1992
56912 ENG                                                                                               03  9506    Printed in Japan


                            www.orphancameras.com
View original page 5Related documents and language editions
From the M. Butkus archive. Original publisher and archive notices are retained.
Check the model and edition against your equipment.
PDF verified 2026-10-10.