Film cameras
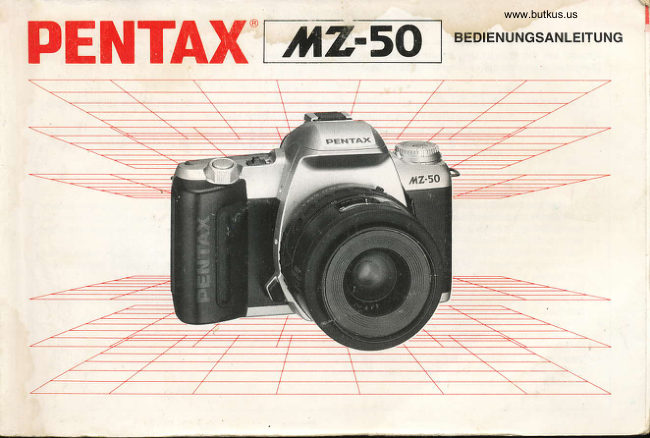
Pentax MZ-50 User manual
User manual for Pentax MZ-50. 99 pages in English. Read the original PDF, download or print a copy without registration.
99 pagesEnglish7.0 MB PDF

Loading your manual…Open PDF directly
Document details
- Brand
- Pentax
- Model / document
- Pentax MZ-50
- Document type
- User manual
- Language
- English
- Pages
- 99
- File size
- 7.0 MB
- Category
- Film cameras
- Document date
- Not specified in catalog
Search available document text
Find a term, then jump to its page in the original PDF. Image-only pages may not be searchable; check the PDF for exact wording and diagrams.
Page 4 · Read text
FOR SAFE USEOF YOURCAMERA

Although we have carefully designed this camera lor safe operation, please be sure to follow                                                                           Yprecautionsgiven on this page.                                                                                                                ni
 A  WARNING This mark indicates precautions that, if not followed, could resutt in        Pra
                serious injury to the operator.
 A  CAUTION This mark indicates precautions that,  if not foltowed, could result in
              minor or medium injury to the operator or damage to the equipment.

A  wARNING                    A cAUnoN
o The electronic circuits inside the camera contain    o Do not use the flash near anyone'seyes, as it may
  high voltage working parts. Never attempt to disas-      hurt them. Be particularlycareful with the flash
 semble the camera yourself.                       around infants.
. Never touch internal parts of the camera if they be-        . Nevertry to disassemble,short or rechargethe bat-
 come exposed from  dropping the camera or  for       tery. Also, do not disposeof the battery in fire, as it
 some other reason, as there is danger of an electric    may explode.
 shock.                                                                                   . Removethe batteriesfrom the cameraimmediately
. Wrapping the strap around your neck is dangerous.          if they becomehot or beginto smoke.Be carefulnot
 Make sure that small children do not get the strap     burn yourselfduring removal.
 caught around their neck.
o Do not look directly at the sun through the camera,
 as viewing the sun for an extended period may dam-
 age your eyes.                                                                                                                       1
                                                                                                                                                                                                                                                                 i. Be sure to store batteries out  of the reach of  chil-                                                                                                                                       o l
  dren. Seek medical assistance immediately  if acci-                                                                              (  dentally swallowed.
                                                                                                                                         )
View original page 4Page 5 · Read text
PRECAUTIONSFOR YOURCAMERA

Your Pentax camera is a high-precisionmecha-   Precautions for storage
nism.Handle it with great care.                                         . Avoid leaving the iamera'for an extended period in
                                                        places where the humidity and temperature are very
Precautionswhen taking pictures                     high, such as in a car.
 o Do not use the camera where  it may come  in con-     o Do not store the camera in a closet with mothballs
   tact with  rain, water, or any other liquid, because       or in an area where chemicals are handled. Store  it
  the camera is not weather, water, or liquid resistant.        in a place with good dry air circulation to prevent
  Should the camera get wet  from  rain, splashing      the growth of fungus.
  water, or any other liquid wipe  it off immediately
  with a dry soft cloth.                           Precautions for proper care
 o Do not drop the camera or allow  it to  hit solid ob-       . Nevertouchthe shuttercurtainor mirrorwith your
  jects. lf the camera suffers a shock or impact, take       finger or any other object.
    it to a Pentax service center for inspection.            o Use a blower and lens brush to remove dust accu-
 o Be careful not to subject the camera to strong vibra-      mulated on the lens or viewfinder.
  tions, shock or pressure. Use a cushion to protect          . Never use solvents such as paint thinner, alcohol or
  the camera when carrying  it in a motorcycle, car,     benzene to clean the camera.
  boat, etc.                                             o Electrical problems may often be caused by water,
 . Condensation on the interior or exterior of the cam-        dirt or dust  at points of  electrical contact. Also
  era may be extremely harmfulto the camera mecha-      check for battery leakage, traces of  dirt or grease,
  nism as  it may cause  rust. Furthermore,   if  the       or corrosion due to salinity-or gas. lf you cannot cor-
  camera is taken from warm temperature to a sub-       rect the problems, have your camera inspected at a
  freezing one or vice versa, the formation  of icelets      Pentax service center. Repairs of this nature are not
  may cause damage. In such a case. put the camera      covered  under  the  terms  of  the  warranty  and
   into a case or plastic bag so that any changes in      charges may be assessed.
  temperature difference is minimized. Do not remove
    it    from the           bag                     until                     temperature                               has                                           stabilized.                              www.butkus.us .                      prints  Regular               color                     may cut off                                   what           size                                        appears
  on the extreme edges of the film frame. Compose
  your picture with a margin of safety at the edges.
View original page 5Page 6 · Read text
PRECAUTIONSFORBATTERYUSAG

Other precautions                                     o Use two 3V lithium batteries (CR2 type).
o The temperature range  at which  this camera         o Misuse of the battery can cause hazards such as
    f u n c t i o n s p r o p e r l y i s S O t    t o  - 1 0 t     ( 1 2 2 ' F     t o           leakage, overheating, explosion, etc. The battery
  1 4 " F ) .                                                 should be inserted with the "*"  and "-" sides fac-
 . A camera which has been submerged  in water            ing correctly.
  usually cannot be repaired. lf such an accident                  . Battery performance may be temporarily hindered
  should occur, it is advisable to contact a Pentax             in low temperatures, but will recover in normal
  Service Center immediately.                              temperatures.
o To maintain optimum performance,  it  is recom-         o Keep a spare battery on hand for replacement
 mended that the camera be inspected everyone          convenience when  shooting outdoors  or  while
  or two years. lf the camera has not been used for            traveling.
 an extended period, or is being prepared for an im-         o lf the built-in flash is used continuously. the bat-
  portant photographic session, it is recommended            tery may become warm, but  it does not mean that
  that you have the camera inspected or test shoot           the battery is faulty; it is one of the battery's char-
  with  it.                                                          acteristics.
o Repairs deemed necessary due to usage of this         o Replace the batteries at the same time. Do not
 product in an industrial or commercial application         mix battery brands, type or an old battery with a
 may not be covered  under the  terms  of  the         new one. lt may cause explosion or overheating.
 Pentax warranty.
o The PENTAX warranty provides only for the re-
  pair  of  defects  in  materials  or workmanship.
 Damage of any kind cannot be repaired at no
 charge under the terms of the warranty.  lf the dif-
  ficulty is caused as a direct result of the product
  being used  in conditions as  outlined  in  the
  "Precautions for Your Camera" section or any
 other operation contrary to the instructions out-
  lined in this manual, charges will be assessed and
 a repair quotation will be provided.
View original page 6Page 10 · Read text
(16)EFFECTOFAPERTUREANDSHUTTERSPEED

                                                      A correct exposure is established by a combination of
                                                                    shutter speed and aperture setting according  to the
                                                                  subject brightness. There are many correct combina-
                                                                       tions of shutter speed and aperture for a particular sub-
                                                                            ject brightness. Different shutter speed and aperture
                                                                    settings produce different effects.

                                                                        Effect   of Shutter  Speed
                                                       The shutter speed determines the film exposure time, or---                                                                the length of time that light is allowed to strike the film.
  g                                                                                                                  lf the subject is moving the image will be blurred when
                                                                a slow shutter speed is used. lt is possible to enhance
                                                                   the effect of motion, (The movement of a wave or wa-
      High shutter speed                                                  terfall) by intentionally using a slower speed. Choosing    zomo                                                             a high shqtter speed will allow the image of a moving
                                                                  subject to be frozen. A higher shutter speed also helps
                                                               prevent camera shake.    o!m,
 _{
  oz
 @


      Slow shutter speed
View original page 10Page 14 · Read text
EASYTO USE (For beginners)
 1. Loading the batteries             2. Attaching  the lens                3. Turning on the power


Open the battery chamber cover by using  Align the red indexes on the       Slide the main switch to ON. (See
a coin. Load two batteries (CR2 type) ac-  lens and camera. Turn the lens     page 20.)
cording to the markings (+,  -)  on the   to the right until it seats with a
battery chamber cover. (See page 14.)      click. (See page 18.)
4. Positioning  the  aperture   ring                                              5. Setting the mode dial
 00000


While holding down the aperture-     Be sure to set the  lens aperture      Set the mode dial to tCIEDl. (See
A-lock button, turn the lens aper-       ring to the   I A  ] position.           page 28.). The Green'Operation
ture ring to the   t A    l  posrtron.                               Mode will be set.
r / C ^ ^    ^ ^ ^ ^     a t ?    \
View original page 14
Page 15 · Read text
6. Loading film                                           7. Selecting the Autofocus Mode


Open the back cover, insert a roll of film, align the end     Set the focus mode switch to   I AF  ]. (See page 33.)
of the film leader with the red mark, and close the back
cover. The film should advance to the first frame auto-
matically. (See page 24.)

8. Composing   the scene  with  the zoom  ring          9. Focus on the subiect and shoot
                        AJ


While looking through the viewfinder, turn thewww.butkus.uszoom    Focus  [   [     ]  I on the subject. Depress the shutter re-
ring to the right or left until you obtain the desired com-     lease button fully to take a photo. (See page 34.)
position. (See page 30.)
View original page 15Page 17 · Read text
#
      Notes:
         *  1. As an F and FA Soft lens do not have the A position on the aperture ring, a correct exposure may not
           tained.
       x2. A correct exposure may not be obtained'
         * 3. Lenses with a maximum aperture of t,/2.8  or larger. (See AF Adapter operating manual.)t*       x 4. Manual focusing using the focus indicator (Fl) (O)   in the viewfinder.
       x 5. Lenses with a maximum aperture of tr/5.6  or larger.
       x 6. The bar graph in the viewfinder does not light up.
I         . The A, F, and FA lenses are the bayonet mount lenses.
             . The A, F, and FA lenses have "A" (auto) position on existing K-mount lenses.
*          . The screw mount lens CANNOT be used to this camera because correct exposures will not be obtained.

I

il
$
t*
                               www.butkus.us
n
View original page 17Page 18 · Read text
FTT HOWTO USETHIS OPERATINGMANUAL
       This manual is organized into the following sections, allowing you to optimize the use of the camera:


                                                      .J:                    I. BASIC OPERATION                          M. ADVANCED OPERATIONS
           (PREPARATION)Pase 1 3 - 26                    Pase 46 - 89


                                          II. BASIC OPERATION
                       (SHOOTING)Page27 - 45


      o lf you want  to begin taking pictures with  this new camera as soon as possible, read section  I and  ll, 'BASIC
      OPERATIoN (PREPARATIoN)" and "BAS|c OPERAT|oN (sHooflNG).'
       These sections introduce only the basic functions of this camera. More detailed information can be found in section
              lll and section lV.
View original page 18Page 20 · Read text
-

 @
  Io
   o!m,
  =oz
  !
 :E
 m
  !
 u
      1. Open the battery chamber cover by using a    2.Load two 3V  lithium  batteries (CR2)  Ioz
        coin, etc. as shown in the illustration.            equivalent as shown in the illustration.
View original page 20Page 24 · Read text
(3) ATTACHINGTHE LENS
     1                                   2-

  @
  32
  o
 o
  !m
     !
     Ioz
    !vm
     !
  v

        1. Remove  the body mount  cap O and  rear  lens     2. Align the red dots on the camera and  lens     Ioz
         cap @ as shown   in the  illustration.                 mount, attach the lens to the camera body,
                                                     and turn   it fully to the right  until you hear a
       o The body mount cap is designed to protect the cam-        click.
         era against scratches and dust at the factory. For stor-
        age, the optional accessory "Body Mount Cap K"  is    o Ensurethat the camera'smain switch is in the [OFF]
         available.                                              position before attaching a lens to prevent unex-
                                                        pected operationof the lens.
View original page 24Page 28 · Read text
Q) FILM LOADING
     We suggest that you  first operate the camera
-      with no film loaded to become familiar with  its
  @    operations.
   Io                                       Rq
     o!m   AutomaticThis camerafilmis designedspeed settingto use DX-coded films
   v    with ISO ratings from 25 to 5000.
   _-l
   oz       . When DX-codedfilm is used,the correct film speedis
        automaticallyset for the camera.lf you use a non-DX
    Tum    codedfilm, you can set the film speed manually.See
       !     page73.
  u    o Beforeloadingfilm for the first time after purchase,
       open the back cover and removethe protective card.
   oz   DO NOT TOUCHTHE SHUTTERCURTAINS.           1. To open the back cover, slide the back cover
                                                            release lever in the direction of the arrow.
                                                       2.Place the film cartridge  in the film chamber
                                                        as shown in the illustration.
                                                                  i i  .     i  i-l i:  ri  ii   i:l ii
                                                         o Always load and unloadfilm in the shadeor by using
                                                        your body to shadethe camera.
               )                                *ffiffiw
                     LI t"t     i:l i-t ii\                 i:i Li iilnfi              ii
View original page 28Page 32 · Read text
-
  o
   Io
     o!mu
   =oz
  T
  T
  m
     !
 u
       3. Open the back cover and remove the film.        x Rewinding a film in mid-roll    Ioz                                                                                                          lf you wish to unload the film before exposingall the
       o A roll of 24-exposure film takes about 13 seconds to    frames,.usethis function.
         rewind.
       o Before opening the back cover, check that   I O  ]  is    Set the main switch  to  the ON  position, and
         b l i n k i n g .                                         then  depress  the  mid-roll  rewind  button  by
       o The shutter may be released a frame or more after the    using the protruding  part of the strap clamp.
         specified number of frames have been used as indi-
        cated by the number of frames on the film cartridge.        . Do ltot depressthe button with an object having a
        However, those extra frames may be lost in process-     sharptip.
          ing. When you take important  pictures, rewind the    o Before opening the back cover, check that  [ @ ]  is
          film when the film reaches the number of frames indi-      blinking.
        cated on the film cartridge.
View original page 32Page 38 · Read text
Q) HOLDINGTHE CAMERA
     Camera held horizontally                      Camera held vertically

--

  @   U'        A,j
   o
  o
   T
  m
      I-{
    oz
   U'
    T    For best results, be sure to hold the camera  cor-     o To reduce camera shake, support your body or the
             r e c t l y a s s h o w n     i n  t h e    i l l u s t r a t i o n s .                 camera on a solid object - a table, tree, or a wall for in-    oo-l                                                                 stance.
    zo        . Hold the camera firmly with your left hand supporting         . When using an ultra-telephoto lens, a tripod that  is
         the camera and lens as shown in the illustrations.         heavier than the total weight of the camera and lens is
               . While taking a picture, hold your breath and gently de-     recommended to avoid camera shake.
         oress the shutter release button. Sudden force on the     o Although there are individual differences among pho-
         shutter release button will cause camera shake. mak-      tographers, in general the shutter speed for a hand
         ing the picture blurred.                                  held camera is the inverse of the focal length. For ex-
                                                             ample, 1,/5O  of second when the focal length  is
                                                    50mm, and 1 ./1OO  of second when   it  is 100mm.
                                                            Using a tripod  is recommended when  the  shutter
                                                         speed is slower than this.
View original page 38Page 41 · Read text
. When the shutter release button is depressed halfway     3. To release the shutter, gently depress the
 down, the shutter speed and aperture setting are dis-      shutter release button fully.
  played in the viewfinder and the on LCD panel.                                                                                                                                               r . i
o When  I  I  ] Utints in the viewfinder and on the LCD     o The shutter cannot be released if the subject is out of
  panel, the use of the  built-in flash is recommended.      focus.                                                                                            -r
  For more details on the built-in flash, see page 37.        o Depress the  shutter release button  halfway down.          -i
. The audible PCV signal can be turned OFF. See details      While   I O]   is on, the camera-to-subject distance is     E
 on page 69.                                                   fixed (focus lock). To refocus on another subject, lift       I
                                                                                                                                                                                                                                                                                                                                                                                                                            Io During autofocus operation, the focusing ring should      your finger off the shutter release button.                     CO )1 l  not be obstructed with your fingers, hands, or any                                                                                                                                                         !m  other object.                                       Predictive Autofocus Mode                             v
                                            When the camera senses subject movement during the     {
The focus indicator IO]  Ulints when the cam-    autofocus  operation, the camera  will  automatically        ozera is not able to obtain proper focus for one of     switch  the focus mode  to  the  predictive autofocus
the following reasons.                         mode to measure the speed of a moving Subject, and
C The subject is too close.Adjust the camera-to-  predict where  it will be at the moment of shutter release
  subject distance.                                            to maintain sharp focus on the subject-@ The subject is difficult to autofocus.See"HARD-TO-                                                                                                                                                                                                                                                                                          u,-oo=zo
  AUTOFOCUS"subject on page 52.                                          .  lf the subject is moving too fast, the shutter may not
                                                              release.

                                                       $n

                             www.butkus.us
View original page 41Page 42 · Read text
--

 @
   t2()
 o
   !mu
  Ioz
  (r,   Focus Lock Function                                                       2.To  prevent  this, center the autofocus frame     Purpose                                                      on the main subject and keep depressing the      The camera focuses  with  the autofocus  frame  in the
                                                                 shutter  release button  halfway down. The in-    roo{=    center of the viewfinder. When the main subject  is off. o
       the autofocus  frame, the main subject  will not be fo-       focus  indicator  remains  on,  indicating  that
      cused properly. Use the focus lock technique to bring       the focus  is temporarily  locked.
       ,the main subject into focus.                                 3. While holding the shutter  release button  half-
                                                  way down, re-aim the camera or recompose
     How  to use                                              the picture, then depress the shutter  release
      1. When the composition does not allow the       button  all the way  to release the shutter.
       autofocus frame to be placed over the most
        important subject in the picture, the camera    o Lifting your finger off the shutter release button
            t will focus on the background as shown in the      clearsthe in-focusindicator[O] in the viewfinderand
         illustration.                                      cancelsthe focus lock function.
                                                                                                                . To refocus on another subject, lift your finger off the
                                                              shutter releasebutton.
View original page 42Page 48 · Read text
. The Automatic flash function will be set only with the
                                                                      Picture Mode set. lf any other mode  is set, the Red-
                                                             eye reduction or Forced emission mode will be set.
                                                                                                                                  . When the  built-in flash is retracted, depressing the
                                                                       multi-function button switches the audible pCV signal--                                             ON and OFF.
  @          0    2o
      o!m,
     Ioz
  u,
     Depress the  multi-function button  with  the     Ioo    built-in flash popped up
        At each press of the multi-function button, the  flash
      mode on the LCD panel switches as shown in the chart.   Jze


       Forced  Red-eyereduction Automatic f lash Red-eyereduction
       emission     (p.a3)      (Smart ftash)         +
         (p.38)                        (p.45)     Automatic ftash
                                             (Smart flash)
View original page 48Page 50 · Read text
o Depress the multi-function button only when the built-    About  Red-eye Phenomenon
           in flash popped-up.  lf  multi-function  button  is de-    Shooting  portr-aits with  flash  in a dark environment
        pressed with  the  built-in flash  retracted, the PCV     often causes a subject's eyes to turn out reddish in the
         Signal Mode will be changed.                                  print. This phenomenon, commonly known as "Red-
       o When the AFSOOFTZ is attached and the slave flash     Eye", is caused by the reflection of the electronic flash
l--        function is in use, the Red-eye reduction flash func-       in the retina of your subjects eye. lt can be reduced by
  E       tion cannot be used as the slave flash  is discharged     taking the photo  in a  brighter  light condition  or by
  2,    when the preflash of the built-in flash is discharged.      shooting with a wider angle lens at a closer distance, or
  o    o When only a dedicated flash  is  in use and  is dis-    by employing the red-eye reduction flash feature. When  o     !      charged, the red-eye reduction display from the LCD     using a Pentax dedicated flash unit off the camera,  it
  m     !      panel is disregarded.                             may also help to position the flash as far away from the
     Joz                                                     camera as possible.
      6-oo
    Iz
  I
View original page 50Page 56 · Read text
When the autofocus mode or the in-focus indi-
       cator is not usable for focusing
      When the autofocus function  or the viewfinder's  in-
        focus indicator [O]  cannot be used for focus confirma-
          tion for the following reasons, focus on the subject  in
         the manual focus mode with the aid of the matte field in
        the viewfinder as you would with a non-AF SLR camera.
--D        a) The in-focus indicator [O]   blinks because the sub-
             ject is difficult to autofocus.
    g     b) The maximum aperture of the lens in use is smaller
           than t,/5.6.
      zom   g
  o
    !m
   v
         Iozo
View original page 56Page 58 · Read text
HARD-TO-AUTOFOCUS   SUBJECTS                   Subjects which may fool the autofocus system include:
       The autofocus system is highly precise, but not perfect.     a) Extremely low-contrast subjects such as a white wall
       Depending on the brightness, contrast, shape, and size         in the autofocus frame  [[    ]].
         of your subject. the autofocus system may not operate.     b) Subjects which  don't  reflect much   light  in  the
         In such a case, set the focus mode switch to  I MF  ] and       autofocus frame  [[    ]].
       use the manual focus mode to focus the lens on the      c) Subjects which are moving too fast.
        subject with the aid of the matte field in the viewfinder      d) Multiple subjects in the foreground and background
        (see page 51).                                                       of the autofocus frame  [[   ]1.
--                                                                        e) Subjects positioned against reflected light or strong
                                                                       backlight or with extremely bright backgrounds.

   E,
    zom  0
  o
       !
  m
       I
       =ozo
View original page 58Page 60 · Read text
--D

     I
    2om
    I    You can also select your desired Picture Mode manu-    2.To select the desired picture mode, move the o
   !m     ally. The picture mode has a total of 5 modes as follows.       select switch until  [l-'l] superimposes on the
  T   See details for each mode on page 55  - 59.                picture mode displayed on the LCD panel.
     How  to  set                                                                                            . When the lens aperture ring is set to a position other    =ozo   Set the lens aperture ring to  I A ].                    than the A position, a correct exposure may not be ob-
       1. Set the mode dial to t@D l.                          tained.


                                                          To the  right


                                                   To        left
View original page 60Related documents and language editions
From the M. Butkus archive. Original publisher and archive notices are retained.
Check the model and edition against your equipment.
PDF verified 2026-10-10.