Film cameras
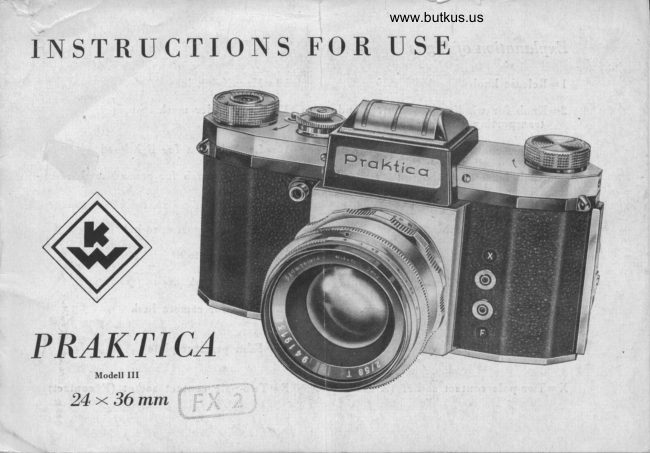
Praktica KW Model III - FX 2 24 x 35mm User manual
User manual for Praktica KW Model III - FX 2 24 x 35mm. 13 pages in English. Read the original PDF, download or print a copy without registration.
13 pagesEnglish2.6 MB PDF
Loading your manual…Open PDF directly
Document details
- Brand
- Praktica
- Model / document
- Praktica KW Model III - FX 2 24 x 35mm
- Document type
- User manual
- Language
- English
- Pages
- 13
- File size
- 2.6 MB
- Category
- Film cameras
- Document date
- Not specified in catalog
Search available document text
Find a term, then jump to its page in the original PDF. Image-only pages may not be searchable; check the PDF for exact wording and diagrams.
Page 4 · Read text
Inserting the fiIm
 The camera back is unlodced by pushing the knob No. lB in the direction o-f the arrow. Open
 the ca,mera badc, take it off, and pull out lhe rewind kmob No. 6
The film cartridge mu,st be placed into the cmpty drambe,r with ther beginning of the film
 projecting in the direction of the picture gate. Pull the beginning of the film away from the
 cartridge an,d fix it into the empty spool on the right-hand  s,ide of the camera.
 It is important that the sprocket teeth catch both perforated edges of the fiI,m. Wind the
ehutter ,by rotating kno'b No. 2.
Make sure that the film liee straight on film guide and sprodret, link the camera baek into
the right-hand groove and close 'it 'down. Tlhe film pre,ssure-plate must ,be perfectly cleau
 befo're 'the camera badc is closed.
After having closed the camera back, make twb blank exposures. The rewindr knob 6 must
hereby tu-rn in _the_ opposite direction of the arrow mark. When all these manipulations,  ,havr.
been performe,d, the counting mechan,ism has to be set to stroke No. I, and-the camera ig
ready for the first exposure.
Changing the fi,lm
Following the 36th_exp-osure, a certain ree,istance will be noticed in winding the shutter
 _a sign that the whole fiJm js exposed and has to ,be rewound into the cartrid"--ge. This ,i,s ,tlone-
!Y Pressing- down the little button 13 and at t,he same turning the rewind--kno,b 6 in thedirection of the arrow.
The beginning_of the-film will slip out orf the cartridge audi,bly, and th,e rewinding procedure
is completed. Open the camera ba& and remove the cartridge with the exposea hti".
Shutter and fi,Im transport
                                                                                                                                           aa) Winding the shutter
    A-full rotation of the knob 2 as far as it will go to the right (clockwise) winds the shutter,
   advances the film to the next frame, an,d swiige the reflix mirror into the light-rat le;;i


                                                                                                         L
View original page 4Page 5 · Read text
Venmo @mike-butkus-camera  Ph. 2083
PayPal Name  Lynn@butkus.org      www.PayPal.me/lynnbutkus
View original page 5
Page 6 · Read text
www.butkus.us
   of the lens. Take eare that the release knob I  is  n o t  proased in white the shutter is
   being wound up. Any not built-in self-timers must be either rvound up or removed from
   the camera before winding the shutter.
b) Setting the shutter speeds
   The speeds are set by means of the adjusting knob 4 and the supplementary knob 5. The
   speed disc is engrave'd rvith
          blad< figuree for the short spee,ds from l/sooth to 1/2bth second, and F (rlaoth),  -
           wit,h red figures for the long spe,e,ds from 1/roth to tlz second,
                                  oo       .   and with  B " eettin,g for time exposures of any desired length.
   With the ,shutter set to the spee.ds of l/sooth to 1/zrth sec., and F the red triangle of the
   supplementary kno.b 5 must point towards the black triangle on the camera top.
  Vhen set to the s,peeds of l/rotth n alz sec., the re,d triangle on the supplementary knob
   must point to the red triangle on the camera top.
   The " B " setting can be used in both positions.
  To eet the speeds, lift the outer ring4oturn it to the desired number and clid< it in. There
    is only ole re,st-hole for 1/z and rlzsth second, marke,d by a dot between the spee,d numbers
   Llz and 1/zr.
   The speed knob may be turned in both ,direction's either before or after winrling up the
    shutter.
c) Releasing the shutter
  The exposure  is                    by gently pree_sing in the knob 1. fn order to avoid hlurring the                -made   picture, the knob ehould not be let loose until the ,shutter has run d,own.,At the i'g,,
    se-tting, the shutter knorb muet be presee,d as long as the exposure is to last. For the use
   of a wire release, the ,kno,b is provided with a thrJad i,nto ,"hl"h the release can be screwed.
                                                                                                                                                                                            o,  A special wire release i-s supplied with the camera rfor lon,g time expoeures in the " T    settin,g (e. g. in night photography).                                                                                                                                                                                                                                                                                                                                                                                                                                                                                                                                                                                  l
                                                                                                                        ,i
View original page 6Page 7 · Read text
Lens and Shutter
a) Press button No. 12. and the lighthood will sprin-g up, uncover-ing the finder lens. Vhen
   the shutter is worrrrd up, a brigf,t, clear image will appear on the ground'glass surface of
   the finder. By turning ih" diri"trce meter ring on -th_e lens ,mount: you can focus the lens                                                                                                                at .  to the greatest possiSle sharpness. Focusing should be performed with the _diaphra-gm
     ful,l oplning,     the lens itopp.d down to the desired aperture imme'diately before                 "rrd - makin,g the expos,ure.
 . To facilitate focusing, the camera is equipped with a magnifying lene', whidr is swung into    operatinrg position by means of lever I0.
  When using t,he magnifying lenso a distance of 15 to 25 mm. between the eye and- the lens
   should be                 -o,bserve,d. Oniy ihen will tLhe image on the ground-glass be perfectly clear.
   The eye-level viewfin'der in the lighthood io very handy for sports enapshots.,To disengage
   the sportsfinder, ,swing out the flap in the front of the lighthooil cap (9)' bring the
                lens into working posibion and draw out the finder mask at the back.   ^ugoifyiog  To close the lighthood, prees the lighthood cap (9) gently with your finger, and all th-e
   parts will automatical;ty llide ;badc to their original position, except the rear finder mask
     (ll), whidr has to be pushed back beforehand.

b) The lens scales
   The ,front ring on the lens mount is en,graved with the diaphragm scale and the in,dex
    point, the middle ring with the ,d,istance scale in meters or feet, and the back ring with
   a diaphragm scale ehowing the depth of sharpness.
   According to this scale, for instance, the Biotar lens f/2 with a faeal length of 58 mm
    (2L/+"), at a distance setting of 4 meters (12 ft.) at an f/ll   a'perture,,gives  a  sh,arpne,ss
    readli,ng from 2.5 to I0 metere (7'6" to 30/).
View original page 7Page 8 · Read text
www.butkus.us

c) Changing the lens
  The lens in the camera body is interchangeable within its threaded .flange. By being
   turne,d to the left (anti-clockwise) the lens can be removed from the camera body. Should
   the camera be load'ed when chan,ging lenses, take care to protect the opening ,from glaring
    light.

fl) The Penta Prism


                                                                                  www.butkus.us


  An acceseory to the Praktica is the Penta Prism. Look into it and you will see an upright,
   non-reverse'd, enlarged groung-glas's image, free from paralax error.
  The Penta Prism is fitted into the open lighthood of the camera from above, while the
   latdr button (12) is being depressed, wheieupot  it is ilrolted by pushing the fastening
  knob to the front.
View original page 8Page 11 · Read text
Flash Synchronization
On the front of the camera are two hipolar contact sockets, the upper one  X contact
for flash tubes (electronic flashes), and the low'er one   F contact    for flash,bulbs.-              -                                                            -             -
X Contuct (aboae):
Shutter speed 1/so e"". for flash durations ranging from 0.r to I ms (1/roooo to 1/rooo sec.).
For flashes lasting fro,m I to 5 ms (1/rooo to 1/zoo sec.) the shutter has to be set on the ts
mark.
This contact is aleo designed for short-burning flash bulbs, in whic,h case the shutter speed
has to rbe set according to the actual flash duration. As a rule, thris will be alzs or 1/ro sec.

F Contact (below):
This contact allows for synehronization with the ehortest shutter speeds of those flash bulbs
whose ignition time is shorter than l0 rns an,d whose actual flash durat,ion is longer than
20 ms. For uee with slower shutter speeds than 1/soo oec., the shutter speed in rns has to be
added to the 20 ms value, and the resultin,g sum 'shows the actual ,duration to be aehieved
by the flash.

Important: The flash bulb must neaer be put into the flash unlt belore the shutter has been
wound up!
View original page 11
Page 12 · Read text
www.butkus.us
    Negatiue Material
     The PRAKTICA takes perforated 35 mm filmo available either in cartridges or in bulk film.
     The length of fitrm in a cartr.id,ge is equal to 36 exposures,,so,metimee, howe_ver,_ cartridges with
      half lenlths are used. If you fiil yoo. own ca€settes or cartridges,you need I,60 meters (6'5ttl
      for 36        You m'ayo of course, urs'e 'shorter len,gths if you rvish to.              "*pos.,res.
I     Cotor film is sold iu exactly the same lengths and packages as black     an'd-white film. The                                                                                   -  your image in all itsI     pn,q,KTICA is just the camera for color p]rotograpy, for by pre-viewing
F      tr"t,tral color on the ground-glass screen, your are ableo to a very great extent, to judge the      effect of the final picture. Also the lenses of the Praktica are color-correcte,d.

    Photomicrography
I      requiree a special attaeh,ment for connecting the        to the microscope. For negatives to                                               scaleo the ground""^"ruglass is available with a clear glass ringI    b" enlar,ged on an especially largeI    and with hairline cross.

   How to take care of your Praktica
     The camera is protected by the Bverready Case. The case protects the carnera also during
      the exposure without causing any inconvenience whatever. The carnera should always be kept
      in the case, with the lens screwed in. It muet be kept spotleesly clean, especially all tftre parts
     coming into contact rvith the film. U,se a very eoft-haired brush for cleaning.
     Never toueh the lens srrrfaces with your fingers. They, too, are to be dusted only with a soft-
      haired brush. This does no harrn to the bluish anti-reflex coating.
View original page 12Page 13 · Read text
r ry


                                                                                                                              1you will derive contin,ual pl,easure from your PRAKTICA it Vou treat- it  kindly' ThepRAKTICA is a masterpice'of precision workmanehi_p and will only then be able to meet
your requirements  if you follow the Inetructions for Use c'arefully.
Do not interfere with the mechanism of the camera. Apply to the rnan'ufacturers  if repairs
become necesrsary. Su,bs,equent oiling or greasing gf tlrg c-.rrnera may lead to-funktional dieturb-
ances or dec.ea.e the quality of t*he pict.t.es.-S,hould you desire any further information or             1advice, please write to the factorY
                                                                Ij


    VEB KAMERA.WE RKE NIEDERSEDLITZ
                          Dresden A 17, Edgar-Andr6-Stra6e 56


                                                                                                                            It 8139/55lrl9/11 EMZ 955 10
                                                             "A
View original page 13Related documents and language editions
From the M. Butkus archive. Original publisher and archive notices are retained.
Check the model and edition against your equipment.
PDF verified 2026-10-10.