Film cameras
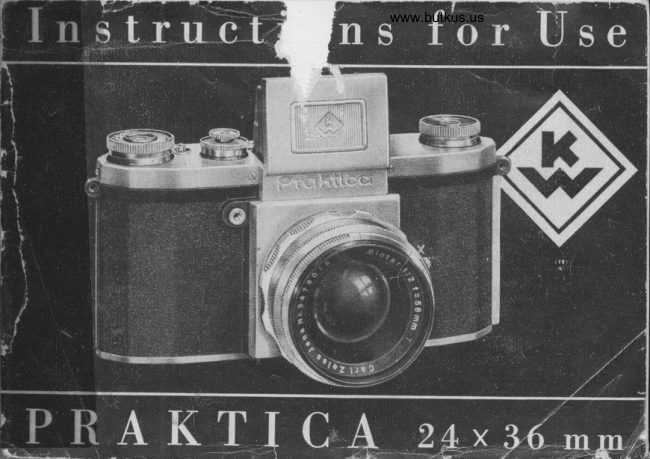
Praktica Parktica KW 24x36mm User manual
User manual for Praktica Parktica KW 24x36mm. 20 pages in English. Read the original PDF, download or print a copy without registration.
20 pagesEnglish5.8 MB PDF
Loading your manual…Open PDF directly
Document details
- Brand
- Praktica
- Model / document
- Praktica Parktica KW 24x36mm
- Document type
- User manual
- Language
- English
- Pages
- 20
- File size
- 5.8 MB
- Category
- Film cameras
- Document date
- Not specified in catalog
Search available document text
Find a term, then jump to its page in the original PDF. Image-only pages may not be searchable; check the PDF for exact wording and diagrams.
Page 3 · Read text
www.butkus.us              Ir
        I
  /T[TRODUCTIO]Y
                 Ithe Prtktica is a one-lens reflex camera taking the perfnrated 35 mm cine film.
            The size of the picture ie 24x 36 mm.


  ?-ro
i                     e. g. shutter winder coupled with film advancement, lock'          ;.                                                                      against double and blank
                 Gxposures' interchangeability of the lenseso and adaptability to micro-photography.    &
                                   means of a light-collecting lens which produces a clear,           i"t        Focussing is performed by
                    liil       bright image.
    t     The Praktica takes all current daylight film cartridges for 36 exposures in black.
I       ,*i     rnd'white and colour film. The Praktica is sure to give perfect results and           il
             mechanical safety if the instructions for use are closely follorved and carried out.           il
     {r{    -lill
     1B
View original page 3Page 6 · Read text
I. Inserting the film

                     The camera back ie unlocked by pushing the
                       knob No. lB in the direction of the arrow. Open
                         the camera back and take it off' and pull out
                           the rewind-knob No.6.

                        The film cartridge must be placed into the empty
                        chamber with the beginning of the film projecting
                                 in the direction of the picture level. Pull the film
                          from the cartridge and fix it into the empty spool
                       on the right-hantl side of the camera.

                                         It is of importance that the sprocket teeth catch
                          both perforated edges of the film.

www.butkus.us            Wind the shutter by rotating the knob No.2.
View original page 6Page 7 · Read text
www.butkus.us


Make sure that the film lies evenly on the film-
guide and toothed drumo link the camera back
into the right-hand groove and close it down.

The film pressure-plate must be perfectly clean
before the camera back ie closed.

After having bolted the camera backo make two
blank exposures. The rewind-knob must hereby
turn in the opposite direction of the arrow mark.

When all these manipulations have been per-
formed, the counting mechanism has to be set
to stroke No. 1.

The camera is now ready for the first exposure.
View original page 7
Page 8 · Read text
II. Changing the film
                                  36 exposures having been made, a certain re-
                                                 sistance will be noticed in winding the shutter -
                                      a sign that the whole film is exposed and has
                                             to be rewound into the cartrid.ge.

                                          This is done by pressing down the little button
                                        No. 13 and at the same time turning the rewind-
                                    knob No. 6 in the direction of the arrow.
The beginning of the film will audibly slip out of the cartridgeo and the rewinding procedure
is completed.

The camera back must now be opened and the exposed film taken out.
Do not change the film in bright sunlight, but if poseible in the ehade. It ie advieable
to deposit the film in light-tight paper or in a metal box after it has been removed from
the camera.


B
View original page 8Page 9 · Read text
www.butkus.us
III. Shutter and film transport
a) Winding the shutter
  A full rotation of the knob No. 2 as far as it
   will go to the right (clockrvise) winds the
    shutter, advances the film to the next pictureo
    and. swings the reflex mirror into the light-
   ray level of the lene. Take care that the
   releaee knob No. I is not pressed in while
   the shutter is being wound up.
b) Setting the speeds
   The speeds are Bet by means of the adjusting knob No. 4 and the supplementary knob
   No. 5. The speed disc is engraved with
       black figures for the short speeds from 1/sqsth to 1/2uth secondo with
       red figuree for the long speeds from l/roth to 1/2 second, and with 'oBoo setting for
       time exposuree of any deeired length.
  When set to the speeds of l/uooth to 1/2uth secondo the red triangle on the supplementary
   knop No. 5 must point towards the black triangle on the camera top.
View original page 9Page 10 · Read text
When set to the speeds of 1/r6th to r/2 second, the red triangle on the supplementary
   knob must point to the red triangle an the camera top.
  The 'oB" setting can be employed in both positions.
  To set the speeds, lift the outer ring No.4 turn it to the desired number and click it in.
   There is onlyone rest-holefor  1/z and rl2uth second, marked by a dot between the speed
   numbers  L l2 and, L 12".
c) Releasing the shutter
  The exposure is made by gently pressing in the button No. l. In order to avoid blurring
                                             the picture, the knob should not be let loose
         iiir,l]:ir:,rr  i li;ri  i:i::.:l:l:i:   rlt.rt  ;:: :  i::;: iiri:tl:  :,:ir :':  i                   until the shutter has run down. When set
                                           at"B", the shutter must be pressed as long
                                             ae the exposure ie to last. For the uee of a
                                         wire releaae, the knob is provided with a
                                               thread into which the release can be ecrewed.
                 www.butkus.us           A special wire release is supplied with the
                                          camera for long time exposures in the T-setting
                                                            (e. g. in night photography).

   l0
View original page 10Page 11 · Read text
www.butkus.us

        IV. Lens and, Shutter
 if
 I       a) Press the button No. 12, and the light.hood
I            will spring up, uncovering the finder lens.
  l .,          W'hen the shutter is wound up, a bright, clear
             picture will appear on the ground.glaes gurface
            of the finder. By turning the distance meter
            ring on the lene mount, the lens is focussed
            to the greatest possible sharpness. Focussing
           should be performed with the diaphragm set
            to the widest aperture, and the lens stopped
         down to the deeired aperture immediately
 h           before making the exposure.
l{
I'         The camera is equipped with a magnifying lens
              for easier focussing. It is swung into operatingil
            position by means of the lever No. 10.
         When using the magnifying  lens, a distance of
           15 to 25 mm between the eye and the glass

                                                                                                         I1
View original page 11Page 12 · Read text
should be observed. Only then will the image
                                      on the ground glass be perfectly clear.
                                   The direct-vision view finder in the light-
                                        hood is very handy for sports snapshots.
                                         In order to disengage this find.er, the flap
                                         must be swung in, rvhereupon the magnifying
                                                 lens is brought into working position. In this
                                    way the flap is held levelo and the eports
                                                finder can be used.
                                To close the light-hood, first swing in the
                                           magnifying lens. Then push in the rear flap
                                             with the forefinger and close down the light-
                                             hood.
                                    b) The lens scales
                                          The front ring on the lens mount is engraved
                                               with the diaphragm ecale and the index point,
                                        the middle ring with the distance ecale in

t2
View original page 12Page 13 · Read text
www.butkus.us
   metres or feet, and the back ring with a dia-
   phragm ecale showing the depth-of.focus.
   According to this scale, for instance, the
   Biotar lens fl2 with a focal length of 5.8 cm
     (2t  l n"), at a distance setting of l2 ft. (4 metres)
   and an f/ll apertureo gives asharpnessreaching
   from .7'6" to 30' (2.5 to l0 metres).
c) Changing the lens
   The lens in the camera body is interchange-
   able within its threaded tlange. By being
   turned to the left (anti.clockwise) the lens can
  be removed from the camera body. Should
   the camera be loaded when the lens is being
   screwed out, take care to shield the aperture
   from glaring light.
d) The mirror
  The mirror ie a very eensitive element in the
   camera, and it must be protected even from

                                                                                          t3
View original page 13Page 14 · Read text
the slightest damage. It ie advisable, before exchanging the lenseso to swing the mirror up.
   Only use a rrery soft-haired brush to remove any possible uncleanliness from-the mirror.

e) Lenses uith the diaphragm-presetting deaice
  To preset the aperture desired for the exposure, draw the milled ring directly behind the
   diaphragm scale backward, holding the diaphragm ring - which has before been adjusted
   to the desired number - with the other hand and setting the red index dot against the
                                           diaphragm number chosen. The milled ring'
                                   when springing back into positiono  rvill. get
                                             coupled with the diaphragm ring. For focus-
                                                     singo the diaphragm ring can now be set to
                                             the full aperture ando without changing the
                                                 position of the camera' turned back until  it
                                               stops at the preset diaphragm number.


    L4
View original page 14Page 18 · Read text
VII. Electronic and Regular Flash Connection
                                                                        ooX"On the front of the camera are three contact sockets. The socket marked      takes electronic
flasheso whereas the 'oFo' mark is for regular flash synchronization.
a) Electronic flashes (X synchronization)
   To be employed for all kinds of electronic devices acting without delay.
   Synchronization allows for exposures up to l/onth second.
b) Flash guns (F synchronization)
   Whenueing suitable flash guns,shutter speeds
   up to 1/56s th second can be synchronized.
   The following chart gives the shorteet shutter
   speeds in connection with the most popular
    flash lamps. The flash bulb must never be put
   into the flash unit before the shutter has been
  wound up.


    IB
View original page 18Related documents and language editions
From the M. Butkus archive. Original publisher and archive notices are retained.
Check the model and edition against your equipment.
PDF verified 2026-10-10.