Film cameras
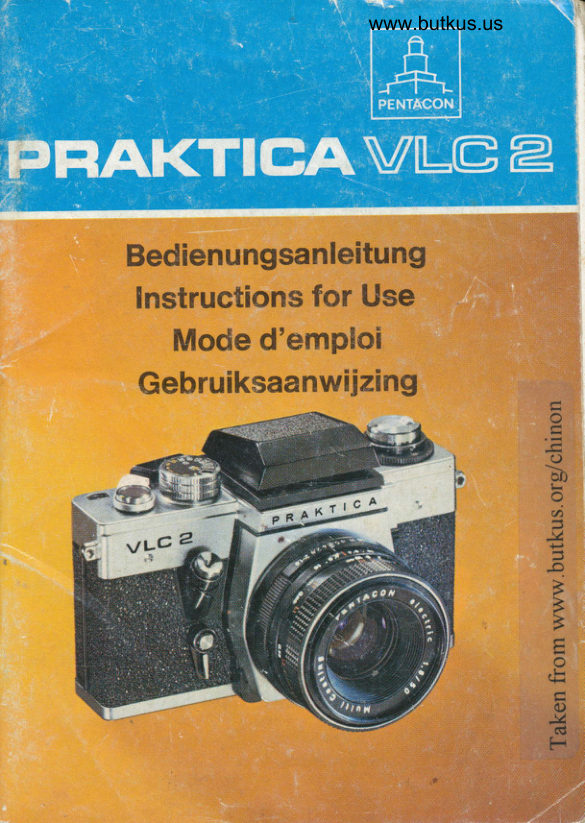
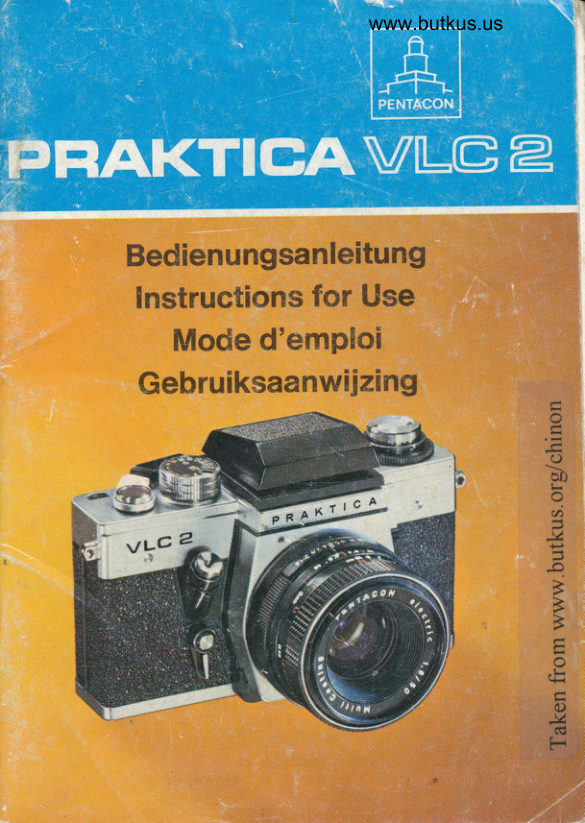
Praktica VLC2 - pages User manual
User manual for Praktica VLC2 - pages. 47 pages in English. Read the original PDF, download or print a copy without registration.
47 pagesEnglish12.1 MB PDF
Loading your manual…Open PDF directly
Document details
- Brand
- Praktica
- Model / document
- Praktica VLC2 - pages
- Document type
- User manual
- Language
- English
- Pages
- 47
- File size
- 12.1 MB
- Category
- Film cameras
- Document date
- Not specified in catalog
Search available document text
Find a term, then jump to its page in the original PDF. Image-only pages may not be searchable; check the PDF for exact wording and diagrams.
Page 2 · Read text
Bedienteile der PRAKTICA VLC 2
    1 Selbstausloser-Spannhebel
    2  Knopt fur SelbstausloserbetEitigung
    3 Ausloser    4  Belichtungszeiten-Einstellknopf
    5  Prismeneinsatz
    6  Rirckspulknopf


      Control Parts of the PRAKTICA VLC 2
    1 Cocking lever for delayed-action release
,   2  Delayed-action release button
    3  Shutter release
    4 Knob for setting the shutter speeds
    5  Prism attachment
    6 Rewind knob


                                                                                                                                                                                                                   .     Les organes du PRAKTICA VLC 2
    1  Levier d'armement de l'auto-d6clencheur
    2 Bouton d'actionnement de I'auto-d6clencheur
    3  D6clencheur
    4  Bouton de r6glage des temps de pose |   '5 Viseurdprisme                                                                                                                                                                                      ;
    6 Bouton de rebobinage


     Bedieningsdelen van de PRAKTICA VLC 2
    1  Zelfontspanner
    2 Knop voor het bedienen van de zelfontspanner
    3  Ontspanner
  .  4  Belichtingstijden-instelknop
   3                                                                             $    i:,:ilil::ffiHJ
      2
\                                                         -   :€rcr&.                    - i
View original page 2Page 4 · Read text
Bitte spenden Sie 2,50 Euro, um diese Website über E-Bay zu unterstützen ... www.PayPal.me/butkusView original page 4
Page 5 · Read text
7  Riickspulkurbel
 8  Blitzlichtnippel
 9  Entriegelungsknopf ftir Wechsel des Suchereinsatzes
 10 Blendeneinstellring
 11 Entfernungseinstellring
 12 Schdrfentiefenskale
 13 Handabblendtaste oder Umschalter
 14 Marke zum Einstellen der Filmempfindlichkeit
 15 Skalen firr Filmempfindlichkeit
 16 Bildzdhler '17 Spannhebel
18 Marke ftlr Belichtungszeiteneinstellung
 19 Okularfassung mit Wechselstelle  fur Zubehor
20 Symbole  frir Messen mit Offen- und Arbeitsblende
21 Umschalter  frir Belichtungsautomatik
 7 Rewind crank
                                                                                    c 8  Flash socket
 9  Uniocking button for changing viewfinder attachment10 Diaphragm setting ring
11 Distance setting ring
12 Depth-of{ield scale
13 Manual stop down key and change-over switch
14 Film speed mark
15 Film speed dials
16 Exposure counter
17 Cocking lever
18 Exposure speed mark
19 Ocular mount with accessory fitting
20 Symbols for full-aperture or taking-aperture measurements
21 Selector ring for automatic exposure control
 7  Manivelle de rebobinage
 8  Prise de synchronisation
  I  Bouton de d6verrouillage pour l'6change du viseur
10 Bague des diaphragmes
11 Bague de mise au point
'12 Echelle de profondeur de champ
13 Touche de diaphragmation manuelle et commutateur
14 Repere de sensibilit6
15 Echelles des sensibilit6s
16 Compte-vues
17 Levier d'armement
18 Repdre de 169lage des temps de pose
4
View original page 5Page 6 · Read text
www. butku s. orglchi non                                  www.butkus.us

1t

12
10
                                                          r3
                                                           15
                                                           14


19  Monture d'oculaire avec adaptateur d'accessoires
20  Symboles de mesure d ouverture de travail ou
    d pleine ouvprture
21  Bigue comrirutatrice de I'automatisme d'exposition

 7  Terugspoelhandel
  8I  OntgrendelingsknopFlitslichtnippel      voor het uitwisselen
    van het zoekerinzetstuk
10   Diafragmaafstelring
11   Afstandsinstelring
12  Scherpte-d iepteschaalverdel      i n g
13   Handdiaf rag matoets of schakelaar
14  Merkje voor het instellen van de filmgevoeligheid
15  Schaalverdeling voor de filmgevoeligheid
16   Beeldteller
17  Transporthandel
18  Merkje voor het instellen van de belichtingstijd
 19  Oculairvatting
20  Symbolen voor het meten met geopend -    en gebruiksdiafragma
 21   Schakelaar voor de belichtingsautomatic
View original page 6Page 7 · Read text
22 Patronenraum
   23 Rtickspulmitnehmer
   24 Lichtschacht-   25 Einstellupe
   26 Knopf zum Offnen des Lichtschachtes
   27 Fangbrigel
   28 Marke zum Filmeinlegen
   29 Aufwickelspule
   30 Haltebockchen
   31 Filmtransportrolle
   32 Stahllamellen-SchlitzverschluB


   22 Cartridge chamber
   23 Rewind catch
   24 Finder hood
   25 Magnifying lens
   26 Button for opening the finder hood
   27 Bracket wires
   28 Marking point for inserting the film
   29 Take-up spool
   30 Supporting piece
   31 Film transport sprocket
   32 Metal-blade focal-plane shutter
                                       \


   22 Chambre de cartouche
   23 Broche de rebobinage
   24 Gapuchon de vis6e
   25 Loupe de mise au point
   26 Bouton d ouvrir le capuchon de vis6e
   27 Etrier serre-film
   28 Repdre de mise en place du film
   29 Bobine receptrice
   30 Bloc guide-film
   31 Tambour d'entrainement du film
   32 Obturateur focal d lamelles d'acier
    6
View original page 7Page 8 · Read text
www.butkus.us
24
25


                            30 2928


22 Patronenruimte
23 Terugspoelmeenemer
24 Lichtschacht
25 Instelloep
26 Knop voor het openen van de lichtschacht
27 Vangbeugels
28 Merkie voor het inleggen van de film
29 Opwikkelspoel
30 Filmgeleider
31 Filmtransportrol
32 Stalen lamellen-spleetsluiter
View original page 8Page 9 · Read text
.F
                                             o
                                                ts                        333
                                                F                                                          J
                                                                                             -ot=

                                              B


33  Stativgewinde
34  Batterieraum mit Batterie
35  R0ckspu lausloser
36  Umschalter   f iir d ie Blendenfunktion

33  Tripod socket
34  Battery compartment with battery
35  Rewind release button
36  Diaphragm operation selection switch

33   Filet pour pied
34  Chambre de pile avec batterie
35  Bouton de d6brayage de rebobinage
36   Levier de changement de diaphragmation

33  Statiefschroefdraad
34   Batterijruimte met batterij
35  Terugspoelmeenemer
36  Schakelaar voor de functie van het diafragma
8
View original page 9Page 10 · Read text
www.butkus.us


Wir wiinschen lhnen mit dieser modernen Spiegelreflexkamera
viel Erfolg. Neben einem neuartigen StahllamellenschlitzverschluB
mit hoheiKonstanz der Belichtungszeiten und kurzer Synchronzeit
frir Elektronenblitzaufnahmen sind ihre besonderen Merkmale die
auswechselbaren Suchereinsdtze sowie die neuartige Belichtungs-
innenmessung, die unabhdngig vom verwendeten Suchereinsatz           -Messung                        erfolgt teilintegral und objektgetreu. Denarbeitet. Die
Vorteil der Belichtungsinnerlmessung bei Offenblendg und damit
ein stets strahlendhelles Sucherbild verdankt diese Spitzenkamera
der elektrischen Blendenwertfibertragung. Dieser Vorteil wird
durch Zwischenringe mit elektrischer Ubertragungseinrichtung
auch bei Nahaufnahmen wirksam.


we wish you every success with this modern reflex camera. Be-
sides a nbvel melal-blade focal-plane shutter with high shutter
speed stability and short synchro speed for electronic flash expo-
                                                                  thesures, other special features are incorporated, such as
exchangeable finder hoods as well as the novel internal light
meterin-g method the use of which is independent on the fact
which ty:pe of finder hoods is being attached. Metering is partially
integrai and true to the brilliance of the subject. The. advantage
offeied by internal-light metering at full aperture and maximum
brightnes6 of the finder image is obtainable with this tog.quality
cai1era by its electrical di-phragm control principle. This ad-
vantage b-ecomes effective even in case of close-ups by inter-
media-te rings which are provided with electrical transmission
means.
View original page 10Page 11 · Read text
Riid<wand Offnen
Riickspulknopf (6) bis zum harten Anschlag nach oben ziehen.
Dadurch wird die Rtickwand entriegelt und kann aufgeklappt
werden. Bildziihler (16) springt dabei automatlsch in die Aus-
gangsstellung zur0ck.


Opening the camera back
Pull rewind knob (6) upwards until you feel hard resistance. The
camera back is unlocked and can be hinged open. The exposure
counter (16) will automatically jump to its zero position.


Ouvraison du dos
Tirer vers le haut, jusqu'dr la but6e solide, le bouton de rebo-
binage (6). Le dos est ainsi d6verrouill6 et peut 6tre rebattu' Le
compte-vues (16) prend automatiquement sa position de d6part.


Achterwand openen
Terugspoelknop (6) tot aan zijn aanslag omhoog trekken. Daar-
door-wordt de achterwand ontgrendeld en kan worden geopend.
De beeldteller (16) springt hierbij vanzelf in de 0-stand terug.
                                                                           11
View original page 11Page 12 · Read text
www.butkus.us


Film einlegen
Filmpatrone einlegen. FangbUgel (27) dlirfen nicht nach oben
stehen, ggf. am gerdndelten Spulenteller verstellen. Filmzunge
bis zur griinen Marke (28) ziehen, unter das Haltebockchen (30)
schieben. Zilhne der Filmtransportrolle (31) m0ssen in die Film-
perforation eingreifen.
Bei starker Filmkrtimmung einen Fangbtigel durch Drehen am
Spulenteller auf den Film auflegen. Rlickspulknopf (6) wieder
eindrUcken, ggf. dabei drehen.


Inserting the film
Load the film cartridge. Wire brackets (27) must not stand up-
wards, if necessary adjust them by turning the knurled spool
flange. Pull the leading edge of the film to the green mark (28)
and push it underneath the supporting piece (3). The teeth of the
film sprocket (31) must engage the perforation of the film.
lf the film tends to bow heavily, turn additionally the knurled
flange until one of the bracket wires is positioned on the film.
Depress rewind knob (6) again, possibly by turning it.
12
View original page 12
Page 13 · Read text
Riid<vYand scfilieBen
R[ckwand an der Riegelseite gegen den Kamerak$rper drticken.
Sie verriegelt sich selbsttdtig.


Glosing the camera bad(
Press the camera back firmly onto the camera body. lt locks
automatically.


Fermeture du dos
                                                       dePresser le bord de verrouillage du dos contre le boitier
I'appareil.  ll se verrouille automatiquement.


Achterwand sluiten
De achterwand aan de vergrendelbare zijde tegen de camera
drukken. Zij vergrendelt zich automatisch.

14
View original page 13Page 14 · Read text
www.butkus.us


 Aufnahmebereitschaft  herstel len
Der Spannhebel (17) besitzt einen Leerhub von etwa 15o und
 kann so in die Bereitschaftsstellung gebracht werden (Griffsicher-
 heit bei Serienaufnahmen). Spannhebel (17) vollstdndig bis An-
schlag schwenken, zurtickfilhren und Kamera mit Ausloser (3)
auslosen. Vorgang wiederholen und anschlieBend nochmals
spannen. Der automatische Bildzdhler (16) zeigt jetzt die Bild-
zahl 1 an.


Preparing for the exposure
The cocking lever (17) has an idle stroke of about 1So so that
it can be moved into its readiness position (ease of grasping
especially in serial shots). Swing the cocking lever (17) around
as tar as it will go, return it, and depress shutter release
knob (3). Repeat this operation and then cock the shutter once
more. The automatic exposure counter (16) now stands on
number "1".

                                                               15
View original page 14Page 15 · Read text
Filmempf indlichkeit einstellen
Ffir die-eingestetttBelichtungsautomatik"        muB der Empfindlichkeitswert desiif mJ           werden. Rdndelring $9s ..ae!9!tungszeiten-einiierrrno"ptes (4) anheben und drehen, bis die DIN- oder ASA-
ZJnl iui Sfale'(1S) der weiBen Marke gegentibersteht. Beim
Loslassen rastet der Ring ein.
Setting the film speed
For the automatic exposure control the tilm speed value must
be set. Lift the knurldd ring of the speed setting .fnob (4)' and
io1"te it until the DtN or ASn speed values on dial (15) stand         ine wnite mark. When being released, the knurled ring
"pp"tit"clicks in.
R6glage sur la sensibilit6 du lilm
L'automatisme d'exposition exige le rdglage sur la sensibilit6 du
titm. Soutever la babue molett6e du bouton de 169lage des temps                                                                sensibilite                                     de                             que I'indice                           jusqu'd                            ce                 la t"ourner            etJ"   po""-ou (4)                                                            repdre                                     du                                                vis-A-vis                                  trouve                                   (i5'1 se                     l'6chellb              sur       hbnl iOf f
 blanc. En relAchant, la bague molett6e s'engrdne'
 Filmgevoeligheid instellen
Voor de belichtingsautomatic moet de filmgevoeligheidswaarde
 van de film wordei ingesteld. De getande ring van de belichtings-                                                                           of                                                 DIN-                                                   tot de                                       draaien                      n9T9n en                   (4) tijden-instelknop                    'O'e6mhoo9                                                                     witte                                              het                                     (15)                                      tegenover                       schaai-verdeling A'SA-waarde o'p
 merkje staat. Bij het loslaten springt de ring erin'
                                                                17
View original page 15Page 16 · Read text
www.butkus.us


 Belichtungszeit einstellen
 Symbol Z          f0r Aufnahmen mit Elektronenblitz  (ca. 1/tzss),
 Einstellung B         fi.ir Langzeitbelichtung. VerschluB bleibt so-
                 lange geoffnet, wie der Ausloser gedrrickt
                      wird.
 1 s bis r/rs s        (o.rangefarben) frir Aufnahmen bei geringer
                     Objekthel lig keit. Stativ erfordert ich.
 t/ro s bis r./rooo S     (weiB) frir Aufnahmen bei guter Objekthellig-
                           keit.
Belichtungszeiten-Einstellknopf  (4) drehen, bis gewr.inschte Zahl
dem orangefarbenen Dreieck gegenribersteht.

Setting the exposure speed
Symbol Z            intended for exposures taken with elec-
                          tronic flash unit (about r/rzs s€c.);
B-setting              intended for long-duration exposures. The
                     shutter remains open as long as the
                        shutter release is being depressed;
1 sec. to r/rs sec.      (orange colour) intended for pictures of
                   less subject brightness. Tripod recom-
                    mended.
t/so s€c. to r/rooo sec. (white colour) intended for pictures of
                   good subject brightness.
Turn the shutter-speed setting knob (4) until the desired numeral
stands opposite the orange colour€d triangle.
18
View original page 16Page 17 · Read text
Blendenzahl einstellen
Die Blendenzahl am Blendeneinstellring  (10) des Objektivs der
ftf"rf" iut Oer Objektivfassung gegenfiberstellen. Bei Objektiven
mit automatischer bruckblendJ IAOAI bleibt die Blende dabei voll
geOtinet. Erst beim Ausl6sen sinliegt sie sich auf den eingestell-
ien Wert. Bei der PRAKTICA VLC 2 offnet sich die Blende sofort
nach dem VerschluBablauf. Durch DrUcken der Handabblend-
                                           M^ (M-anuell)tisie  (f gl oder Umstetten von A (Automatik) auf  .
Oes Uirs6nalters ftir die Blendenfunktion (36) (je nach Ausfflhrung
des Objektivs) kann die Schdirfentiefe im Sucherbild kontrolliert
werden.


Setting the diaphragm numeral
                                                                                                  (1,0)Set the diaphragm numeral on the diaphragm setting ring
of the lens'so that it stands opposite the marking point on the
lens mount. when using lenses with automatic pressure dia-
phragm (ADB), the diaphragm remains fully open.. Only when
ieleasing, the shutter closes down to the pre-set value. In case
of the PRAKTICA VLC 2 the diaphragm opens again immediately
after the shutter has run down. When depressing the manualstop-down key (13) or switching from A (automatic operation)
to M lmanuil oferation) the diaphragm-operation selectionswitch (bO) you ard able to check the depth of field in the view-
finder image.
20
View original page 17Page 18 · Read text
www.butkus.us

     e,


R6glage du nombre d'ouverture
Mettre lg nombre d'ouverture de la bague des diaphragmes (10)
en face du repdre sur la monture de I'objectif. Aux objectifs d
pr$s6lection automatique (ADB), le diaphragm reste entidrement
buvert A cela. ll ne se ferme sur la valeur r6gl6e qu'au momentdu d6clenchement. Le diaphragme du PRAKTICA VLC 2 se
rouvre aussit6t que I'obturateur s'est d6rou16. En actionnant la
touche de diaphiagmation manuelle (13) ou en d6pla9ant de A
(automatique) dr M (manuel) le levier de changement de dia-
phragmation (36) on peut contrOler la profondeur de champ sur
I'image de vis6e.


Diafragmagetal instellen
De gewenste diafragmawaarde op de diafragmaafstelring (10)
instellen. Bij objectieven met een automatisch drukdiafragma
(ADD) blijft het diafragma daarbij volledig geopend. Pas bij het
ontspannen sluit zij zich op de ingestelde waarde. Bij de
PRAKTICA VLC 2 opent het diafragma zich onmiddelijk na het
bedndigen van het sluiten. Door het drukken op de handdiafragma-
toets (13) of door het omstellen van A (automatic) op M (hand)
van de omschakelaar voor de functie van het diafragma (36) (al
naar gelang de uitvoering van het objectief) kan de scherpte-
diepte in het zoekerbeeld worden gecontroleerd.

                                                                           21
View original page 18Page 20 · Read text
www.butkus.us
     Belichtungsautomatik
     Die Belichtungsautomatik  mit elektrischer Blendenwerttibertra-
    gung ermoglicht das Lichtmessen bei voll geoffneter Objektiv-
     OtenOe und-damit strahlendhellem Sucherbild. Die Objektive mit
      elektrischer BlendenwertUbertragung besitzen entsprechende
       Kontaktstifte. Es ist jedoch auch moglich, alle tibrigen Objektive
                                                                                             zn    ohne Blendenelektrik mit dem PRAKTICA-GewindeanschluB
     verwenden. Die Messung erfolgt dann mit Arbeitsblende, wobei
     das Sucherbild mehr oder weniger, je nach gewdhlter Blende,
      verdunkelt wird.
        Filr beide MeBmethoden bieten sich zwei Verfahren an:
     a) Vorwahl der Belichtungszeit und MeBabgleich durch Ver-
          iindern des Blendenwertes,
     b) Festlegen einer bestimmten Blendenzahl und Abgleich durch
         Veriindern der Bel ichtungszeit.


     Automatic exposure control
     The newly devised automatic exposure system makes it possible,
     by means of the electric transmission of the diaphragm values,
     to tafe the meter readings with the photographic lens at full
       aperture, so that the viewfinder image remains at its maximum
ri:     ll   biightness. The lenses arranged for electric diaphragm control            f   have contact pins. But it is also possible to use all other lenses
      without automatic diaphragm control provided they are fitted
      with the PRAKTICA thread. In this case, metering is performed
      with the lens stopped down to taking aperture. The finder image
       will, according to the aperture selected, thus be somewhat
       darker.
      There are two methods of metering from which to choose:
        a) You preselect the shutter sPeed and balance by adjusting
          the aperture, or
        b) You preselect a certain aPerture and balance by adjusting
          the shutter speed.
                                                                 23
View original page 20Page 21 · Read text
Messen mit offenblende - bei Belichtungszeitvorwahl
Umschalter ftir die Belichtungsautomatik (21) mit seiner Markie-
1rlng-";i Oas Symbol 0   stellen. Umschalte.r.f"i-'die Blenden-
iunition tg6l am objektiv auf A stellen. Belichtungszeit am Ein-siellknopi  1ri) vorwiihlen. Ausloser (3) bis.zum ftrhlbaren Druck-                                                                        bis                                                (10) drehen,                  den Blendendinstellring.              ,nO        LlnO-riict<en;ilki                                           den Strich-                         MeBwerkzeiger zwischen                   sichtbare       Sucherbildler im
marken im Anzeigefeld steht.


 Metering at full aperture with lhe shutter speud
preselected
set the mark of the diaphragm control selector ring (21). to ioinciOe with the Cl symbol. Set diaphragm-operation selection
 i*it.n (36) on the lens to A. Preselect the expogure speed by                   (4). Depress shutter release (3).till y.ou feel the
 "Jir.iiriri-i<noOoressure- point and roiate diaphragm setting ring (10). till the
 li"tet nLe'dle visible in the viewfinder field is centred between the focusing marks.
                                                                25
View original page 21Page 22 · Read text
www.butkus.us
                            h


Messen mit Offenblende -  bei Blendenzahlvorwahl
Umschalter ftir die Belichtungsautomatik  (21) steht auf Sym-
bol O   Umschalter f[ir die Blendenfunktion (36) am Objektiv
auf A stellen. Blendenzahl am Blendenring (10) einstellen. Aus-
loser (3) bis zum ftihlbaren Druckpunkt eindrticken und Einstell-
knopf (4) rastend drehen (Zwischenwerte unzuldssig), bis der
MeBwerkzeiger zwischen den Strichmarken im Anzeigefeld steht.
Kann die genaue Einstellung nicht ganz erzielt werden, so ist die
Feinkorrektur durch Blendenverstellung (auch Zwischenwerte)
moglich.


Metering at full aperture with the diaphragm stop
preselected
Set diaphragm control selector ring (21) to the El symbol. Set
diaphragm-operation selection switch (36) on the lens to A.
Set the diaphragm numeral on the diaphragm setting ring (10).
Depress shutter release (3) till you feel the pressure point and
rotate knob (4) to click-stops (not to intermediate values)  till
the meter needle is centred between the focusing marks within
the indicator area. lf no correct adjustment can be obtained the
diaphragm ring has to be moved for fine adjustment (and to
intermediate values, too).
                                                               27
View original page 22Page 23 · Read text
Messen mit Arbeitsblende                       - bei Beliclrtungszeitvonrahl
Fti r Objektive oh ne elektrische Blendenwertii bertragu ng. U mschal-
ter fflr die Belichtungsautomatik (21) mit seiner Markierung auf
das Symbol El  stellen. Belichtungszeit am Einstellknopf (4) vor-
wiihleh. Abgleichen wie oben beschrieben. Bei objektiven mit
automatischer Druckblende  ist wdhrend des MeBvorganges die
Handabblendtaste (13) zu drficken bzw. der Umschalter fiir die
Blendenfunktion (36) auf M zu stellen (entspricht beim PANCO-
LAR 1,8/50 der unt6ren Stellun! des Schalthebels [Rastblende]).


Metering at taking aperture with the shutter speed
preselected
For lenses without electric transmission of the diaphragm values
move the mark of selector ring for diaphragm control (21) to
the El symbol. Preselect the shutter speed on knob (4). Adjustas described above. On lenses with automatic pressure dia-
phragm the stop down key (13) has to be depressed or thediaphragm-operation selection switch (36) set to M while the
meier reading is taken. (On PANCOLAR 50 mm f/1.8 correspond-
 ing to the lower position of the lever [click-stop diaphragm].)
                                                           29
View original page 23Related documents and language editions
From the M. Butkus archive. Original publisher and archive notices are retained.
Check the model and edition against your equipment.
PDF verified 2026-10-10.