Film cameras
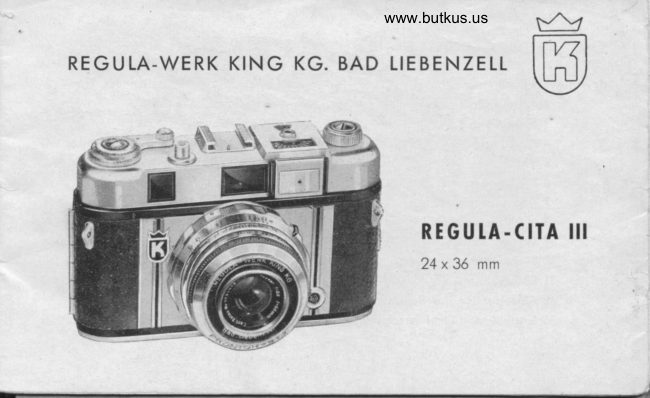
Regula III-b / Regula-CITA III User manual
User manual for Regula III-b / Regula-CITA III. 21 pages in English. Read the original PDF, download or print a copy without registration.
21 pagesEnglish1.6 MB PDF
Loading your manual…Open PDF directly
Document details
- Brand
- Regula
- Model / document
- Regula III-b / Regula-CITA III
- Document type
- User manual
- Language
- English
- Pages
- 21
- File size
- 1.6 MB
- Category
- Film cameras
- Document date
- Not specified in catalog
Search available document text
Find a term, then jump to its page in the original PDF. Image-only pages may not be searchable; check the PDF for exact wording and diagrams.
Page 6 · Read text
@eo, %nguln-friemtlt

                     You ore now the proud owner of o REGULA comero, ond your photo
                         deoler snd the monufocturer wish you every success.The comero hos
                      been designed ond  built to the highest precision stondords, ond  this
                 m e o n s c o m p le te re lio b ility.

                       T h e  f o l l o w i ng  in stru ctio n s o re d e sig n e d to .h e lp  you ovoid m oking
                            errors. Pleose reod them, lt's for better to be sofe thon sorry.

                        With  the comero  in  front  of  you, reod these instructions corefully,
                     Use the  illustrotion to  locote the vorious ports of  the comero, ond
                       where possible hondle the ports mentioned. The good worker olwoystQl,
                                                    f o m i l o r i s e s h imse lf with  h is to o ls.tj

                                                                                  ;i&idi*-..                                                                                                            ,'-.'      "                                                  .tff
View original page 6Page 7 · Read text
TOADING THE FItM

           Only  use films  of  good nome     here,
              y o u r p h o t o d e o l e r w i l l  h e l p . T h e c o m e r o
                 is designed to  occept stondord 35 mm
               film cossettes (24x36 mm) 20 or 36 expo-
            sures     Block ond  Withe  or  Colour.
          C h o o s e o  s h o d y s p o t -  n o t b r i g h t s u n l i g h t
               (o) To insert the film, first press down the
           body lock (20), open the comero bock ond
            press or  pu ll  the  rewind knob   (l l)  up,
             o s  f o r o s   i t w i l l g o . T h i s e n o b l e s y o u  t o
              insert the  film  cossette, into  the  empty
              s p o c e t h o t  r e m o i n s .
              (b) Push the  rewind knob down,  to  its
             o r i g i n o l p o s i t i o n . A t  t i m e s , i t m o y h o v e t o
           be turned slightly.
               (c) Fold inwords, obout  1lt inch  of  the

www.orphancameras.com
View original page 7Page 8 · Read text
end of the film. Insert this end  into the slot of the toke-up spool. Turn lhe toke-up
 spool, so thot the  film  is tightened ond ensure thot the tronsport wheel engoges
 firmly in one of the perforotions. This is very imporloni, for  if the film is riot ottoched
 firmly to the toke-up spool, no photogrophs will be tokenl

 (d) Close the  lid firmly.  lt will  "click" into ploce.

(e) Now  thot hlm  is looded  into the comero, two blonk exposures musf be mode
bef ore  t h e  f i l m   i s   i n   t h e c orre ct p o sitio n fo r  "sh o o tin g ".To d o  this, the following
s t eps mu s t b e  t q k e n :
Turn the tionsport lever  (l) forword  with o steody movement of your Right Thumb
until it.stops. At the some time oscertoin thot the rewind knob is turning ogoinst lhe                                       .  i
orrow. This ensures thot  le  film  is being tronsported correctly. Allow  the tronsport
lever to glide to  it's normol position  (lf the tronsport lever is blocked in ony woy,
press tl.re releose button).
Now press the releose button (4) ond repeot the some operotion once ogoin. At the
third movemenl of  the tronsport lever, the film  will  be  in the correct position for
your first exposure. Turn ihe. film counter (3) to 20 or 36 occording to the length of
film. The counter will then outomoticolly show ihe remoining number of exposures.

, - ' t
                                                                                    3
View original page 8Page 9 · Read text
(f) Your REGULA comero hos o doUble exposure preventiorr device, ond lherefore  it
      is impossible to moke the error of photogrophing fwo different subiects on the some
     negotive. Also  it incorporotes o double tronsport prevention device -  this meons thot
    you connot tronsport the film without releosing the shutter. lf you connot releose the
     shutter you hove to tronsporl the film. Not only thot  -     if you hove not turned the                                                                                                                        ;?l
                                                                                                                                                                                                                                                                                                                                                                                                               I     tronsport lever enough,   it musi be turned on,ce ogoin   -   But you do  not  loose
     o n y  f i l m !
      (g) The next 3 steps ore eosy -  Set the distonce (18). -  Set the diophrogm (19) ond
         t h e ex posu r e t i m e  ( 2 1 ) .B u l  l et' s e xp lo in th e n e w lig h t vo lu e ,-  P ro ntor ,SVS- Shutter .

    SHUTTER
                                                                                              'l         l.  Gives you o  ronge  of speeds from                                                       to  ]/sooseconds. These speeds con be set
     betore or  ofter the film  tronsport hos been  turned.    lt  is not possible to use '/in
     b e t w e e n " s p e e d s e t t i n g s . N . B .   s p e e d s e t t i n g 3 0 :          l / s o s e c o n d . W h e n  u s i n g " B "
     (Bulb) the shutter will  remoin open os long os the releose button  is pressed down,.
     For speed settings longer thon  l/go second, we recommed thot you use o  relioble
      tripod, ond olso o coble releose, which screws into the threod of the body releose
     button.  Incidentolly, shutter is cocked  outomoticolly when the  film  is tronsported.

   4                      www.orphancameras.com
a"'1':-..."br--.+x*;                            :..s,
View original page 9Page 10 · Read text
2. The M-X  lever (8) normolly  sloys on X. To use the "M"  setting, refer to the expo-
sure tobles listed on the iorton contoining your flosh bulbs.
For deloyed oction the  lever  is sel to  "v"   -  ond  this  is only  possible ofter the
shutter is cocked. After the shutter is releosed you hove 6-8 seconds ovoiloble before
ihe photogroph  is token,. The lever will then outomoticolly return to "X".


DIAPHRAGM & EXPOSURESETTINGS

The REGULA comero hos the odvontoge thot the diophrogm ond shutter mechcnisms
ore coupled by the  light volue system. Here ore some hints obout this new system.
You probobly know thot you will olwoys get on evenly exposed negotive by closing
the diophrogm  l/2 stop, providing  of course ihot you lengthen the shutter speed to
the some extent.
A setting ol  llns sec. ot  f 2.8 would correspond lo 1/5ssec. ot   f 4 or 1/:o sec. ot  f 5.6,
or  l/ts sec. ot  f 8 or  l/s sec. ot  f   ll  or 1l sec. ot  f  .|6. These figures illustrote thot this
relotion of diophrogm  to  shutter speed gives exoctly the some exposure. This relo-
t ions hip is k n o w n o s  " l i g h t v olu e " o n d in th e e xo mp re sh o wn "rig h t volue'10".

                                                  5                                                 .&*
View original page 10Page 12 · Read text
4. With  the REGULA comero, this hos been simplified for you, by providing o  light
volue scole (LVS) exposure meter, built by the world's most fomous ond lorgest ntonu-
focturers of exposure meters -  Gossen. This meter provides o LV reoding ot which
the shufter must be set. Hence ot LV "l0" you would be in o position to choose ony
c o mbin o t i o n o f  s h u l t e r s p e e d o n d d io p h ro g m, o s  illu stro te d o b ove  in por o.3.  T o
C o  t his , t h e  f o l l o w i n g o c t i o n is to ke n :

Press in the clutch lever (22) ond set the red LV number to the red orrow by nnoving
the ring to the  left or right. For very high LV reodings, it will be necessory to move
the knurled shutter speed ring  (21) -   this  is only possible by pressing in the clutch
lever. Hoving set the LV reoding,  it  is only n,ecessoryto decide on the best combi-
notion of shutter speed ond diophrogm which will  suit your subiect ond produce the
most suiloble depth of field.

5. With  the REGULA comero,  it  is olso possible to  set the diophrogm ond  shutter
independently of the LV setting. This is, once ogoin done, by pressing in the clutch
lever ond  turning  the opproximote  rings  to  their  correct setting. Moke  sure thot
these rings click into  position. So, should you wont  to  olter fhe shutter speed the
d iophro g m w i l l c h o n g e o u t omo tico lly in th e co rre ct ro tio .
View original page 12
Page 13 · Read text
6. The green numbers connot be set -     t h e y o n l y   i n d i c o t e e x p o s u r e i n  f u l l s e c o n d so t
o c e r t o i n d i o p h r o g m s e t t i n g e . g . 4  seconds of F/8 -  such on exposure con only be
o b t o i n e d o f  " 8 " s e t t i n g , o n d h o l d i r r g the releose down for seconds.

DEPTH OF FIETD

T h i s  i s p u r e l y d e p e n C e n ot n
t h e d i o p h r o g m s e t t i n g . T h e
m o r e y o u  c l o s e y o u r d i o -
ph rog m   (the  h ig h er  the
n u m b e r ) ,  t h e  g r e o t e r   t h e                                          I
d e p t h o f   f i e l d .   l t o l s o b e -
comes greoter, os the  di-
stonce from the subieci in-
creoses.
T o m o k e  i t s i m p l e f o r y o u ,
o  depth  of  field scole  (7)
is   ovided obove the  di-

                        www.orphancameras.com
View original page 13Page 14 · Read text
stonce ring. (18). This shows, on either side of the centre mork the figures F 2.8  to
              .|6.
        F   Now follow these two exomPles:
                l.  Set the diophrogm ring  to   I  ond the disionce ring  to 20. On  the depfh of  field
         scole (left) ot  F. 8 the distonce ring  reods  " lnfinity" ond on  the scole (right) the
         distonce shown  is opproximotely "l0  feet". This meons, thot ot F 8 focusesd on "20
         teet" the photogroph will produce good focus between "l0  feei" ond  "lnfinity".
          2. Set the distonce ring to 8, leoving the diophrogm ring ot 8. At F 8, you  lvill see
         thot the focus ronge  lies between "12 feel" ond "6  feet".1
I
I          tn these two exomples, you  will  see the importonce of depth of  field. Now,   it  is
i        simple to decide on ony depth of field ot ony distonce or ony diophrogm sefting.
II
       THE TIGHT VATUE EXPOSUREMETER

         .   Gossen -  designers of the Sixon, Tri-Six ond Sixtomot x 3 Exposure Meters, hove desi-
        gned this meter with  speciol core, ond   if used correctly your REGULA comero will
        produce firsl closs results.                                                                                              ,'': ts"                                                                                        i,,                                                                                        i                                                                       -*.     _                                  . , , r :                   . . : :                                                                            .i
View original page 14Page 15 · Read text
W h e n    l o o d i n g  t h e c o m e r o w i t h F i l m , s e t  t h e  f i l m
                             speed by turning he knob on the reor window of
                                   the LV Meter. As your subiect is viewed, poinl the
                            LV Meter towords  it. Out-doors it  is odvisoble to
                                                      tilt  the meter downwords slightly to  ovoid  too
                           much sky  light   f rom  entering the very sensitive
                                  photo-electric cell. Where  possible, the  subiect
                                should be opprooched closely ond the LV Mete:
                                 pointed ot  the moin oreo  to  be photogrophed.
                              Core should be token to ovoid costing o shodow
                                        of the LV Meter into the oreo being meosured.

                          On subiects thot hove wide ronges of brightness,
                                                            it   is  better  to  meosure tlre  brightest ond  the
                                 dorkest oreos, ond toke on overoge reoding.

For Incident Light Meosurement slide  the  diffusing  disk  over the  front  of  the
honeycomb lens ond  point the meter from the subiect to the position from which
you will toke the picture.

                      www.orphancameras.com
View original page 15Page 16 · Read text
Axiom    With  Block ond Withe  Film, "Expose for the shodows ond the highlights
 l o o k o f t e r  t h e m s e l v e s " .W i t h C o l o u r F i l m , " E x p o s e f o r   t h e h i g h l i g h t s o n d   t h e s h o -
dows look ofter themselves".
The Gossen LV Meter hos two ronges of  light sensitivity. Normolly the Front Cover
is closed   ond the position of the needle noted viz by the white numbers corre-
sponding with  the white  or  blqck chonnels. Under poor  lighting conditions, the
View original page 16
Page 17 · Read text
needle will  not move  -   so, press the top edge of ihe front cover. The LV Reoding
 is then reod from  the yellow numbers. To rJmind you, the reor side of  the fronl
cover when you open  is morked in yellow.                                                                            t.

THE COUPTED RANGEFINDER                                                                                                                      i
This is fitted to the REGULA CITA  lll (REGULA-RM),ond  is very simple io use. In the
mid d le o f   t h e v i e w f i n d e r fie ld yo u  will se e o  lig h t co lo u re d rectongle ond  in this
you  will  notice thot your subiect hos two imoges.  lf the set ring (18f is turned with
your fingers, one imoge will move. Turn the ring  until both imogLs ore exoctly super-
imposed -   qt this point you ore  in occurote focus.
With  moving objects viz motor rocing ond sports etc.,  it  is only necessory to  pre-
determine the distonce ot which you wont to work.  Set thot distonce on the diston,ce                             I
s  c o le      on d            v i e w                  y o u r s u b i ect th ro u g h th e ro n g e fin d e r. Wh e n th e  ir noges coincide -            I.Lpress      the         body                releose.
G E NE R A TH I N T S                                                                                                      II
                                                                                                                                                   f. l. Alwoys hold the comero sleody ond  level.
2. Put your  eye os close  to  the  viewfinder os  possible ond  frome  your  subiect
   o c c u r o t e l y .

1 2                    www.orphancameras.com
View original page 17Page 18 · Read text
3. When toking ihe "shot" -   don't  ierk the body releose -'on   eosy steody pressure
           is ideol. Hold your breoth os the releose is pressed.

    FLASH "SHOIS"
    -When purchosing o flosh gun, osk your deoler for  his odvice.  li  will be fitted into
      the occessory shoe (2) of the comero, or with certoin types on to o brockef or orm'
     The contocl of the synchronizotion cord  will then be slipped on the synchronizotion
      contoct of the comero (23).
      For exposure of r/m second ond  longer, the shulter synchro lever (8) is to be set
       at "X", or  if you wont to be  in the picture yourself set  it to  "V". For exposures l/3e
                                  ,,M"                                       setting is required  -   in  this position deloyed oction     second to.1/:oosecond the
      shots ore impossible. Every corton of floshbulbs is supplied with  full informotion on
      shutter setting, guide numbers ond the "flosh to subiect" distonce.

    ELECTRONICFTASH
     Accurote synchronizolion ot the "X" setting is possible ot  oll speeds. A normol set-
       ting of r/oosecond is very useful for overoge subiects.

h 1 3
E.              ,*",.Slt .,.'  ,     ;e      dr,   *aft*,-        ;   .                                       .:,1-                                                                                "  "rtgqil
View original page 18Page 19 · Read text
R E W I N D ! N G T H E F I t M

          When the film counter (3) reoches "O"  the
                           f i l m    i s  f u l l y e x p o s e d , o n d    i t    i s n o w ne-
            cessory  to  rewind the  fi lm bqck  into  the
             co ssette.
            With your  left thumb, press the lock but-
              ton (10) on the bottom of the comero, qnd
            keep  it pressed during the rewinding ope-
                       r o t i o n . W i t h     t h e   r i g h t  h o n d     i u r n    t h e
             rewind knob   (l I )  in  the d irectiorr of  the
             orrow,  until the film  is rewound into the
             cossette.Wherr the film  is olmost comple-
                           t e l y  r e w o u n d , o  s l i g h t  r e s i s t o n c ew i l l  b e
                 felt.   lt  is overcome eosily o nd smoothly,
             by on extro revolution of the rewind knob
              ond  ot  this stoge the end  of  the film
            hos left toke-up spool.
          Open the bock of the comero, pull out the
            rewind knob ond remove the film cossette.

www.orphancameras.com
View original page 19Page 20 · Read text
REGUTA ACCESORIES
A   f u ll ro n g e o f o c c e s s o r i e si s o vo ilo b le fo r yo u r RE GUL A co me ro :
l. A  beoutiful Leother Ever Reody Cose which olwoys protect your comero.
2. A  voriety  of  Filters for  use with  Block ond Whiie  or  Col'our Film. Conversion
   F ilt e rs f o r u s i n g D c y l i g h t C o lo u r Film in o rtificio l lig h t o n d vice ver so.
3. Close-up Attochmenls for  flowers, insects, copyin,g etc.
4. Sunshode -   o very _essentioloccessory.
5. Tripods.
For full  detoils contoct your photo deoler or write  to ihe Distributors. They ore  ol
y o u r s e rvi c e o t o l l  t i m e s .

CARE
Treot the comero corefully. Do not touch the Lens, with your fingers. lf this hoppens,
it must be cleoned ot once with o piece of cleon, oftenwoshed linen, lens cleoning
t is s ue or o h i g h q u o l i t y c h o mo is.
An  oir  blower  or comel  hoir  brush  will  olso remove dust from  the  lens or  the
inside of the comero.  lf the comero is not fo be used for some time  -   releose the
shutter.
View original page 20
Page 21 · Read text
IAST BUI NOT LEASI

Reodrlhese instructionsonce more. Photogrophyis lots of fun -  Experiencemokes
perfect.Your REGULAcomerowill olwoys be relioble.

                                                                                   /-<-)                    t luck!r            I               Qood


REGUlA.WERKKINGKG.BADI.IEBENZEII

                      www.orphancameras.com                      SCHWARZWA1D.J
View original page 21Related documents and language editions
From the M. Butkus archive. Original publisher and archive notices are retained.
Check the model and edition against your equipment.
PDF verified 2026-10-10.