Film cameras
Revueflex B - translated User manual
User manual for Revueflex B - translated. 11 pages in English. Read the original PDF, download or print a copy without registration.
11 pagesEnglish7.7 MB PDF
Loading your manual…Open PDF directly
Document details
- Brand
- Revue
- Model / document
- Revueflex B - translated
- Document type
- User manual
- Language
- English
- Pages
- 11
- File size
- 7.7 MB
- Category
- Film cameras
- Document date
- Not specified in catalog
Search available document text
Find a term, then jump to its page in the original PDF. Image-only pages may not be searchable; check the PDF for exact wording and diagrams.
Page 1 · Read text
www.butkus.us

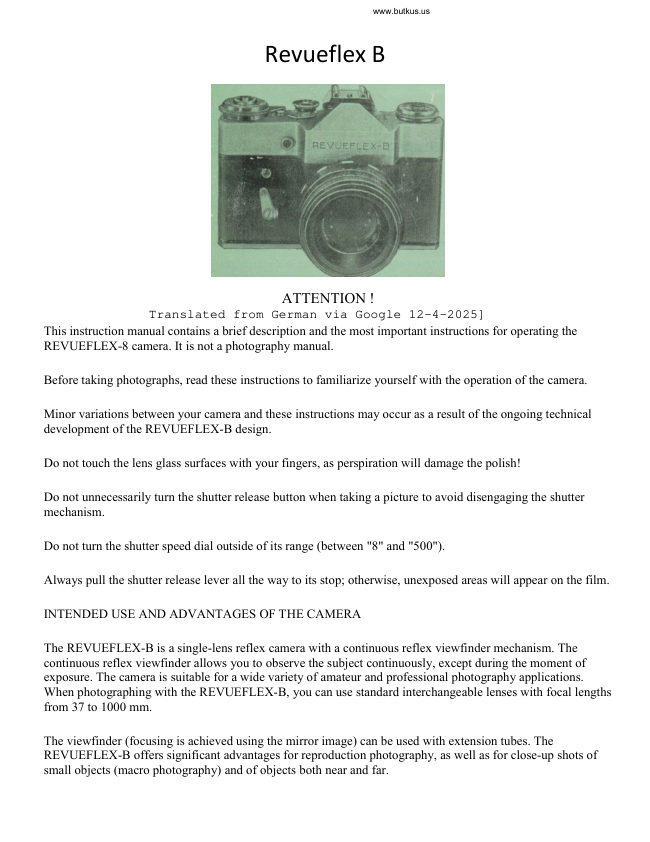
                    Revueflex B


                         ATTENTION !
              Translated from German via Google 12-4-2025]
This instruction manual contains a brief description and the most important instructions for operating the
REVUEFLEX-8 camera. It is not a photography manual.

Before taking photographs, read these instructions to familiarize yourself with the operation of the camera.

Minor variations between your camera and these instructions may occur as a result of the ongoing technical
development of the REVUEFLEX-B design.

Do not touch the lens glass surfaces with your fingers, as perspiration will damage the polish!

Do not unnecessarily turn the shutter release button when taking a picture to avoid disengaging the shutter
mechanism.

Do not turn the shutter speed dial outside of its range (between "8" and "500").

Always pull the shutter release lever all the way to its stop; otherwise, unexposed areas will appear on the film.

INTENDED USE AND ADVANTAGES OF THE CAMERA

The REVUEFLEX-B is a single-lens reflex camera with a continuous reflex viewfinder mechanism. The
continuous reflex viewfinder allows you to observe the subject continuously, except during the moment of
exposure. The camera is suitable for a wide variety of amateur and professional photography applications.
When photographing with the REVUEFLEX-B, you can use standard interchangeable lenses with focal lengths
from 37 to 1000 mm.

The viewfinder (focusing is achieved using the mirror image) can be used with extension tubes. The
REVUEFLEX-B offers significant advantages for reproduction photography, as well as for close-up shots of
small objects (macro photography) and of objects both near and far.
View original page 1Page 3 · Read text
www.butkus.us


                    Index of the setting ring for full aperture
                    Aperture setting ring
                    Aperture ring with index
                  Depth of field scale with index triangle
                     Distance scale
                   Focus ring
                   Threaded ring for attaching the lens

                    Aperture setting ring with index Focus ring
                    with aperture scale
                     Distance scale
                  Depth of field scale


     Shutter release button

      Synchronization lever

 Synchronization lever index
       Exposure scale index
            Exposure scale
     Rewind release button
         Film advance lever

                                 Frame counter index   I        I
                                 Frame counter with drive pin


    Rewind button


Film sensitivity scale

                                   www.butkus.us
View original page 3Page 6 · Read text
www.butkus.us


INSTALLING THE FILM INTO THE CAMERA
Open the camera back by sliding the locking latch
upwards. Pull the rewind knob upwards and
remove the cassette.
The film is loaded in daylight. Proceed as follows:

1. Open the camera back by sliding the locking
latch upwards.

2. Clamp the film end under the spring of the take-
up spool and engage the perforation with the
spool tooth. Ensure the film is correctly positioned
between the guide rails.

3. Place the cassette into the spool compartment.
When inserting the cassette, pull the rewind knob                           www.butkus.us
upwards.

4. Lower the rewind knob.

5. Close the back and lock the locking mechanism
by pressing it downwards.


6. Cock the shutter by turning the winding lever until a noticeable stop is heard. Then press the
release button.

Cocking the shutter advances the film by one frame.

To bring the unexposed film in front of the frame, the shutter must be cocked three times and
released each time by pressing the button.

Note: When cocking the shutter, observe whether the rewind knob turns smoothly. If it does
not, check whether the film has been inserted correctly.

7. The zero mark on the film speed dial is aligned with the setting index by rotating the dial in
any direction. The shutter must be cocked while doing this.
View original page 6
Page 7 · Read text
8. The film speed scale has the numbers 16, 32, 65, 130, and 16. 250; 500 are attached, the
film speed corresponds to rOCT units. The dots between these numbers correspond to the film
speed in ASA units. The numbers 13; 16; 19; 22; 25; 28 denote the film speed in DIN grades.

To set the sensitivity and type of film, you turn the film sensitivity scale until a required
number or the corresponding index (0, - tungsten or * - sunlight for color film) appears on the
black line on the rewind knob, while holding the film sensitivity scale for its edges and holding
the rewind knob with your other hand.


                        EXPOSURE TIME SETTING
                                  Pull the exposure time setting knob
                            out slightly and, by turning it, set an exposure value opposite
                            the index mark in the center of the knob. Lower the exposure
                           time setting knob down and lock it in this position. The
                         numbers on the exposure scale indicate an exposure duration
                                  in fractions of a second, and the B setting means a manual
                                  setting.

                         To obtain a longer exposure time, cock the shutter, set the
                                setting knob to "B," press the shutter release button, and turn
                                             it counterclockwise until it stops. After exposure, return the
                              shutter release button to its starting position.
View original page 7Page 8 · Read text
www.butkus.us

Notes:
1. Setting the exposure time may be demonstrated with
the shutter cocked or released.
2. A longer exposure time and the B" setting are
recommended for tripod-mounted shots.

3. When shooting without flash equipment, the
synchronization lever can be set to any position within
the range of "X" to "M" on the side of the rewind button.

APPERTURE SETTING
The required aperture is determined on the HELIOS-44-2
lens by comparing one of the numbers (2; 2.8; 4; 5.6; 8;
11; 16) on the aperture ring with the index.
The aperture is set by turning the ring until a light click is
heard, confirming that the ring is locked in place. The
INDUSTAR-50-2 lens stops down after focusing.


2. Longer exposure times and the focusing
Focusing must be demonstrated with the aperture fully open.

To do this, the aperture ring of the HELIOS-44-2 lens must be turned counterclockwise until it
stops. Point the lens at the subject and, looking into the eyepiece, turn the focus ring until you
get a sharp image of the subject on the focusing screen.

After focusing, the HELIOS-44-2 lens is stopped down by turning the aperture ring clockwise
until it stops. When photographing objects at different distances, it is recommended to use the
depth-of-field scale. f.,~

The depth-of-field scale consists of two rows of numbers engraved symmetrically on either side
of the index, corresponding to specific aperture values. After focusing, the limits of the depth
range for the selected aperture can be determined using the distance scale. These limits are set
by the corresponding numbers on the depth-of-field scale on either side of the index.

Example: The lens is set to 4 m at aperture f/11. Then all objects in the range of 2.5 to 10 m
will be in focus.
View original page 8
Page 9 · Read text
FLASH PICTURES
To get good pictures in low light, various flash units are used. The REVUEFLEX-B camera has
a special device that synchronizes the shutter response time and the flash duration.

When shooting with flashbulbs, the synchronization lever should be set opposite the "M" mark.
When shooting with a drone flash tube, the synchronization lever should be set opposite the "X"
mark. [This camera does not have a hot shoe. You cannot use a flash with a hot shoe
connection. You need a flash with a cable to the X sync plug. Possible to use a flash with
independent grip if the flash has a hot shoe.]

When using flash units, only the flash duration of 1/30 sec should be set on the REVUEFLEX-
B, as only in this case is the full flash output enabled. Any faster speed, the shutter will cut off
the image.

The exposure time "B" is not desirable when taking photos with flash lamps, because
during a long exposure time, a large amount of side light (after the flash) enters the camera and
you get a blurry photo.


SELF-TIMER SHOOTING
To take a self-timer shot, you must cock the shutter,
cock the self-timer mechanism, and turn the self-timer
lever down to its stop. After setting the exposure time
and choosing the subject, focus the lens. After pressing
the self-timer button, take a position in front of the
camera. Once the button is pressed, the self-timer
mechanism starts moving and releases the shutter after

                                                                                             www.butkus.usapproximately 9 seconds.


                                                                            TAIR-11
  MIR-1
                             HEL!OS-41-2                                                                                               f = 133 mm
   f = 37 mm
                                        f = 58 mm
View original page 9Page 10 · Read text
www.butkus.us


                            MOT-500                     MOT-1000
 Tair – 3                      F=500mm                    F=1000mm
F-300mm


When shooting with the REVUEFLEX-B camera, various commercially available
interchangeable lenses can be used with ZE IT type cameras with rollover shutter.

The interchangeable lenses are attached to the camera using an M42 X 1 thread.

When using the TAIR-3 interchangeable lens, slight cropping of the left negative edge is
possible.

To unscrew the Indu-star-50-2 or Helio-44-2 lens from the camera, it must be turned
counterclockwise, holding it by the ring with the depth-of-field scale or by the ring for image
focus adjustment.
View original page 10Page 11 · Read text
UNLOADING THE CAMERA

When the frame counter reads “24” or
"36", the exposed film must be rewound into the
cassette.

This is done as follows:

1. Press the rewind release button to switch off the
advance mechanism.

Hold it down and, while holding it in the pressed
position, turn the rewind knob in the direction of the
arrow until the end of the film releases from the spring
clip on the take-up spool.


You will notice this by the reduction in resistance when removing the film.

2. Open the camera back.

3. Pull up the rewind knob and remove the cassette from the camera.

Note: For the next shot, cock the shutter and check, holding your finger on the toothed drum,
whether it is rotating.


SOME TIPS
To achieve good photographic results with the REVUEFLEX-B, careful operation and proper
handling are required. The camera must be protected from impacts, shocks, dust, moisture, and
sudden temperature changes.

The camera is stored in the closed ready case. The lens is protected by the lens cap, and the
shutter and self-timer must not be left cocked.

The lens should not be unscrewed unless absolutely necessary to prevent dust and dirt from
getting onto the optical surfaces.

The coated optical surfaces should only be cleaned externally with a clean, soft cotton cloth or a
cotton ball lightly moistened with pure alcohol, ether (petrol or sulfur ether), or, as a last resort,
cologne.
 ... The camera is a complex optical precision instrument; therefore, repairs and adjustments may
only be carried out by a first-class specialist.
View original page 11
Related documents and language editions
From the M. Butkus archive. Original publisher and archive notices are retained.
Check the model and edition against your equipment.
PDF verified 2026-10-10.