Light meters
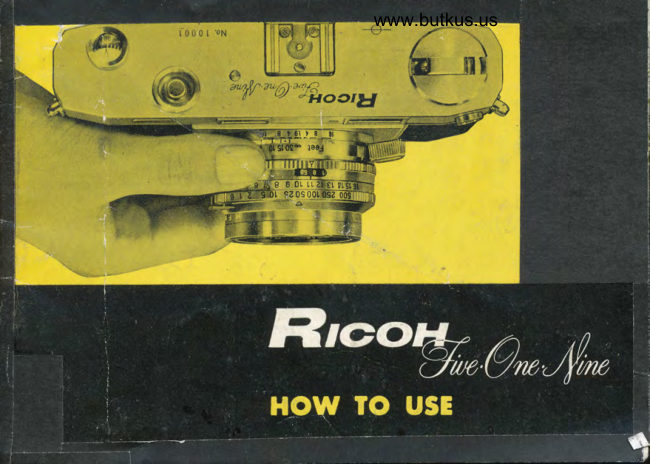
RICOH 519m (METER) User manual
User manual for RICOH 519m (METER). 37 pages in English. Read the original PDF, download or print a copy without registration.
37 pagesEnglish13.8 MB PDF

Loading your manual…Open PDF directly
Document details
- Brand
- Ricoh
- Model / document
- RICOH 519m (METER)
- Document type
- User manual
- Language
- English
- Pages
- 37
- File size
- 13.8 MB
- Category
- Light meters
- Document date
- Not specified in catalog
Search available document text
Find a term, then jump to its page in the original PDF. Image-only pages may not be searchable; check the PDF for exact wording and diagrams.
Page 3 · Read text
PRINCIPAT
      PARTS


   O  Light value meter photocell
   @ Range-finder window
    C  Triggermatic-Action  lever
                   , Lens    @
      ,e  View-finder window
   @ DUO-LEVER focusing controls
             Eyeler   @
2
View original page 3Page 4 · Read text
www.butkus.us
        @ Combined sYnchro setting
                    and self-timer ring
               e   Shutter speed setting ring
        @ Light value figures
                    ,0 F stop window
        @ Light value adjusting ring
        @ Distance scale


                                     Digitally                                      signed                                        by mike butkus   (}   Depth-of-field scale                            DN: cn=mike                                             butkus,
                                              ou=29,mike butkus o=orphancameras,email=mike@butkus.org,                                              c=US
                                 Date: 2018.09.21 15:39:12 -04'00'                     (5) Rapid rewinding crank
              t@ Accessory shoe
                ,O  Corclless flash lontact
                    6.9 Shutter release button
                    tCI Light value meter dial
        @ Light value meter needle
              A1 Film-tyPe indicator scale
                                          3
View original page 4Page 5 · Read text
@  Rewinding spindle
@  Film counter
@  View-and-range finder .y.pi...
@  Film rail
@  Flash terminal
@  Rewinding release button
@  Sprocket
(E  Take-up spool knob
@  Take-up spool slot
@  Tripod bushing
@  Back cover locking disc
@  Film pressure plate
@  Cartridge positioning spring
@  Film-type indicator
View original page 5
Page 7 · Read text
(3 )  Place your ner,r' fiim cartridge in the chamber
                                          below the rewinding spindle. (See Figure 3.)
                                    (4)  Engage the end of your unexposed'' film


                         F.3
                    H;


firmly in the inner take-up spooi slot. (See
Figure 4.)       KIf the slot is not in position, turn the take-
up spool knob so that the slot comes in posi-
tion.
View original page 7Page 8 · Read text
www.butkus.us

( 5 ) Make sure the perforations on the
      film are properly engaged on the
      teeth of the sprocket, and that the
     film is properly centered. While
      pressing the rewinding release but-
      ton, turn the take-up spool knob in
     the direction indicated by the u'hite
     arrow to make sure the film is to
    be wound properly.

( 6 ) Then wipe off any particles of dust or finger marks on the film pressure plate
     with a soft brush or piece of gauze. When you have done this, put on the
     cover gently and firmly, taking good care that the film pressure plate does not
     get caught on the edge of the film, and turn the back cover locking discs, in
     the directicn indicated by black arrovr', so that the white marks come in  line
     with C
View original page 8Page 9 · Read text
(7)


    in which your film is sold and probably in the Directions printed and enclosed in the
    packet' Bring either ASA or DIN number of your film in line with the black mark by
    turning the dial with the tip of your nail on the tiny metal catch. This is done so thar
   you might remember what the film speed is a matter of utmost importance when taking
    pictures' When the camera is empty, bring the catch (where there is no number) in line with
    the black mark.
(S)  Bring our the triggermatic-action  lever
8
View original page 9Page 10 · Read text
www.butkus.us
                                               S '!(e) You will note that the film counter shows  ('
      (Start). (See Figure 5.) Release the shutter or at
      least press the button to ensure that it  is released
    and turn the triggermatic-action lever with your left
     index or middle finger as far as it  will go to the
      left. This advances the film by one frame and
     cocks the shutter at the same time.  If the lever
      will not advance. never force it;  because it means                                                              F.6
     the shutter has not been released
       Release the shutter again and advance the film     your first picture. Anything
     once more and you will find that the second small      taken on a frame bifore the larger
     dot comes under the center line of the film count€r.      dot comes under the line is likely
    When the film is advanced 3rd time, a larger dot      to be on an exposed part of the
     (mark of the first frame) comes to the center.            film and therefore to be useless.
      Then set the LIGHT VALUE required and take     (See Figure 6.)
                                                                     9
View original page 10Page 11 · Read text
EXPOSURE
                      TUIETER
      Regardless of how good a camera you      requirement  it is best to use an exposure
    have. through careless exposure a much an-    meter which determines the exposure
    ticipated subject will turn out a disappoint-        scientifically.
    ing white or black. In photography there      The RICOH 5l9M has a built-in direct-
     is nothing more important than proper ex-      readins type exposure meter of the latest
   posure. Up till now. many people have    type Therefore, even a novice can become
    bet'n takine photographs with only a rough      proficient in photography many times fast-
    guess of the exposure based on their senses      er than with cameras which do not have a
   or exposure tables. Only through proper       built-in exposure meter. Especially in color
    exposure can you truly appreciate the r€-      photography,  it shows off its greatest ver.
    sult of a good photograph To fulfil this       satility


70
View original page 11Page 12 · Read text
www.butkus.us
I{OW TO UsE THE EXPOSURE METER     Also. when photographing a distant view,
                                             such as expansive scenery,  if your camera is
                                                            tilting upward too high it  will measure the
In the reflected light type the rule is to meas-      light from the sky and the more important
ure light by pointing it toward the subject       trees or buildings will become underexposed.
from carnera position But, when photograph-     So, measure by tilting the camera slightly
ing people against a bright background, you     downward toward the ground. When photo-
should get close enough to the subject so you     graphing into a light source be careful not to
can obtain a true reading of only the reflect-      allow direct light to enter the light window
ed light from the subject.                        of the exposure meter.

                                         i,! \ \(      l)              --\ \--. o             -)+               arf    r+)iI                 - '.-                    -)',,                                 z/,-t,  q:='#        +
View original page 12Page 13 · Read text
roo great or too iittle, the picture will be no
                                         good. In the conventional type of camera EXPOSURE                                            one has to set the shutter speed and the re-
                                                 quired f stop separately. The LIGHT VALUE
                                                  device eliminates all this trouble. since any AND                              change in the shutter speed due to any change
                                                  in the f stop or any change in the f stop due
                                                 to any change in the shutter speed is done TIGHT VATUE     AUTOMATICALLY.  It must of course be
                                                 understood that the amount of light is about
                                                  the same
                                      Your RICOH 5l9M has this device, so
                                            makes AUTOMATIC the givi.rg and ensur-
                                                 ing of the correct exposure by simply setting
      In taking a picture a certain amount     the LIGHT VALUE indicator. This is a
     of light must pass through the lens and     mechanical brain that computes the correct
    reach the film. This is what is called an     exposure for you, provided you know what
    exposure.  If the amount of exposure is     tbe LIGHT VALUE  is.
l2
View original page 13Page 14 · Read text
www.butkus.us


HOW TO USE THE TIGHT VALUE


(1)  Ir{atch the ASA or DIN number of the
    film rn your calr^era with ilie 11 rnark by
    turning the light vah're dial  (See Figure
     7. 8)
    Point the carnera toward the subject you
    intend to photograph.

    According to the brightness of the subject,
    the needie of the meter wili fluctuate and
     gradually come to a stop at a certain point.
   The number indicated is the proper light
     value.
View original page 14Page 15 · Read text
(2)  After measuring the light value. turn     (3)  If either shutter speed or opening (which
   the light value adjusting ring and            affects depth of field of focus shown on a
   bring it  into the required position.           figure on another pagQ is not what you
    (See Figure 9, which shows that the         want, turn the shutter speed setting fing
    light value is  ,, I I ").  Disregard all          until your desired speed or opening  is
    shutter speeds and the relative openings          indicated. (See Figure 10.)
    in setting the light value. Just shoot.
                                     When ycfu want to have everything in
                                                 sharp focus, turn the shutter speed set-
                                                      ting ring to the left.   If on the other
View original page 15Page 16 · Read text
www.butkus.us
hand vou wish to have things on the
far and near side of your subject out
of focus, turn this ring to the right.
  The extent to which things are in
sharp lbcus may be found by reading
the depth of field scale. (See Figure
 ll and 12.;

  The f stops must be interpreted on
the scale in such readings of depths of
field as being a rough guide.

  When the required shutter speed is
a fast one, turn the shutter speed set-
ting ring to the right until ,:he requir-
ed speed is brought in line with the
reci mark.
View original page 16
Page 17 · Read text
When the required shutter speed is a        Similarly, when a slower shutter speed  is
          slow one, turn the ring to the left until the      required, moving the shutter speed rlng be-
          required speed is brought in line with the     yond thg f/16 point will result in the tight
         same red mark.                               value figure getting out of line, and this wiil
                                                                result in overexposure.
                    ' Make sure that the shutter speeds are                                                       Medial points just between the light values
          brought exactly in line with the click stops'                                         may be used, such as 2.5. 3.5......16.5.
           since no intermediate speeds are obtainable.
                                         When the shutter speed is set to " B "  tfle
          So long as there is no change in the light      shutter will remain open so long as the shut-
           value, the required exposure is constantly      ter release button is pressed. The figures
                                                                                                                                                                                          I       and automatically ensured, whatever the      stand for fractions of a second. so that
            shutter speed or f stop you set. Ffowever,     means I second. 2 means 1/2 second, 4 means
          at f/1.9 the f stop window stops moving      1/4 second, and 500 means l/500 second. 'fhe
        any farther, so that if you move the shut-      aperture or opening is bigger in proportion to
                                                                                                                                                                     is            ter speed setting ring beyond this point,      the smallness of the f stop number and
                                                                                                              the          'the light value figure will get out of  line,      smaller in proporticin to the largeness of
         and the result will be underexposure.               f stop tru:nber.
      roII
  I
l{..
View original page 17Page 18 · Read text
www.butkus.us


                                  16          16        84 1.94 g

TUIAKING
                                         As illustrated in the above figure the
                                                depth of field of focus increases in propor-THE BEST USE
                                                     tion to the smallness of the opening or f
                                                 stop, and decreases in proportion to its    OF
                                                    largeness.  It is this range that is corn-
                                           monly referred to as the depth of field.DEPTH OF FIETD
View original page 18Page 19 · Read text
Consequently, apart from the fact that you will have
to make sure your subject is in sharp focus, give full
consideration to this important factor.  For instance.
in taking a picture of a person, the blurring of the
background by using a wide opening will make the
person stand out


                                                       On the other  lru
                                                                      where people arg
                                                                                 ing becomes nec(:s
                                                                                 sharp on every su
View original page 19Page 20 · Read text
www.butkus.us
                                      Thus, if you set the opening a  f B and the dis-
                                          tance scale at the red dot, everything rvill be in
                                         sharp focus from l0 feet to infinity. (See Figure 13.)
                                         For taking sequcnce shots referred to in a subsequent  '
                                             section this will prove of immense advantage.


and, when taking a grouP Picture
 standing iP rows a small open-
r$ary to ensure that the focus is
rbject.
View original page 20Page 22 · Read text
www.butkus.us
TOCUSING THE CAilIERA
l. As illustrated in Figure 14, place your right index
    finger lightly on the shutter release button and with
   both hands turn the Duo-lever focusing controis'
2, Usually the image as seen through the view-and-
    rangefinder will apper " double " in the center tinted
    square, which means that the subject is not in
    focus-  lVhen this is the case, move the lever
   so that the two images merge, or  in  other
    words, becorne superimposed. The subject
     is now in sharp focus'
  Out of focus ( too far)                   In focus               Out of focrrs (too near)
View original page 22Page 24 · Read text
www.butkus.us
   Steady your camera when you shoot by     ing shots that are spoilt owing to any jolting
 resting the camera against a part of your    of the camera is the use of the tripod. For
 face and hold your breath for a moment as   any speed slower than ll30 we ,""o**.r}
 you shoot. (See Figures 15 and 16.)                   its use. It always pays to make sur-e that
  The camera is built in such a way as to    your important group and other pictures
 prevent the taking of double exposures and    are not spoilt.
 the skipping of a frame. In other words,    When using a cable release, screw it on to
 there is no danger of DOUBLE EXPOSURES    the shutter release button groove.
or BLANKS.
  Do not advance the film until the shutter
has been fully released. This is particularly                                   F. 16
irnportant when using the bulb or slow shut-
ter speeds.
  After you have advanced your film, which
cocks your shutter automatically, it is highly
advisable rrot to change shutter speeds between
11250 and l/500.
  The only absolute guarantee against tak-
View original page 24
Page 25 · Read text
USING THE SEtF-TIMER


  To use the self-timer, put the camera        Since it enables you to also get into the picture,
on a tripod and focus on Your group.        prints of your family and friends will be'more
Set the light value and pull the trigger        delightful to look at whelr mounted in your
lever. Turn .the combined synchro        album.
setting and self-timer ring to the left
and set the mark at  (( V "  Position.
Prcssing down on the shutter release
button will start the self-timer an{
the exposure will be made automa-
tically after about an B second delay.
View original page 25Related documents and language editions
From the M. Butkus archive. Original publisher and archive notices are retained.
Check the model and edition against your equipment.
PDF verified 2026-10-10.