Light meters
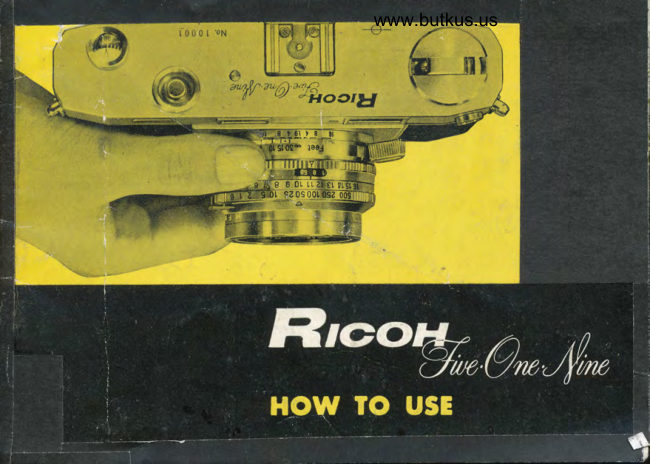
Ricoh Five One Nine (Ricoh 519) - no meter User manual
User manual for Ricoh Five One Nine (Ricoh 519) - no meter. 30 pages in English. Read the original PDF, download or print a copy without registration.
30 pagesEnglish1.9 MB PDF
Loading your manual…Open PDF directly
Document details
- Brand
- Ricoh
- Model / document
- Ricoh Five One Nine (Ricoh 519) - no meter
- Document type
- User manual
- Language
- English
- Pages
- 30
- File size
- 1.9 MB
- Category
- Light meters
- Document date
- Not specified in catalog
Search available document text
Find a term, then jump to its page in the original PDF. Image-only pages may not be searchable; check the PDF for exact wording and diagrams.
Page 3 · Read text
#


  IMPORTANT
The triggermatic-action  is
a single stroke rapid film
advance system. When the
lever is pulled to the left,
the film is advanced to the
next frame and the shutter
is automatically  set.
When using I to l7l0sec.
shutter speed or Bulb
setting, do not pull the
lever until the shutter
action is cornpleted.
View original page 3
Page 5 · Read text
@ Depth-of-field scale    @                                        Sprocket       @ Tripod bushing (American
                                                                         standard)
@ Rewinding spindle slot   @ Take-up spool     @ Film pressure plate
@ View-and-rangefinder   @ Take-up spool slot   @ Cartridge positioning spririg     eyepiece
           @ Device for setting back film@ Film rail                     counter automaticallv to @ Film-type indicator                                         starting point
@ Rewinding release    @ Back cover locking disc  @ Back cover locking disc
View original page 5Page 6 · Read text
I                                              www.butkus.us
             OPENING AND LOADING THE CAMERA

           Avoid direct sunlight

          use 35 mon filnas in cartridge (not in rnagazines), 2o or 36 frarnes.
View original page 6Page 7 · Read text
(l)   Turn back cover locking discs so that the red dots come
                                        in line with the red O.  (See Figure 4.)
                          (2)  Place fingers against both sides of the back cover and pull
                              down gently, holding the camera firmly.  \\':hen putting
                              on the cover again, follow a reverse process, making sure
                                                              it is fully engaged. Be sure the edges are in position and
                                      the film pressure plate does not catch and get scratched.
                                 Turn Uatt< cover lock-
                                     irg discs so that the
      red dots come in line with the black C. (See Figure 5.)
( 3 )  Place your nerv film cartridge in the chamber below the
      rewinding spindle. (See Figure 6.)
                                                                 the( 4 ) Engage the end of your unexposed film firmly in
      rnner take-up spool slot. (See Figure 7.)
         If the solt is not in position, turn the inside flange so
      that the slot come in position.
                                          -5-
View original page 7Page 8 · Read text
,-
                                              www.butkus.us
                                                 ( 5 ) Make sure the perforatrons on the film are properly
                                           engaged on the teeth of the sprocket, and that the
                                                       film in properly, centered. Taking care that the film
                                                    cartridge does not j'*p  or fall out of the chamber,
                                            turn together the flanges both inside and outside in
                                         the direction indicated by the white arrow'  If  it
                                                                                                                                                                         is                                                      refuses to turn any more, it means the shutter
                                            cocked; so do not force it on any account' Just
                                                      release the shutter and it will go on turning' (See
                                              Figure B.)
    (6)  Make sure that the Rlm end is properly          cover gentlY and firmlY, taking good
          engaged in the take-up spool slot, and               ca.re that the film pressure plate does not
         then wipe off any particles of dust or            get caught on the edge of the film, and
            finger marks on the film pressure plate            turn the back cover locking discs, in the
                                                           by black arrow, so          with a soft brush or Piece of  gauze'             direction indicated
        when you have done this, Put on the            that the red dots come in line with C'
                                             6-
View original page 8Page 9 · Read text
( 7 ) At the bottom of the cao'era, and on one of the
     back cover locking discs, you wilr find your film-
      type indicator with ASA numbers. These ASA num-
     bers stand for degrees of sensitiveness of films to
       Iight, so that when the ASA figure is high, less ex_
      posure or faster shutter speeds are required, while
     in case of a film with a low sensitivity the ASA
       figure is also low, so that greater exposure or slower
      shutter speeds become necessary. This ASA exposure
     index is indicated on the packet in which your film is sold and probably in the Directions
      printed and enclosed in the packet. Bring this figure in line with the red dot by turning
     the dial with the tip of your nail on the tiny metal catch. This is done so that you
     might remember what the film speed is, a matter of utmost importance when taking pic-
     tures. If your film is a colour film use the portion marked COLOR on a white base.
       If the film is a daylight type, use the portion marked CoLoR on a black base if.the film
      is manufactured for use with artificial light. When the camera is empty, bring the catch
     (where there is no number) in line with the red dot. (see Figure 9.)
View original page 9Page 10 · Read text
www.butkus.us
(B  )  Bring out the triggermatic-action lever.
(e  ) You will note that the film counter show  ,, S "  (Start). (See
      Figure 10.) Release the shutter or at least press the button
        to ensure that it is released, and turn the triggermatic-action
       lever with your left index or middle finger as far as. it will go
       to the left. This advances the film by one frame and cocks
      the shutter at the same time.  If the lever will not advance,
      ner'er force it;  because it means the shutter has not
     been released. Release the shutter again and advance the
      film once more, and you will find that the arrow in the
      film counter is opposite a point closer to "  I " than to
       " S ".  When the film is advanced for the 3rd time, the
      arrow points at "l".  Then set the LIGHT VALUE required
     and take your first picture. Anything taken on a frame
      before the arrow points at "  I "  is likely to be on an
      exposed part of the film, and therefore to be useless.
          -a-
View original page 10Page 11 · Read text
'I

      EXPOSURE AND LIGHT VU,UN
                       In taking a picture a certain amount of light must pass through the
                      lens and reach the film. This is what is called an exposure. If the
                     amount of exposure  is too great or too little, the picture will be no good.
                     In the conventional type of camera one has to set the shutter speed and
                       the required f stop separately.. The LIGHT VALUE device eliminates
                             all this trouble, since any change ih the shutter speed due to any change
                       in the f stop or any change in the f stop due to any change in the
i..    l                      shutter speed is done AUTOMATICALLY.  It must of course be
j                      understood that the amount of light is about the same.
ffi                    This is the first Japanese camera which makes AUTOMATIC theF
                        giving and ensuring of the correct exposure by simply setting the LIGHT
               VALUE indicator. This is a mechanical brain that compures the correct
                      exposure for you, provided you know what the LIGHT VALUE is.


                                      -9-
View original page 11Page 13 · Read text
l.  Set your light value by referring to the light-value table
    or by taking a reading from an electric exposure meter.
2.  Turn the light value adjusting ring and bring it into
   the required position. (See Figure 12, which shows
    that the light value is ,,  l l ").  Disregard all shutter
    speeds and the relative openings in setting the light
   value. Just shoot.
3.   If either shutter speed or opening (which affects depth
    of field of focus shown on a chart on another page) is
   not what you want, turn the shutter speed setting ring
    until your desired speed or opening is indicated. (See
    Figure 13.)
    When )'ou want to have everything in sharp focus,
   turn the shutter speed setting ring to the left.  If on
    the other hand you wish to have things on the far and
   near side of your subject out of focus, turn the ring to
    the right.
                                                    *                                      -11
View original page 13Page 14 · Read text
www.butkus.us
  The extent to which things are in sharp       So long as there is no change in the light
focus may be found by reading the depth of                                                    value, the required exposure is constantly and
field scale. (See Figure 14 and 15.)
                                                automatically ensured, whatever the shutter
  Thc f  stopr must be interpreted on the scale in  such     speed or f stop you set. However, at fll.g
   readings of depths of field as trcing a rough guidc
                                            the f stop window stops moving any farther,
  When the required shutter speed is a fast     so that if you move the shutter speed setting
one, turn the shutter speed setting ring to the                                               ring beyond this point, the light value figure
right until the required speed is brought irr
                                                     will get out of line, and the result will beline with the red mark arrow V.
                                                    underexposure.
  When the required shutter speed is a slow
one, turn the ring to the left until the requir-        Similarly, when a slower shutter speed is
ed speed is brought in line with the same red                                                 required, moving the shutter speed ring be-arrow V.
                                      yond the f/16 point will result in the light
                           '.h,l,,..  Make sure that the         speeds are brought exactly in                                                value figure getting out of line, and  this will
   line with the click stops, since no intermediate sPeeds are
  obtainable.                                            result rrrin overexposure.ovcrcxPusurc.
                                         _ E_
View original page 14Page 15 · Read text
Medial points just between the light values may be used,
such as 2.5, 4.5......15.5.

  The Ooly case in which the light value cannot be used
is when the shutter speed is l/500.

  When the shutter speed is set to ,, B " the shutter will re-
main open so long as the shutter release button is pressed.
The figures stand for fractions of a second, so that I means I
second, 2 means l/2 second, 5 means l/5 second, and 500 means
l/500 second. The aperture or opening is bigger in proportion
to the smallness of the f stop number and is smaller in propor-
tion to the largeness of the f stop number; and the opening
itself  is. a 5-sided hole as illustrated in Figure 16.
       -r3-
View original page 15Page 17 · Read text
i'qfrll
  il
   I


         Thus, if you set the opening at fl9 and the
        distance scale at the red dot, everything will
Il{
F      be in sharp focus from l0 feet to infinity. (See
l-
       ,Figure 17.) For taking sequence shots refer-
       red to in a subsequent section this wili prove
        of immense advantage.
View original page 17Page 18 · Read text
www.butkus.us
 FOCUSING THE CAMERA

t.  Place your right index finger lightly on          that the subject is not in focus. When this
    the shutter release button and with both           is the case, move the lever so that the two
   hands turn the Duo-lever focusing control.         images merge, or, in other words, become
2.  The bright-line frame visible in the view-        superimposed. The subject is now in sharp
    and-rangefinder shows you the area of the           focus.
    picture which will appear on your negative.         When taking close-up pictures the border-
   Usually the image as seen through the         line of the area of the picture will shift
    view-and-rangefinder will appear "double?'          to the position of the parallax correction
   in the centre tinted square, which means         marks as seen in the brightJine frame.


        Out of focus (too far)                         In focus                    Out of focus (too near)
View original page 18Page 19 · Read text
TAKING YOUR PICTURE

                                                                    usTo muddle moans the possibility of missing a shot I so let
do things systematically so as not to miss our chance.
       l.  Get your light value set.
    2. Decide on your depth of fleld and shutter speed.
    3. Wind your film, which cocks the shutter, too.
    4. Focus your subject.
    5. Release the button and take your picture.
Stcady your camera when you shoot by |resting the carrrera
against a part of your face and hold your breath for a
moment as you shoot. (See Figures 2l and 22.)

              Do not advance the film until the shutter has been fully
                 released. Thrs is             important when using  the                                       .ParticularlY
                  bulb or slow shutter lPeeds'
                      After you have advanced your film, which cocks your
                  shutter automatically, it  is highly advisable not to change
                                                  - 17-
View original page 19Page 20 · Read text
www.butkus.us                                         TRIPOD ideal, as you can directshutter speeds between ll10 and ll25  and  between        " CINE"
l/250 and l/s00.                                  your camera toward any direction while it rests
   Do not keep pulling the triggermatic-action  lever       fitted on to it.   It always pays to rna.ke
when the camera is unloaded, maas  it y put the camera     sure that your irnportant group and
out of order.                                       other pictures are not spoilt. When using
                                   a self-tirrrer
The only absolute grrarantee                  or a shutter release, screw it on to the
                          against taking shots that     shutter release button groove. The RICOH
                      are spoilt owing to any    SELFTIMER, which may be procured from
                            jolting of the camera  is     your dealer, gives a wide margin of 7 to 15
                    the use of the tripod.     seconds before the shutters is released. The
                 For any speed slower     length of time depends on the extent to which
                  than ll25 we recom-        it  is woundl so that you could experiment
              mend the use  of    with it when the camera is unloaded and
               RICOH "CINE'' TRI.     remember just how far you should wind it.
              POD. When you use    The RICOH SELF-TIMER is your answer
                 a self-timer a tripod  is     for the family group picture and other pic-
               a necessity; and you     tures in which you wish to have everyone
                          will find your RICOH      in, including yourself. (See Figure 23.)

                                          -18*
View original page 20Page 21 · Read text
TAKING SEQUENCE SHOTS WrTH THE
TRIGGERMATIC_ACTION LEVER

               The Triggermatic-action lever is an outstanding feature of this miniature
                   carnera, adding further to the maneuverability of an already maneuverable
                   carnera. only a full pull on the triggermatic action lever, which takes but a
                    fraction of a second, and the film is advanced by a frame and the shutter
                 set. This LEVER-PULLING AND SHUTTER-RELEASING ACTION
                       is so rapid and smooth as to be a feature unequalled in other cameras.
                        If you bring the red dot on the distance scale to the centre and set the
                   lens opening fl9, its versatility is greatly increased, ENABLING THE
            TAKING OF PICTURES AT THE RATE OF IO IN IO SECONDS.


                                      -19-
View original page 21Page 22 · Read text
www.butkus.us
     WHEN YOU HAVE FINISHED TAKING PICTURES
   When you have come to the end of your film, it will refuse to advance any farther. IJ you
pull itour leuer against this resistance, tlu perforati.ons wiII tear and. lou mal eum spoil the last part of 2our
rtI*.  In order to prevent such a mishap  it is wise to go a little easy on your lever after your 20th
exposure or 36th exposure, depending on the number of exposures your film is expected to take.
With most films I to 3 extra pictures can be taken than indicated on the film package.
    In rewinding the film-do not open the back of the catrrera until this is cornpleted-flip
up the rewinding crank fully, shift the rewinding release button on the back-side of the top toward
the letter '6 R " as indicated, and rewind in the direction of the arrow on the crank. Do not
let go the rewinding release button referred to1 while you rewind the films already exposed,
because if you do, the film will tear owing to the locking of the sprocket. (See Figure 25.)
   When the film has been fully wound back into the
film cartridge, the crank will become extremely light.    i
Open the back of the carnera and take out the cartridge    il
carefully. The taking off the back cover will cause the    i
film counter to return automatically to S (Start). On no     i
accorrnt open the back of the carrlera until you feel     i
assured the film has been fully rewound. Neither   :
should it be opened in direct sunlight, as strong light can
pierce into the cartridge through the narrow slot.                                            i
                                    -20-
View original page 22Page 23 · Read text
YOUR RICOH ELASH GUN
                 The flash gun is your answer to taking pictures at night, especially of
                        subjects that are in motion, to taking a portrait against the light, and
                    to softening the too-sharp contrast in strong sunlight.
              We have flash bulbs of various kinds, such as F, M, or Strobe. On
                an ordinary camera there is no course but to choose the kind of bulb
                      for which the synchro mechanism is made. The Ricoh 519 however,
                          is provided with M, F, and X settings, making  it possible to use
                       all kinds of flash bulbs. Set the synchro lever to M, F, or Strobe,
                    according to the kind of flash bulb as indicated on the wrapper or
                   box, and you will be ensured of your flash light and shutter opening
                         fully synchronising from I to l/500, according to the conditions indicated
                     in the following table, which illustrates the relation between the kind
                     of bulb and synchro setting.


:{


                                   -21 -
View original page 23Page 24 · Read text
www.butkus.us

    SETTING


 BULB
                X               F         M
      F          B, l-ll50        B, l-ll100         Unsuitable
                                  B, t-t/25          All speeds   M          B, l-t/25     |
    Strobe          All speeds   Will not synchr.   Will not synchr.                                          I                      I
  There are many kinds of  flash gun; but    FLASH GUN BC-605, it  will save you the
RICOH 519 is provide with a CORDLESS      trouble of attaching a flash cord on to the
FLASH CONTACT on the ACCESSORY       flash terminal. No dangling cord, and no
SHOE, so that if you slip on your RICOH      failure in charging the bulb throqgh faulty
                                    -22*
View original page 24Page 25 · Read text
Gonnection is your gift that comes to you in     of flash light to the qubject results in a
your RICOH FLASH GUN BC-605.           proportionate and great difierence in the
  In taking pictures with flash, it is vital that    arnount of light. Thus, it  is extremely
the exposure is correct. Otherwise, under-   irnportant to set the correct f stop accord-
exposure or overexposure will result, the danger   ing to the distance frorrr the subject.
being even greater in most cases than in day    To put it simply, granting that different
light conditions where the Iight is even. Arry    types of bulb differ in their luminosity, the
variation in the distance frorn the source     closer the subject the smaller must the opening
   :::.  ., ::  jr:iq::i;;, rit':rt.fi:j;,--EBlii;ry:",r-i;iilli.i     be and vice versa.
                            With any packet of flash bulbs you buy you will find a table of
                            what are technically referred to as GUIDE NUMBERS.  If you
                                divide the number which fits your case by the distance-in-feett
                              the figure you get shows the f stop opening which is required
                                  for your shot. For example, if your film has ASA 100 Exposure
                               Index, you look for your GUIDE NUMBER that is given for
                                this Index. If you wish to find out the distance-in-feet for a
                               given f stop, divide the GUIDE NUMBER by the number that
                                stands for the f stop.

                                     -23-
View original page 25Related documents and language editions
From the M. Butkus archive. Original publisher and archive notices are retained.
Check the model and edition against your equipment.
PDF verified 2026-10-10.