Film cameras
Ricoh Mirai 105 - - Direct User manual
User manual for Ricoh Mirai 105 - - Direct. 59 pages in English. Read the original PDF, download or print a copy without registration.
59 pagesEnglish9.4 MB PDF
Loading your manual…Open PDF directly
Document details
- Brand
- Ricoh
- Model / document
- Ricoh Mirai 105 - - Direct
- Document type
- User manual
- Language
- English
- Pages
- 59
- File size
- 9.4 MB
- Category
- Film cameras
- Document date
- Not specified in catalog
Search available document text
Find a term, then jump to its page in the original PDF. Image-only pages may not be searchable; check the PDF for exact wording and diagrams.
Page 2 · Read text
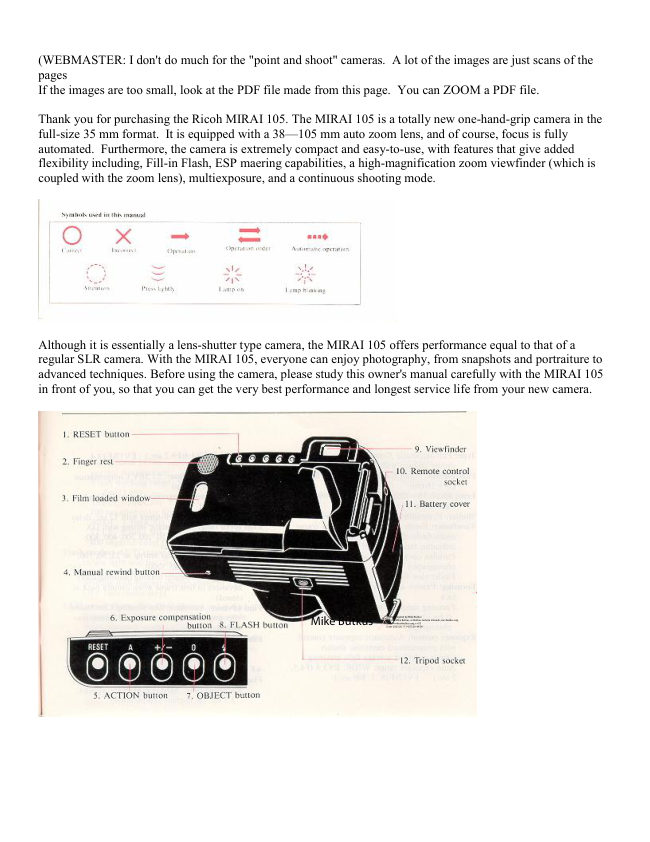
Thank you for purchasing the Ricoh MIRAI 105. The MIRAI 105 is a totally new one-hand-grip camera in the
 full-size 35 mm format. It is equipped with a 38-105 mm auto zoom lens, and of course, focus is fully automated.
 Furthermore, the camera is extremely compact and easy-to-use, with fearures that give added flexibility including,  Fill-in
 Flash, ESP metering capabilities, a high-magnification zoom viewfinder (which is coupled with the zoom lens), multi-
exposure, and a continuous shooting mode. Although  it is essentially a lens-shutter type camera, the MIRAI 105 offers
performance equal to that of a regular SLR camera. With the MIRAI 105, everyone can enjoy photography, from
snapshots and portraiture to advanced techniques.
Before using the camera, please study this owner's manual carefully with the MIRAI 105 in front of you, so that
you can get the very best performance and longest service life from your new camera.


   Symbols used in this manual
                                                                     rrrf
                                                           Operation-    order       Automatic operation    Correct                             Operation-         x.,                                           -
                         a--
                                                                                                                     r. !.2                          ,r1t                                                                                                                                                     a-                                                                                                                                             -a                            :ra                      i,'a--'                                                                                      ,'i'a                                                          /l\
             Attc.ntion            Press lightlv            Lamp on           Lamp blinking
View original page 2Page 3 · Read text
www.butkus.us            TABLE OF CONTENTS


    Preparations before taking pictures ......    J   Taking photographs lV                   30
      Loading batteries                       4    Auto-zoomphotography...     3l
      Checking the batteries                        5       Multi-exposure photography       33
    Taking photographs I  ..                     6      Remote Control socket               35
       l,oading the film                                                 I   To take better photographs          36
      Taking photographs  ...                  r0    Zoom lens.                     ........ 3i
      Unloading the film                       l4      Autofocus (AF) .                      39
2  Taking photographs II    .                       t5    Exposure                             4l
      Using the focus lock   .                    l6      Viewfinder displays                 44
      Taking a continuous series of shots      l7    LCD panel and mode buttons       46
      Using the self-timer  ...                     t8      Using the accessories .                48
      Macro photography ...                20   Care and Storage                      50
       Photographing distant objects          22    Questions and answers  . . ..                 52
      E^posure compensation  ..             23    Description of controls  .. .               54
      Using the RESET button               24   Specifications                       56
   Taking photographs III                    25
       Flash auto photography                26
       Flash OFF mode When you
       don't want the flash to fire                . ... . 27
       Using fill-in flash              ........ 28
View original page 3Page 6 · Read text
Venmo @mike-butkus-camera  Ph. 2083
PayPal Name  Lynn@butkus.org      www.PayPal.me/lynnbutkus
View original page 6
Page 8 · Read text
Loading Batteries


    Do not use incorrect batteries or mix new and old batteries at the same time.


Set the power switch to OFF, and remove         Insert the batteries in the correct directions
the battery cover on the side of the grip.         and replace the cover.
                                      Two 3V lithium batteries (DL  I 23A or CR123A)
                                                         * Before replacing batteries, set the power
                                                 switch to OFF.
View original page 8Page 11 · Read text
Loading the Film            www.butkus.us
     Film-loading and film-speed selection (lSO) for DX film is automatic in this camera.

Make sureNMfilm is a DX type film.             To open the back, slide the camera back
* When using non-DX film. it is set                release knob.
 automatically at ISO 100.
View original page 11Page 12 · Read text
tttrra000t


                                                          www.butkus.usrrttttt!rrtl

lnsert the film cartridge. Be sure to do this in     Align the film leader with the red mark.
the shade.
* Be careful not to touch the lens with your
  fingers or the film leader.
View original page 12Page 13 · Read text
www.butkus.us


Close the camera back.                        Film type confirmation: This is possible
The film is automarically wound until the       through the window in the camera back.
exposure counter reads L
+ If the film is wound incorrectly, the lO.will                                                        9
  blink, open the camera back and load the
  film aeain.


                            -l       -                                      i'i o___LleT                1 I
View original page 13Page 14 · Read text
Taking Photographs
                           Use the Combination strap- (See p. 48)


    Remove the lens cap pressing the parts          While looking through the viewfinder, aim
IO   marked.                                            the camera at the subject you want to shoot.


                         www.butkus.us
    Operate the zoom button to adjust the lens        * Be careful not to touch the lens surface
     until you see the image you want.                 with your finger.
View original page 14Page 15 · Read text
www.butkus.us

When the TELE side of the zoom@button is    When the WIDE side of the zoom button
pressed, the lens will zoom to the telephoto        is pressed, the lens will zoom to the wide-
side. (In the telephoto position, the maximum      angle side. (In the wide-angle position, the      lt
focal lensth of the lens is 105 mm)           minimum focal length of the lens is 38 mm).
4


                                                         Autofocus frame


Move the camera so the subject is in the
center of the autofocus frame. Make sure to
keep the subject within the frame.
View original page 15Page 16 · Read text
Press the shutter release button halfway to     When the subject is in focus, [E lights in the
    focus.                                              viewfinder.
t2  The button can be pressed in two steps;        When the [E blinks, try focusing again
    autofocus operates when the button is            because your subject is not in focus.
                                                                   * The shutter cannot be released with [E    pressed to the first of these steps.
                                                          blinking.


                                                                             l             E|[e--Elafter the shutter is released, the    Press the shutter release button fully.            Immediately
                                                        film is automatically wound by one frame,
                                            and the exposure counter advances by one'
View original page 16Page 18 · Read text
Unloading the Film


                                   ()N
                           --l                            -ll-rll ;L-i'r                        e-:-E-                             j                  I   s. H0tF              9OO€OF-/
I4  When you reach the end of the film, it is          Press the rewind button to rewind the film
     automatically rewound.                            before you have completely shot the roll.
                                                                   * The final reading of the exposure counter
                                                            prior to rewinding may be more than the
                                             number of exposures specified for the film
           t
   When rewinding is completed, the sound of
     the motor operating will stop and @will blink.
      * Once the winding is finished, the film must
      be removed before any other operations
      are possible.                            Open the camera back, and remove the film.
View original page 18Page 19 · Read text
www.butkus.us


f.
f,

                                       b-  mrnHril@5r
                 Taking Photographs II

   The MIRAI 105 is provided with various functions that add greater versatility to
   photography. In this section, the operation of each of the camera's various features
    will be described, explaining how to use them most effectively.
     * Mode buttons cannot be cancelled after being set, even if the power is switched off.
    Be careful when changing the mode used for shooting. Use the reset button to
     return to the normal shooting mode.
View original page 19Page 20 · Read text
Using thc Focus Lock
              This is used when the subject is not in the autofocus frame. (See p. 39)
                  a


t6  Aim the camera to center your subject           Maintain the pressure on the shutter release
    within the autofocus frame.                      button, re-aim the camera to obtain the
    Press the shutter release button lightly to         required composition.
    lock focus on the subject you want.
   When focused, [F will light in the
    viewfinder.


     * When the focus is locked, the exposure  is        Press the shutter release fullv to take the
      also fixed (AE lock).                          photograph.
View original page 20Page 21 · Read text
Taking a Continuous Series of shots www.butkus.us

   You can shoot continuously at a speed of  | .3 frames a second  ( I frame every approx.
    2.5 seconds when the flash is used. Refer to page 26 for the flash working range
   when in the continuous shooting mode).


                                                                                                   I7


Press the ACTION button so that the         The camera will shoot repgatedly as long as
mode or-r indicator on the LCD panel starts      the shutter release button is depressed.
                                                             * The focus and exposure will be locked toblinking.
                                                     the settings corresponding to the first
                                             frame of the series. so be careful when
                                                 shooting a moving subject or other subject
                                             where light levels and subject distance
                                                  vanes.
View original page 21Page 22 · Read text
Kaeq


                                                                      www.butkus.us
Press the ACTION button. and set the           Press the shutter release button lightly, and
                                            .                                   focus on the subject you want to shoot.mode to S
    utint s.                            When focused, [E lights in the viewfinder.'S
View original page 22Page 23 · Read text
www.butkus.us


     Press the shutter release fully to start the       *The self-timer can be cancelled at any time
     self-timer. The AF llluminator  lights. The        before the shot is taken by performing any
                                                                                                       I9     shutter will fire in 12 seconds. The AF            of the following operations:
     Illuminator will start blinking 2 seconds          (1) Pressing the ACTION button
     before the shutter is released.                      (2) Sliding the power switch to OFF
     After use, press the ACTION button to cancel      (3) Pressing the RESET button
     the mode.                              To avoid incorrect exposure in the self-
                                                   timer mode, ensure that strong light does
                                                 not enter through the viewfinder.


ii
View original page 23Page 24 · Read text
Macro Photography

    Macro Photography allows photographs to be taken with the subject as close as 0.8
   m (2.6 ft) to the camera.


                                                      www.butkus.us


Press the OBJECT button and set the         The lens zooms to the full telephoto
mode to O  .                                         position, and M will be indicated in the
rl/ blinks.                                          viewfinder.
                                           At this time, the field of view slightly shifts
                                             towards the lower left of the viewfinder to
                                            compensate for the parallax condition in
                                        macro photography (See p. 44).
View original page 24Page 25 · Read text
www.butkus.us


Press the shutter release button.
* In macro photography, zooming is not
  possible.                                                                                              2I
         .---__-ffi:r1


Shooting range: Macro photography  is possible when the subject is at a distance of from 0.8 m
(2.6 ft) to  | .3 m (4.3 ft) from the front surface of the lens. When the subject is out of this
 range. EE will blink in the viewfinder, and the shutter can not be released. However, the
 shutter can sometimes be released incorrectly when the subiect is extremely close to the camera
View original page 25Page 27 · Read text
Exposure Compensation        www.butkus.us


                                                                                             1.5 EVTo control the exposure, press the + /        The compensation varies between -
button until the desired compensation value    and *1.5 EV in steps of 0.5 EV every time
is indicated.                                    the button is pressed. The compensation
                                                 indicator on the LCD panel will blink to
                                        show the selected compensation.
o -1.sEV             O+oev                            ,5EV
View original page 27Page 28 · Read text
Using the RESET Button

         lf you have made a mistake in setting any controls, etc., press this Reset button to
      return to the standard shooting mode.


Press the RESET button.                     The Git-, ,U , ,lt, 4, M.E. and exposure
                                              compensation modes, the flash 4 and I orr
                                        and the auto zoom {B [I] will be released.
                                       Then the standard mode will be set.
View original page 28Related documents and language editions
From the M. Butkus archive. Original publisher and archive notices are retained.
Check the model and edition against your equipment.
PDF verified 2026-10-10.