Film cameras
Ricoh XR-20sp User manual
User manual for Ricoh XR-20sp. 45 pages in Spanish, English. Read the original PDF, download or print a copy without registration.
45 pagesSpanish, English5.4 MB PDF
Loading your manual…Open PDF directly
Document details
- Brand
- Ricoh
- Model / document
- Ricoh XR-20sp
- Document type
- User manual
- Language
- Spanish, English
- Pages
- 45
- File size
- 5.4 MB
- Category
- Film cameras
- Document date
- Not specified in catalog
Search available document text
Find a term, then jump to its page in the original PDF. Image-only pages may not be searchable; check the PDF for exact wording and diagrams.
Page 1 · Read text
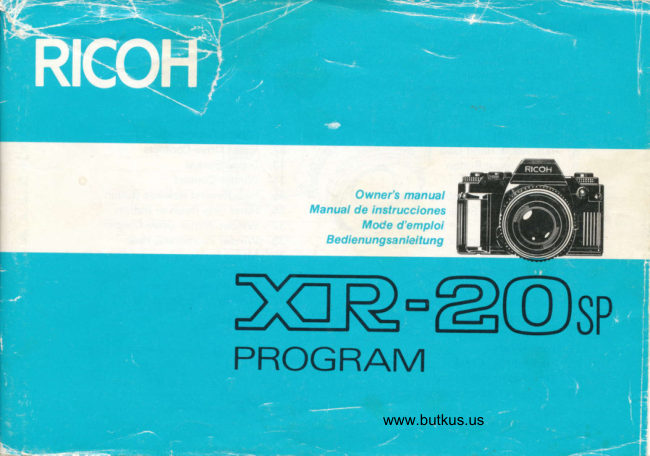
Owner's manual
M a nual d e   i nstrucci ones
       Mode d'emploi
   Bedienungsa nieitung


         www.butkus.us
View original page 1Page 4 · Read text
NOMENCLATURE                           www.butkus.us\  "G.  iF
  '1. Power ON-OFF Switch                           25.  Hot Shc\e
 2. Shutter Release Button                          26.  Flash Crntrol Contact
 3. Exposure Counter                                  27.  Data Back Contacts
 4. Shutter Speed Index Line                      28   Viewfinc-.r Eyepiece
 5. Film Advance Lever                              29.  Film Rewrnd Shaft
 6. Shutter Speed Dial/Prqram selector              30.  Film Chamber
 7. Strap Eyelet                                      31   Battery Compa rtment Cover
 8. Removable Hand Grip                              32.  Motor Drive Contacts
 9. Lens Release Button                               33.  Tripod Socket
 1 0. F-Stop Ring                               34  Winder Contact
1 1. Lens Locator Mounting Node                      35.  Film Rewind Release Button
12. Depth of Field Scale                               36.  Hand Grip Release Button
13. Focusing Ring                                    37.  Winder,/Motor  Drive Coupler
14. AE Lock,zllluminator Button                        38.  Winder Positioning Hole
15. P Lock Button                                      39. Memo Holder/Program Curve Display
16. Self Timer Button                                40.  Back Cover
17. Self Timer Monitor                               41.  Film Pressure Plate
18. Film Speed Dial                                    42.  Film Take-up Spool
19. Exposure Compensation Dial                     43.  Sprocket
20. Film Rewind Knob,zBack Cover
     Lock Release
21. Film Rewind Crank
22. Film Speed Index Line
23. Exposure Compensation Index
     Line
24. llluminating Window
                                  -2-
View original page 4Page 6 · Read text
www.butkus.us          MOUNT THE LENS           ACOPLAMIENTO DEL
                1. Pull the back lens cap to remove  it   OBJETIV
                   from the lens. (Fig. 3)               1. Quitar la tapa del objetivo tirando
                                                       de ella hacia afuera (Fig.3)
               2. Pull off the body cap (Fig. 4)            2. Sacar la tapa del cuerpo. (Fig. 4)
                3. Align the red dot on the camera    3. Alinear el punto rojo de la c5mara
                   with the red dot on the lens and      con el punto rojo de la lente y mon-
Fig.3 Abb.3        mount the lens on the camera.             tar el objetivo en la cdmara.
                         (Flg. 5)                                       (Fig. 5l


Fis.4 Abb.4


Fis.5 Abb.S
                        -12-
View original page 6Page 7 · Read text
Turn the lens in the arrow direction       Girar el objetivo hacia la derecha
                                       until  it clicks into place. (Fig. 6)             tal como indica la  f lecha, hasta que
                                                      un sonido "click" indique que ya
                             To remove the lens, turn the lens in       est6 aiustado en su lugar. (Fig. 5)
                             the arrow direction with the Lens
                              Release Button depressed. (Fig.7)      Para quitar el objetivq, girar el
www.butkus.us                                               mismo hacia la izquierda  tal como
                            The conventional K mount lens can       indica la flecha, presionando el
           Fis.6 Abb.6       be used as aperture-priority and       bot6n liberador del objetivo. (Fig.7l
                        manual but cannot be used for
                                    progra mmed AE photograPhY.            Los objetavos con la montura K con-
                                                                vencional oueden utilizarse con
                                Proper performance of camera may       prioridad de apertura y en manual
                          not always be guaranteed with      pero no pueden utilizarse con foto-
                               lenses other than RICOH. For best       grafia programada AE.
                               results, use a RICOH original
                             equipment lens.                      El perfecto funcionamiento de la
                                                cdmra no puede garantizarse
                                                              cuando se utilicen otros objetivos
                                                         que no sean RICOH. Para mejores
                                                                     resultados utilice los equipos de
                                                                             objetivos originales de RICOH.


                                            www.butkus.us
                                  -14-
View original page 7Page 8 · Read text
www.butkus.us            SET LENS AT "P'' POSITION    COLOCACION DE LOS OBJE-
         fi             1. Turn the F-Stop Ring while P Lock  TIVOS EN POSICION "P"        -S15           Button is pressed. (Fig. 8)                                  'I . Girar el aro de diaf ragmas mientras
                                                           el bot6n de cierre P est6 oresio-
                2. Set it to the locking "P" position as       nado. (Fig. 8)
                 shown for programmed automatac
                    exposure photography. (Fig. 9)           Colocarlo en posici6n "P" tal como
                                                          se indica, para fotografias de expo-
Fig.8 Abb.8     *  To unlock "P", turn the F-Stop Ring      sici6n a utomdtica programada.
                     while P Lock Button is depressed.         (Fig. 9l
                                                       Para desbloquear la posici6n "P"
                                                                        girar el aro de diaf ragmas mientras
                                                                          el bot6n "P" estii oresionado.


Fis.9 Abb.9


                           -16-
View original page 8Page 9 · Read text
INSERT BATTERIES          COLOCACION DE LAS PILAS
                         1. Slide the Battery Compartment      1 . Para abrir la tapa de las pilas, desli-
                          Cover rn the arrow direction with       zdr con la uffa en la direcci6n que
                                 ll         llr,*-il                                   ll    i          your fingernail to open. (Fig. 1O)          indica la flecha. (Fig. 1O)            LI -n

                          partment according to (+) and (-)      mento de acuerdo con los signos (rJ@tt  a)ooJ-          2. Place batteries in the battery com-    2. Colocar las pilas en su comparti-
                      shown inside the battery compart-       y (-) tal como se muestra en el inte-
     Fig.1O Abb.1O        ment and close the comDartment         rior del compartimento de pilas y
                                cover. (Fig. 11)                          luego cerrarlo. (Fig. 11  )
                            Batteries for use                          Pilas apropiadas
            O Four alkaline 1 .5V batteries (LR44):  O 4 pilas alcalinas 1,5V (LR-zt4): una
                            Lasting about six months under      duraci6n aproximada de 6 meses
                           normal use.                                                 util iz:idolas normalmente.
            O Four silver oxide 1.55V batteries   a 4 pilas de 6xido de plata 1,55V (SR-
                                                                                                                                                                                                    1                          (SR44): Lasting about one year        441: Lina duraci6n aproximada de
                           under normal use.                   aio utiliziidolas normalmente.
                    a Two lithium 3V batteries (CR-   a 2 pilas de litio 3V (CR-1/3N): una
      Fig.1 1 Abb.11               1 ./3N ): Lasting about one year       duraci6n aproximada de 1 afro utili-
                           under normal use.                       zdndolas normalmente.
                       Also refer to "CARE OF BAT-       Consulte tambi6n "Cuidado de sus
                            TERIES."                                       oilas".


                                          www.butkus.us
                                           - 18 -
View original page 9Page 10 · Read text
www.butkus.usCOMPROBACION DEL            CHECK CONDITION OF
               BATTERIES                 ESTADO DE LAS PILAS
                    1. Turn the Porarer ON-OFF Switch      1 . Colocar el interruotor ON-OFF en la
                    ON. (Fig. 12)                            posici6n ON (Fig. 12)
                        Batteries are in good condition,      Las pilas estardn en buenas con-
                  when a liquid crystal display such       diciones cuando el indicador de
                                                                                                                                  In-                as a Shutter Speed Indicator       cristal liquido tgual que el
                      appears in the finder (Fig. 13)          dicador de velocidad del obturador
                                                             aparezcan en el visor. (Fig. 13)
                The BAT (battery low warning)
                          blinks in the  f rnder to warm agatnst      Cuando la palabra BAT (avisador de
                      their failure when capacity of       bajo rendimiento de las pilas) par-
                     batteries drops below proper      padee en el visor, se indicarii el
                       operating level. Change batteries                    f allo de capacidad de las pilas para
                       as soon as possible. (Fig. 14)           operar en un rendimiento normal.
                                                        Cambiar las pilas lo antes posible.
                                                                       (Fig. 1a)


Fig.14 Abb.14
                                     20
View original page 10Page 11 · Read text
INSERT THE FILM           COLOCACION DE LA
                     (Do not exoose the film to direct  PELICULA
                                sunlight when inserting the film.)        (No exponer la pelicula directamente a
                                                                              la luz del sol cuando se colooue en la
                          1. Pull up the Film Rewind Knob until    cdmara.)
                               the Back Cover snaps open.
                                    (Fig. 15)                                      Tirar hacia arriba del bot6n de rebo-
                                                                    binado de la pelicula hasta que la
        Fis.15 Abb.15         2.  Insert the film in the Film Chamber       tapa trasera se abra. (Fig. 151
                        and push the Film Rewind Knob
                        down to the original position. You       Colocar la pelicula en su comparti-
                          may have to rotate the knob slightly      mento y presionar el bot6n de rebo-
                                  to push  it down completely.              binado de la pelicula hacia abajo a
                                   (Fig. 16)                          su posici6n original. Ouizas tenga
                                    Insert the film leader in the slit on     que girarse ligeramente el bot6n
                               the Film Take-up Spool. (Fig. 17)       para poder presionarlo completa-
             www.butkus.us                                        mente hacia aba1o. (Fig. 16)
        Fig.16 Abb.16                                                       Insertar la pelicula en la ranura que
                                                                                       est:i sobre el carrete de bobinado
                                                             de la pelicula. (Fig. 17)     +
TM

        Fis.17 Abb.17                            www.butkus.us
                                  -22-
View original page 11Page 12 · Read text
www.butkus.us                            Advance the Film Advance Lever to     4. Avanzar la pelicula por mediacion
                           wind the film round the Film Take-      de la palanca de avance, que bobi-
                         up Spool. Check that the sprocket      nar6 la pelicula en el carrete de
                               holes on the  f ilm are fully engaged       bobinado de la misma. Comprobar
                           on the Sprocket Teeth. (Fig. 18)        que los huecos de la pelicula est:in
                                                                     perfectamente engranados con los
                             Close the Back Cover, unfold the       dientes del engranaje. (Fig. 18)
                           Film Rewind Crank and turn  it
                               gently in the arrow direction until      Cerrar la tapa trasera, cerrar la       Fis.18 Abb.18                            any slack is taken up. (Fig. 19)          palanca de rebobinado de la pel-
                                                                                  icula y girarla ligeramente talcomo
                         Advance the film and press the       indica la flecha hasta que la pel-
                                Shutter Release Button a fewtimes        icula quede tensada. (Fig. 19)
                                                      Exposure                                      appears                                                     in the
                                                           properly     o. Avanzar la pelicula y prsionar el-                         Counter.until "1 "                                              is                            The  f ilm
                            advanced if the Film Rewind Knob      bot6n de disparo del obturador
                              rotates when the Film Advance       unas cuantas veces hasta que en el
                                Lever is stroked to advance the film.       contador de exposiciones aparezca
                                     (Fig. 20)                                  el n.o 1. La oelicula avanzar1 ade-        Fis.19 Abb.19                                                             cuadamente si el bot6n de rebobi-
                                                                     nado gira cuando avance la pelicula
                                                           por mediaci6n de la palanca de
                                                                        avance. (Fig. 2O)


        Fis.20 Abb.2O
                              -24-
View original page 12Page 13 · Read text
When inserting the film in a cold    *  Cuando se coloque la pelicula en
                         place, the film leader may be hard       lugares frios, dsta puede quedar
                   and become brittle. Warm the film      dura y quebradiza. En tales condi-
                      leader with your hand In such       ciones calentar la oelicula con las
                            conditions.                            manos.
                                                        *  Cuando se inserte la pelicula serd
                When inserting the film, it is more      mds conveniente colocar el dial de
                     convenient to set the Shutter       velocidades del obturador en una
Fig.21 Abb.21        Speed Dial to a high speed rather        posici6n de alta velocidad. No colo-                  than "P"  (Program) while       car el dial en la posici6n "P" (Pro-
                        advancing the film to the number 1        gra mada) mientras la pelicula
                          position, to avoid a slow shutter      avanza hacia el nfmero 1 para evi-
                      speed (the slowest is 16 seconds).        tar una velocidad baja del obtura-
                When you are ready for shooting,        dor (la minima es de 16 segundos).
                   be sure to set the Shutter Soeed     Cuando est6 listo para disparar,
                          Dial back to "P" (Program)                asegilrese de colocar el dial de velo-
                                                             cidades del obturador en la posi-
              SET THE FILM SPEED                 ci6n "P" (Programada).
                     1. The film speed (lSO,zASA) shown
                    on the film package must be set to coLocAcloN DE LA SENSI-
                       the Film Speed Index Line.      BILIDAD DE LA PELICULA
                                                       1. La sensibilidad de la oelicula
                  2. Pull the Film Speed Dial and turn it      (ISO,zASA) se muestra sobre la caia
                           to set to the index. lFig.21)       de la misma. dicha sensibilidad
                                                             tiene oue ser colocada sobre el
                                                                          indice de velocidades de la oelicula.
                                                       2. firar del dial de velocidades de la
                                                                       pelicula y girarlo para colocarlo en
                                       www.butkus.usel indice. (Fig. 21)
                         -26-
View original page 13Page 15 · Read text
HOW TO HOLD YOUR       COMO SOSTENER SU
            CAMERA                CAMARA
                  (Good position for photography)       (Une buena posici6n para fotografiar)
                  (1) Lightly put your right-hand   (1) Colocar ligeramente el dedo
                             forefinger on the Shutter Release         indice de su mano derecha sobre
                         Button and hold the camera body          el bot6n de disoaro del obturador
                        with other fingers.                          y aguantar el cuerpo de la camara
                      l2l  Make your right arm comfortable.        con los otros dedos.
Fig.23 Abb.23      (3) Cradle your camera in your left
                   hand and hold it so that the   (21 Colocar su brazo derecho
                     Focusing Ring can be easily         confortableme  nte.
                         turned with fingers.
               (41 Brace your left elbow to your body   (3) Cojer la cdmara con su mano
                      and put the camera to your face.         izquierda y agudntarla de forma
                     Look through the viewfinder to      que peuda girar fdcilmente  el
                      compose your picture. (Fig. 23)          arco de enfoque con sus dedos.
                   *   lt is important to practice correct
                      shooting position to avoid blurred   (41 Apoyar el codo izquierdo sobre su
                        or tilted pictures.                    cuerpo y colocar la cdmara
                                                                  delante de la cara. Mirar a trav6s
                                                                 del visor para componer la foto-
                                                                              grafia. (Fig. 23)
                                                        *  Es aconsejable practicar la posici6n
                                                de disparo para evitar fotografias
                                                                  borrosas o inclinadas.

                                       www.butkus.us
                         -30-
View original page 15Page 16 · Read text
www.butkus.us
              PROGRAM AE               FOTOGRAFIAS CON EL
               PHOTOGRAPHY            PROGRAMA AE
                        ln program AE photography, the   En las fotografias con el programa AE,
                    camera automatically selects the f-   la cdmara selecciona automdtica-
                        stop number and the shutter speed   mente el n[mero de diafragma y la
                      according to subject illumination.    velocidad del obturador de acuerdo con
                      Programs are best for general photos     la iluminacion del sujeto. Esta modali-
                        of figures or scenery. Special-effects   dad es la meior para fotografias de pai-
     Fis.24 Abb.24       shooting etc., can be done using the    saje o figuras.
                    XR-20SP's multitude of  override  Con la cdmara XR-20SP oueden
                            options. Please keep in mind however    hacerse disparos con efectos especia-
                          that for most shooling you can jusl     les y multitud de opciones mds.
                         focus and snap.                   Sin embargo piense que para la
                                                            mayorfa de disparos solo tiene que
                         1. Turn the Power ON-OFF Switch    enfocarse y disparar.
                         ON. (Fig. 2a)
                                                            1. Girar el interruotor ON-OFF hacia
www.butkus.us            2. Set the Shutter Speed Dial to "P".         la posici6n ON. (Fig. 24).
     Fis.25 Abb.25            (Fig. 2s)
                                                                  Colocar el dial de velocidades  del
                           Set the lens to "P". (Fig. 26)            obturador a "P". (Fig. 25)
                               4. Look through the viewfinder and       Colocar el ob.jetivo a "P". (Fig. 26)
                           turn the Focusing Ring to focus.
                       You can focus either by using the     M irar a trav6s del visor y girar el a ro
                                 Split lmage or Microprism.             de enfoque para enfocar.
                                             Se puede enfocar tambi6n  utili-
                                             zando la imagen partida o
                                                                        mrcropflsma.     Fis.26 Abb.26
                             -32-
View original page 16Page 17 · Read text
sPEED PROGRAM (SP) AE     FOTOGRAFIA AE CON VELO-
             PHOTOGRAPHY             CIDAD PROGRAMADA
                 The speed program AE photography is    Esta modalidad es una combinaci6n de
              a combination of the program AE     las fotografias con programa AE y de la
                     photography and shutter speed priority    fotografia con prioridad de velocidad
             AE photography. Use this mode to    del obturador. Utilizar este programa
                  avoid shutter speeds slower than   para evitar una velocidad de obtura-
                 1/25O second. (F,g. 27)                 ci6n menor de 1/25O segundos.
                                                              (F.g.271Fig.27 Abb.27
                                1. Turn the F-Stop Ring to set to "P".    1. Girar el aro de diafragma y situarlo
                                                   en la posici6n "P".
                           2. Turn the Shutter Speed Dial to set   2. Girar eldialde velocidad delobtura-
                          to "SP".                        dor para obtener la velocidad
                                                                   deseada.
                  When the subject is bright enough,    * Cuando el sujeto est6 suficiente-
                     any shutter speed between 1/25O      mente iluminado, cualquier veloci-
                  and 1 /2@O sec. will be selected      dad de obturaci6n entre 1 /25O Y
                        according to the brightness of the        1/2O{.Jc_ segundos serd seleccio-
                        subject, and you can see the      nada de acuerdo con la luminosi-
                          selected shutter speed as well as f-      dad del sujeto. En el visor Podrii
                       stop number in the viewfinder. lf       verse la velocidad seleccionada del
                       the brightness of the subject is not       obturador y el ndmero de dia-
                     enough even at full-open aperture,      fragma. Si la luminosidad  del
                a slower shutter speed is       sujeto no es suficiente aun estando
                        automatically selected to obtain     a plena apertura, se seleccionard
                          correct exposure. In this case, the      automdticamente una velocidad
                        Shutter Speed lndicator blinks to     mds lenta del obturador Para obte-
                   warn that a slower shutter speed      ner una exposici6n correcta. En
                      than 1 /25O is selected.                  este caso el indicador de velocidad
                                      www.butkus.us
                             -34-
                                                                              I
View original page 17Page 18 · Read text
APERTURE-PRIORITY AE  www.butkus.usdel obturador parpadeard avisando
PH OTOGRAPHY                    que ha sido seleccionada una velo-
In aperture-priority AE photography,       cidad del obturador mds lenta de
the camera automatically sets correct      1/250.
shutter speeds according to a pre-   FOTOGRAFIAS CON
selected f-stop number and brightness  PRIORIDAD DE APERTURA AE
of  subjects. This is suitable lor  En las fotografias con prioridad de
photography taking advantage of   apertura AE, la cdmara coloca
specific depth-of-field results as in    automdticamente la velocidad correcta
portraits or scenery pictures.          del obturador, de acuerdo con el
                                ndmero pre-seleccionado del aro de
1. Set the Shutter Speed Dial to "P".    diafragmas y la iluminacion de los
                                            sujetos. Esto es apropiado para hacer
2. Turn the F-Stop Ring to set the    fotografias con una profundidad de
   desired f-stop number.          campo determinada, dando un
  When the Shutter Speed Indicator    excelente resultado en retratos y
    is in the orange range. the shutter     fotograf ias esc6n icas.
   speed is too slow. Select a new f-    1. Poner el dial de velocidad del
   stop number or mount the camera       obturador en posici6n "P".
  on a tripod or other suitable    2. Girar el aro de diafragmas al
    platform.                                    nf mero que se desee.
                                   Cuando el indicador de velocidad
  When overexposure mark (A) or      del obturador estd en la gama
   underexposure mark (V)appears in       naranja, significa que la velocidad
   the viewfinder, exposure is not       del obturador es demasiado lenta.
    correct. Turn the F-Stop Ring to       Seleccionar un nuevo numero en el
   change the f-stop number.            aro de diaf ragma o colocar la
                                     cdmara sobre un tripode u otra pla-
                                          taforma apropiada.
              -36-
View original page 18Page 19 · Read text
MANUAL PHOTOGRAPHY         *  Cuando la marca de sobreexoosi-
                      Select manual mode to manually set       ci6n (A) o subexposrci6n (V)aparez-
                    the shutter and the f-stop number in      can en el visor, la exoosici6n no es
                  unusual or creative picture taking       correcta. Seleccionar un nuevo
                        situations.                             n[mero en el aro de diafragmas.
                                       FOTOGRAFIAS MANUALES                   1. Set the Shutter Soeed Dial to the
                        desired soeed.                       Seleccionar la modalidad manual para
Fig.28 Abb.28                                                 efectuar fotografias creativas en situa-
                             2. The pre-set shutter speed is snown    ciones especif icas, colocando manual-
                      by the Indicator on the LCD meter   mente la velocidad de obturador y el
                                                           aro de diafragmas.                             display. A second lndicator blinks to
                           indicate a "suggested" speed at a    1. Colocar el dial de velocidad del
                        given f-stop. (Fig. 28)                   obturador en la velocidad deseada.
                                                    2. La velocidad pre-seleccionada del
                 When the F-Stop Ring is turned and       obturador se muestra en el indica-
                          the Shutter Speed Indicatorandthe        dor sobre el indicador medidor LCD.
                         blinking Indicator showing correct        El parpadeo de un segundo indica-
                      exposure overlap each other. This      dor le mostrarii la velocidad suge-
                        indicates that correct exoosure is       rida que tendria que colocarse en
                                set.                                            el aro de diafragmas. (Fig. 28)
                                                    3. Cuando se haya girado el anillo de
                                                             diafragmas y el indicador develoci-
                                                       dades de obturaci6n intermitente
                                                      mostrando la exposici6n correcta
                                                     se superpongan esto indicarii que
                                           se ha ajustado una exposici6n
                                                                          correcta.
                                       www.butkus.us
                         -38-
View original page 19Page 21 · Read text
REWIND THE FILM           REBOBINADO DE LA
                      (Do not expose the film to direct   PELICULA
                                sunlight when unloading the film.)       (No exponer la pelicula directamente a
                                                                                          la luz del sol cuandose quite la pelicula
                        Push the Film Rewind Release   de la ciimara.)
                                  Button. The button stays locked in    1. Presionar el bot6n de rebobinado
                                    position                         de la pellcula. El bot6n estard en
                                                                          posici6n cerrada. (Fig. 31)                                      (Fig. 31)        Fig.31 Abb.31                                         2. Desdoblar la palanca de rebobi-
                                                             nado de la pelicula y giraria en la
                                Unfold the Film Rewind Crank and       direccion oue indica la flecha.
                                 turn it in the arrow direction. When      Cuando la pelicula est6 rebobinada
                         the film has been completely       por completo, la palanca de rebobi-
                              rewound, the tension of the Film     nado queda suelta sin tensi6n
                            Rewind Crank is suddenly released      pudiendo dar vueltas libremente.
                                                                                  (Fis, 32)                           and turns freely.
                                                                                                            la tapa trasera y quitar la pel-                                      (Fig. 32)                  3  Abrir                                                                                        icula. (Fig. 33)1@Fis.32 Abb.32         3. Open the Back Cover and unload
                                 the film. (Fig. 33)


        Fis.33 Abb.33
                         _42_    www.butkus.us
View original page 21Page 22 · Read text
Never open the Back Cover untilwww.butkus.usNo abrir nunca  la tapa trasera hasta
film rewinding is completed.      que la pelicula no est6 completa-
lmmediately close the Back Cover      mente rebobinada. Si por error se                                      abriera la tapa trasera antes oto save some of your shots if the                                   durante el rebobinado, cerrarlaBack Cover is opened by mistake                              inmediatamente para salvarduring or before rewinding.                                      alguna de sus fotografias.
                                 Cuandose bobine la pelicula. des-
lf you wind the film beyond the set      pu6s de haberse excedido en el
number of     f rames, the  Film     ntjmero de exposiciones,  la
Advance Lever may get stuck mid-       palanca de avance de la pelicula
stroke. The Film Rewind Release      puede quedar bloqueada y el bot6n
Button will not stay depressed in. lf      derebobinadode  la pelicula noper-                              manecerd presionado. Si estothis occurs. rewind the film while                                        sucede, rebobinar la pelicula mien-holding the Film Rewind Release                                             tras se mantiene presionado dicho
Button pressed down.                                      bot6n de rebobinado.


           -44-
View original page 22Page 23 · Read text
SELF-TIMER PHOTOGRAPHY    FOTOGRAFIAS CON
                The Self-Timer is used to include   AUTODIS
                  yourself in party pictures or    El autodisparador, se utiliza normal-
                    commemorative shots.              mente cuando uno mismo quiere
                                                                         incluirse en la fotografia, en fiestas o
                      1. Advance the film.                      con memoracrones.
                    2. Press the Self-Timer Button. The        1  Avanzar la pelicula.
  Fis.34 Abb.34         Self-Timer Indicator Lamo blinks.    z  Presionar  el bot6n Autodisparador.
                      In     'l O seconds, the shutter is      La ldmpara indicadora del autodis-
                           automatically released. (Fig. 34)        parador parpadeard y el obturador
                                                       se disparard automdticamente en
                      To cancel the Self-Timer after it is      1O segundos. (Fig. 34)
                           set, press the Self-Timer Button
                             again.                             Para cancelar el autodisparador.
                                                                       presaonar solamente el bot6n Auto-
                        Use the Viewfinder Cap attached to       disoarador de nuevo.ltti                  the strao to cover the Viewfinder        Utilizar la tapa del visor que estd
  Fis.35 Abb.35        Eyepiece when usrng the Self -       sujetada a la correa para tapar el
                  Timer in modes other than       ocular del visor siempre que se uti-
                   "Manual" to avoid incorrect       lice al Autodisparador u otras
                         exposure due to incident-light from      modalidades que no sean la
                          the Viewfinder Eyepiece. (Fig. 35)       manual, para asi evitar exposicio-
                                                                  nes incorrectas debidas a la luz inci-
               B (Bulb) setting is not available       dente que penetra por el ocular del
                    when the Self-Timer is used.              visor. (Fig. 35)
                                   B (exposici6n de tiempo) no se
                                                        puede utilizar cuando se utiliza el
                                                                     autodisDarador.
                                        www.butkus.us
                              -46-
View original page 23Page 24 · Read text
FLASH PHOTOGRAPHY    www.butkus.usFOTOGRAFIAS CON FLASH
                      (Programmed flash photography)        (Fotografias con flash programado)
                                              lf the RlcoH SPEEDL|TE 300P or 240   Si utiliza el flash RICOH Speedlite                      is used on the RICOH XR-2OSP   3OO P o 24O con la cdmara RICOH XR-
                       camera, the shutter speed and the f-   2OSP en el programa AE la velocidad
                           stop number are a utomatically  set with    del obturador y el nf mero de diafragma
                     the camera is set to program AE   se colocardn autom6ticamente.
                           photography.
     Fis.36 Abb.36                                                                        Deslizar la unidad de flash en la
                         1. Slide the flash unit into the Hot       zapata y ajustorlo bien con el torni-
                       Shoe and tighten  it with the lock          llo de seguridad. (Fig. 36)
                            screw. (Fig. 36)
                                                              Colocar el dial de velocidad del
                      2. Set the Shutter Speed Dial ro "p" or      obturador en la posici6n "P" o
                            "SP". (Fig. 37)                          "SP". (Fis. 37)
www.butkus.us           3. Set the F-Stop Ring to "P". (Fig.38)       Colocar el aro de diafragmas en la
                                                                       posici6n "P". (Fig. 38)    Fig.37 Abb.37


                                -48-
View original page 24Page 25 · Read text
4. Set the flash A,zM selector to "A".       Poner el selector A,zM del flash en
                            (Fis. 39)                                      la posici6n A. (Fig. 39)
                      Turn the  f lash power On-Off switch        Girar el interruptor de potencia ON-
                  ON. (Fig. 4O)                      OFF hacia la posici6n ON. (Fig.40)
               When  f ully charged, the Flash   6. Cuando el flash est6 completa-
                     Ready Indicator (red LED) lights in     mente cargado, en el visor se
Fis.39 Abb.39          the finder. (Fig. 41)                   encenderd una luz roja LED que
                                                                                indicarii que el flash estii listo para
                     Focus the subject and press the       disparar. (Fig. 41)
                   Shutter Release Button for
                           shooting.                             Enfocar al sujeto y presionar el bot6n
                                                       de disparo para efectuar la fotografia.
                       Refer to Operating Instructions for
                     the flash unit for more creative    *  Mire las instrucciones de operacio-
                        technioues and technical details.        nes del flash para una t6cnica mds
                                                                     creativa y miis detalles t6cnicos.
Fis.4O Abb.4O


Fig.41 Abb.41
                                       www.butkus.us
                         -50-
View original page 25Related documents and language editions
From the M. Butkus archive. Original publisher and archive notices are retained.
Check the model and edition against your equipment.
PDF verified 2026-10-10.