Film cameras
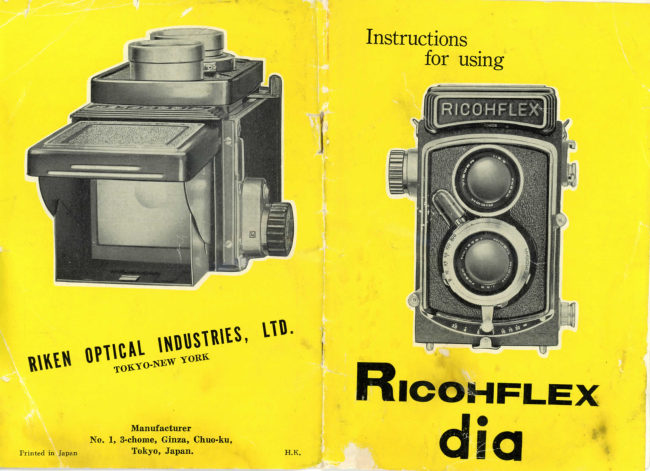
Ricohflex Dia User manual
User manual for Ricohflex Dia. 24 pages in English. Read the original PDF, download or print a copy without registration.
24 pagesEnglish2.6 MB PDF
Loading your manual…Open PDF directly
Document details
- Brand
- Ricoh
- Model / document
- Ricohflex Dia
- Document type
- User manual
- Language
- English
- Pages
- 24
- File size
- 2.6 MB
- Category
- Film cameras
- Document date
- Not specified in catalog
Search available document text
Find a term, then jump to its page in the original PDF. Image-only pages may not be searchable; check the PDF for exact wording and diagrams.
Page 3 · Read text
il            www.orphancameras.com-/--/
          rHE .jyrtrNc  ACHTEVEMENT  n"q**{#         '"ffifl                 REFLEX DESIGN!                 ---"-'--1N     -&
        .      ----'
      -.tThe   RICOHFLEX   "DIA"  was  designed  and  precision  engineered      to give you performance  and  photographic   results  which  are  equal    ,tI
      to those obtainable  from  the most expensive  twin-lens   reflexes.
         Although    the  RICOHFLEX     '!tDIA"    is  moderately     priced,    its
     8 cm RIKENON   f/3.5  is  a  4-element,   tessar  type  lens  hard-coated
    and   color-corrected     for   unsurpassed   corner-to-corner    negative
     sharpness.

        The   needle-point    clarity   of   details   is  evident  even   at   full
    diaphragm   opening.    Also,  color   prints  and  transparencies   have
     truer  tone reproduction   over  the  entire  spectrum.
        The  most  important   and  outstanding   feature   is  the  exclusive
   DUO-LEVER*FOCUSING   system. Developed  by  Riken,   its superiority
    over  other  systems  has  been  proven   by  the  ease and  rapidity      )
     with  which  the  subject   is  brought   into  sharp  focus.   In  addition,
    hand movements-the    cause of blurred  pictures-are   minim2ed.                                                                                         IIiI       A   brilliant    fulll-size  2%  x 2%  image   is  clearly  seen  on  the
     extra-bright   viewing  screen even  in  the dimmest   light.  The  hinged      {I
    magnifier    is  easily  flipped  into  position   to  enable  you  to  critically
    chepk the sharpness  of focus  of  the  entire  picture  format.  And,   for
    action  or  sports,  just  look  through  the  eye-level  finder.

     * Patented  and  trade  mark   registered

         - 2 -
t*
View original page 3Page 4 · Read text
The  shutter  has speeds up  to  11400 ot  a second  which    is  fast
 enough  to  "stop"  any  type  of  action,   especially  sport  events.  The
 shutter's  construction   provides  the  highest   efficiency  at  any  speed
 setting.    It  is  fully  synchronized   for "M"  and  "X"  flash requirements.
 Also,   the  built-in   self-timer   enables  you  to  get   into  the  picture-a
 convenient    feature  when   taking   group   pictures.  On  pages  12
 through   17,  additional  information    will  be found  on  selecting  and
 setting  the proper  shutter  sPeed.
    On the  lightweight,    die-cast aluminum   alloy  body,    all  surfaces
 are machined  at  microscopically   small  tolerances   with   the  highest
 degree   of  accuracy.   And,   the  anti-reflection     baffies  interrupt    the
  stray    light   which   usually   reduces   the   contrast    of  the  image
 on the  film.
.*    To  enable  you  to  obtain   the  maximum    pleasure   from   your
                  ,.DIA",                  we have endeavOred  to include  many  principles RICOHFLEX
  of advanced  technique  as well  as  all  basic  operations.    These  "tips"
  are  based  on  recognized   factors   that   ate  used  by    all  leading
 photographers  and which  result   in  ptize-winning   pictures;   they  are
 easy  to  follow  and  you   will  show  your   shots  with   pride  as  to
 your  ability.
      Before  loading  the camera  with   film,  we recommend   that  you
  put  the camera  through   its  various  operations  to familiarize  yourself
  with  some  simple  points   to  be remembered.   The  illustrations   on
 pages  4 and  5  will   serve  as  useful  guides   for   identification     of
  various  parts.
     You can  load  the  camera  with  any  standard   120 spool  film  in
  either  black-and-white   or  color  for  72 exposures  of 2lX2/,     format.
                                                                                                        - 3 -

                                                            &$ELr4-S
View original page 4Page 5 · Read text
www.orphancameras.com


                   i?ICOF{FLEX
                    D IA
                                         (serni-&utomat)


          PRINCIPAL PARTS

       Focusing hood  o
  @ Carrying  strap loop
  @ Film winding  knob
  @ Film advance release
  @ Film speed indicator
  @ Exposure counter
  @ Control window  for  shutter speed and diaphragm  stop
  @ Shutter cocking  lever
  @ DUO-LEVER  focusing
  @ Shutter speed selector
  @ Shutter  release button

4
View original page 5Page 6 · Read text
@ Taking  lens

  @ M-X sychr onization lever

  @ Aperture  selector

  @ Feed spool knob

  @ Self-timer lever

  @ Viewing lens
  @ Flash terminal

  @ Accessory shoe

  @ Cordless flash contact

  @ Take-up spool knob

  @ Direct view-finder frame

  @ Sighting aperture  for  direct  view-finder

  @ Magnifi.er for  critical  focusing
                      @ Back cover
, i '                     @ Back cover locking
                                                                                                                    ,
                                              clamp

                      @ Back cover locking

                                                      disc

                      @ Tripod bushing


                                                                              5
View original page 6Page 7 · Read text
www.orphancameras.comFILM LOADING

     The   Ricohflex   Dia  takes  12 exposures on  I20  roll  film.   Film
 should not be put  into,  or taken out of the camera  in direct  sunlight.
         OPENING THE CAMERA


 (A).   Rotate  the locking  disc @  in  the  direction  of the  red  arrow
 --Q-    The  locking  clamp @  will  move  away  from   the  camera
body and can be lifted  up  to the  position  shown  in  figure  4.
(B).  Swing  the hinged  back  open  to the position  shown   in  figure
5. You  will  note  that  the counter @ automatically  returned  to "O".
(C).  Put  the empty spool in  the
"take-up"   chamber  by  pulling
the  knob @  away  from   the
camera body and  engaging  the
slit  on   the  spool   with    the
end  of the winding  knob's shaft.
Release the knob,  engaging  the
spool with   its  shaft.   Turn   the
winding  knob  until  the long  slot
of  the  take-up  spool   is  in  the
position shown  in  figure  9.

     6
View original page 7Page 8 · Read text
o
(D).   Pull knob @ away from      (E).  Break  the  seal and  Pull
camera body.   Place  the  film     out  the paper  leader.
roll  in to the  "feed"  chamber,
seating  the  slit  onto  the  stud.
Be sure to properlY engage the
spool on both  ends.


                                                                              I


 (F).  Draw  the paper  over  the     (G).  Turn   the  film  winding
two rollers and slide the taPered     knob,  winding   the  film  leader
end  into  the  long  slot  of  the     evenly  onto  the take-uP  sPool
 take-up spool and  out  through      until  the  double-ended  arrow
 the short  one.                        points  to  the two  red  dots on
                                       the camera  boby.

                                                              7
View original page 8Page 9 · Read text
www.orphancameras.com


                                                (H).  The   reverse   order   of
                                      opening  the camera back is.now
                                    used  to close  it.  Shut the hinged
                                        back, push the clamp  into  place
                                   and  move  the  locking   disc   in
                                         the direction  of the arrow--C-i
                                    be  sure   the  clamp    is  caught
                                        onto  the small  pin.

      SETTING FILM TYPE INDICATOR
               INTRODUCTION
     Film  manufacturers   rate   their  various   films  according  to the
effect  of  the   light  upon  the  particular   emulsion.  Some films  are
more  sensitive and responsive  to  light  than  others.
     International   standards  have been adapted so that  you can make
most  effective  use  these  values,    especially    in   setting   exposure
meters.  These  ratings  are expressed  as numbers  which  are referred
to as the  film's  "ASA  Exposure  Index".
    The  data  sheet  in  every   film  package   will  give  two  numbers
under   the  "Exposure    Index";  -one  number    is  used when   taking
daylight  shots and  the  other when  under  artificial  lighting,  such ?s,
flash  or  flood lamps.  With  black-
and-white     fi.lms,   the   tungsten
number   is  generally  80%  of the
daylight    index.   However,    with
color   films   the  package   clearly
indicates  that   it   is  for  use  with
daylight  or  artificial   light.  There-
fore,  when  using  color  film,   set
the indicator  to the number  listed
under  the primary  intended usage
since the secondary  index  is quite
different  because a  specific   filter
is  also  required.   The   film   data
sheet   should    also   be   read
thoroughly   since  many  excellent
"tips"  on proper  settings  are given.  The  beginning  amateur  should
give  close attention   to the  data,  especially   if   it  for  color  film,
View original page 9Page 10 · Read text
SETTING
        (I).   Turn  the  indicator   disc @  until  the  ASA   Daylight   Exposure
     Index   is  opposite  the  marker.    Illustrated    is  a  setting   of  100 for
     Super XX  fitm.   If  the film  is daylight  type color,  use the "D-COLOR"
      reference number;  for  artifical  light  color, use the "T-COLOR"  number.
          BRINGING THE FIRST FRAME
                INTO POSTTION
                                                         (J).   Press   down   on   the   film
/r.1                                     advance     release    @.     This
                                              automatically      engages      the
                                                internal   film  advancing  gears.
                                                   (K).   Turn  the  fi.lm winding  knob
                      @  in a clockwise  direction   until
                                                                                     it  stops. As you can  see in  fi.g'urre
                                                                                                irl"                                             14, the number      has appeared
                                                      in   the   counter   window.      All
                                         succeeding  frames   are  brought


       into  position  by  rePeating   stePs
        irJ"          and   "K".     After   the   last
       picture,  again press down  on  the
       film   advance   release;   the   red
       circle  will  appear  in  the  window
     and  the  film  winding   knob  can
     be turned  continuouslY.


                                                 This  exclusive   Riken  feature
                                            prevents   the   film   from   being
                                   wound   past   its  proper   Position
                                             since  advance   of  the  film  onlY
                                     becomes  possible  when  the  film
                                       advance  release button   is Pressed
                                       down.     It   completelY  eliminates
                                           blank  exposures and  gives  equal
                                        spaces     between      negatives,
                                           preventing  overlaPped  shots.
View original page 10Page 11 · Read text
www.orphancameras.com        COMPOSITIOI{ AII{D EXPOSURE
               FOCUSING
    Duo-Lever  Focusing  is the most modern system since the subject
 is brought  into  sharp  focus faster and easier.  Also, hand movements
 -the  cause of blurred  pictures-are   minimi  zed,.

    OPEN TI{E HOOI)
    The   hood    is   opened   by
simply    lifting   upon   the   back
part  of  it. Be sure  to remove  the
protective  lens  cap.

            HOLDING


                                                                                                                                                                                                                                                                               (                                                                                                                                   i*fiil+tll:ll88AI:9Fjf,t+t!.r{{.!'4 *{:d  8:,I: }:*
                                                                                                                                                        I'lt,t'l,ll!.1
   When  the  camera   is  held  a t c h          waist  level,   the  best
perspective  is obtained  since the   I rnes        subject are undistorted
in  the  picture  format.
    The  fi.ngers should be on the  Duo-Lever  controls  as illustrated
above.  By keeping  both hands on the camera  in  this manner,   the
subject  is quickly  brought  into  sharp  focus  by  moving   the  levers
 '   '  .  .  .  the   left  lever   is moved  downward     if  the  point  of  sharp
focus  is further  than  the subject and,  conversely,  the  right  lever  is
moved downward    if  the  point  of sharpness  is closer  to  the camera.
    The  area  visible on the extra-bright   viewing   screen   is exactly
what   will  appear  on  the  negative.     It  thus becomes very  easy to
select the desired  subject  matter,  background,    etc., by moving  the
camera  to the  right  or  left, and up  or  down.
   - 1 0 -
View original page 11Page 12 · Read text
CRITICAL FOCUSING

                                    The  wide-field  magnifier  can
                                  be  "flipped  up"    in a fraction   of
                                    a second when   critical   focusing
                                                  is  necessary.  As  illustrated   in
                                           figure   19,   just  push  the  direct
                                        viewfinder  frame  @ back  about
                                                    Il2  inch and  the  magnifi.er  auto-
                                        matically  swings  into  Position.
                                When  using  the   magnifier,
hold the eye close to   it !
    Before  closing  the hood, be sure  to push the  magnifier down  to
its original  Position !

            EYE.LEVEL  VIEWFINDER

                                    For  rapid  eye-level  shooting,   first
                             push  the  frame  down   into  the  hood
                                          until    it  catches  on  the  latch.   Then,
                               by  sighting  through   the  aPerture  @,
                                  the   limits   of  the  field  will  be  seen
                                 through   the   direct   viewfinder.      It   is
                                 abvisable   to    first   focus   with   the
                                 viewing  screen  to  obtain   the  correct
                                 distance  setting  for  the main  subject.
                                The  frame   is  brought  back  to  its
                                     original  position  by moving  the  hood
                                         slightly  back.   This  releases the  latch
                             and  the frame  springs  up  into  place.

              CLOSING THE HOOD

    Be sure the  magnifi.er  is  in  its  original  position.  Then,  to  close
 the hood,  just push the  top towards  the back  of the camera.
                                                                                                                        - 1 1   -
View original page 12Page 13 · Read text
www.orphancameras.com    SHUTTER SPEED AND.APETURE  OPENING

     By  moving   the  shutter  speed  selector @  and  the  aperture
 selector @,   the speed and  stop  settings   are  visible   in  the  "peep
 window"  @.    It  is very  easy  to  quickly  change  from  one speed to
 another  or from  one diaphragm  opening  to another  without  changing
 the camera  position  since the extra  large  control  window   is located
 on the top  of the lens housing.


       SHUTTER
       SPEED
                                 APERTURE       CONTROL
                                CONTROL


                                Figure   2l

     Addition    information   on   the   shutter   speed  and   aperture
relationship   is on pages 16 and  IT
   - L 2 -
View original page 13Page 14 · Read text
PICTURE TAKING
      According   to  :
             the  light  conditions'
             the extend  of action  of our  subject,
             the desired  Picture  dePth,
       set  the  aperture   and   shutter  speed  to  meet  our   picture-taking
      requirements.    Illustrated   in  fi.gure 2L are an aperture  of  fl8 and a
                                   of a second-I     shutter  speed of U50
I


                                      Figure  22
         Cock  the  shutter  by moving  lever @ down  as far  as  it  will  go'
      See the  picture  on  the  left  in  fi.gure  22.  Aftet  focusing  on  the main
       subject  and  selecting  the  desired  area,   press down  on  the  shutter
       release button  @)  *ittt   a gentle  squeezing  action.   Since very   little
      pressure  on the  button   is iequired   to  put  the  shutter's   mechanism
                             ,,jabbing"   push on   it  should  be avoided  because  it        into  motion  ,  a
         will  cause the camera  to "move"   at the moment when  the diaphragm
         is open.  The  illustration   on the  right   in  figure 22 shows the correct
      method  of releasing  the  shutter-


          The most  important   operations   in  the  making   of an  attractive
        picture  are  to  properly  arrange  the  subject  matter  and  to  choose
       the  camera  angle  which   portrays   the  best  perspective.   Your  big
      advantage   in  using  the Ricohflex  lies  in seeing on the viewing  screen
     EXACTLy   what   will  appear  on  the  negative.      It  becomes  an  easy
       matter   to  select  the  proper   taking   point   to  obtain  your  desired
        format.  On  the  following  pages are  the  basic factors which  are easy
        to use and worth  while  remembenng.
View original page 14Page 15 · Read text
www.orphancameras.comprinciples  of good composition:  simplicity.    By using these main
balance,  leading  line,  background,   depth and camera  angle,  your
pictures   will  be more  attractive   to everyone  and  of prize-winning
caliber.
Simplicity.    Every  picture  should  have  a  main  point   of interest
whether    it be a single  object  or a group.   It  should present one idea
with  clarity  and  not  have  distracting   objects  or  lines which  would
prevent  the viewer  from  recognizing   the photograph's   purpose.
Balance.   Photo  pictures  of more  than one object   (for example   : 3
persons) are considered  to be well-balanced  when  they  are  in  har-
mony  with  one another.  This  can be done by  arranging   objects  of
similar  shape and  size in various  positions.    If you place your  main
interest  halfway  between  the center  and  the edge  of the viewfinder,
you  will  find your  composition  immediately  has a pleasing  effect;   it
is generally  agreed among  professionals  that  the  principal  object  of
attraction  should  not be  in  the exact  center.  This  technique  is very
useful when  taking  a group  picture--have  some of  the people  pose
in various  positions,  rather  than  lined up abreast.
Leading   line.  Any  line-straight    or curved-that    brings  the eye to
the main  object  is an excellent  feature  in a picture.  This  technique
is especially  useful   in  outdoor  photography  where  a roadway,   or
even footprints   in  the sand from  the  lower   left  corner  leading   to
the  subject,  can be included.  Notice  how,   in  the  picture  to  the  left,
                                           the  ripples  in  the  water  lead
                                          our eyes to the swans.
                                  DETA:  The line of the camera
                                        angle  is from  the  lower   left
                                         corner  through   our   graceful
                                    swans   towards    the    typical
                                     Japanese  house  in  the  upper
                                                 right  corner. As you  will  note,
                                we used all our basic principles
                                                to bring   out a pastoral  scene.
                                          Enlarged,      it became a restful
                                     and   decorative    picture    for
                                       everyone   to  enjoy    its  rustic
                                            serenity      (f 116 at  U50  of  a
                                    second on Plus  X).

     - L 4 -
View original page 15Page 16 · Read text
DATA:
  Plus X  film
    (ASA  80)
    t l 4
  11200 of a second
  R-O  filter
  (see additional
   details below)


Background.     In a close-up picture  of a  specific object,   the  back-
ground  should  be  plain  or   in  harmony   with   the  subject.   Your
selection  of appropriate  surroundings   will  be an  indication   of  your
ability.      If  conditions   witl  not  permit  an  agreeable  background,
overcome    it  by  decreasing  the  depth-of -field  through  an  increase
in  the aperture  like we  did  for  model above.
Depth.   When  taking  a picture  of a  far-off  scene,  a 3-D  effect   is
added   if a nearby  object  is also included  in sharp  focus.
Camera  angle.    This  does not  refer  to the holding  of the camera'
but  to  what   is  selected   f or  the  picture  area.  Whenever   possible,
within   this  area, avoid  horizontal  or  vertical  lines  (as seen through
 the  viewfi.nder)  that  divide  the  picture  in  half  !
     About  the  photograph   above.  The fi"tm data recommended  tl16
 at   l/ 100 of a second. Since a red  filter  with  a  factor  of 8 was used,
 the aperture was opened to  t15.6.  To  increase the  blurring    of  the
 background,    the   stop  was  opened   further    to    tl4'   Then,   to
 compensate  for   this  larger  f-stop,   the  shuttr  speed was increased
 to  IlZ00 of a second.  The  smiling  model now   "stands  out"   for  a
 pleasing  picture  to be  put  into  the album'
                                                                                          - t 5 -
View original page 16Page 17 · Read text
www.orphancameras.com
               SELECTING
      SHUTTER SPEED AND APERTURE

    We know  you  will  find  picture-taking    is fun;     if photography    is
 a new  addition   to your  hobbies, we  believe  that,  after  reading   this
 section,  you  will  see  it  is also easy.
     The  combination   of the  lens opening  and  shutter  speed contrors
 the amount  of  light  entering   the  camera.  The  diaphragm   setting
 determines  how much  of  the  lens'  area  will  be used and the shutter
 speed  will  govern   the  duration   of  the  opening.   However,   before
 selecting  these  settings,  we  believe you should understand  what  thev
 are and how  they  work.

             APERTURE  OPENING

    when  we  select an aperture   openingr  w€  regulate   the. size  of
 the  circular  hole  in  the diaphragm.    This  openint    will   control  the
 intensity   of  the  light  admitted   into  the camera.
    The  size  of  this  opening   is  designated  by  a number  and   is
 referred   to  by  many   interchangeabte   names:   ,,rens  stop,   f-stop,
f-number,   aperture,  and diaphragm   setting   (or  stop).,,
    The   "f"  numbers  are exacty  the  reverse  of the  opnings.   The
smallest  number   (f/3.5)  on  the  diaphragm   scale  is  the maximum
opening,  white  conversely,   the  largest  number   (f/16)  is the  smallest
opening-
    The  aperture  scale has these stop  markings:
                        3.5  4  5.6  8    ll    t6
    Beginning   with  the  smalrest  opening,     fll6,  each  succeeding
setting  doubles  the  quantity   of  effective   light  passed  through    th;
Iens. Thus,  at  f.15.6 we  put  8  times  more   light  onto  the  negative
than we do at  f.176!
   A  "half-stop"   f-number  can  be  obtained  by  setting   the   scale
between  two  numbers.   For  exampre:   if we desire an  fl6.s  opening,
move the  aperture  control  lever  so that  the blank  area between  the
fi5.6 and 8 markings   is  in  the peep window.
    Since the amount  of  right  required  to reproduce  a given  subject
is fixed,   the  shutter  speed must  be considered  before  selecting  this
opening;  this  is explained  on the  next  page.

   - 1 6 -
View original page 17Page 18 · Read text
-
               SHUTT!]R SPEEI)
    The  Ricohflex  Dia  shutter  speed are:
               8 1 2 5 1 0 2 5 5 0 1 0 0 2 0 0 4 0 0
    These numbers  represent  fractions   of a second. That   is,  1: one
second,  while  400:  1/400 th  of a second. The  larger  the number,  the
faster-is  the  shutter  action  in  its opening  and  closing.   This  means
that  at  the  slowest speed (one second),  400 times  more   light    will
pass through   the  lens than  at  the  highest  speed'
    The  position  "B"   is used  for  time  exposures  since  the  shutter
will  remain  open as long  as the  release button   is depressed.  when
using  this  setting,    the camera  should be  placed  on  a  fi'rm,   solid
supplrt-preferably     a tripod-and    a cable release should  be used  to
open and  close the  shutter-
              DELAYED  ACTION
    To use the  self-timer,   put  the camera  on a tripod  and focus on
your  group.  Set the  aperture,  shutter  speed and cock  the shutter  in
 the  usual  manner.  Push  the  self-timer   lever @  down.  Pressing
down  on the  shutter  release button   will  activate  the  self-timer  and
 the  exposure   will  be made  automaticalty     af.ter  a  7  second   delay.
Since  it  enables you  to  also  get  into  the  picture,    prints   of  your
 fu-ify   and  friends   will  be more  delightful   to look  at when mounted
 in  your  album.
     Note:   The   self   timer    will   not  operate  when   the   shutter
            sPeed  setting    i8  at   "8"'
                ACTION SHOTS
    The  selection  of  your  shutter  speed  is determined   primarily   by
 the amount  of  "movement"    of  your  subject.   For  personS walking
 towards  your  camera,   1/50 of a second  will  freeze  the  movement.
 For  sport  events  or  horse  races where  the  action   is approaching
 or  moving  away  from   the  camera,  use  1/100  of  a  second.    If  the
 action   is  very   fast  or  is  moving   across  the  field  of view,  set  the
 speed on 71200 or  ll40o  of a second.
       WHAT STOP AND SPEED TO USE ?
     As we have seen from  the  preceding  sections,  the  lens stop and
 shutter  speed are dependent  upon each other  to  obtain   the  correct
 exposure and  composition;   f.l8 at  1/50 of a second and  fi5.6  at 71100
 of a second  will  produce  the same image  density  on  the  negative.
 The  combination   you  select   will  depend  upon  what  you want   in
 your  picture.
                                                                                                        - 1 7 -
View original page 18Page 19 · Read text
www.orphancameras.com
         FLASH TECHNIQUP

     Your   Richohflex   Dia  has  an    lvf -X   synchr onization   system.
 Perfect  coincidence  of the  flash with  the  shutter  opening  is obtained
 when  using  strobe  (electronic  flash)  and  with  almost  every  type  of
 flashbulb.


               rrx"                  Setting                         rrM" Setting

                                 Figure  23

    Type X  synchronization    is used with  electronic  flash units  and
Class  F   flashbulbs.  Move   the  lever @  to  the   rrx"  setting   as
illustrated   above.
   When  Class M  flashbulbs  are used, the  lever @ is moved  to the
M  position.  When  the  shutter  release button   is pressed, the  shutter's
opening  is delayed about 16 milliseconds.    This  delay  will  give  the
lamp  sufficient  time  to reach  its peak brilliance  at the exact moment
that  the shutter   is wide  open, even  at  the  fastest  shutter  speed.
    The  chart  on  the  opposite  page  lists  the  speeds  which  can
used with  the  different  types  of  flashbulbs.
  _ 1 8 _
View original page 19Page 20 · Read text
MOUNTING THE FLASH UNIT

Holding   the  contact   spring
 trp,  slide  the  metal   plate   of
the   RICOH   Flash,    Model
8-300,  as  far  as   it  can  go
 into   the  accessory  shoe @.
The    circuit      is   completed
through     the   special   flash
contact @  in  the  center   of
the shoe. Figu re 24 illustrates
the Model  8-300 mounted   in
the shoe.
  For  other  flash unit  models,
the  connecting   cord   must
have an European-type   tip  to
fit  onto  the flash terminal  @.

     "Battery   case-bracket"   types  of  flash guns can  also be used by
attaching  the bracket   to the  tripod  bushing  @.

       FLASHBULBS           USABLE SPEED RANGE

 Class    TYPE NUMBERS
  M    5,58. 8,25, 258, PF3&PF4      all speeds      B to ll25
   F         SF, SM & SS        B to ll25      B to Il50
                            l/I-2           B to 1/100     B to Il25

  FP        6, 68, 26 & 26H^         DO NOT USE
    ELECTRONIC FLASH        NOT              i     ALL
         (STROBE)        RECOMMENDEDI   SPEEDS
  There   is a tabte  of GUIDE NUMBERS  on every  flashbulb package.
Under  the  tungsten   index   of your   film,   you   will   find  a nunber
for  your   shutter  speed  setting  which   gives   the   relationship    of
"distance-from-subject"   and  the aperture.   Dividing   this number  by
the  distance-in-feet  from  your  subject,   you  obtain  the  correct  stop
opening.   For example   :  if  the number   is 110 and  you  are  10  feet
away,  the aperture  should be set on  tlIL.
View original page 20Page 21 · Read text
www.orphancameras.comMULTIPE FLASH

i       By     using     an
     additional  lamp   in  an
                                           (B)    extension  unit,  picture
     quality   will  be greatly
    improved.    Roundness
    and    depth    will   be
    added  to  the  features
     of  the  face and harsh
    shadows       witl     be
    "softened".

             Attach       the
                                               -
    connecting   cord  from
    the  extension   unit   to
    the   terminal   marked
    "extension".  The diagram  shows a basic "Triangle',   set-up that  gives
   good  results   ; one flash  (A)  is on  the camera  and  the  extension  (B)
     is placed high  and  to the  right  about  half  the  distance   of  subject-
    to-camera.  This  arrangement    will  give  you  the simplest  professional
    lighting.

      An  additional   professional  "touch"   is  to place a white  cardboard
    slightly   to the  left,   above and behind  the  subject.    This  acts as a                 !
    reflector  and  directs  the  main  light  back  into  the shadows  to give
    highlight   for  the  hair.                                                                 ri                    (
       The  diaphragm   setting  must  be  closed one  full  stop  to  allow
    for  the  additional    tight.   For exampre   : your   calculator  shows an
   opening  of  flrr   for  one lamp;   set the  aperture  on  f/16  for  the two
   lamps.

         - 2 0 _
                                         *i.                                    '.-   i*;*u.  --,  .i.  ,;                               .:                                      r;
View original page 21Page 22 · Read text
SOME TIPS ON FLASH


             * Buy the proper type of flashbulb.   Ele sure to use blue-coated

      bulbs with  daylight type color film.

               * Use  fresh   batteries.   The   light   of  a, flashbulb   tasts  only  a

        fraction  of a second. To  catch  the  picture,  the camera  shutter  must

      be wide open  at  that  exact moment.  Weak  batteries  will  not produce

       the  light  at  that  required  instant.

             * Don't   let your  subject just  sit  ; have then doing something
      which avoids the appearance of a "posed" picture.l
              * Use  flash   "fi.lI-in"  to  eliminate  unattractive  squints  and

      harsh,   dark shadows caused by strong sunlight.  You'll  find  that

       flash adds a sparkling  quality  to your  pictures   if you have your
      subjects facing off to an angle from the sunlight  instead of having

           it shine into their eyes.li
             * When taking  flash pictures outdoors at night,  in a very large   i
       ii   room or a room with  dark  interiors,  increase the aperture opening

      by  one  f/-stop.   For example   :  from  the  Guide  Number  and
        Di.turr*,    your   Calculator  tells you to use   flll    ;  set the aperture
     on f/8.

                                                                                                                - 2 t -
View original page 22Related documents and language editions

From the M. Butkus archive. Original publisher and archive notices are retained.
Check the model and edition against your equipment.
PDF verified 2026-10-10.