Film cameras
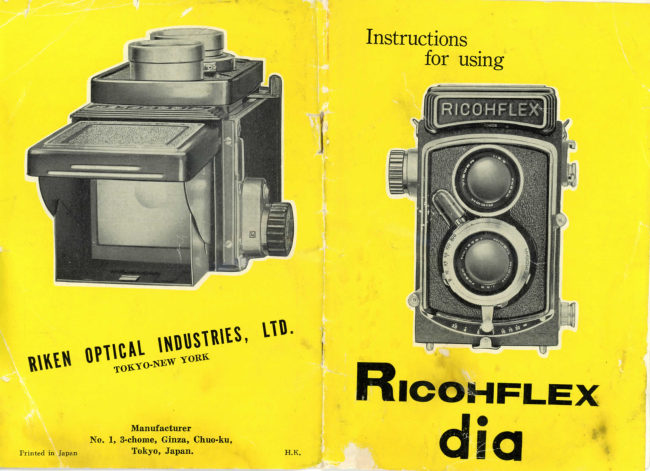
Ricohflex Dia M User manual
User manual for Ricohflex Dia M. 6 pages in English. Read the original PDF, download or print a copy without registration.
6 pagesEnglish3.8 MB PDF
Loading your manual…Open PDF directly
Document details
- Brand
- Ricoh
- Model / document
- Ricohflex Dia M
- Document type
- User manual
- Language
- English
- Pages
- 6
- File size
- 3.8 MB
- Category
- Film cameras
- Document date
- Not specified in catalog
Search available document text
Find a term, then jump to its page in the original PDF. Image-only pages may not be searchable; check the PDF for exact wording and diagrams.
Page 3 · Read text
FILM LOADING


T h e  Ricohflex Dia takes 12 ex-
posures  on  number  120   roll
film.    Picture  size   is 2 { x 2 1
inches.   F i l m  should  not  be
put  into,  or  taken  out  of the
camera  in bright  sunlight.

A  Before   starting,   the   ex-    B  Push  the  locking  lever  in
posure  counter  must  be  on
                                       direction  of the arrow and  lift
" O " .  T o  advance   it  to  this                                                   E   Pull  knob     away   from     F  Break the  seal and pull out
number, follow the instructions     the  locking clamp  up  to  the             camera  body.   Place  the   film     the paper  leader.
on page  5.                           position shown in  fig. 1.                           roll  into the  " feed " chamber,
                                                                                        seating  the  slit onto the  stud.
                                            t
                                                                               Again,   be   sure   to  properly
                                                                          engage the spool on both  ends.


            i * ^   0   4-
C  Swing the hinged back open  to the  position shown in  fig.  2.

                                                                G  Draw  the  paper  over  the    H  T u r n the film winding knob,
D  Put the empty  spool in the "take-up" chamber by pulling  the             two rollers and slide the tapered     winding the  film  leader evenly
knob away  from  the camera body and engaging the long  slit on             end  into  the  long  slot  of the     onto  the  take-up  spool  until
                                                                                  take-up spool and out from  the     the double-ended  arrow  points
the spool with the end of the winding knob's  shaft.  Release  the               short  one.                              to  the  two  red  dots  on  the
knob, engaging the spool with  its  shaft.                                                                     camera  body.

                                                           — 3 —
View original page 3Page 4 · Read text
I  T h e reverse order of opening the camera  is novy used  to close
 it: shut the hinged  back, push the clamp into place and move  the
 locking  lever  in  the  reverse direction of the arrow; be sure  the
clamp  is caught onto the small pin.


                                                                                       L  T u r n  the  film winding knob   M   Aftei  you    first  exposure,
                                                                                               until   it  stops.  As you  see  in     the   film   is  advanced   to  the
                                                                                                      figure   dJ) the  " 1 "  is now cen-     next  frame  by   first  lifting up
                                                                                       tered  in  the  counter window.     the release button  (this causes
                                                                          T h e A U T O - S T O P  will prevent      half  of the  " 1 "  to  disappear
                                                                                      the winding knob from turning     and  also  releases the A U T O -
                                                                             any   further.    A U T O - S T O P      S T O P ) .  T h e n  turn the wind-
                                                                                     action  is explained  below.             ing knob until  it stops; number
                                                                                                                                                                   " 2 "  is now in the  counter.

                                                  AUTO-STOP ACTION
J  Set  the  film speed indicator    K  T o bring the  film  into  po-
to  the A S A  exposure  index      sition  for  the    first  exposure,            T h e  A U T O - S T O P makes your camera  the equal  of most  expen-
number  for  your    film.   Illus-     the  " O " must be advanced so               sive twin-lens reflexes  since  it prevents the  film from being wound
                                                                                           past  its proper position. Advance of the  film becomes  possible  onlytrated    is   a   setting   of  100      that only  half  of  it   is  visible.
                                                                                                  after  lifting  the   film  advance  release  button.  T h i s  completely
(Super X X ) .                    T h i s   is done  as  follows:  the                                                                                    eliminates blank  exposures  and  gives  equal  spaces between  ne-
T h e  data  sheet  in every   film     release  button   is  pulled  up-                gatives, preventing overlapped  shots.  T h e starting  lever is moved
package will give two numbers    wards  at  the  same  time  that              only once.  When the counter  is on  " O " , the  A U T O - S T O P   is
under  " Exposure Index " : one     the  starting  lever   is  moved                 not  engaged and the winding knob  can  be  turned  continuously.
number   is  used when  taking     forward.  Moving  the  button           Moving  the  starting  lever  and  release  button  at the same time
outdoor  shots  and  the  other     and  lever  simultaneously  will              puts the A U T O - S T O P  in action.
when under artificially lighting,     release the internal " O " hold-
such  as  flash  of  flood lamps.         ing   spring.   I f  half   of   the                  UNLOADING
                              number " disappeared  ", proceed
                                                                                    After  the  last  exposure  (Number  12), lifting the release button
                                         to  the  next  step.  Figure ®                                                                                                will  dis-engage  the  A U T O - S T O P .  When  the  winding knob  is
                                           illustrates  this action.                      then  turned,  the  counter  will  return  to  " O " . Make  about  10
                                                                     more turns of the knob to be certain  that the paper  is completely
                                                                wound  onto  the  take-up  spool.  Open  the  camera,  remove  the
                                                                                     spool and seal the  paper.

                                                      -   4 —               donated to www.butkus.us
View original page 4Page 5 · Read text
FOCUSING                                             PICTURE TAKING

Duo-Lever focusing  is the most modern system  since  the  subject
is  brought  into sharp focus  faster and easier.  Also, hand move-                      (1) According to the desired  picture
ments—the  cause of blurred pictures—are  minimized.                               depth, the amount  of action and
T h e  hood  is opened by simply  lifting  up  on  the  back  part.  Be                    light conditions,  set the  aperture
sure  to remove  the protective  lens  cap.                                        and shutter speed  controls.
Looking  into  the hood, you  see  the ground  glass viewing  screen.        @ Cock  the shutter  by moving  the
The  image  on  this  screen   is  very  bright  due  to  the  advanced                  lever @  as  far  as  it will go  to-
camera  design.                                                               wards  the  shutter  speed   scale.
                                                                  Movement  in the  opposite  direc-
                                                                                            tion  will  release  it.
                                                                                                                                     (3) T h e subject's image on the view-
                                                                                                           ing  screen  will come  into  sharp
                                                                                    focus  as the Duo-Lever  controls
                                                                                               are moved.


                                              THE EXPOSURE
When  holding  the  camera  in     For   rapid  eye-level  shooting,

the  normal  viewing  position,     push  the  front  panel  of  the                       (S) fiolding  it chest-level  is the most
the  fingers  should  be  on  the    hood down into the hood.  T o                 natural way.   After getting  sharp
                                                                                              focus,  a   flip  of  the   finger   will      www.butkus.us
Duo-Lever   controls  as   illus-     bring  it back, press  the  direct
                                                                                                       trip the  shutter  release  lever.
 trated  above.  T h e  subject   is     view-finder  window   release.                                                                                                                                        (3) For   rapid   eye-level   shooting,
quickly  brought   into   sharp     Before  closing  hood,  be  sure                  sight  through  the  aperture    as
focus by moving the  right  (or      to bring the panel  to  its  origi-                   illustrated.  T h e  release   lever
                                                                                                   can  be  easily  tripped  by  either
 left) lever down.  When  using       nal  position  !
                                                                                  index   finger.
 the  magnifier  to check  critical
                                                             © Many people  prefer  to  hold  the
 sharpness  of  focus,  hold  the                                               camera  at  waist-level  for  better
 eye close to  it  !  Before closing                                                        perspective. When held this way,
                                                                                           the Duo-Lever controls will bring hood, be  sure  to  hold  magni-
                                                                                           the  subject  in  fast  focus  since
 fier back to its original position  !
                                                                                                    less hand movement  is required.
View original page 5Page 6 · Read text
SELECTING APERTURE OPENING                         FLASH

Aperture  scale markings are:   16   I I  8   5.6  4   3.5
                                                                     Any  flash  unit may be used  with  your  camera.  Pictured  below
Each number  is referred  to as the  " f " stop, aperture  opening, or                                                                                      are two models-one  the  " pocket " type and the other is a " battery
diaphragm setting (as well as various combinations of these terms).            case-bracket" model.  T h e connecting  cord must  have  an  " E u -
T h e   largest  number,  f/16,  represents  the  smallest  opening  and            ropean type " connecting  tip.
" 3.5"  is the  largest  stop.  Beginning  with   f,'16,  each  succeeding
stop doubles  the amount  of  light  passing thru  the lens, except for
f,'3.5 which  is only    stop larger than  f/4.  T h e stop  is selected  by
moving  lever @ to the desired  aperture  marking.

       SELECTING SHUTTER SPEED

shutter speed markings  are:  B  10  25  50  100  300
These numbers represent  fractions of a second:  that   is,  10 = 1/10
second  ; 25=1/25 sec, and so on up to 300 = 1/300 sec.  T h e larger
the  number,  the  faster  the  shutter  opens  and  closes.  On  the
                                                                       T h e  synchronization  is an  " X " interval.  For correct coincidence
slowest speed  (10), thirty times  as much  light  will  pass compared
                                                                                                  of the  flash with shutter opening, the chart below  lists the  shutter
to  the  fastest.  On " B ",  the  shutter  stays open  as long  as  lever                                                                              speeds which maybe  used with  different  flashbulb  types.
@   is held  in the  release position.
Selection  of shutter  setting  is determined  by the "movement" of            C L A S S   B U L B N U M B E R S     S H U T T E R  S P E E D  R A N G E
your  subject.  Since  a  fixed amount  of light  is  need  for  the  ex-                       F        S F ,  S M & SS          B  to 1/50 second
posure,  shutter  speed  and  aperture  opening  are  interdependent.                                                                 -     M-2                      B  to 1/25 second
For  example: your subject  is moving and the exposure meter (or            M       #5,  8, 11, 25 & 40     B  to 1/25 second
data  sheet) shows  at  1/25  second  to  use  f/16.  Since  1/100  sec.                 F P     # 6 & 26               F P  bulbs should not be  used
will  " freeze " the action, use  it with  f/8.                                     E L E C T R O N I C  F L A S H  (strobe)—all speeds

                                                                       There  is a table of G U I D E N U M B E R S on every  flashbulb  pack-
                          4  A P E R T U R E                                                   age.  Under the tungsten index of your  film, you  will  find  a num-
                             S C A L E                                                   ber for your shutter speed  setting which gives the relationship of
                                                                                                            " distance-from-subject " and  the aperture.  Dividing  this number
                                        S H U T T E R    •                                by the distance-in-feet  from your subject, you  obtain  the  correct
                                             S C A L E                                       stop opening.  For example:  if the number  is 110 and you are iO
                                                                                               feet away,  the aperture should be  set on f/11.

                                         donated to www.butkus.us            — 9    -
View original page 6Related documents and language editions

From the M. Butkus archive. Original publisher and archive notices are retained.
Check the model and edition against your equipment.
PDF verified 2026-10-10.