Film cameras
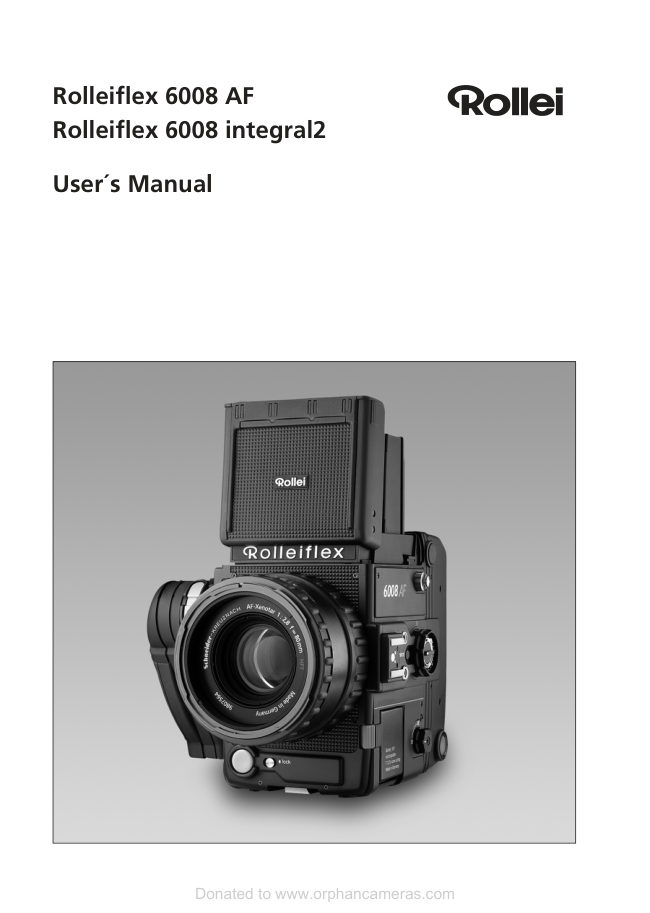
Rollei 6008 AF User manual
User manual for Rollei 6008 AF. 112 pages in English. Read the original PDF, download or print a copy without registration.
112 pagesEnglish13.8 MB PDF
Loading your manual…Open PDF directly
Document details
- Brand
- Rollei
- Model / document
- Rollei 6008 AF
- Document type
- User manual
- Language
- English
- Pages
- 112
- File size
- 13.8 MB
- Category
- Film cameras
- Document date
- Not specified in catalog
Search available document text
Find a term, then jump to its page in the original PDF. Image-only pages may not be searchable; check the PDF for exact wording and diagrams.
Page 3 · Read text
..............................................................................CONTENTS


Components and controls      »  6    Changing lenses              » 33
                                       Changing the viewfinder system   » 33
Introduction                » 10                                       Changing magnifi ers
Brief instructions                                 (for eyeglass wearers)           » 34
                                       Changing focusing screens       » 34Charging the battery           » 12
Inserting the battery            » 12
Attaching the lens             » 12     Film advance
Loading film                 » 13     Switching camera on and off      » 35
Attaching the magazine         » 14     Single frames                » 35
Advancing the fi lm            » 14     Continuous shooting           » 35
Switching camera on and off      » 15     Bracketing                  » 36
Opening the viewfi nder hood     » 15      Silent operation               » 36
Closing the viewfinder hood      » 15     Limiting the length of
Focusing                    » 16     continuous bursts             » 36
– Autofocusing: Single AF*      » 16
– Manual focusing*            » 17    Focusing                   » 37
Selecting the exposure mode      » 17
Selecting the metering pattern    » 18    Autofocusing*
Exposure metering             » 18
                                         – Single AF                  » 39Removing the fi lm             » 18
                                         – Continuous AF              » 39Viewfinder display             » 19
Handling and using the camera          Manual focusing
                                         – Focus indication*            » 39Using your camera             » 20
Preparing the camera           » 21
                                      Metering patternsAttaching the shoulder strap      » 21
                                   and exposure modesInserting the battery            » 21
Opening the folding hood        » 21     Selecting a metering pattern
Closing the folding hood        » 21     – Center-weighted
Charging the battery           » 22       multi-zone metering          » 41
Charging from car battery        » 23     – Spot metering              » 42
Additional power supply         » 23     – Multi-spot metering          » 42
Battery status                » 24     Setting an exposure compensation  » 44
Changing batteries            » 25     Exposure modes and
Changing fuses               » 26     exposure metering             » 44
Attaching the handgrip         » 26     – Aperture-priority AE          » 44
Changing the grip position       » 27     – Shutter-priority AE           » 45
Adjusting the wrist strap         » 27     – Programmed AE             » 45
Loading and changing fi lm inserts  » 28     – Program curve              » 46
Loading film inserts            » 29     – Metered manual             » 47
Removing the fi lm             » 30     – Bulb/T                    » 47
Setting the fi lm speed          » 30     Depth-of-field preview          » 48
Removing/changing magazines    » 31    AE lock                    » 48
Magazine identifi cation         » 32      Stray-light compensation        » 49


*(6008..............................................................................AF only)                                                            3


                 Donated to www.orphancameras.com
View original page 3Page 4 · Read text
..............................................................................CONTENTS


     Shutter release                       Custom functions
     – Using a cable release or                    Applying custom functions
        release cable               » 50     to switch                   » 65
     – Using the self-timer          » 51
     – Mirror lockup               » 52     Flash photography
    Automatic bracketing         » 53     Flash photography             » 66
                                                     Setting leading or trailing
     Multiple exposures           » 55                                                  sync and sync speed            » 67
    Frame counter               » 57    Manual flash control
                                                without an SCA adapter         » 67
     Additional viewfinder display   » 58     Flash photography with Rollei
                                         SCA-3562 (or SCA-356)
     Error management           » 59     Dedicated Flash Adapter         » 68
                                           Autofl ash with SCA adapter     Variable default settings       » 60
                                                          in low light                  » 70
     Selecting the AF mode*                   – Flash photography with
     – Three active AF areas         » 61      programmed AE             » 70
     – Spot AF                   » 61     – Flash photography with
                                                          aperture-priority AE          » 70
     Selecting leading or trailing sync          – Flash photography with
     – Leading sync               » 62        shutter-priority AE           » 71
     – Trailing sync                » 62     – Automatic fi ll fl ash with
                                       SCA adapter               » 71
     Selecting the bracketing mode           Compensated fill fl ash          » 72
     – First bracketing mode         » 63     – Additive fi ll fl ash            » 72
     – Second bracketing mode       » 63     – Automatic fi ll fl ash with flash
                                                          units permitting fl ash-exposure
    Frame counter                                               compensation
     Activating and adjusting the                       (only with SCA-3562 adapter)   » 73
     frame counter for standard                 Manual flash control           » 74
     magazines                  » 64     Flash bracketing with SCA adapter  » 75
     Reset                      » 64     Preflash                    » 76


    *(6008 AF only)
4   ..............................................................................


                  Donated to www.orphancameras.com
View original page 4Page 5 · Read text
..............................................................................CONTENTS


Practical hints                                 Teleconverters                » 86
Shooting at low temperature      » 77     Interchangeable magazines       » 86
Shooting in extreme                          Interchangeable viewfinders      » 86
lighting conditions             » 77     Focusing screens              » 88
– Spot metering              » 78    Matte box                  » 89
– Multi-spot metering          » 78     External battery connector       » 89
– Exposure compensation        » 79     PowerInterface               » 90
– Automatic bracketing         » 79    SCA-3562 Flash Adapter         » 90
– Substitute reading           » 80    MasterWare                 » 91
– Close-up reading            » 80    The Rolleifl ex 6000 System       » 92
– Subject contrast             » 80     Troubleshooting              » 96
Close-up photography          » 81     Compatibility with
Instant shutter release          » 83     older components             » 102
Care of your camera           » 84     Specifi cations                » 105
Further optional accessories      » 85     Lens table                   » 108
Interchangeable lenses          » 85


..............................................................................  5


                 Donated to www.orphancameras.com
View original page 5Page 7 · Read text
..............................................................................COMPONENTS AND CONTROLS


 1 Master switch                       20 Shutter release, bottom right
                                                  (two-stage)* 2 Viewfinder release button, right
                                     21 Lateral grip 3 Strap holder, right
                                     22 Leather wrist strap, detachable 4 Screen-holder release, right
                                     23 Shutter-speed dial 5 Magnifi er holder
                                     24 Shutter release, top right (two-stage)* 6 Viewfinder magnifi er
                                     25 Lateral-grip holder 7 Folding viewfi nder hood
                                     26 Focus-mode dial* 8 Rechargeable battery
                                     27 Memo button 9 Fuse
                                     28 Empty fi lm spool10 Viewfi nder release, left
                                     29 Index for arrow on film leader11 Screen-holder release, right
                                     30 Universal terminal with screw thread12 Data panel
                                     31 Custom-function switch13 Distance scale
                                     32 Stop-down button14 Aperture scale
                                     33 Seat for empty fi lm spool, with icon15 Double filter bayonet
                                     34 Release knob for fi lm change, right16 Aperture index
                                     35 Magazine back17 Distance index and
    depth-of-fi eld scale                   36 Release knob for magazine change,
                                                        right18 Camera bayonet mount
                                     37 Film-speed dial19  Shutter-release lock


                                        *(6008 AF only)
..............................................................................  7


                 Donated to www.orphancameras.com
View original page 7Page 9 · Read text
..............................................................................COMPONENTS AND CONTROLS


38 Spare fuse                          58  Film-path icon

39 Spare-fuse slide                      59 Film-advance flange
40 Interchangeable focusing screen         60  Auxiliary shutter
41  Folding hood, detachable                                     61  Tripod quick-release bracket
42  Strap holder, left                                     62 3/8“ tripod socket
43 Exposure-compensation/
                                     63 1/4“ tripod socket
   fill-flash switch
                                     64  Battery slot44 Metering-pattern/menu dial
                                     65 Grip-adjustment release45 Multi-exposure knob
46 Release knob for magazine change,      66  Lateral-grip holding pin
     left                                     67 Lens bayonet mount
47  Sticker recess                                     68 Interchangeable lens
48 Film-change release, left
                                     69 Diaphragm ring
49 Grip for laminar drawslide
                                     70  Shutter-priority AE lock
50 Interchangeable magazine
                                     71 Focusing ring
51 Frame-counter window
                                     72 Lens release
52 Memo holder
                                     73  Mirror-lockup button
53  Film stage, detachable for
    use of special accessories              74 X-sync terminal

54 Magazine hinge                     75 Hot shoe with additional
                                                dedicated contacts55 Spring tab for fi lm spool
56 Memo-holder slot                    76  Cable-release socket
57  Film insert                          77  Battery tab


..............................................................................  9


                 Donated to www.orphancameras.com
View original page 9Page 10 · Read text
ROLLEIFLEX 6008 AF/6008 integral2
     ..............................................................................


     Rolleifl ex 6008 AF                        For the hurried reader, there are
     Rolleifl ex 6008 integral2                   introductory brief instructions.

      Congratulations on your new Rolleifl ex        These are followed by a detailed descrip-
     6008. We appreciate your patronage and       tion with pictures of all important aspects
       trust that your new camera will give you       of the camera, guiding you step by step
     outstanding service for many years to         from assembling the basic camera mod-
     come.                                           ules right up to removing the exposed
                                         fi lm.     Your Rolleifl ex 6008 has been designed
      for professional use. It is ideally suited for       This in turn is followed by a number of
      creative use in fashion, people and action       practical tips and additional information
     photography as well as in architectural and    on the workings of your camera as well as
       industrial applications.                                   its major accessories.

                                   A tabular annex gives all important data of
                                                our line of interchangeable lenses.

                                                           In the case of operating errors – which
                                              even an experienced photographer might
                                       make in the heat of a shoot or after pro-
                                               longed non-use of the camera – a trou-
                                                    ble-shooting guide will help you locate
                                                      possible causes and find a way to correct
                                              them. All parts numbers in the text and
                                                  the illustrations stand for one and the
                                         same part and can be looked up in the
                                         two picture plates.


10  ..............................................................................


                   Donated to www.orphancameras.com
View original page 10Page 11 · Read text
ROLLEIFLEX 6008 AF/6008 integral2
..............................................................................


Please note:                        » Interchangeable magazines removed
                                          from the camera should always be pro-Like any precision instrument, your Rollei-
                                                tected by closing their laminar drawslideflex 6008 AF/6008 integral2 deserves care-
                                        and attaching their protective cover.ful handling.
                                 » These cover the most important controlsProceed with care above all when remov-
                                        and manipulations you need to acquainting or attaching interchangeable maga-
                                                   yourself with your camera and its opera-zines or lenses:
                                                       tion. Readers who prefer detailed infor-
» Never touch the refl ex mirror or special        mation right from the beginning should
  light-absorbing surfaces when there is           start on page 19.
  no lens on the camera. In this case,
                                 » Hints regarding autofocus or focus indi-  always close the camera‘s mirror box
                                                 cation refer exclusively to the Rolleiflex  with its protective cap.
                                       6008 AF.
» When there is no magazine on the
  camera, make sure that the exposed        Note:
  auxiliary shutter 60 is not subject to
                                             Users of earlier models of the Rolleifl ex  pressure. In this case, always protect the
                                     6000 Series should read the paragraph  camera by attaching its rear cover.
                                              “Compatibility with earlier components“.


..............................................................................  11


                 Donated to www.orphancameras.com
View original page 11Page 12 · Read text
..............................................................................BRIEF INSTRUCTIONS


                           77              a


        8


                                       b                 68       18  72   77


     Charging the battery                       Inserting the battery

     Connect power-supply cable a to power        Slide charged battery 8 with tab 77 down
      terminal b of charger and the latter to AC.      into camera and engage tab.
     The green LED signals readiness.

       All usual line voltages between 100 and                                             Attaching the lens
     240 V AC may be used. Press tab 77 up,
     withdraw battery 8 and insert it in the          Press red button 72 down and remove
      charger as shown. Charging takes about      cap turning it counterclockwise. Align red
     one hour.                                    index of lens 68 with red dot on camera
                                               bayonet mount 18, insert it as far as it will
     Nicad batteries are subject to a slow                                         go and turn it clockwise until it clicks into
      continual discharge. To ensure that your                                                       place.
     camera is always ready for use, be sure to
      recharge your battery every 2 to 3 months.


12  ..............................................................................


                   Donated to www.orphancameras.com
View original page 12Page 14 · Read text
BRIEF INSTRUCTIONS
     ..............................................................................


     Attaching the magazine                 Advancing the film

    Hook interchangeable magazine straight       Set master switch 1 to “1“ and press the
      into bottom hinge, swing it up and press       shutter release down fully: The film will be
    down until it engages with a click. Push       advanced to frame 1. Frame counter 51
      grip 49 down as far as it will go.               reads “1“. Should “1“ fail to appear, press
                                                  the shutter release again.


14  ..............................................................................


                   Donated to www.orphancameras.com
View original page 14Page 15 · Read text
BRIEF INSTRUCTIONS
..............................................................................


                                                                       5


                                                                                    7


                                                                                    1

                                              49

                                      1

                                    31


Switching camera on and off            Opening the viewfinder hood

Master switch set to “S“, “C“ or “S±“.           Lift viewfinder hood 7 at rear and swing it
Switch camera on by briefl y pressing           up. To flip up magnifier holder 5, press the
memo button or shutter release. It will          grip towards the edge of the hood.
now remain active in its standard mode for
at least 40 s. This period will be extended      Closing the viewfinder hood
for another 40 s if one of the camera‘s                                                 Press magnifier holder 5 down until it
controls is used. To switch the camera off,                                                   locks. Press two side flaps of the hood
turn its master switch to “off“. Accidental                                           inwards and release, letting the hood close
activation will then be impossible.                                                automatically.


..............................................................................  15


                 Donated to www.orphancameras.com
View original page 15Page 16 · Read text
..............................................................................BRIEF INSTRUCTIONS


                         26


     Focusing                                Autofocusing: Single AF (6008 AF)

     Use focus mode dial 26 (6008 AF) to           Place the focus area on the ground-glass
     change over between autofocus (single AF     screen over the subject to be focused (see
     – “sing“ – or continuous AF – “cont“) and      illustration) and slightly depress the shutter
     manual focusing (“man“).                       release. Your AF lens will now focus auto-
                                                          matically. To repeat focusing, release the
                                                      shutter button and again press it lightly.
                                               Your subject has been detected as soon as
                                                    only the center icon of the focus indicator
                                                   appears.

                                                                                   If the three components of the focus indi-
                                                     cator are blinking, automatic focusing is
                                                      impossible. In this case, place the focus
                                                   area on a more contrasty and better tex-
                                                   tured subject at the same distance and
                                                   focus on the latter. If necessary, focus
                                                  manually.


16  ..............................................................................


                   Donated to www.orphancameras.com
View original page 16Page 17 · Read text
..............................................................................BRIEF INSTRUCTIONS


                                                                                69


                                                                                23


                                                                                70


Manual focusing                           Selecting the exposure mode
(Focus indication*)                                 » Programmed AE
Point the focus area of the 6008 AF at the                                              Set aperture ring 69 and shutter-speed dial
subject detail on which you wish to focus                                     23 to “A“. The camera is biased for a
and turn ring 71 until only the central                                   minimum shutter speed of 1/125 s.
symbol of the focus display appears.
Keep turning focusing ring 71 until only      » Aperture priority AE
the central part of the focus indicator          Set shutter-speed dial 23 to “A“, release
appears. Arrows indicate the direction in       aperture ring 69 by pressing knob 70 and
which the focusing ring should be turned.      set desired working aperture.
If all three components of the focus indica-
tor are blinking, autofocusing is impos-      » Shutter-priority AE
sible. In this case, make the focus area         Set aperture ring 69 to “A“ and select
coincide with a more contrasty and better      desired shutter speed by turning dial 23.
textured subject located at the same dis-
tance.                             » Manual exposure control

                                                 Select aperture and shutter speed using
                                            the aperture ring and the shutter-speed
                                                          dial. Balance exposure on the large central
                                             index of the light balance.


*(6008..............................................................................AF only)                                                            17


                 Donated to www.orphancameras.com
View original page 17Page 18 · Read text
..............................................................................BRIEF INSTRUCTIONS


                        1023
                                                    57


                                                    34                                35

                       44                                                             48


     Selecting the metering pattern          Removing the film

      Dial 44 offers the following metering pat-      After the last exposure, the film is auto-
      terns:                                            matically wound up. Then open the maga-
                                                     zine back and remove the film insert. Take
    » Center-weighted                        out the exposed film and glue down its
       multi-zone metering                         leader. Replace the film insert. Press down
      for normal lighting conditions                 the magazine back until it clicks into place.
                                                                                   It is advisable to remove the magazine    » Spot metering
                                             from the camera when changing films.
      for diffi cult lighting conditions
                                             Note:
    » Multi-spot metering
                                                  Before opening the magazine back 35,
      for diffi cult or extreme lighting conditions.                                            be sure to push grip 49 all the way
    Up to fi ve separate spot readings are pos-                                                           in the direction of the arrow “magazine
       sible.                                              change/remove insert“. Failure to do so
                                       may damage the laminar drawslide!

     Exposure metering

     The metering system is active as soon
      as the camera is switched on. To lock
      the exposure, keep memo button 27
     depressed or engage it (pushing it back).


18  ..............................................................................


                   Donated to www.orphancameras.com
View original page 18Page 20 · Read text
..............................................................................HANDLING AND USING YOUR CAMERA


     Handling and using the camera           Note:

      This is a step-by-step explanation of all           In its basic configuration, the camera is
     important operations right from assem-        shipped in special packing designed to
      bling the camera modules up to the            provide optimum protection for all its
     removal of the exposed film. If necessary,      components. It is recommended that this
      additional hints are given for additional        packing be kept for later use. Make a
       clarification. For practical tips, see page 77.     point of noting down the serial numbers
                                                    of camera and lenses. These will help you     Should problems be encountered, see the
                                                    recover the equipment and prove your      table on pages 96 – 101.
                                               ownership should it ever be lost.


20  ..............................................................................


                   Donated to www.orphancameras.com
View original page 20Page 21 · Read text
..............................................................................ATTACHING THE LENS


                                                                                    7


                                                3

                                                                                42


                                                                                    8
        68       18  72   77


Attaching the lens                       Attaching the shoulder strap

Remove the front and rear caps. Press         Push the self-locking eyelets onto holders
button 72 and remove the protective body    3 and 42 until they click into place. To
cap by counterclockwise rotation. Fully         loosen the strap, lift the release grip and
insert lens 68 with its red index aligned       unhook the eyelets.
with the red dot of the camera bayonet                                       The strap holders of the camera allow
mount 18, and turn it clockwise until it                                            the strap to be turned freely so that the
clicks into position.                                       camera can easily be carried in various
                                                  positions.
Inserting the battery

Slide battery 8 with tab 77 down into the     Opening the folding hood
battery compartment and tighten the tab.                                                             Lift viewfinder hood 7 at rear and swing it
                                            up. To flip the magnifier holder 5 up, press
                                            the grip towards the edge of the hood.
                                       The magnifier holder swings up.

                                          Closing the folding hood

                                         Push magnifier holder 5 down. Press the
                                     two lateral hood flaps inwards and release
                                         them. The viewfinder hood will close auto-
                                                   matically.


..............................................................................  21


                 Donated to www.orphancameras.com
View original page 21Page 22 · Read text
..............................................................................CHARGING THE BATTERY


                          77                            a


        8


        d  e                                          b


     Charging the battery                         Place battery 8 with its contacts onto the
                                                     pins in the charger slot. Rapid charging      Plug the power-supply cable a into the AC
                                                                will start after about 2 s, and the red LED      terminal b of the charger and connect it
                                                  glows. Cutoff voltage and battery tem-      to the AC supply. The green LED indicates
                                                   perature are monitored during charging.      readiness. All normal AC voltages and fre-
                                              At the cutoff voltage, the unit switches     quencies are suitable:
                                                    to trickle charge. If the battery voltage
    » 100V – 240V AC, 50 Hz – 60 Hz.           exceeds the admissible maximum, the red
     The power-supply unit has protective insu-     LED will go out and rapid charging is inter-
      lation and conforms to the pertinent          rupted until the temperature is back to
    EU safety regulations. It comes with a          normal.
     1.25amp slow-blow fuse. Its outputs (bat-       Trickle charging is in progress when the
      tery pins, terminals) are protected against      green and red LEDs are blinking. This
      short circuits due to defective batteries       makes up for the spontaneous discharge
      or metallic objects. Battery temperature is      of the battery so that the latter may be left
     monitored and limited.                            in the charger over prolonged periods.

                                            Ambient temperature: approx. 5°C to     Note:
                                               35°C. The overall duration of the charging
     Be sure to prevent bare metallic objects         cycle depends on battery condition. After
     from entering the battery slot and use the     normal discharge, about one hour or less
      unit exclusively in a dry environment.                is sufficient.


22  ..............................................................................


                   Donated to www.orphancameras.com
View original page 22Page 23 · Read text
..............................................................................CHARGING FROM CAR BATTERY


                                            d


                                                e


Note:                                  Charging from car battery

If you wish to resume rapid charging after     Connect the car‘s lighter socket to the
trickle charge has started, briefly lift the        low-voltage terminal d of the charger.
battery off the contacts and replace it: The     Normal charging from a 12V car battery
one-hour timer starts, and rapid charging        will take about 14 hours. The two LEDs
is resumed.                                           will remain off.

If the battery is very hot – red LED off with
battery in place –, rapid charging can be                                         Additional power supply
started only after it has cooled down.
                                 An external device running on 12 VDC
                                           with a maximum of 500 mA can be con-
                                           nected to the 3.5 mm jack e of the
                                                charger. The green LED signals readiness.
                                       The maximum admissible length of the
                                           connecting cable is 2 m.


..............................................................................  23


                 Donated to www.orphancameras.com
View original page 23Page 24 · Read text
..............................................................................BATTERY STATUS


                                                                                      77


     Battery status                      When the display reads “CHArGE“, the
                                            camera will switch off. If possible, keep a     With the camera switched on, battery
                                                                 fully charged spare battery ready.      status is monitored automatically.
                                                                                   It is advisable to recharge the battery as     The following display appears:
                                             soon as the icon      starts blinking,
    » for full or suffi cient capacity        ,          above all at low temperatures. Use of the
    » for partial discharge        ,                    external battery connector – which allows
                                                  the battery to be carried close to your
    » blinking     for very low capacity          body – also is very helpful at low ambient
         (sufficient only for a few additional          temperatures.
         shots).


24  ..............................................................................


                   Donated to www.orphancameras.com
View original page 24Page 25 · Read text
..............................................................................CHANGING BATTERIES


                                                        77


Note:                                Changing batteries

To avoid premature discharging of the bat-     Push tab 77 up and remove discharged
tery, be sure to reset master switch 1 to         battery 8. Insert the recharged battery
“off“ after using the camera.                 with its tab pointing down into the battery
                                                          slot. Firmly press down the tab until itFor technical reasons, Nicad batteries will
                                           engages.slowly discharge even if they are not
used. To ensure instant readiness of your
                                        Note:camera, be sure to recharge the battery
every two to three months.                  Always switch your camera off before
                                          changing batteries to keep exposure set-
                                                  tings in memory.


..............................................................................  25


                 Donated to www.orphancameras.com
View original page 25Page 26 · Read text
..............................................................................CHANGING FUSES


                                                                                66 21  22


                     8     38        39                                 23


     Changing fuses                          Attaching the handgrip

     Remove battery and pull fuse 9 out of         To avoid unintentional shutter tripping
        its holder. The open slide 39 exposes the     when attaching the grip, set the master
      spare fuse 38. Press this down into the         switch to “off“. Turn shutter-speed dial
      holder so that it clicks into place. Close       23 to < > and hold it in this position.
       slide 39.                                            Insert holding pin 66 of grip 21 fully
                                                       into the opening in the shutter-speed dial.      Suitable fuses – 1.25amp/250V, slow-blow
                                                      Let go of the dial so that it resets from its     – are commercially available.
                                      < > position.
     To avoid damage to the camera, never use
                                            The grip is now fixed to the camera. To      fuses of higher rating!
                                            remove the grip, proceed in the reverse
     Should the spare fuse blow too, try to           order.
      locate the cause (e.g. fi lm-loading error,
      especially film running off the spool; fi lm
      torn at low temperature or come off paper
       leader.) If the trouble cannot be located,
      please contact Rollei Service.


26  ..............................................................................


                   Donated to www.orphancameras.com
View original page 26Related documents and language editions

From the M. Butkus archive. Original publisher and archive notices are retained.
Check the model and edition against your equipment.
PDF verified 2026-10-10.