Film cameras
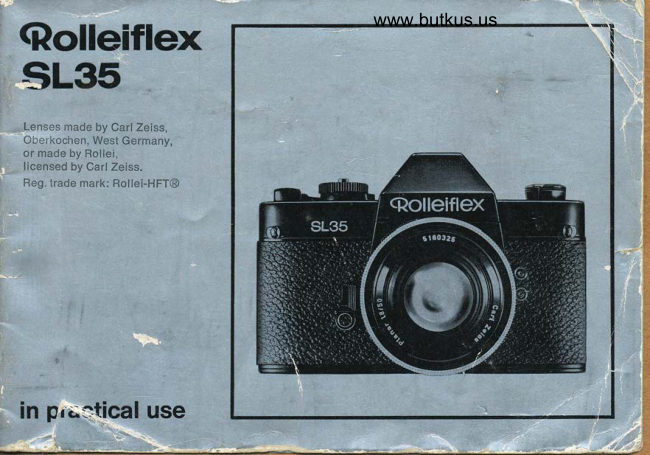
Rolleiflex SL35 User manual
User manual for Rolleiflex SL35. 50 pages in English. Read the original PDF, download or print a copy without registration.
50 pagesEnglish4.8 MB PDF
Loading your manual…Open PDF directly
Document details
- Brand
- Rollei
- Model / document
- Rolleiflex SL35
- Document type
- User manual
- Language
- English
- Pages
- 50
- File size
- 4.8 MB
- Category
- Film cameras
- Document date
- Not specified in catalog
Search available document text
Find a term, then jump to its page in the original PDF. Image-only pages may not be searchable; check the PDF for exact wording and diagrams.
Page 1 · Read text
Qolleiflex                  www.butkus.us
SL35

 Lenses made by Carl Zeiss,
 OLre.kochen, West Germany,
 or made by Rollei,
 licensed by Carl Zeiss.
 Reg. trade mark: Rollei-HFT@


in pr;stical use
View original page 1
Page 3 · Read text
Shooting in a nutshell
B        Film loading    Pull up knob A until back
                                                 seec                    opens. Load the film -                   page 8.
D                       Pull up ring B, turn and en-
                      gage ASA or Dll\l speed. AIter-
                        nately release button C and
                     wind up lever D until counter
                E shows '1   '
        Shutter speed   Turn speed dial F and set, for
        selecting         instance, to r/rzs second.
        Subject        Sight subject in finder, and
        focusing      turn ring G  until image
                      appears sharp in spot H.
       Exposure       Turn aperture ring J to centre
         setting         needle K while pressing down
                        aperture knob L.
        Shooting!       Press shutter release M fully
                    down, then rewind lever for
                        next picture.
View original page 3Page 5 · Read text
Gamera controls and componentg                            F
 1  Serial number of camera                     23  Lens bayonet
 2 Camera bayonet                             24  Red dot on camera bayonet
 3  Serial number of lens                         25   Instant return mirror             h 4  Eyelet for carrying strap                     26  Camera body
 5 Camera back                                27  Shutter speed dial
 6 Rewind knob                                  28  Shutter speed index
 7 Exposure counter                              29  Changeover switch for automatic (A)
 8 Rapid winding lever for                         or manual (M) aperture setting
     film transport and shutter tensioning         30  Coupling pin for aperture automation
 9  Film speed setting rim                             31  Cable release socket
10  ASA/DlN index                              32  Self-timer tensioning lever
11  Stop-down key for exposure measurement      33  Self-timer start button
12  Release button                                 34  Rewind crank
13  Lens                                           35  Rewind release
14  Focusing ring with                             36  Cover of battery compartment
    distance scale in feet and metres             37  Tripod bush
15  Aperture ring                                38  Blanking screw for accessory shoe
16  Finder eyepiece                                39  Locating pin for accessory shoe
17  Aperture and distance index                 40  X-synchronising outlet for electronic flash
18   Infra-ied index                                   41   FP-synchronising outlet for flash bulbs
19  Depth of field indicator                       42  3-point camera support
20  Mounting groove for finder accessories        43  Coupling link for aperture automation
21  Locking button of bayonet mount             44  Screw thread
22  Red dot on lens bayonet                            for filter and lens hood
4
View original page 5Page 8 · Read text
www.butkus.us
The ever-ready case
to remove the camera: Snap open the rear
press button, fold open the front 45 of the case.
Release the lugs 46 at both sides.
lhread the carrying strap as shown, with the
seam inside, through the loops of the non-slip
pad 47 and then through the eyelets 4. Secure
the ends at the required length.
Inserting the camera: Proceed in the reverse
order, leading the lugs 46 behind the eyelets 4
and close. The front 45 is fully removable;
release with the sliding button. The ever-ready
case is designed to permit rapid film changing
and therefore has no triPod bush.
The lens cap
for the intercnangeable lenses and the blanking
cap for the camera body (the latter available
as an accessory) protect the equipment against
dust and damPness.
 Insertion and removal of the blanking cap in
the camera body: See page 14 -  Changing
'lenses.
 Inserting a batterY
 Proceed as described on page 28 - Changing
.the battery.
View original page 8
Page 10 · Read text
Checking the correct film advance: The rewind        www.butkus.us
knob 6 should rotate during tensioning (with
2O-exposure or 12-exposure cartridges or short
bulk lengths it may only start turning after
several exposures).
Setting the film speed
Move the winding tever 8 into its starting posi-
tion as shown (this facilitates handling for in-
stance when wearing gioves). Pull up the rim 9
and turn until the speed figure of the film
loaded in the camera engages opposite the
index mark 10 (the dots indicate intermediate
speed values).
The setting range covers trom 12 to 6400 ASA
(12 to 39 DIN) as shown in the table below:
ASA DIN ASA DIN ASA DIN ASA DIN
12      12   64     19   320   26  1600   33
16      13   80     20   400   27  2000   34
20      14  100     21   500    28  2500   35
25      15  125     22   640    29  3200   36
32      16  160     23   800    30  4000   37
40      17  200     24  1000    31  5000    38
50      18  250     25  1250   32  6400    39
View original page 10
Page 11 · Read text
The correct camera hold
            follows almost automatically from the handy
          shape and functional layout of the controls:
           For horizontal shots
             hold the camera in the right hand with the index
              finger on the stop-down key 11 and the release
             button 12. The left hand holds the lens 13 ancj
            operates the focusing mount 14 as well as thet
            aperture ring 15.
           Press the eye closely against the finder eye-
.;ii:      "        piece 16, supporting the camera against the
             forehead.
    K 31-14      For upright shots
            hold the camera in the same way, but turnecl
           through 90o.
           This hold permits rapid switching from hori-
             zontal to upright shots, although other camera
            holds can also be used if preferred.
View original page 11Page 12 · Read text
www.butkus.usFocusing
Sight the subject so that the main object
appears within the microprism spot 50 or the
screen ring 51 or the focusing screen 52. Turn
the focusing mount 14 until the image appears
fully sharp without any blur or "shimmering"
effect.
Depending on the subject conditions, use the
above screen areas as follows:
The microprism spot yields abrupt definition
change from unsharp to sharp. Use for quick
focusing e. g. sports, action and feature photo-
graphy.
The screen ring surrounding the microprism
spot is evenly bright and finely matted. Use
for central focusing in place of the microprism
spot, e. g. at small apertures and/or with close-
up, macro and photomicro subjects.
The focusing screen has an extremely fine
Fresnel lens structure for even illumination
from the centre to the edges. Use for general
focusing of main subject points outside the
centre, also at small apertures -  e. g. in close-ups, macrophotography and photomicrography
and for copying where the sharpness needs
checking right to the edges of the field.
View original page 12
Page 13 · Read text
With infra-red film
                                                   (of maximum sensitivity at a wavelength of
                                            800 nm) first focus as described above. Then
                                                    read the distance opposite the index'17, mount
                                                  the infra-red filter and reset the distance read
                                                     against the infra-red index 18.
                                              Depth of field
                                                  Direct assessment: Fully depress the stop-
                                       down key 11, thus closing the aperture to the
                                                  preset value. The expected depth of field in
                                                  the image can then be judged directly on the
                                                 focusing screen 52 (suitable only for bright
          www.butkus.us                         lighting and with not too small apertures).
                                        From the depth of fleld indicator: Here the
                                                 aperture marks corresponding to the preset
                                                     lens aperture on the scale 19, to each side of
                                               the index mark 17, point to the depht of field
                                             zone on the focusing ring 14 (circle of confu-
                                                     sion z : 50 microns or 0.002 inch; further stop-
                                                    ping down is necessary for utmost sharpness).
                                               Example: 50 mm Planar f/1.8, stopped down
                                                    to f/16 and focused to 10 feet: depth of field
                                              from approx. 51lz feet to oo.
                                            From tables: A depth of field table is available
                                                       separately, with exact values for all lenses.
12
View original page 13Page 14 · Read text
www.butkus.usFraming the subject
The prism finder shows a bright, laterally cor-
rect and parallax-free image with optimum con-                       54
formity to the view recorded on the film.
lf the required subject field or the aspiredperspective view cannot be covered with the       O
lens attached by changing the shooting direc-
tion or viewpoint, use interchangeable lenses
(see page 14 - Changing lenses).
Finder accessories
The mounting groove 20 on the finder eyepiece
16 takes an eyepiece cup 53 to screen off ex-
ternal glare.
Spectacle wearers may use a correcting lens 54
made up by any optician (outside diameter of
the lens 26 mm). lnsert the lens directly in the
inside mount of the cup 53 by pushing in until
it engages. Remove by pushing out in the op-
posite direction.
The groove 20 will also take a right angle finder
which is used for low-level shots (worm's eye
views), for shooting round the corner and when
using the camera on a microscope  etc.
View original page 14
Page 16 · Read text
www.butkus.usNever touch the instant return mirror 25. When
no lens is mounted in the camera body 26
close it with the blanking cap 56, available as
an accessory (fit and remove this like an inter-
changeable lens).
Protect the front and rear lens of interchange-
able lenses, when not on the camera, with the
caps 57 and 58.

Interchangeable lenses
with distance scales in feet and metres, quick-
change bayonet mount, depth of field indicator,
infra-red index, automatic spring-loaded aper-
ture control, filter thread, and click stop aper-
tures with half stop intervals:
Carl Zeiss
                                ultra-wide angle 25 mm Distagon t/2.8 -
 35 mm Distagon 't/2.8 -  normal wide-                              angle
                              standard 50 mm Planar    t/1.8 -                        medium long 85 mm Sonnar   t/2.8 -                            focus
                              telephoto135 mm Tele-Tessar f/4  -200 mm Tele-Tessar f/4   '- telephoto

further details see page 47.    9@o
View original page 16Page 17 · Read text
The lens case 59 protects the lens against dust
                                            and moisture. Remove the internal lid 60 when
                                                     the lens is inserted with the front and rear caps
                                                        in position.
                                          The same lens case takes the 35, 50 or 85 mm
                                                         lenses.

                                             Lens cases with extra lenses can also be fitted
                                         on the camera carrying strap. A second strap
                                   may carry further lens cases 59 with inter-
                                               changeable lenses or accessories.


16
View original page 17Page 18 · Read text
www.butkus.usThe exposure meter
The full-field exposure measurement method
at the working aperture has been designed by
practical photographers for practical photo-
graphy. ln the large majority of cases this well
planned system directly yields the optimum
reading. lt works reliably even in difficult spe-
cial cases if a few simple rules are followed.         @The exposure meter is a precision instrument
of high sensitivity with a specially extended mea-
suring range (1 second atf /1.8 tol/rooo second
at f/16 with 100 ASA or 21 DIN film).  lt assesses
the average brightness of the subject field
covered and uses two cadmium sulphide
cells to measure the light coming through the
lens. This "TTL measurement" automatically
allows for all brightness variations due to fil-
ters, extension tubes, extension bellows, effec-
tive lens aperture changes etc. Moreover, the
Rollei measuring system accordingly weights
the important image centre more than the edge
of the field. The illustration shows the shape
and position of the central area whose bright-
ness contributes about 90 per cent of the rea-
ding.
View original page 18
Page 19 · Read text
Measuring the exposure
                                   With preselected shutter speed
                                     Turn the shutter speed dial 27 in either direc-
                                          tion until the required shutter speed engages
                                        opposite the index 28. This can be done with
                                        the shutter tensioned or not tensioned.
                                 The figures on the shutter speed dial indicate
                                          fractions of a second. No intermediate values
                                 can be used.
                                   The B setting (for time exposures of any length)
                                   cannot be preselected for exposure measure-
                                        ment.
                                        Set the changeover switch 29 to "A" (automatic
                                    spring-loaded aperture). Sight the subject
                                       through the finder eyepiece 16 and depress the
                                     stop-down key 1'l: this switches on the meter
                                        system. Turn the aperture ring 15 to centre the
                                   meter needle 61. The aperture ring engages
                                             at half stop intervals down to the smallest stop
www.butkus.us                     but one; however, intermediate settings can
                                    also be used.
                             When the meter needle is centred in the cut-
                                             out, the correct aperture is set for the prese-
                                        lected shutter speed. Then release the stop-
                              down key: this switches off the meter system
                                  and the meter needle returns into its rest posi-
                                         tion pointing obliquely upwards.
View original page 19Page 20 · Read text
www.butkus.us lf the meter needle does not react or cannot
be centred, preselect a different exposure
time: lf the needle stops too high up, use a
shorter time;  if the needle is too low down, use
a longer time, as given in the table on page 50.
Applications: Exposures requiring fast shutter
speeds to arrest rapid movement (action and
sports shots, street scenes, children, animals
etc.) or to avoid camera shake (when shooting
from a car, train, ship or aircraft, when moun-
taineering etc.).
lmportant: The large measuring range permits
shots under virtually all light conditions. The
usable setting range and appropriate time for
preselection are shown in the table on page 50.
View original page 20
Page 21 · Read text
With preselected aperture
                                                 Set the changeover switch 29 to "A". Turn the
                                                 aperture ring 15 to the selected value. Sight
                                               the subject and fully depress the stop-down
                                               key 11. Centre the meter needle 61 by turning
                                                     the shutter speed dial27. Always let the shutter
                                             speed dial engage fully; no intermediate values
                                             can be used.  lf this procedure brings the B set-
                                                      ting into play, see pages 27 and 50.
                                     When the meter needle is centred in the cut-
                                                    out, the correct shutter speed is set for the
                                                 preselected aperture. Then release the stop-
                                         down key.
                                                                                   lf the meter needle cannot be centred, prese-
                                                               lect a different aperture:
                                                                        lf the meter needle stops above the central
                                                        position, use a smaller aperture; if it stops
                                                   below, preselect a larger aperture.
                                                     Applications: Subjects requiring a specified
                                                 depth of field as determined from the indicator
                                                  19 or the depth of field table (architecture, indu-
                                                                 strial shots, macrophotography etc. mostly re-
                                                      quiring maximum depth of field; fashion, por-
                                                                     trait and advertising shots often requiring mini-
                               mum depth of field for differential focusing)-
20
View original page 21Page 22 · Read text
www.butkus.uslmportant:  lf turning the shutter speed dial 27
fails to centre the meter needle, a subsequent
"fine adjustment" with the aperture ring 15 will
do the rest.

Without automatic spring-loaded aperture
Move the changeover switch 29 to "M" (manual
setting). Fully depress the stop-down key 11.
Centre the meter needle 61 by turning the aper-
ture ring 15 and/or the shutter speed dial 27.
When the needle is centred in the cut-out, the
aperture and exposure time are correctly set.
Applications: Subjects requiring direct depth
of field control without pressing the stop-down
key; also shots with

the lens in its retro position (see page 32) or
with lenses of other makes in the intermediate
adapter (see page 3B).
View original page 22
Page 24 · Read text
www.butkus.usAfter the exposure
Smoothly and fully (!) pull out the rapid winding
lever 8 and let it swing back into its starting
position.
This advances the film by one frame, retensions
the shutter and gets the camera ready for the
next shot. With rapid picture sequences the
camera may remain against the eye in shooting
position.
The rapid winding lever can be worked in a
single stroke or in several (usually two) strokes;
on letting  it go it returns to its starting position.
When not in use, fold it back against the
camera body.
The exposure counter 7 shows the number of
eposures made on the film. The twentieth and
thirty-sixth exposure (for 2O-exposure and 36-
exposure cartridges) are marked in red; the
second and all subsequent odd numbers are
marked by dots. After the thirty-eighth ex-
posure (also marked in red) the exposure
counter stops counting. Further exposures may
however still be made  if the film is long enough.
The exposure counter 7 springs back to zero
on pulling up the rewind knob 6.
View original page 24
Page 25 · Read text
Unloading the film
                                                      After the last exposure: swing out the rewind
                                                  crank 34, briefly press in the rewind release 35
                                         and turn the crank 34 in the direction of the
                                              arrow until the resistance of the film tension
                                                suddenly slacks off (during the next film trans-
                                                  port movement the rewind release 35 springs
                                                    out again).
                                               Fold in the crank 34 and pull up the rewind
                                                knob 6. The camera back 5 springs open;swing
                                                                                  it fully open. Fully pull up the rewind knob 6
                                            and remove the film cartridge.
                                              Unload the film at least in the shadow of your
                                     own body; avoid brilliant sun and dusty con-
                                                             ditions.
                                            Exposed films (especially colour films) should
                                     be processed as soon as possible, as they
                                                  only keep for a limited time.


24
View original page 25Page 26 · Read text
www.butkus.usPractical hints
Selecting the best shutter sPeed                  /
lmage sharpness depends, among other things,                                      .&on the use of a sufficiently fast shutter speed.                   r/ro(x)sec
Therefore
With hand-held exposures: Use fast speeds to
avoid camera shake. The longest usable time
is r/ro second; t/oo and r/rzs second are safer
and more reliable. With long focus lenses and                        da not very steady camera hold use l/,rzs or,better still, r/zso second.             -LT^*o-l/soosec
With moving subjects: Use short exposure
times to avoid movement blur. As a general
guide: Starting and landing aircraft at close
range, motor races                                     r,/rooo secofld. Winter         il5@sec 'Jtsports, tennis     1/rooo to r"/soo second. Horse #               -races, cross country                    runners     llsoo second.                              -   1/zsoRunning children and cyclists                               -      to 1/rzssecond. Walking figures, standing people -tlns lo r/eo S€Cood.                                                    1t2so-1n25seq                    4"        &In general: Movement at close range and
across the viewing direction needs faster
shutter speeds, movement from greater distan-
ces and approaching or receding from the
camera can be taken with longer exposure
times.                                       r125_1'60sec                   ft           fui
View original page 26
Page 27 · Read text
The snapshot setting for quick or unprepared       Correct exposure measurement
shots which do not permit direct focusing                                             The exposure meter measures the mean bright-through the finder:                                            ness of the subject field covered. lt directlyFind a suitable setting of distance and aperturq                                                         yields the correct exposure settings forfor an adequate sharp zone from the deptti
of field indicator 19 or depth of field table,      Normal subiects: Lighting from the front or
and set these values on the camera. This re-       obliquely from the side, without brilliant high-
quires good subject lighting or a high-speed        lights or heavy shadows. Balanced light and
film to allow sufficiently short exposure times      dark areas.
to arrest subject movement.                                                    Special subjects: Appreciable brightness con-
                                                        trast between the main subject and its sur-
                                               roundings -  shots against the light, figures                                                     in brilliant sun against snow or ice, Mediter-
                                            ranean seaside subjects etc., main subject
                                                      constituting only a small part of the field of
                                              view (e. g. figures not filling the frame against
                                                       large sky areas).
                                    A reading from the camera position would here
                                                     yield a wrong exposure setting. This can be
                                            compensated by a
                                                Close-up reading: Approach the subject with
                                                    the camera until the main subject fills the finder
                                                view. Set the exposure, then return to the
                                                            original viewpoint for the shot itself.
                                                                        lf close-up readings are not possible, use a
View original page 27Related documents and language editions
From the M. Butkus archive. Original publisher and archive notices are retained.
Check the model and edition against your equipment.
PDF verified 2026-10-10.