Film cameras
Rolleimat F User manual
User manual for Rolleimat F. 16 pages in English. Read the original PDF, download or print a copy without registration.
16 pagesEnglish0.8 MB PDF

Loading your manual…Open PDF directly
Document details
- Brand
- Rollei
- Model / document
- Rolleimat F
- Document type
- User manual
- Language
- English
- Pages
- 16
- File size
- 0.8 MB
- Category
- Film cameras
- Document date
- Not specified in catalog
Search available document text
Find a term, then jump to its page in the original PDF. Image-only pages may not be searchable; check the PDF for exact wording and diagrams.
Page 2 · Read text
www.orphancameras.com(Rolleimat        F
                                  in der Praxis
                               in practicaluse
                     dans la pratique
                           nell'usopratico
                       en la practica
                                 in de praktijk
View original page 2Page 3 · Read text
www.orphancameras.com
 Inhalt                       Seite   Indlce                  Pagina
 EinzelteileundFunktionen       2  P a r et if u n z i o n. i. . .            34
 Schnellkursusftlr den erstenFilm  3  corsoratrd;beiri prtmaberricora36
VordererstenAufnahme         4   Primadi scattarela primafoto     38
VorjederAufnahme            5   Primadi ciascunaesposizione   39
Achtung-Aufnahme!           6   Scattodellafoto              40
Tipsf Lirdie Kamerapraxis        7   ConsigliperI'usopratico       41
 Datenund Zahlen              1 1  Datitecnici                 45
 Bltte beim Lesen dieerste und letzte   Durante la lettura, tenete aperti   i
 Umschlagseite herausklappen.      due risvolti di copedina.


Contenta                 Page  lndlce                  P6gina
 Individualpartsandfunction     .  . 1 2  Piezasy funci6nes          .  .  .  . 4 6
Crashcourseforthefirstfilm     .  . 1 3  Cursordpidoparalaprimerapelicula48
Beforetakingthe firstpicture    .  . 1 4 Antesde tomarla primerafotogratia49
Beforeeachexposure              .   1 5  Antesdecadatoma      .  .  .  .  . 51
Takethe picturel                      .   1 6  Tomadelafotografia              .  . 52
Tipsfor usingyourcamera       .  . 1 7  Indicacionesparala pr6ctica     53
Factsandfigures                      .  . 2 1  Caracteristicas                       .  . 57
When reading, please open the first   Slrvase abrir la primera y la 0ltima
and the last cover leal.              pagrna.


Contenu                Page  Inhoud                   Bladzilde
El6mentsetfonctions.  .  .  .  .  . 22  Onderdelenen funkties       58
Coursrapidepour le premierfilm  24  Spoedcursusvoor de eerstefilm  59
Avantlapremidrephoto.  .  .  .  . 26  Voorde eersteopname        60
Avantchaquephoto              .  . 27  Vooriedereopname         61
Prisedevue               .  .  .  .  .  . 28   Letop - Opname!           62
Conseilsd'emploidel'appareil. 29  Wenkenvoorde praktijk       63
C a r a c t 6 r i s t i q u e s      . . . . 3 3     Technischegegevens        67
D6plier la premidre et la derniCre   Bij het lezen de eerste en de laatste
page de couverture, s'il vous plait.    zljden van het omslag uitvouwen.
View original page 3
Page 5 · Read text
www.orphancameras.com
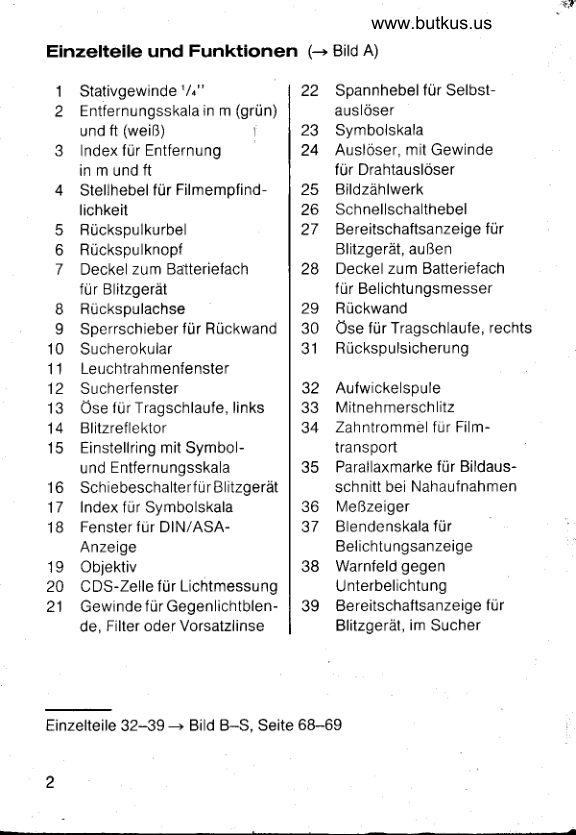
Indlvldual  pafts  and  function   (-+ Fig.A)

  1  Trioodsocketl/"          22  Self-timerlever
 2  Focusingscalein m (green)  23 Zonescale
    andft (white)            24  Shutterrelease,withthread
 3  Focusingindexin m andft          for cablerelease
 4  Adjustmentleverfor       25 Framecounter
     filmspeed             26 Rapidwind lever
 5  Rewindcrank           27 Readysignalfor flashunit,
 6  Rewindknob                   external
 7  Coverfor flashunit        28 Coverfor lightmeter
     batterychamber                 batterychamber
 8  Rewindspindle         29 Cameraback
 9  Lockingcatchfor         30  Eyeletfor wriststrap,
    cameraback                   right-hand
10  Viewfindereyepiece      31 Rewindlock
 1'l  Brightframewindow
12 Viewfinderwindow        32 Take-upspool
1 3 Eyeletfor wriststrap,      33 Take-upslot
    left-hand              34 Sprocketfor filmadvance
1 4 Flashreflector          35  Parallaxmarkfor framing
1 5 Focusingringwithzoneand      subjectin close-ups
    distancescale          36 Meterindicatorneedle
1 6 Slideswitchfor flashunit    37 Aperturescalefor exposure
1 7 Indexfor zonescale            reading
1 8 Windowfor DlN/ASAreadino 38  Underexposurewarningarea
1 9 Lens                   39 Readysignalfor flashunit,
20 CdS cellfor lightmetering         in viewfinder
2 1 Threadfor lenshood,filteror
    close-uplens


Parts32-39 --+figs. B-S, Page68-69

1 2
View original page 5Page 6 · Read text
.
            www.orphancameras.com
Crash  course   for  the  flrst  film

 lnsert the batteries
        For lightmeter:Usinga coin,turn cover28 anti-clockwiseto
       removeand insertbatterysuppliedwith camerawith * pole
       upwards--+fig. B. Screwcovertight.
        For flashunit:Slidecover7 in directionof arrowand lift up,
         Insertbatteriessuppliedwith camerainto batterychamber
        accordingto pole diagram+  fig. C. Closecoverand press
       down.
Insert the film
         Slidecatch9 in directionof arrowand open cameraback29.
         Insertfilm cartridgeand push film leaderinto take-upslot
       33 +  fig. D. Closecamerabackuntilit clicksintoplace.Cock
       andreleasealternately--+fig.N, untilframecounter25reaches
         .1.-+fig.E.
Set the film speed
      Removeprotectivelens cap. Turn adjustmentlever 4 until
       DIN/ASAspeedappearsin window18 -+ fig. F.
Focus the camera
        Usingeitherzonescale23 --+fig.G or focusingscale2, zone
         set is visiblein viewfinder.When shootingwith flash see
        focusingtableon page19.
Line up the subject
       Keepsubjectwithinbrightframe,meterneedle36 (forshots
        withoutflash)outsidered warningarea38 --+fig. H.
lf needleis in red warningarea,
       as in fig. K, availablelightis too weak:slideswitch16to /   .  -
        Flashunitspringsintoshootingposition+  fig. p. Redsignals
       27 and39 indicatethatflashis readyfor shooting--+fig. e.
Take the picture!
        Hold camerasteadyand withouttilting+  fig. L and M. press
        shutterrelease24.Windfilmon -+ fig.N. Turnoffflashunitby
       pushingit down.
View original page 6Page 7 · Read text
www.orphancameras.com

       Before  taking  the  first  picture

        Insert the batterles
      as describedon page 17 (if the photographicdealerhas not already
      doneso).

      Remove the protective lens caP
      and keepin a safeplace;whenthe camerais not in use,the cap must
      alwaysbe replacedto conservethe light meterbatteryand protectthe
       lensand measuringcellfromdust.

        Insert the film
      The cameratakes35 mm films(Type135)in cartridgesfor 12,20,24or
      36 exposures.The film mustbe insertedat leastin the shadowof your
      body,not in directsunlight.
      Releasecameraback with slide catch9 and lift up. Pushout rewind
      knob 6 and insertfilm cartridge.Turn rewindknobwith crank5 untilit
      engageswithfilmcartridgeandthen pushin fully.
      Turntake-upspool32 untiloneof thetake-upslots33 is facingupwards.
      Pushfilmleaderintothisslot--->fig. D. Alternatelypressshutterrelease
      24 andadvancefilmwithrapidwind lever26 +  fig. N, untilperforations
      on bothsides(!) of filmare runningon sprocket34. Closecameraback
         until it clicks.Again alternatelypress shutterreleaseand wind until
      framecounter25 reaches.1.-+ fig. E.

       Set the film speed
      Usingadjustmentlever4, adjustcamerato film speeduntilDIN/ASA
      valueclicksin window18 - DIN speedin red, ASA speedin white
        --+fig. F. For25 DIN/250ASA the settingshouldbe 24 DIN/200ASA.

       Attach the wrist strap
            It ensuresthatthecamerais alwaysreadytohandandhangscomfortably                                                             '1             f romyourwrist.Thestrapcanbe attachedto eyelet 3 or 30 as required.


  ,   1   4   I
rl
View original page 7Page 8 · Read text
r*G
           www.orphancameras.com
Before  each  exposure

Frame your subject
Holdcameraas in figs.L or M and slipcarryingstrapoveryourwristto
steadythe camera.Hold your eye close to viewfindereyepiece10,
takingcarenot to coverviewfinderwindows1 1 and 12 andmeasuring
cell20.

Framesubjectso that it liescompletelywithinbrightframeof viewfinder
+  fig. H. Areasurroundingbrightframemakesit easierto followfast-
movingobjects.
At close rangefrom 1 to 3 m (3.3to 10 ft): framesubjectonly up to
parallaxmark35 -+ fig. K.

Exposure reading
Sufficientlybrightexposurelightis indicatedby meterindicatorneedle
36 on scale37 --+'fig.H: needlebetween2.8 and22. lf exposurelightis
insufficient,indicatorneedleremainsin red warningarea38 +  fig. K:
use built-inflashunit-+ Tip@.

Focusing
Usingzonescale23 --->fig. G, on ,,Portrait- Groupof 2- Groupof 3 -
Landscape":set chosensymbolon index17 tor externalsetting- for                                                    '15internalsettingthroughviewfinderturnthissymbolwithring  closeto
red warningarea.

Usingfocusingscale:measureor estimatedistancebetweencamera
and subjectand set thisvaluewithscale2 to index3 +  fig.A.

Clearlyaudibleclickswithsymbolsfor groupsof 2 and3 personsas well
as for 1.5and 3 m (5 and 10 ft) ensurerapidand exactsetting.
View original page 8Page 9 · Read text
www.orphancameras.com

      Take  the  picture!

      Holdcamerasteiadywithouttilting.Pressshutterrelease24 fullydown
       -+ figs.L and M.

      With self-timer
      Screwcameraontotripodusingsocket1 or use a firm base.Movelever
      22 downto stop to tension+  fig. O. Pressshutterreleaseas above,
      delaytimeapprox.10 sec.

      With cable release
     Use a tripodor a firm basehere,too; screwcablereleaseintoshutter
      release24.

       After  each  exposure
       Pullrapidwindlever26 throughto stopandallowto springback.Frame
      counter25 indicatesnumberof exposurestaken.

       After  the  last exposure
      Foldout rewindcrank5 and engagewith squareend of rewindcrank
      spindle8+  fig.R. Pressrewindlock31 brieflyandturncrankin direction
       of arrowuntilno moretensioncan be felt (rewindlock31 springsout
                    advance).          on              nextfilm lli    again      Release           camera                  back                         withslidecatch9 and liftup +  fig. S. Pullrewind
      crank5 to stop and removefilm cartridge.Filmshouldbe removedat
       leastin shadowof yourbody,avoidingbrightsunlightandentryof dust.

     Exposedfilms(speciallycolourfilms)shouldbe developedas soonas
       possible,sincetheycanonlybe storedfor a limitedtime.
 illlli


 I    1 6

!1,r
View original page 9Page 10 · Read text
www.orphancameras.com
Tlps  for uslng  your  camera

@ Batteries
Forthe lightmeter:
One 1.35 V mercurybatteryis requiredsuch as MalloryPX 675,
Eveready675, NationalH-C or a batteryof similarqualitymade by
anothermanufacturer.
Removecover28 with a coin+  fig. B. Cleannew batterywith a clothto
removeany oxide coating.lnsertbattery(withpositivepole to positive
symbolon cover);holdbatteryonlyon the rim,do nottouchbackor f ront.
Replacecoverandscrewdowntight.

Batterycheck:turncameratowardsa brightlightsource- meterneedle
36 must be clearlyseen to swing upwards+  fig. H. Batterylife is
1-2 years,althoughit is advisableto changeit everyyear.Replacingthe
lens cap when the camerais not in use saves batterypower,as the
lightmeterthen ceasesto function.

Forthe flashunit:
Two 1.5 V alkali-manganesebatteriestype AA are requiredsuch as
Varta4006,MalloryMN 1500,NationalAM 3 or othersof similarquality.
Slidecover7 in directionof arrowand open+  fig. C. Insertbatteries
accordingto polediagramin batterychamber.Closecoverand press

tight in oppositedirectionto arrow.
Batterycheck: Slide switch 16 from o to  /   . After a few secondsred
signal27 lightsup to show sufficientbatterypower.lf batteriesdo not
havesufficientpowerthereis a delaybeforeredsignallightsup or it fails
to light-+ alsoTip @. Dischargedbatteriesmustalwaysbe replacedas
a pair,neversingly.


                                                     1 7
View original page 10Page 11 · Read text
www.orphancameras.com
    @ For carrying the camera
       a wrist strapand carryingcase are provided.After the strap has been
       attached-+ page14,the end of the strapis drawnoutwardsthroughthe
 I      openingof the case.Whenthe caseis pushedback,the camerais ready
I   @forFiltersuse.
 I     changethe imagereproductionby emphasisingthe colourof the filter       and subduingthe complementarycolour.Furtherdetailsare given in
        the informationsheetsuppliedwitheveryfilter.

      The filtershouldbe screwednot too tightlyintothread21. Measuring
         cell 20 receivesonly filteredlightso that exposureadjustmentsare
       unnecessary.

    @ Lens hood
             It is alwaysadvisableto use a lenshood:ililll
       Lens I9 and measuringcell20 are protectednot only from directlight
       sourcesandflarebut alsofromfingermarks,rainor snow;the brilliance
       andsharpnessof the picturesare improved.

       Screwlens hood intothread21 -it is availablefrom specialistdealers
            ( M 4 6x 1 ) .

    @ Close-ups
         at a distanceof less than 1 m (3.3 ft) requirea close-uplens screwed
         into thread21. These are availablefrom specialistdealers(thread
      M46 x 1; usedaccordingto manufacturer'sinstructions).
 lilll

 lritl
l1ll1l18 ill111
klllil[
View original page 11Page 12 · Read text
-e           www.orphancameras.com
@ Flash exposurcs
Slideswitch16 from oto /  :flash unit is extendedand switcheson
automatically--+fig. P. Redsignals27 and39 showwhenflashis ready
for use. When batteriesare new and the flash is in continuoLlsuse,
signalslightup afterapprox.7 sec,althoughthiscantakea few seconds
longeron initialuse of flashor at low temperatures.lf batteriesare low,
red signalsonlylightup afterabout30 sec or not at all.
For uprightphotographs,flash reflector14 must be held upwardsto
avoidundesirableshadows--+fig. M.

Thebuilt-inautomaticflashcontrolensurescorrectexposuredepending
on filmspeedin followingdistanceranges:

DIN         15-17  18-19  20-21   22-25    26-28
ASA         2540    50-64   80-1 00   125-250  320-500
Distancem    1-3     1 4     14.8     1-6.6    1.5-10.6
Distanceft    3.3-10 3.3-13.13.3-15.7 3.3-21.7 5-34.8

Focusthe camerawith ring 15 withinthese rangesonly.4.8 m for
20/21 DIN (15.7ft for 80/100ASA)film is markedby a greenspot;for
6.6 m and 10.6m (21.7ttand34.8ft)theringis setaccordinglybetween
o ano@.
After the photographhas been taken,push the flash unit back into the
camera(switch16 changesin o positionautomatically)to conservethe
batteries.Around 250 flashescan be obtainedwith 2 new alkali-
manganesebatteries.

Fill-inflashin daylight
For against{he-lightshotsand/orwhen the foregroundis too dark,a
fill-inflashlightensshadowsand improvesthe illuminationof the fore-
grouno.
Focusingfortheseshotse.g.with21 DlN (100 ASA)film: withilluminated
background1 to approx.3 m (3.3to approx.10 ft), at twilightor with
cloudysky 3 to approx.5 m (10to approx.16 ft) see o mdrkon m scale.

                                                     1 9
View original page 12Page 13 · Read text
#i            www.orphancameras.com
    @ Malntenanoe and care
       Clean the camera and accessoriesat shorter or longer intervals
      dependingon frequencyof use: cleanexternalpartswith a soft cloth,
       glasspartswith lens cleaningpaper.Dust must be removedfrom all
        internalpartswitha softbrush.
        Batteriesshouldbe removedifthe camerais notusedfor longerperiods.

        Protectcamerafrom sand,water,brightsunlightand shocks;when the
      camerais not in use it shouldbe keptin the carryingcasewiththe lens
      caoon.

      The internationalRolleiserviceorganisationwith manycontractualand
         affiliatedphotographicrepairworkshopsandthe Rolleidealersthrough-
       out the worldcan offerthe correctservicefor your Rolleiand helpyou
        withallquestionsrelatingto photography.


1fl1lt,

lilll


          *         withnew alkali-manganesebatteries

       Technicalmodificationsand inclusionof accessoriesreserved.

      20
View original page 13Page 14 · Read text
www.orphancameras.com
 Facts  and  flgures

 Type:24 x 36 mm viewfindercamerawithautomaticCdSprogrammed
 exposuresystemand built-inelectronicflashunit.

 Features: Rapidfilm loadingsystem,forwardcountingframecounter
 with automaticzeroing,rapidfilm advancewith lockto preventdouble
 exposuresandoverwinding;brightframeviewfinder0.48x withparallax
 mark, aperturescale,underexposurewarningarea and flash ready
 signal;centralbehind-the-lensshutter,cablereleasethread,self-timer. 1/0"    lripodsocket,carryingeyelets.
Exposure automation: Electronicexposurecontrolfrom 1/ssosec/f 22   '/oosec/fto            2.8; adjustablefilm speeds j5-28 DIN/25-500ASA;
cds cellnearlens,effectiveevenwhenfilteris used;measuringrange
EV 9-1 7 (64-16300 cdlm,)at 100 ASA/21DtN; powersuppty.by one
 1.35V mercurybattery.

Lens: 38 mm Rolleinon1:2.8 with helicalmount,4 components/
3 elements;focusingby click-inzone symbolsor m/ft scalefrom I m/
3.3 ft, selectedzonesymbolvisiblein viewfinder;filterthreadM 46 x  i .

Electronic flash unit: Guide number 12 (39) and operatingrange
1-4.8m (3.3-15.7tt)a121DIN(100ASA),recyctingtimeapprox.7 sec*,
doublereadyindicator,numberof flashesapprox.2so*: "Flashmatic"
system,in shootingpositionautomaticallyswitchedon and connected
to exposureprogramme;spring-loadedextendablereflector;power
supplyby two 1.5 V alkali-manganesebatteries.
Dimensions:approx.135x 54_5x 77 mm(S.31x 2.15x 3.03in)
Weight:approx.380g (13.40oz)withoutbatteries.
Accessories:Protectivelenscap,carryingcase,wriststrap.


                                               21
View original page 14Related documents and language editions
From the M. Butkus archive. Original publisher and archive notices are retained.
Check the model and edition against your equipment.
PDF verified 2026-10-10.