Film cameras
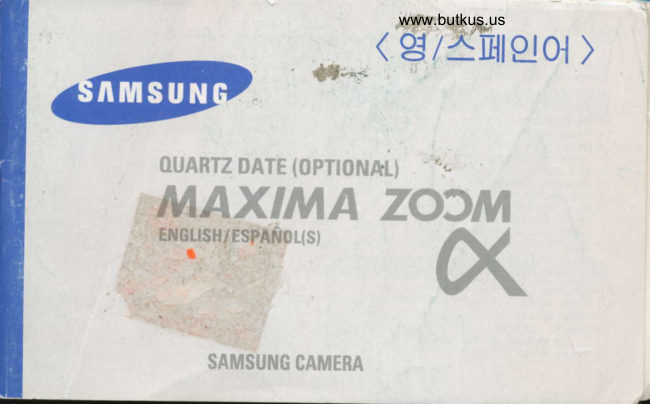
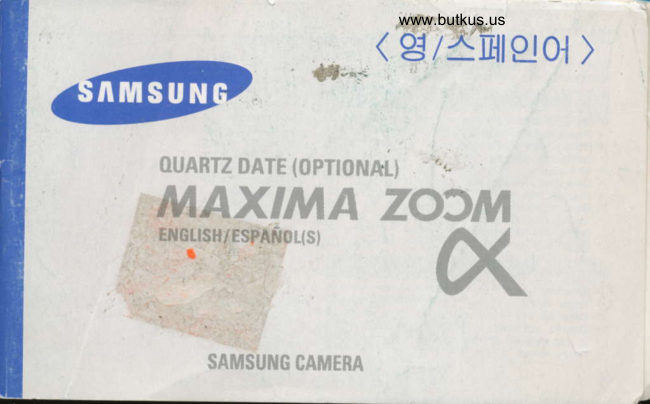
Samsung Maxima Zoom User manual
User manual for Samsung Maxima Zoom. 40 pages in English. Read the original PDF, download or print a copy without registration.
40 pagesEnglish4.9 MB PDF
Loading your manual…Open PDF directly
Document details
- Brand
- Samsung
- Model / document
- Samsung Maxima Zoom
- Document type
- User manual
- Language
- English
- Pages
- 40
- File size
- 4.9 MB
- Category
- Film cameras
- Document date
- Not specified in catalog
Search available document text
Find a term, then jump to its page in the original PDF. Image-only pages may not be searchable; check the PDF for exact wording and diagrams.
Page 1 · Read text
www.butkus.us


OUARTZ DATE (OPTIONAi} ',
MAXIMA ZO)MEXcusH/tsPAN0(st
       li


     SAMSUNG CAMEBA
View original page 1Page 3 · Read text
www.butkus.usNAME OF PARTS


LCD panel                                                         Autofocus windows
                                                                       Film rewind buttonFinder window
                                                                             Function mode
Zoom button (Tele)                                                           selection button
Zoom button (Wide                                             Snap shooting
                                                                                 button
Power button (ON/OFF)
                                                                       Flash mode
Shutter button                                                                 selection button

              Mike Butkus   DigitallyDN:email=mike@butkus.org,Date:cn=Mike2024.12.04signedButkus,by15:34:28Mikeo, ou=Butkus.org,Butkusc=US-05'00'
                                                                                  Self-timer lamo
Strap holder                                                                 Exposure sensor
                                                         Landscaoe mode button
 . Prior to returnrng camera to lhe place ol purchase please check ltthium
   baltery by Insertrng a neu, lresh batlery (S).
 * Always have a lresh baltery avarlable Donl mrss your best shot.
View original page 3Page 7 · Read text
Venmo @mike-butkus-camera  Ph. 2083
PayPal Name  Lynn@butkus.org      www.PayPal.me/lynnbutkus
View original page 7
Page 8 · Read text
USING THE CAMERA                 www.butkus.us
                                                . Press the ON/OFF button to turn power on. The lens
                                cap opens and LCD indications appear.
                                                . The lens cap closes and power switches off automa-
                                                 tically after 3 minutes if you do not use camera.
                                                . While looking through the viewfinder, aim the ca-
                                mera at the subject and operate the zoom buttons.
                                                . Press the 'T'(Tele) button to move the lens out (1)
                                 and press the 'W'(Wide) button to move the lens
                                           in (2).
                                                . When the lens move in and out, the LCD panel
                                shows the following  : 35, 40, 45,50, 60, 7Omm.
                                                                   ,t< The shutter release locks during zooming.            O
            @  .ql.-5       i
View original page 8Page 9 · Read text
FILM LOADING


  Open the back cover by sliding the release knob as shown above.
  Insert a roll of film in the film chamber.
  Hold the film roll with one hand and pull out the end of the film with the other hand.
  Pull the end of the film to the film tip position as shown above.
    lf you have pulled the film too far, rewind the film a little. The film should be flat.
  Close the back cover until you hear the "CLICK" sound, the film will automatically
  advance until the film counter reads  " 1"
 When the film counter reads 1. the film winding stops automatically.
View original page 9Page 10 · Read text
www.butkus.us


ruffi"l-ffi
 . The camera automatically sets the film speed for ISO
  5O-320O DX film.
. When you use non-DX film, the camera will automatica-
   lly set its film speed at ISO 100.
. Do not load the film in the direct sunlight.
x The camera detects if a film is mis-loaded and the 'F'
  mark will flash in the LCD whilst locking the shutter.
  Open the camera back cover and repeat the film loa-
  ding operation.
                                                 8
View original page 10Page 11 · Read text
USING THE VIEW FINDER
                                         . Press the shutter button half way to check the
                                    ,      indicaiton lamp.
                             Auto Focus lamp (Green LED)                                         . The Green LED tums on when the subject is bet                  3                            ween 1M (3.3ft)-oo.                                         . The Green LED blinks rapidly when the subject is too                  2    ilose. The shutter locks automatically.                                         . The Green LED blinks slowly when the subject is be-
                                tween O.55M (1.8f1)-1M  (3.3ft).
1. Picture Area Frame             Flash-Ready tamp (Red LED)2.Macro area frame                  . The Red LED turns on when the flash is fully char-
3.            Frame  Auto-Focus                                         . Theged. Red LED blinks slowly when using a tripod is re-  .   The auto-focus                         is set for the
    picture area inside this frame.     commended to avoid camera shake.
                      NOTE
                                         . The Red LED turns off when the flash is not
                                   charged yet.
                                   (The shutter locks automatically.)
View original page 11Page 13 · Read text
TAKING PICTURES
. Aim theffiautofocus frame at the subject.
. Press the shutter button halfway. The lens will focus on the subject and the green LED
  turns on.
. Press the shutter button all the way to take a picture.
. The camera will focus on any subject between 0.55M (1.Bft)-m.
    lf the subject is between O.55M(1.8ft)-1M(3.3ft),the green LED blinks slowly and the camera
  will sei on macro automaticallv.


11
View original page 13Page 14 · Read text
www.butkus.us

 ffit ,,\R-w^
H2#xww-Y=Y--

 . Flash automatically  fires to provide correct exposure in low light.
   (Refer to the "USING THE VIEWFINDER")
 *. Ftash range(tSO 1OO film)    . Wide:O.55M (t.Aft)-5.1M (tO.Stt)                                          . Tele :0.65M (2.1ft)-2.9M (9.6ft)
NOTE
 .  In order to avord camera shake, hold the camera steady and press the shutter button
    carefully, particularly when using the longer focal length (telephoto).


                                                                                  t2
View original page 14Page 15 · Read text
USING THE FOCUS LOCK
                                     .  lf you want to focus on a subject that is not in center of your      %^/\.--'---                                    picture, use the focus lock function described below.
                                       1. Aim the camera at the subject you want to focus on.   it't/f#\            2. Press the shutter button half way. (Tne green LED turns on
                             or blinks slowly)
                                     . Be careful not to press the shuter button all the way down
                               to avoid taking an unwanted picture.
                                  3. Keeping the shutter button depressed, recompose your pic-
                                 ture as desired.
                                     . Hold the camera steady and gently press the shutter button
                                      fully down.
                                     . The focus lock can be released by lifting your finger from the
                                 shutter button.
                                                                                                                  .;"       ,:j,i          ',J'..          ':.      'r,.i'...;.,1'
                                    have a bright light in the background (complete
                                     2. Fireworks, smoke, or similar floating subjects.
                                    3. Shining or glossy sur{aces such as a car body or water.
                                    4. SubjectS behind windows.

13
View original page 15Page 16 · Read text
www.butkus.us
REWINDING THE FILM
1) AUTOMATIC REWINDING
                    |ilf                    ilil        qtre
 . After taking all the pictures on a roll of film, it will automatically rewind. . The motor stops when the rewinding is completed.
  ' The "back cover open" and the "film canister" indication  will blink on the LCD panel.
NOTE .  ff the motor stops before the LCD shows "g", replace the battery.
       Do not open the back cover until the battery is replaced.
2) MID.ROLL REWINDING
                                   . To rewind the film in the middle of a roll, press the rewin-
      FLASHT')                 ding button using a ball point pen.
 @-MODEL)

                                                                           T4
View original page 16Page 18 · Read text
www.butkus.us
  FIASH MODE
    . You can select the flash mode by pressing the FLASH button.

           AUTO FLASH                       RED.EYERED.EYE REDUCTIONREDUCTION                     BACKLIGHT CONTROL
                                                                                              I                                                o nuro ofi                    fonurootf                                  lrrl   I ffinrrrf                                                                                                   I,tt        FLASH OFF               RED.EYE REDUCTION  FILL-IN FLASH                  FILL.IN FLASH +
                                                        orrr-r--rru                                               o nu-ttt            LT                                         ff                      (So f     ,  ooFF                             full     I                frllt
  NOTE
    . When pressing the FI-ASH MODE button or SHOOTING MODE button, the modes
     change in the sequence shown above.
    . After you take a picutre with a particular shooting mode, the camera will reset to
      the Normal photography mode automatically.
       (ln case of 2 sec. delayed shutter release, Fuzzy zoom, Portrait zoom and Continuous
      shooting, the camera will be set to the same mode.)

                                                                                 16
View original page 18Page 19 · Read text
selF-TtMER t)
                                     . You can take a picture of yourself by using the self-timer.
             Gl-O                  . After selecting the self-timer mode by pressing the    ftfficfl\Yt-.t-         MODE button, press the shutter button.
                                     . The self-timer lamp turns on for 7 seconds and blinks for
                          3 seconds before the shutter is released.

       E-!s


t7
View original page 19Page 20 · Read text
rSS DouBLE sELF-rtMER        www.butkus.us
    ffiflr;"FLASHr)  h'=(qn                 \_4J


                                    . The self-timer lamp turns on for 7 seconds and blinks for
                         3 seconds on the first shot.                                    . The second shot will be 3 seconds after the first shot.
                   NOTE
                                    . When using flash, the shooting interval may become
                                   longer due to the flash recharging.


                                                                         18
View original page 20Page 21 · Read text
DELAYED sHurrERS z sEcoND                                                                 . Use this mode when you want       rusxf)                                                      to avoid camera shake cau-        _------A)/      (SMPI                                                 sed by shutter release.         ------'s,/^          )o=O                 t-]        '\\?€ I     MoDEUF=T\                                      . In this mode, the picture is ta-
                       Eilg                                  ken 2 seconds after releasing
                                                            the shutter button.     csg
F'IZZY INTELLIGENT SHOOTING
        FLASH.)                     . To avoid camera shake'and under-exposured subjects
       (SNAPI-----Av)lo=O                    in your picutres, use FUZZY mode. The built-in intelli-       ---V^                       gent microcomputer enables you to get clear and pro-
       MoDEU;=----n                                   F                         ll   I              perly exposed pictures by controlling the focal length,
                                        flash and shutter in compliance with the surrounding  si-
             -         NOTEtuation.
                     t          . ln FUZZY mode, the subject size of your picture may        '-1r                              be changed as the lens will automatically adiust to pro-
                                     vide the optimum photographic conditions. Cg
View original page 21Page 22 · Read text
FONTNNN PORTRAIT ZOOM     www.butkus.us
     FLASHr)                       . Use Portrait zoom mode to maintain a constant size wi-
      -'--a\v                              thin the frame, even though the distance to the subject  qt/:=o    MODE(J1 y\                . IayPositionyary.your(Examplesubject :irtthreenterHead and shouldersof the viewfinderportrait) and             Etl                  press the shutter button half-away. The zoom will ope-
                                     . Pressrate automaticallythe shutter buttonto attainfullythetodesiredtake theshot.picture.


                                    (Normal mode)              (Portrait zoom)


                                                                     20
View original page 22Page 24 · Read text
coNnNuous sHoonNG   www.butkus.ustr                                . Use this mode to take a sequence of pictures of a moving
            o              . Assubject.long as )lou press the shutter button, the camera will con-      MODE
                               tinue to trake pictures. The camera focuses on the subject
                            frame by frame during.this operation, so the autofocus frame
                             should be kept on the subject.
      t-1,LI      I    NOTE
                                . When the flash fires, the interval between shots will be
                              increased by 4 seconds due to the flash recharging.


                                                                     22qEn@@ffi
View original page 24Page 25 · Read text
MULTr.ExposuRE sHoorrNcE       FLASHA                   . Use Multi-Exposure shooting mode to combine multiple ima-
      (SNAPI-----a"     -"-at=ic:--*1))o=O                . gesPressonthea singleshutterframe.button after selecting the multi-exposure
             \=_-rJ           shooting mode ( E ).Tne film will not advance and the Mut-
                                ti-Exposure mark ( E ) will blink to indicate that Multi-Expo-
                               sure shooting is in progress.      E,     TO COMBINE MORE THAN TWICE   :
                              Select the Multi-Exposure shooting mode again before the se-           ttg       B             cond exposure, and those succeeding  it. After the last exposure
                                 in the sequence, the film will abvance to the next frame.
                  NOTE
                                 . You are recommended to combine lust two exposures on a
                             frame as too many multiple shots may overexpose the pic-
                                 . ture.You can get better results when you use Multi-Exposure  with
                                 . Thedark datebackground.will be imprinted on the last exposure (Q.D model
                                  only)

23
View original page 25Page 27 · Read text
BULB BULB SHOOTING  : B SHUTTER
       FLASHr)                  . Use the BULB mode for time exposures of subjects such as      _----4.)/     (SMPI )o*O                 firework and night scenes. The shutter remains open for as
                              long as the shutter button is depressed and the lapse of time  Woql            E-JJ              is shown on the LCD panel.
                                . Bulb-sync(ButO  with flash) : When you take portrait pictures
                            with night scene background, you can combine any flash
                 ( auL-Bl   L       mode with the Bulb-shooting. This allows the main subject to
                        be illuminated. can
                                   NOTE
                                                                  . To avoid camera shake, use
                                                                  . aUsetripod.this mode only in low  li-
                                                                ght, otherwise the pictures
                                                                             will be overexposed.


                                 BULB mode,8SEC wilh ISO 100
View original page 27Page 28 · Read text
RED-EYE REDUcrloNwww.butkus.us: PRE'FLASHf  . nuro t(S                                                                               you                                . The red'eye phenomenon is most likely to occur when
                               take portriit pictures with flash in very low light.
                                . To reduce the red'eye in flash portraits, use the pre-flash'


                    (D . RED EYE
                             . AUTO
                                 FILL.IN   =r       O OFF CS

                             (NUTO FLASH)      (RED-EYE REDUCTION)
  NOTE
   The flash fires twice in sequence, so be careful not to shake the
   camera between flashes.
    { Red-eye phenomenon occurs because the retina behind the pupil of an eye reflects
      flash light. lt is sometimes useful to switch on all room lights in order to
      decrease 'red eye'.
                                                                      26
View original page 28Related documents and language editions
From the M. Butkus archive. Original publisher and archive notices are retained.
Check the model and edition against your equipment.
PDF verified 2026-10-10.