Flashes & lighting
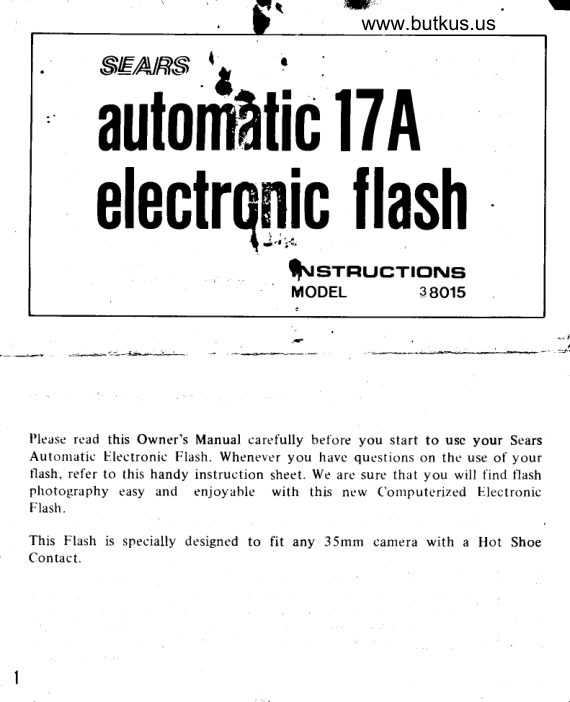
Sears Automatic 17A Electronic Flash User manual
User manual for Sears Automatic 17A Electronic Flash. 7 pages in English. Read the original PDF, download or print a copy without registration.
7 pagesEnglish1.2 MB PDF
Loading your manual…Open PDF directly
Document details
- Brand
- Sears
- Model / document
- Sears Automatic 17A Electronic Flash
- Document type
- User manual
- Language
- English
- Pages
- 7
- File size
- 1.2 MB
- Category
- Flashes & lighting
- Document date
- Not specified in catalog
Search available document text
Find a term, then jump to its page in the original PDF. Image-only pages may not be searchable; check the PDF for exact wording and diagrams.
Page 1 · Read text
www.butkus.us               5'
                 t,     |    S€IYRS                                           '
   aulomatic l7
   electrqq1fc flash
                  tvsrnucrroNs
                         MODEL        38015


Please rcad this Owner's Manual carefully before you start to use your Sears
Autonratic F.lectronic Flash. Whenever you havc qucstions on the use of your
t'lash, refer to this handy instruction sheet. We are sure that you will find f'lash
photography easy and enjoyable with this new (lontputerized  F.lectronic
Flash.
This Flash is specially designed to fit any 35mm camera with a Hot Shoe
Contact.
View original page 1Page 2 · Read text
Battery Compartment  Lid
                                                                                 Exposur€ Tsble
 Mike Butkus                  Digitally                                                             DN:email=mike@butkus.org,Date:cn=Mike2023.04.30signedButkus,by15:00:53Mikeo=ButkusButkusc=US-04'00'camera manuals, ou=butkus.org, \#


                             PC Cord
                                    Socket
                                    Mounting
                                     Foot                                  PC CordI


Specif ications:

Guide Number                        : 49 (lSO/ASA 100, feet)
                        98 (ISO/ASA 400, feetl
Power Source                          : 4 AA size alkaline batteries 1.5V, (NiCd  rechargpable
                                  batteries not recommendedl
Working aperture and range     : F/2.8-|SO/ASA 10O 4-17ft
for automatic operation       F5.6-tSO/ASA 400
Angle of Coverage                 : Horizontal 6O0 Vertical 45o
Flash Duration                       : Approx. l/100O
Color                                      : Same as daylight
Recycling Time                      : 5 sec. (with alkaline batteries)
Number of Flashes                  : About 130 flashes with alkaline batteries
Test Circuit                           : Open Flash, Test Button built-in
Dimensions                            : 1.8" x 2.4" x 4.1" (45 x 60 x 104mml
Weight                                     : 4.1 oz (115 g) w/o Batteries
View original page 2Page 3 · Read text
lnserting the Batteries                    www.butkus.us 1. Be sure Auto-Manual-Off Switch is in the Off position.
 2. Open the Battery Compartment Lid by pushing outward.
     Insert 4 AA size 1.5V alkaline batteries in the compartment
    according to the diagram inside. (NiCd rechargeable batteries
    not recommended)
 3. Close the Battery Compartment  Lid by pushing. back until
       it locks in place.
 Checking the Battery
 1. Slide the Auto-Manual-Off  Switch on the back of the flash    to the "M" position, so that you hear a soft, high-pitched @    sound.
 2. In about 4 seconds the Ready Lamp should glow, indicating
    the flash is ready to shoot. 3. Replace the batteries when the Ready Lamp does not glow m^l    in 20 seconds or when no sound is heard after the flash  is
    switched on.
4. Push the Test Button to make sure your flash unit works
    properly. lf the flash fires, then wait until the Ready Lamp
    glows again.      P]

                   lash to the Camera
 ',.         ,*  torn*    ,oo*   U*   flash into the camera's
    'nr"r,    hot ltroe clp. Make sure it ip inserted all the way.    rtrccessory
  lYour  flash,.ili. now fully connected with the camera through
    the contacts tn the shoe.
2. Set your camera shutter spetd control to the X synchro
   position. lf ,ryour camera doesn't l13re a special X synchro
   position it  is generally safe to use the.1/30 sec. snutrer
    speed.
   (Read your camera owner's manual for details on flash
    synch ron izat ion.  )
   (Hpt Stroe Contact: The term refers to the round metal
   platl which you can find in the center of your camera.s
   aicegory shoe clip.)
3.  lf ahe camera does not have a hot shoe contact, use the
   synchro cord which comes with your   f lash unit.

                                   :!
View original page 3Page 5 · Read text
Automatic Operation

Choosing the Right Exposure:
When used for automatic flash photography,  your flash automatically  controls  light output
and sets the correct exposures for the subject within the automatic  range. Once you set the
aperture (f-stop) on your camera, there is no need to change it again while taking pictures
within the available automatic range.

Shooting Automatical ly
Automatic Operation Range (4ft to 17ft)
 1. Set your camera to the proper speed setting for electronic
    ffash -  usually 1160,'1 1125 second or mark "X" (Refer to
    your camera owner's manual).
2. Determine the proper camera aperture setting for the ISO/
   ASA film speed you are using by referring to the specification
   page or Exposure Table on the back of the flash unit. Read
    across the first column "lSO" until you find your film speed.


   Then read down to the column in green under "17" feet.
   This number is the f-stop to set on your camera for using
    the flash at any distance up to 1 7 feet.
   (Example: set your camera aperture at F28 for ISO/ASA
   100 film at 17 feet.)
3. Once you set the F-stop on your camera there is no need
    to change  it when shooting within the automatic  range.
4. Sfide the Auto-Manual-Off Switch to "4"  for Automatic.
   Focus your camera. Take the picture after the Ready Lamp
    glows.

Manual Operation
You will find that the Automatic (A) setting is the most con-
venient setting for almost all of your flash photography. The
"MANUAL" (M) setting  is provided for more unusual situations
like outdoor flash use or shooting at a distance greater than the
automatrc range.                  t',
                        -:as,--:3t+--'     ::---.,**i,^..'.-
View original page 5Page 6 · Read text
www.butkus.us
      Set your camera to the correct shutter speed for electronic
                 f lash. (Ref er to your camera owner's manual).
      Focus your camera and read or estimate the distance from
       the flash to the subiect.
    3. Read the proper f-stop setting on the Exposure Table by
       referring to the distance and the ISO/ASA film speed. Set
        this f-stop on your camera lens.
     For example, when shooting at 12ft, with ISO/ASA 100
       film. the correct f-stop is F4 You can also calculate the
        f-stop by using the following handy formula:
       F-stop = Guide Number * Distance
   4. Slide the Auto-Manual-Off Switch to "M" for "MANUAL"'
     Aim vour camera at the subiect. Take the picture when the
      Ready Lamp glows.
   5. Turn flasn off after last picture.


8.


   Hints for Maintenance and Better Flash Photography:

   Remove Batteries
     It is recommended that if you are not going to use the flash for more than 24 hours, remove
    the batteries from the Battery Compartment. The failure of a flash unit to function properly
    usuallv results from a user leaving the flash switch "ON" while the batteries are left in the
    battery compartment. As a result, the battery drain may then corrode the terminals inside
    the battery compartment  or the flash unit itself.
   Save Battery Power.  lt  is a good idea to turn off the flash when you do not plan to take
    a picture for several minutes or more.
                                                      ffi*"rAt:=ml|   Reflections                          I|   When taking flash pictures, avoid shooting straight into highlv                                                                               I    ht-N{        |                                       glass                                                  water.'Reflec-                            mirrors,                                        or glittering                        like     reflective              surfaces                                                                                     |                                                           -;szl_l_                          pictures                                    poor exposure.                                  cause                                or                                                                             lf you               ruin your       may    tions                                                                                     |  /t                                                                                                             ll    ft   fu\          |   have to shoot a subject with such reflectors, shoot from a         ^Tr<qt            I
    differenr angle so that any reflections do not bounce back                                                                                         I   kN*                 |     directry inro the camera rens.
                                                                                    /\f_il                          |                                                                                         I
                                                                          '   -:   :r       iiii'                                                        '                                                                '        I   r:
View original page 6Page 7 · Read text
Outdoor pictures
   Your flash can be used to improve outdoor piJirr"., especially
   when your'subject  is under a shadow or tree, or when bright
    sunlight is behind the subject, causing hard shadows over the
     subiect's face. The use of  f lash eliminates squinting and shadows
   and helps bring out natural facial expressions on the subiect.
    Flash photography is also useful on cloudy days. Your flash
    should be set in the "M" position for manual operation out-
     doors.


     Flash Care
    Keep your flash unit away from dust and moisture to prolong
      its life.


10


                   FULL ONE YEAR WABRANTY

                lf, within one year from the date of purchase, this electronic flash fails to operate
          properly due to a defect in material or workmanship, RETURN lT T0 THE
       NEAREST SEARS ST0BE lN THE UNITED STATES and Sears will repair
           or replace  it free of charge.
          This warranty gives you specific legal rights, and you may also have other rights
          which vary from state to state.                                             1.                :l
       SEARS, R0EBUCK AND C0., Dept. 698/731A, Sears Tower, Chicago,
         tL 60684

     Sold by SEARS ROEBUCK AND CO. Chicaso, lL 60684            PK11A- 01-9A

                                                                        o5o18F
                                                                                            /
View original page 7Related documents and language editions
From the M. Butkus archive. Original publisher and archive notices are retained.
Check the model and edition against your equipment.
PDF verified 2026-10-10.