Sewing machines
Singer 27-4 (black and white scan) — User manual
User manual for Singer 27-4 (black and white scan). 11 pages in English. Read the original PDF, download or print a copy without registration.
11 pagesEnglish4.3 MB PDF
Loading your manual…Open PDF directly
Document details
- Brand
- Singer
- Model / document
- Singer 27-4 (black and white scan)
- Document type
- User manual
- Language
- English
- Pages
- 11
- File size
- 4.3 MB
- Category
- Sewing machines
- Document date
- Not specified in catalog
Search available document text
Find a term, then jump to its page in the original PDF. Image-only pages may not be searchable; check the PDF for exact wording and diagrams.
Page 2 · Read text
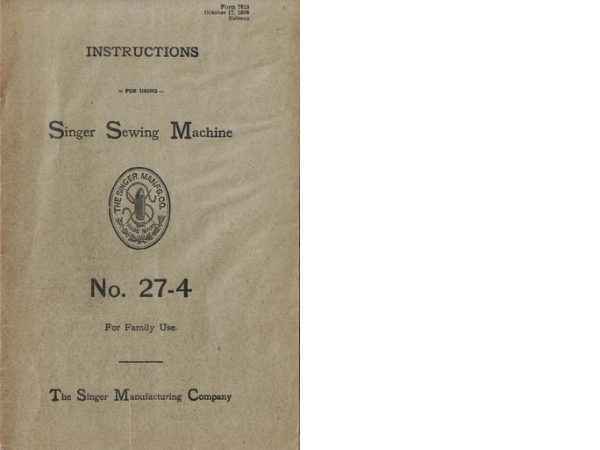
INSTRUCTIONS
         -m 050.0—
Singer Sewing Machine


  No. 27-4

                For Family Use


  The Singer Manufacturing Co.
View original page 2Page 4 · Read text
‘IP'


hytnxnhgthemaehlnehaekoultahlngea  ‘l‘hepattaatthed‘ht
hnnd,htsidethearm,eanheseeniftheplateonthehackofthe
arm istnlten 05.  For cleaning and thorough oiling. theface plate,
ontheendofthearmattheleft mnhetnkenol if the 'I'0§cfe'l
which fasten it axeretnm'ed; the smaller mverontheam in front of
theoperattl'can hetnrned around. as shown in Fig. 2. to rent-1:3
pnrucovuedbyit.   Only onedmpofoilisnmryin
placemnthan this amount will henfnohenefit.
    The stand slwuld he oiled at etch end of the treatlle when- the
pivot screws enter it. at both ends of the mind pitnun. and m the
endaofthehttndwhcelahaft.
                                           i.“ ‘

         TO OPERATE THE TRRADL}
    Relene the halaneewheel by turning the stop motion on the
outside of the balance wheel. overeat-art! you as {at an it will go;
the hnlttneewheel will then turn freely without moving the sewing
mechanism: place both feet squarely upon the trendle, and turn the                                                          TO WIND THE BOBBIN OF UNDER THREAD.
balancewheel by hand over toward you; this will mm the lmul

            the feet;'first on one, then on the othtn’ side of thewheel.pmtreadleof  and pitnmn  ; continue the motion that begun by the                                                     (Bee l‘lp. 4 and G.)                                                                                              Pull the upper part of the bobbin winder toward you until theneedle. tutti] the balance wheel can he kept in continuous rotation
by the feet alone: then turn the stop motion over from you af- tar                      pulley at the right touches the belt. turn the large sterew called the
nponsihlqraiae the preset: foot by the lifter on the back 05 the                      stop motion. which is outside the centre of the balance wheel, over
amend no the machine without trying to new until you can                    toward you as in: on  it will go; the balance wheel will then turn
withoutnydificnltyheepnparegnlarmotion.                                             loosely, without moving the stitching mechnniatn  ; place the spool of
                                                                             under thread upon the apcol pin on the arm. and lead the thread into
                                                                                     the eyelet (t, Fig. 8) on the face plate, then to the lower eyelet in
                                                                                   the bobbin winder threndgnide (t. Fig. 4) andinto the upper eyelet
                                                                 (2)inthenmepieee:dnwtheknoh (3) atthelefthnndtotheleft  m Tm OUT THE SHUTTLE AND BOBBIN.
                                                                           and placethehohhin hetweentheenp (4) atthe rightnndtheoentre   Moutthefmntalideinthehedplateztumthehhnee
                                                                                                                                                                                                                                                                                                                                                                                                                                                                                                                                      ‘wheelot'er towardyon until theahnttle in its mnieriensfaraa                     hole at the  left, at the tame time placing the end of the thrnd
pmn’hletowardyon.andprendownnponthepointottheahnttle;        ham the cup and the end of the bobbin; releue the knob (3)
thiawill raise thehaehendoftheahnttleaothatiteanheeadly                   and turn the balance wheel as in sewing and the bobbin will he
Wmandthehohhinrentoved.                                         wound regnlnrly and automatically; take the filled bobbin out of
                                                                                     the bobbin winder: push tlte bobbin winder heck and turn the stop
                                                                               motion over from you to clamp the balance wheel.
View original page 4Page 5 · Read text
‘1l!

                                                                                                                    “g. C.2‘
                    T0 THREAD THE SHUTTLE.

                 Take the shuttle haven-n 1h: thumb and fingm of the  left                   When the bobbin is in in plane, mu a slight premnre on the
                 hand. vn'lh its point (imam! yon. put (ht bobbin in the shank with                    end of it with the forefinger of the 1m hand. and dmw me (we end
                 the thread dmwing {mm  it over man! \he right. as shown in                        of the thread into the long slot in the athumc bath- in the directing )
                    Fig. 5'                                                                                         oi the point o€ the shame as {It a it will go. as shown in Fig. 6.
View original page 5Page 6 · Read text
--——-—o
                                    Fig.  7.
   Draw toward the heel: end again, until the thread lies under               4-7
the swing. exactly as shown in Fig. 7, and until the bobbin mm.                           nut
menta' to revolve. This completes the thmding of theshuttle.
                                                              70 THREAD THE NEEDLE.
                                                                                                                                 (Se. Flg. 8.)
                                                                                        Place the spool of upper thread upon the spool pin on the arm  ;            TO SET THE NEEDLE.     “fl
                                                                                          leod the thmd from the spool into the eyelet (t) in the upper edge
     Raise the needle hot to its highest point: hold the needle in                                                                                       of the face plate, down and around from tight to  left under the
the left hand. with the flat side of the shank toward the right, ptuh                                                                                         tension releoser and between the tension disc: (3). into the eye of
 it up into the needle clamp rm far as it  will go. and fasten by the                                                                                      the thread take-up spring (3), up And through the hole in the take-
thumb screw: no further adjustment“ the needle will be                 my.                  np lever (4). into the thread guide (5). in front of the (nee plate,
                                                                               node: the thread guide (6), near the lower end of the needle but,
                                                                        and 5mm left to right through the eye (7), of the needle.
View original page 6Page 7 · Read text
10
          TO PREPARE FOR SEWG.                            Thenndutenrlonqunhedhyanallmnearthepdnt
     Beforecornmencing tort-w, talte holdot' theendof theneedle                      cl theahnttieon hanpperside(aeel’lg.6);turnthis sue-over
 thread, leaving it slack from the hand to the needle. and turn t]:                       to the right to make the threaddnwo! hardenortotheleftto
 balance wheel toward you until the needle mom down and np                  malteitdnrr mzlfwthistmsiouhulmonceproperly
 again to ita highs point; the needle thread has then been carried                     deusted. itisnrely neeeaaaryto change ituaoorrcet stitchcan
 amndthennder thread. which can he dmwn npthronghthe hole                       usually be obtained by varying the tightnean of the upper thread;
                                                                                                              regulated by the thumb screw. spring and inthethmat platehy the tmxllethrmiand both should then In             mapper tension is
 hid hack under the preuer foot.                                                      on the am, directly  in front; turn the thumb ncrew over to
                                                                                      the right to nuke the upper thread tighter. or to the left to make it
                                                     bean,
           10 COMMEXCE T0 SEW.                                     TO TURN A CORNER.

                                                                                           the materhhraise the presser  foot. and turn the corner-matingnpnmwmmwinqtmgmequdomPlacement-aerial under the needle.let thepna-erfoot down                     of  Stop (It. machine while the needle is rising. but before it is out
to'ardyon.                                                                           the needle      pivot.                                                                                                                                .\                                               aaa“.
         T0 REGULATE THE TENSION.                             FOR‘SEWING FLANNRL on BIAS sat-mam
                                                                         Uaea short stitch and  light tt-nsioua so that there will be mf-
                                                                            fldent thread in the seam to allow the goods to stretch it necessary.
                         ”3.9.
                                                                 TO REMOVE THE WORK.
    For ordinary ditching. the upper and under threads should be                            w the thread take-up rest  at  its highest point: raise thelocked in the centre of the thickness of the material as shown in                                                                                            preaaer foot and draw the fiahrlc hack and to the left mo inches or
 Pir- 9                                                                             more, at theaatne time pressing with the thumb of the right hand
                                                                           on the tension relen'ng lever under the tension  discs: cut the
                                                                           threadrcloaetothegoodgluring the t-tulsumlcrtheprezeter foot.

                                   Fig. 10.                                      10 ALTER THE LENGTH OP STITCH.
   H the upper thread lulu-1d too tightly by its tension, or if the                     Upon the n'de of the arm near the bobbin winder is a large
under thread  is too loose. the thread  will  lie straight along the                    thrush-crew; turn it over to the‘ right to tunlte the stitch longer,
upper surface of the material ns ihmgn lung. to.                                 ortothe left to make it shorter.
                                                     TO CHANGE THE PMURE OF THE PRESSER P00?
                                                               ON THE MATERIAL
                                                                           Turn thelarge thnrnh screw  at the top of the arm. directly
                                                                                                                              foot. to the right to mnlte the Pfcflmrc heavier. or                                   Fla. ll.                                             overthe pus:                                                                                          to thelefitontakeitlighter; the more should he only haw)-
   Uthenndertenioniatootightorthenppertoohoaethe                   enonghtoprerent themterial rising with the needle and to ensure
thrudwiflliertnlghtllongthenndersldeofthenmhlas                       tint the feed ntot'ea the work along evenly: a heavier pressure
rhownianJt.      ‘                                                   mldnakethentachinernnharderandlxot whendit.
View original page 7Page 9 · Read text
To open the cabinet tum «wet the tea! which covers the
machine, release the platfonn, upon which the machine is fastened
by passing the button at the zight of the operator near the bottom
of the upper right door, first taking hold of the mnof the machine
with the left hand to steady  it  zui  it rises; when entirely up pmih
hack the npprr doom, which then become a firm support for the                                                                    To close the ubinet. bring the upper doors to the front, and
platform.  See page 15.                                                                                              close the lower once as shown on page 1+ A slight pressure upon
                                                                                     the machine will then force it down beneath the top of the abinet,
                                                                              andmfter the platform is luched, theleaf is folded over the aperture,
                                                                    mpIetely enclosing the machine
View original page 9Related documents and language editions

SingerPDF
Adjuster's for the Singer Model 20
Service manual
19 pages · EnglishRead →

SingerPDF
Singer 101-4 & 101-12
User manual
56 pages · EnglishRead →

SingerPDF
Singer 101-4 & 101-12 (black and white scan)
User manual
54 pages · EnglishRead →

SingerPDF
Singer 115
User manual
36 pages · EnglishRead →

SingerPDF
Singer 127 & 128
User manual
18 pages · EnglishRead →

SingerPDF
Singer 12K
User manual
12 pages · EnglishRead →

SingerPDF
Singer 15
User manual
36 pages · EnglishRead →

SingerPDF
Singer 15-125
User manual
38 pages · EnglishRead →

SingerPDF
Singer 15-22
User manual
13 pages · EnglishRead →

SingerPDF
Singer 15-30 / 15-87 & Generic 15 Class (rotated for printing)
User manual
14 pages · EnglishRead →

SingerPDF
Singer 15-30 / 15-87 & generic 15 class machines
User manual
14 pages · EnglishRead →

SingerPDF
Singer 15-86
User manual
24 pages · EnglishRead →
From the ISMACS International. Original publisher and archive notices are retained.
Check the model and edition against your equipment.
PDF verified 2026-10-11.