Sewing machines
Singer 27K & 28K — User manual
User manual for Singer 27K & 28K. 36 pages in English. Read the original PDF, download or print a copy without registration.
36 pagesEnglish4.5 MB PDF
Loading your manual…Open PDF directly
Document details
- Brand
- Singer
- Model / document
- Singer 27K & 28K
- Document type
- User manual
- Language
- English
- Pages
- 36
- File size
- 4.5 MB
- Category
- Sewing machines
- Document date
- Not specified in catalog
Search available document text
Find a term, then jump to its page in the original PDF. Image-only pages may not be searchable; check the PDF for exact wording and diagrams.
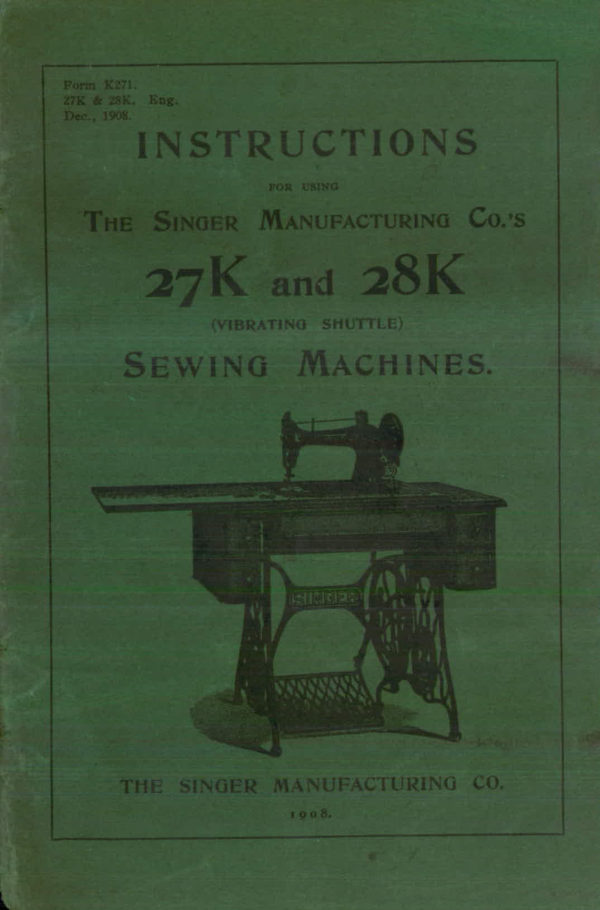
Page 1 · Read text
Form KR71
27K & 28K. Eag
 Dec., 1908.INSTRUCTIONS
                 FOR URING

 ThE Singer ManUfactUring Co.'s
  27K and 28K
             (VIBRATING SHUTTLE)
   SewIng MacHINES.


    THE SINGER MANUFACTURING CO,

                        1908.
View original page 1Page 2 · Read text
The Importance of Good Oil

                      FOR

       Sewing Machines.


     There is nothing connected with a Sewing Machine which

 better illustrates the proverb that " the best is the cheapest" than the

 small but important item of OiL.


        BAD OIL does not last as long as good oil, and is really

               dearer.


      BAD OIL, makes a machine run hard.


       BAD OIL leaves a sediment, and the oily portion is soon

               exhausted.


        BAD OIL clogs the oil holes, so that it does not reach the

                 bearings, and thus prevents the efficient working

               of the machine, besides causing rapid wear of

                  the parts.


   Knowing from many years' experience the great importance of
Good Oil, we put up an Extra Quality Machine Oil, in Bottles,

 SPECIALLY PREPARED FOR SEWING MACHINES.


 N.B, -See that the words " The Singer Manufacturing Company"

               are moulded in relief upon the Bollle.
View original page 2Page 3 · Read text
Form K271.
27K & 28K. Eng.
Dec., 1908,
     INSTRUCTIONS

                       FOR USING

 THE SIngER MANUFacTUrIng COMPANy's
     27K and 28K
   SEWING MACHINES

               (VIBRATING SHUTTLE).


      THE SINGER MANUFACTURING CO.
                        1908.
View original page 3Page 6 · Read text
Instructions for Using Singer's


                 Fig.


                                                                  StoprictionMotionScrew


OILING PLACES SHOWN BY ARROWS.


               Fig. 4.


 OILING PLACES SHOWN BY ARROWS.
View original page 6Page 7 · Read text
37 K and 28K (Vibrating Shuttle) Sewing Machines.

     INSTRUCTIONS

                         FOR USING
The Singer Manufacturing Compang's
    27 K AND 28 K
                (VIBRATING SHUTTLE)
  SEWING MACHINES.

           To Oil the Machine.

 ThE places where the machine should be oiled are indicated by the
 arrows in Figs. 3 and 4.
   To oil the bearing of the balance-wheel, first loosen the wheel
 by holding it with the left hand while with the right you turn the
 stop-motion friction screw (see Fig. 3) towards you. Then turn the
 balance-wheel to bring the small hole in the hub at the right of
 the wheel uppermost, and put a drop or two of oil in this hole. The
 wheel should then be worked slightly forward and backward to allow
 the oil to work into the bearing.
   Oil the thread take-up lever hinge-screw and roller through the
opening in the side of the head towards the operator. Raise the
 needle-bar to its highest point and oil the needle-bar cam and
 roller through the top hole in the side of the head away from the
 operator. The oiling places for the feed and shuttle mechanism
inside of the arm can be reached by removing the plate on the
 back of the machine.
    Moisten a small piece of muslin with oil and rub it over the
 face of the shuttle-race, and also put a few drops of oil in the
 shuttle-race oil hole under the front slide, at least once a day when
 in constant use. The bobbin-winder spindle bearing and worm must
 be oiled occasionally; also the cam-wheel which operates the thread
 guide. The point of the bobbin placed in the left centre of the
 winder should be slightly moistened with oil.
View original page 7Page 8 · Read text
6                   Instructions for Using Singer's

   To reach the parts to be oiled under the bed of the machine.
turn the machine back, as in Fig. 4, To effect this, the belt must
 first be thrown off the band-wheel, which is done (the machine being
 in motion) by turning the belt-shifter handle (shown in Fig. 2) to
 the left. After oiling (as indicated in Fig. 4) turn the machine up
 again, and operate the treadle as in sewing (with the wheel turning
 towards you), which will automatically replace the belt on the
 band wheel.
   The points requiring oil in the stand are the bearings at each
end of the band-wheel crank, treadle and treadle pitman.
 oiling, run the machine rapidly for a few moments (with the presser-
 foot up) to work the oil into the bearings. Then carefully wipe off
 the surplus oil. All places where one part of the machine rubs
 against another, producing friction, require oiling, and if, after oiling,
 the machine runs hard, it is certain that some place has been
 overlooked.
    If the machine runs hard after standing for some time, use a
  little paraffin or benzine, in the usual way, run rapidly, wipe clean,
and then oil with our extra quality machine oil. which should always
    be used. The machine should be oiled once a day if in constant
 use, and after standing for some time should be always cleaned and
 oiled before using.
    To make sure of good oil, always buy it at any of the Company's
 offices from their authorised agents. The genuine oil is put up in
 bottles, with " The Singer Manufacturing Company" moulded in
 relief upon the bottle, and each cork sealed with the Company's
 trade mark.

              The Stop Motion.
   The object of the stop motion is to enable the operator to
 wind a bobbin by running the balance-wheel without running the
machine, which not only saves labour, but permits the re-winding
 of a bobbin when a seam is partially sewn, without removing the
 goods from the machine or interfering with the upper or needle
 thread.
    To operate the stop motion, turn the stop motion friction-screw
 outside of the balance-wheel over towar's you to release the balance-
 wheel, and in the opposite direction to clamp it. (See Fig. 3.)

      To Operate the Treadle and Machine.

      First loosen the balance-wheel by turning the stop-motion friction
 screw (see Fig. 3) towards you, then place your feet upon the treadle
View original page 8Page 9 · Read text
27 K and 28 K (Vibrating Shuttle) Sewing Machines.

 with the instep directly over the centre; turn the balance-wheel
 towards you with the right hand, allowing the feet to move freely
 with the motion thus commenced, and continue this motion by an
 alternate pressure of the heel and toe, until a regular and easy
 motion is acquired.
   Do not attempt to learn anything else until you are proficient
 in the use of the treadle, so that you can start and stop the machine
 without turning the balance-wheel in the wrong direction.
    After becoming familiar with the treadle movement, connect
 the balance-wheel with the machine by turning the stop motion,
 friction screw from you. Raise the presser-foot by the presser-bar
  lifter, start the balance-wheel towards you, and continue the motion
with the feet, as above described. After becoming proficient in
 this motion, place a piece of cloth between the feed and presser-
 foot, let the foot down upon it, and operate the machine in this
 way until you have become accustomed to guiding the material.


 Caution 1. | Neveronrunthethefeedmachineand no withcloth thebetween.presser-foot resting

              (It is never necessary to open the back shuttle-slide. If,
 Caution 2. 3 however,before thisthrowingis done,the machineBE SUREback thatupon ititsis hinges.closed

           (Do not try to help the machine by pulling the fabric
 Caution 3.        lest you bend the needle; the machine feeds with-
                   out any assistance.


 Caution 4. | Never run the machine with both shuttle and needle
                    threaded, except while you are sewing.

                / Do not allow lint or dust to accumulate in the shuttle
                    or under the shuttle-tensin spring, as any foreign
                    substance inside the shuttle (particularly in the
  Caution 5.       inner end) will prevent the proper action of the
                  bobbin; and under the tension spring, will render
                    the shuttle tension inoperative.

            To Set the Needle.

    Hold the needle in the left hand with the flat side of the shank
 towards the arm of the machine; raise the needle-bar to its highest
  point, put the needle up in the clamp as far as it will go, and
  tighten the thumb-screw.
View original page 9Page 10 · Read text
Instructions for Using Singer's

                                  FiG. 5.


          To Thread the Needle.

                             (See Fig. 5.)
   Pass the thread from the spool through the eyelet (1) at the top
of the front of the face-plate, downward between the tension discs (2)
from right to left, through the eyelet (3) of the thread take-up spring,
up and through the eyelet hole (4) in the end of the take-up, from
the front: into the thread guard (5) on the front of the face-plate,
then under the thread guide (6) on the lower end of the needle-bar,
and from left to right through the eye (7) of the needle.
View original page 10Page 11 · Read text
27K and 28K (Vibrating Shuttle) Sewing Machines.
          To Wind the Bobbin.
    Loosen the balance-wheel by means of the stop-motion (see page 6),
 and press back the bobbin-winder until the balance-wheel bears upon
 the rubber on the pulley with sufficient pressure to drive the winder.
 Place the bobbin in the bobbin-winder, and the spool of thread on the
spool-pin of the machine.Draw the thread into the evelet in the face-
 plate as in sewing, thence into the eyelets in the thread-guide of the
 winder, first at the lower end, and then at the top, secure the free end
 of the thread by placing it between the head of the bobbin and the cup
 at the end of the bobbin-winder spindle, and operate the treadle the
 same as in sewing.
          To Remove the Shuttle.
   Open the front slide of the machine and turn the balance-wheel
 towards you till the shuttle and the carrier come full under the opening.
 Depress the point of the shuttle with the thumb and raise the other end
 with the forefinger. Avoid trying to lift the shuttle by the spring.
          To Thread the Shuttle.
                             (See Fies. 6, 7, and 8. )
    Take the shuttle between the thumb and fingers of the left hand,
 with its point towards you, put the bobbin in the shuttle with the thread
 drawing from it at the top side towards the right, as shown in Fig. 6.

                       FiG.
View original page 11Page 13 · Read text
27K and 28K (Vibrating Shuttle) Sewing Machines.

 To Replace the Shuttle and Prepare for Sewing.
    With the shuttle-carrier under the opening (see " To Remove the
Shuttle "), place the shuttle in the carrier with its point towards you
 With the left hand take hold of the needle thread (leaving it slack
 from the end to the needle, turn the balance-wheel towards you
 until the needle moves down and up again to its highest point, thus
 catching the shuttle thread; draw up gently the free end of the
needle thread and the shuttle thread will appear; then draw the
 shuttle thread up through the hole in the throat-plate, lay both
threads back across the feed points, close the slide, place the material
 beneath the needle, lower the presser-foot upon it, and commence to
 sew, turning the wheel towards you.
        Be sure that every part is clean before you commence to sew.
          To Regulate the Tensions.
    The tension of the needle thread is regulated by turning the screw
 at the side of the face plate nearest the operator, to the right to
increase, and to the left to diminish, the tension. The tension of
the shuttle thread is regulated by the small screw near the point
 of the shuttle on its top side. Using the small screw driver, turn to
 the right to increase, or to the left to diminish, the tension. (See
Caution 5, on page 7.) The tension of the needle thread should be
a very little stiffer than that of the shuttle thread; to ascertain this,
 pull the shuttle thread through the hole in the throat-plate, and
 the needle thread through the hole at the end of the thread take-up
 lever. The tensions should be regulated so as to lock the stitch in
 the centre of the goods.
     If there are loops or a straight thread on the under side of the
 material, thus-


  it shows that the upper or needle-tension is too loose, and should be
 increased, as explained above.
    If loops or a straight thread appear on the upper side of the
 goods, thus-


 it shows that the upper tension is too tight, and it should be
View original page 13Page 14 · Read text
12                  Instructions for Using Singer's

 diminished so that the lock will be in the centre of the material,
and the stitch alike on both sides, thus


    Care should also be taken to select thread suitable to the material
 to be sewn (see Table on page 32), for with too coarse a thread the
 lock of the stitch may not be hidden in the centre of the fabric.

           To Remove the Work.
    Raise the needle-bar to its highest point. Raise the presser-bar
 lifter with the forefinger of the right hand, and at the same time press
 slightly with the thumb upon the tension release (see Fig. 2).
 Continue the pressure while with the left hand the work is drawn
 backwards and to the left about two inches: then cut the threads
close to the goods, leaving the two inches of thread with which to
 re-commence sewing.
       To Alter the Length of Stitch.
   On the side of the arm, near the trade mark, is the feed regulating
thumb-screw (see Fig. 1).To lengthen the stitch, turn the screw
 over to the right, and in the opposite direction to shorten it,

     To Change the Pressure on Material.
   Turn the thumb-screw through which the presser-bar passes at
 the top of the head of the machine, to the right to increase, and to
 the left to decrease, the pressure. For ordinary family sewing, this
 pressure rarely needs to be changed

               General Remarks.
   The leather belt, which gives motion to the machine, should
 always be tight enough not to slip, but not so tight as to prevent
the easy motion of the machine.  If the belt is too long, uncouple
it and cut off squarely from one end, say half-an-inch.
   Be sure that the slide over the shuttle-race is kept closed. THIS
IS IMPORTANT.
    If the machine does not work well, it will be because some of the
View original page 14Page 15 · Read text
27 K and 28K (Vibrating Shuttle) Sewing Machines.      13

 foregoing instructions have not been followed; but users who cannot
 discover the cause should not alter the adjustments of the machine,
 but obtain the necessary assistance from the nearest office of the
Company.


       TOOLS AND ACCESSORIES.

  We send with each Machine a set of Attachments, also all
 necessary Tools and Accessories, and a Machine Instruction Book.


   NEEDLES, SILKS, THREADS, AND OIL.

   The Company kcep in Stock superior Needles of their own
 manufacture, the best quality of Silk Twist and Linen Thread,
 SUPERIOR GLaCe and soft finished Cottons manufactured ex-
 pressly for the Company, and highly refined extra quality

machine oil.


        Detailed Price List of Needles, Silk, Linen and Cotton Threads, sent Post Free.


              INSTRUCTION FREE TO ALL.
  PRICE LISTS GRATIS BY POST.

       PRINTED DIRECTIONS IN FOREIGN LANGUAGES


      Every Description of Sewing Machine Repaired or Exchanged.
View original page 15Page 16 · Read text
Instructions for Using Singer's


                               FiG. 9.


      27 K and 28K MACHINES.

              FITTED TO WORK BY HAND.

   The above illustration shows the 28 K Machine on wood base,
 fitted with hand-driving accessory. Thus fitted, these machines can
be worked by hand upon an ordinary domestic table It is also
supplied with a wood cover, which, with the base, forms a most
 convenient portable case. The hand motion is communicated by
 the handle acting upon the balance wheel by a radial arm and
spring catch.
View original page 16Page 17 · Read text
27 K and 28K (Vibrating Shuttle) Sewing Machines.


                                   FiG. 10.


    Singer's Stand Brace (with Belt thrown off).

     Fig. 10 shows our Stand Brace, with dress-guard and belt-shifter.
    The band-wheel and treadle have their bearings entirely indepen-
 dent of the stand (or legs), thereby assuring a correct adjustment
 and easy action. This distinctive feature of Singer's Stand is of
 great importance to the health and comfort of the operator. The
 band-wheel and treadle also work upon adjustable centres, by means
of which the friction is reduced to a minimum, while lost motion
 can be readily taken up. These devices render Singer's Stand the
 lightest running of any sewing machine stand ever constructed
View original page 17Page 18 · Read text
Instructions for Using Singer's


              Fig. 11.
                         Singer's Belt Shifter.

                            This invention simplifies and makes
                            easy the often irritating task of throwing
                                off and replacing the belt.
                        To throw off the belt, press the small
                              lever at the top of the dress-guard to the
                                   left with the forefinger, keeping up the
                          motion of the treadle meanwhile.
                       To put on the belt, allow the lever to
                           spring back in its place, and operate the
                            treadle as in sewing (with the wheel
                         turning towards you), when a single
                            revolution of the wheel will bring the
                                belt back in place.

                                                      Fig. 12.


      Singer's Pitman.
   Fig. 12 shows our adjustable Pit-
 man. The block which forms one
 half of the journal is adjusted to the
crank or pin by means of the screw,
shown at the top of the cut.
 When taking up lost motion, be
 careful not to make the journal so
 close as to prevent the free motion
of the band-wheel.
View original page 18Page 19 · Read text
27K and 28K (Vibrating Shuttle) Sewing Machines.


                                                                                       Interposing
                                                                 Spring I


                     List No. 026156.
        For 27K and 28K Machines.

    This is an illustration of the Ruffler (026156) in the condition
 required for use on the 27 K and 28 K Machines. Note particularly
that the spring plate is below the stop in the ruffling blade arm. In
 this position the spring plate is inoperative. it not being required
 with 27 K and 28 K Machines.
View original page 19Page 20 · Read text
18
       INSTRUCTIONS
                          FOR
USING THE ATTACHMENTS
         FOR THE 27 K AND 28 K MACHINES.

                                  Fig. 13.


            The Tuck- Marker.
    Attach the tuck-marker to the machine by the guide thumb-screw,
    as here shown, passing the needle through the eyelet upon the
 marker-lever. Adjust the gauge to the desired width for the tuck.
 and the marker-slide to the distance required from the needle to
the fold of the next tuck. Fix the thumb-screws firmly, then stitch
 the tuck folded, and the action of the marker will gauge and mark
 the next one ready for folding. If more space is wanted between
the tucks, move the marker from the needle; if less, move it towards
 the needle, being careful not to move the gauge
View original page 20Page 21 · Read text
27K and 28K (Vibrating Shuttle) Sewing Machines.


                              FIG. 14.


             The Braider.

   Raise the presser-foot to its highest point, loosen the screw that
holds the presser-foot in place, and slip off the foot downward. Put

on in its place the extra presser-foot (which is also the braider), and

before tightening the screw push the foot as far up on the foot-bar
as it will go. Pass the braid through the hole in the braider, in
front of the needle, as shown above, and carefully follow the pattern
to be braided
View original page 21Page 22 · Read text
20                   Instructions for Using Singer's


                                Fig. 15.


           Set of Wide Hemmers.

   These hemmers are of four different widths. Adjust the extra

presser-foot (as explained on page 19), and attach the hemmer to the

presser-foot by means of the thumb-screw at the back of the foot.

The edge of the scroll will then be in a line with the needle, and
the attachment ready for use. Pass the right hand edge of the
fabric into the hemmer, turning it over and drawing it backward

and forward until it fills the scroll; then lower the presser-foot and

commence to sew, being careful to guide the edge of the fabric so
as to keep the scroll full
View original page 22Page 23 · Read text
27K and 28K (Vibrating Shuttle) Sewing Machines.


                             FiG. 16.


              The Binder.
    Attach the binder in the same way as the wide nemmer (see page
 20) Then cut the end of the binding to a point and pass it into the
 scrolls as far as the needle. Then place the material to be bound in
the recess of the binder, lower the presser-foot and proceed to sew,
 guiding the material so as to keep its edge within the recess and
 close to the binding. If the sewing is too close to, or too far from,
 the edge of the binding, loosen the screw and adjust the binder
to the desired position. The binding should be of sufficient width
 to fill the scroll, and should be cut on the bias, if convenient.
   To bind a scalloped edge, fold the material at the point where
 two scallops meet, so that an almost straight edge is presented;
 then bind past the point and partly round the outer curve, and
repeat the operation for each successive scallop.

       The binder sent out with machines is of the size most generally required,

  but other sizes can be obtained from the Company if desired.
View original page 23Related documents and language editions

SingerPDF
Adjuster's for the Singer Model 20
Service manual
19 pages · EnglishRead →

SingerPDF
Singer 101-4 & 101-12
User manual
56 pages · EnglishRead →

SingerPDF
Singer 101-4 & 101-12 (black and white scan)
User manual
54 pages · EnglishRead →

SingerPDF
Singer 115
User manual
36 pages · EnglishRead →

SingerPDF
Singer 127 & 128
User manual
18 pages · EnglishRead →

SingerPDF
Singer 12K
User manual
12 pages · EnglishRead →

SingerPDF
Singer 15
User manual
36 pages · EnglishRead →

SingerPDF
Singer 15-125
User manual
38 pages · EnglishRead →

SingerPDF
Singer 15-22
User manual
13 pages · EnglishRead →

SingerPDF
Singer 15-30 / 15-87 & Generic 15 Class (rotated for printing)
User manual
14 pages · EnglishRead →

SingerPDF
Singer 15-30 / 15-87 & generic 15 class machines
User manual
14 pages · EnglishRead →

SingerPDF
Singer 15-86
User manual
24 pages · EnglishRead →
From the ISMACS International. Original publisher and archive notices are retained.
Check the model and edition against your equipment.
PDF verified 2026-10-11.