Sewing machines
Singer 28 (enlarged scan) — User manual
User manual for Singer 28 (enlarged scan). 36 pages in English. Read the original PDF, download or print a copy without registration.
36 pagesEnglish4.0 MB PDF
Loading your manual…Open PDF directly
Document details
- Brand
- Singer
- Model / document
- Singer 28 (enlarged scan)
- Document type
- User manual
- Language
- English
- Pages
- 36
- File size
- 4.0 MB
- Category
- Sewing machines
- Document date
- Not specified in catalog
Search available document text
Find a term, then jump to its page in the original PDF. Image-only pages may not be searchable; check the PDF for exact wording and diagrams.
Page 1 · Read text
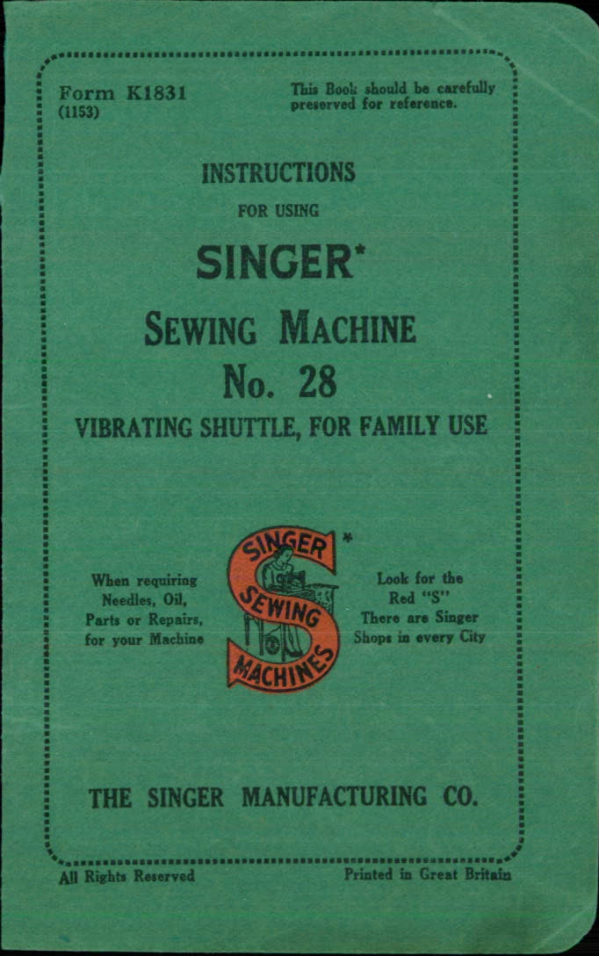
Form K1831              This Book should be carefully
                                  preserved for reference.
(1153)


           INSTRUCTIONS

                FOR USING

     SINGER*

    SEWING MACHINE
        No. 28

 VIBRATING SHUTTLE, FOR FAMILY USE


            *            SINGER
     When requiring                       Look for the
                                   Red "S"
      Needles, Oil,

    Parts or Repairs,                     There are Singer           SEWING
    for your Machine                    Shops in every City

             MACHINES


  THE SINGER MANUFACTURING CO.


All Rights Reserved                    Printed inGreat Britain
View original page 1Page 2 · Read text
WARNING

  It is essential that your machine
 should be kept well oiled, in accordance
 with the instructions given on pages 13
 and 14 of this book.


   Singer Oil, which is specially pre-
 pared for sewing machines, is supplied
in tins which have the well-known
 Singer Red "S" printed thereon.

   Singer Needles are stamped with the
 Trade Mark SIMANCO* and are sold in
 green packets which also bear the Singer
 Red Letter "S."

  Needles in Containers marked
       " For Singer Machines "
   are not Singer made needles.


  Should your machine require over-
 hauling or repair, apply only to a Singer
Shop or Singer Salesman, otherwise
you will risk its being irretrievably
damaged.


  Every description of sewing machinerepaired,
View original page 2Page 3 · Read text
Form K1831
 To all whom it may concern :
  The improper placing or renewal of the
trade-mark  " SINGER" or any other of
 the trade-marks of The Singer Manufacturing
Company (all of which are duly Registered
 Trade-marks) on any machine that has been
 repaired, rebuilt, reconditioned, or altered in
any way whatsoever outside a SINGER factory
 or an authorised SINGER agency is forbidden.

         SINGER SERVICE
  Now that you have purchased your new
 Singer Sewing Machine we do not want you to
 feel that your relations with us have come to
an end.
  The following instructions are worded so
 that they may be easily understood by every-
 one, and we would suggest that you study
them carefully in order that you may obtain
 the fullest use and pleasure from your sewing
machine.  If, however, you require further
 assistance we would ask you to call at the
 local Singer Shop where advice will always
 be willingly given in the use of any Singer
 Machine and its Attachments.
  We hope, too, that you will make the Singer
 Shop your headquarters for sewing supplies
 and service. Only there, or through Singer
 authorised representatives, can you secure
 genuine Singer oil, cotton, needles, etc. all
 of which are so important in obtaining the
 best results from your sewing machine.
        *A Trade Mark of
  THE SINGER MANUFACTURING CO.
View original page 3Page 4 · Read text
It's sew easy by electricity!


                                                Singerlight


convert your hand or treadle machine to
speedy, effortless, all-electric sewing
 One screw attaches the Singer Motor.
The convenient Foot Control starts and stops the
motor instantly and regulates the sewing speed.
The Singerlight, also fixed by one screw gives light
where it is most needed... on the sewing. See,
 try and buy at your local Singer Sewing Centre.


                               Foot ControlSINGER
motor and
Singerlight:
View original page 4Page 5 · Read text
The Hand Attachment


                                   K 3973
             Fig. 1.                          Fig. 2.


WHENthethehandcoverattachmentis removedwillfrombe foundthe machine,to be out
      of working position, as shown in Fig. 1.
To operate the machine, pull the small spring stud
 (2, Fig. 1) and turn the handle back until the lever
 (1, Fig. 1) enters the socket (3, Fig. 1); also see
that the hinged finger (4, Fig. 2) is turned back
between the spokes of the wheel. The machine
 will then be ready for working, as shown in Fig. 2.

  Before replacing the cover, the lever should be
disengaged, and the handle placed in the position
shown in Fig. I.
View original page 5Page 6 · Read text
Balance Wheel Stop Motion

  This device allows the balance wheel to run free,
                       so that bobbins
                  may be wound,
                           without operating
                               the mechanism. To
                          loosen the wheel,
                      hold it with the
                                    left hand, and with
                              the right hand turn
                         the stop motion
                            screw over towards
                          you, as shown in
                           K 3031
                                  Fig. 3.
                Fig. 3.

      To Operate the Hand Machine

  Tighten the balance wheel (see Fig. 3) and place a
piece of material under the presser foot (7, Fig. 5).
Then lower the latter by means of the lifter (3,
Fig. 5). Now turn the handle over from you to
work the machine, without its being threaded, until
you are accustomed to guiding the material with
the left hand.
View original page 6Page 7 · Read text
5
 To Ensure Perfect Action of the Machine

  The balance wheel must always turn over towards
you.
  Do not work the machine with the presser foot
lowered or with the shuttle and the needle threaded,
except when sewing.

  Both slides over the shuttle must be kept closed.

                      To Set the Needle
                                (See Fig. 4)
                              Raise the needle
                          bar to its highest
                          point and loosen
                          the thumb screw
        Flat         Enlarged   (A). Hold the        Side        View of                             needle with the left                          Flat Side.
                        hand and, with its
                             flat side to the
              K4154
                                right, insert it into
                            the needle clamp      Fig. 4.  Positioning Needle
            in Needle Clamp.
                           (B) as far as it will
     Then retighten the thumb screw.go.
View original page 7Page 8 · Read text
6
         To Thread the Needle
                  (See Fig. 5)
  Turn the balance wheel until the lever (2) is at
its highest. Place a reel of thread on the spool
pin and pass the thread through the notch (13),
                 down, and from right to
                        left under and between
                       the tension discs (12), and            •14                   up through the eyelet in the                   .13
                     take-up spring (4). Then
                    pass the thread from the
                          front through the hole in the
                        lever (2), down through the
2                   guard (5), into the guide (6),               and from left to right
3                      through the eye of the needle.
                 Draw about three inches of
              12 thread through the eye of the 4--
                      needle with which to com-
                 11 mence sewing.
 5---
            10 To obtain best results
                             it is absolutely neces-
                 sary that the needle
            9   used be of the size
  6                 stated for the number
            8               ki430° of cotton, linen or silk,  7
                  as shown on inside of
           Fig. 5.       back cover. If rough or
 uneven thread is used, or if it passes with
 difficulty through the eye of the needle, the
 machine will not function satisfactorily.
  The Singer Needle Threader saves time,
 trouble and patience, and is invaluable to
 those having defective sight.
View original page 8Page 9 · Read text
7

         To Wind the Bobbin
                  (See Fig. 6)

   Loosen the balance wheel (see Fig. 3) and push
the top of the winder from you until its rubber
ring (5) just touches
the ledge of the balance
wheel. Turn the latterover towards you until  3     2  4
the thread guide (2)
moves to the extreme
right. Place a reel of
thread on the spool pin
and pass the end of
thread  throughthe
notch at top of the
face plate (13, Fig: 5) ;
then thread the winder       M1293
by passing the thread
upward through the
eyelet (1) and into the              Fig. 6.
notch (2). Draw the
knob (3) to the left, and place an empty bobbin
between the cup at the right (4) and the centre
hole at the left. Now clamp the end of thread
between the cup and the end of the bobbin, turn
the balance wheel towards you and wind by operat-
ing the machine as when sewing. When nearly
full remove the bobbin by pulling the knob (3) to
the left; then withdraw the winder from the ledge
of the balance wheel and tighten the latter by
turning the stop motion screw from you.
View original page 9Page 10 · Read text
To Remove the Shuttle
  Open the front slide of the machine and turn
the balance wheel towards you until the shuttle
comes full under the opening. Press down the point
of the shuttle with the thumb and lift out. Turn the
open end of the shuttle downward and the bobbin
will drop out.
  NOTE.-The shuttle should not be lifted out by
the spring.

         To Thread the Shuttle
  Hold the shuttle, as in Fig. 7, and insert the
bobbin so that the end of the thread draws from the
left towards the right, as shown in the illustration.


                                                Tension
                                                    Spring


                                                Tension
                                              Screw


                                         K1295
                             Pig. 7.
View original page 10Page 11 · Read text
9
  Place the fore-
finger of the lefthand on the end of
the bobbin,and
draw the  thread
down into the slot of
the shuttle, towards
the point, as far as it
will go (see Fig. 8);
then pull the thread


                                                   K1296
                                           Fig. 8.
             tightly upwards and down again, so
              that it lies across the point in the centre
            of the spring, as shown in Fig. 9.
        To Replace the Shuttle.


 K1291
     Fig. 9.
   After threading,
take the shuttle in
theitspointright handtowardswith
 you, and place it in
 the shuttle carrier,
 as shown in Fig. 10,
leaving a loose end
of  thread about
three inches long
 above  the  slide.
Then close the latter.                Fig. 10.
  NOTE.-Keep the inside of the shuttle and under
 the tension spring (see Fig. 7) free from accumulation
of lint or dust.
View original page 11Page 12 · Read text
10
        To Prepare for Sewing
  With the left hand hold the end of the needle
thread, leaving it slack from the hand to the needle.
                        Turn the balance
                            wheel over towards
                        you for the needle
                                  to move down and
                 up again toits
                           highest. Pull the
                            thread        are                         holding,youand the
                          under thread will
                               brought
                      with it through 350                  the hole in the
                                 K1453  throat plate, as
                Fig. 11.        shown in Fig.                                        11.Place both ends of thread under and to the back of
the presser foot.
         To Commence Sewing
  Place the material to be sewn beneath the presser
foot, lower the latter, and commence to sew by
turning the balance wheel over towards you.
  NOTE.-Do not try to help the feeding of the work
by pulling the material, as this may deflect the needle
and cause it to break. The machine feeds without
any assistance.
         To Remove the Work
  Raise the needle bar to its highest, lift the presser
foot (7, Fig. 5), at the same time pressing the tension
release (10, Fig. 5) with the thumb of the right hand.
Move the material back and to the left, and sever the
threads by passing them over the thread cutter
above the presser foot.Leave a few inches
of thread under and at the back of the presser
foot.
View original page 12Page 13 · Read text
11
       To Regulate the Tensions


                         Correct Stitch.
  For ordinary stitching, the tension on the upper
andunder threads should be equal, so as to lock
both threads in the centre of the work, as above.
   If either tension is stronger than the other,
imperfect stitching will be the result, thus:—
 Deedee     Needle Thread Tension        Needle Thread Tension
          too strong.                   too weak.
  Fine fabrics require a light tension, while
heavy materials want more tension to obtain
a perfect stitch.
  The tension on the needle thread should be regulated
only when the presser foot is down.
   A correct stitch can usually be obtained by
varying the tension on the needle thread (see
Fig. 12).
  Lower the presser foot and turn
the thumb nut in the direction
illustrated by the arrow to in-
crease the tension or in the
opposite direction to lessen it.
  As all machines are correctly
adjusted before leaving the fac-
tory, the under tension seldom
requires to be altered, but if this
becomes necessary tighten the
screw near the pointof the
                                             K1434   Thumb
shuttlethe tension,(see orFig.loosen7) toitincreaseshghtly               Nut.
to lessen the tension.                      Fig. 12.
  Always use thread with correspondingsize of
needle as per Table on page 3 of cover.
View original page 13Page 14 · Read text
12

                     To Alter the
                       Length of
                             Stitch
                           Turn the thumb
RESINGERIC                  screw inwards (see
                                 Fig. 13) to lengthen
                            the stitch, or turn
                           outwards to short-
                        en it.

                   Fig. 13.

   To Change the Pressure on Material
  For ordinary family sewing it is seldom necessary
to change the pressure on the material. If sewing
fine silk or flimsy material, lighten the pressure
by giving the thumb screw (1, Fig. 5) two or
three turns upwards. To increase the pressure,
give the thumb screw a few turns downwards.

          To Turn a Corner
  Stop the machine when the needle is rising, but
still in the material. Raise the presser foot and
turn the work, using the needle as a pivot. Then
lower the presser foot.

     • To Sew Flannel or Bias Seams
  Use a short stitch and as light a tension as possible
on the needle thread, so that the stitching will be
 loose enough to allow the material to stretch.
View original page 14Page 15 · Read text
13

         To Oil the Machine


                                     K1432

                            Fig. 14.

  To ensure easy running the machine requires to
be oiled so that all moving parts in contact are
covered with a film of oil. These should never
be allowed to become dry.
   If used constantly, the machine should be oiled
daily, while with moderate use, an occasional oiling
is sufficient. A drop of oil applied at the points
indicated by arrows in Figs. 14 and 15 is sufficient.
The small plate in front'of the machine and the
larger plate at the back should both be turned up
and oil applied to the parts exposed.It is im-
portant that oil be applied to point "A," Fig. 14,
when the take-up lever (2, Fig. 5) is at its lowest,
and a little oil rubbed over the surface of the shuttle
race.  There are also two holes in the hand attach-
ment to which oil should be applied occasionally.
When oiling, insert the oil can spout well into the
holes.
View original page 15Page 16 · Read text
14

   After oiling, run the machine rapidly for a few
 minutes so that the oil may reach the bearings.
 Neglect to oil the machine will shorten its
 life and cause you trouble and annoyance.


   K1433


                              Fig. 15.

  Always use Singer oil. Inferior oil clogs
che sea rapid ear ots echaniorking, and
View original page 16Page 17 · Read text
15
          HINTS.
  Machine working heavily. If the machine
 runs hard after being idle, oil with paraffin. Then
 run rapidly, wipe clean and oil with Singer Oil.
  Needles Breaking. See that the needle is not
 bent, the upper tension is not too tight, and the
presser foot or attachments are securely fastened.
 Avoid pulling the material and do not sew heavy
seams or thick goods with too fine a needle (see
table on inside of back cover).
  Thread Breaking. If the needle thread breaks,
see that :
  The machine is properly threaded.
  The upper tension is not too tight.
  The needle is not bent, blunt or set incorrectly.
  The thread is not too coarse for the needle (see
     table on inside of back cover).
  The thread take-up spring (4, Fig. 5) is not broken.
  Should the under thread break, loosen the under
tension (see page 11), and see that the shuttle and
under the tension spring are free from fluff.
  Skipping of Stitches. See that the needle is
correctly set (see page 5), is not blunt, bent, or too
fine for the thread.
  Stitches Looping. See that the spring (4,
Fig. 5) is not broken, that the upper and under
tensions are equal (see page 11), that both shuttle
and needle are properly threaded, that the thread
is of good quality and of correct size for the needle
(see table on inside of back cover).
  Material Puckering. See that both tension
are equal.
View original page 17Page 18 · Read text
INSTRUCTIONS

                 FOR USING

      ATTACHMENTS
           WHICH MAY BE USED WITH
      SINGER*
  SEWING MACHINE
         No. 28
NOTE. Before applying any of these attachments
           raise the needle and remove the presser foot.
         After substituting the attachment turn the         balance wheel slowly over towards you to
        make sure that the needle passes through the
           centre of the needle hole.


    Darning by sewing machine is
     infinitely neater, stronger, and
    more quickly done than by hand.

      A tiresome task becomes a pleasure !
    Read how to do this in separate
     pamphlet, Form 1001 ad 33, which
     may be obtained free from any Singer
         Shop or Singer Salesman.
View original page 18Page 19 · Read text
17

                Bias Gauge

   The Bias Gauge will be found very useful (especi-
 ally in the case of soft materials) when cutting bias
 strips from is inch to 1& inches in width. This may


                                                K4159

be done by placing the bias gauge upon the point of
the scissors and setting the blued indicator to the
width desired.The line F is the point at which to
set the blued indicator for facings, the line B forbinding, and the line C for cording or piping.
  Insert the material in the gauge with the edge
against the blued indicator, and hold as shown
above.
  Bias binding for use with the Binder Attachment
should be cut t& inch wide, and to do this the
indicator should be set midway between the lines
F and B.
View original page 19Page 20 · Read text
18
         The Binder-Binding
   Pass the binding through the scroll of the binder
 and draw it under the needle. Place the edge of
 the material to be bound between the scroll of the


  K1304                            LESTCARESTRES


 binder and under the needle, lower the presser-bar
lifter and sew as usual.
   Bias binding should be cut l& of an inch wide.
  To Bind with Dress Braid.-Proceed as when using bias binding: but as dress braid and binding
 purchased already folded are narrower than bias
binding they should be inserted in the outer slot of
the binder. The edges of dress braid are not turned
under as in the case of bias binding.
  To make French Folds.-Proceed as directed
for binding, but pass the cloth beneath the binder-
foot, so that the fold is stitched on to the face of
the material instead of on the edge.
View original page 20Related documents and language editions

SingerPDF
Adjuster's for the Singer Model 20
Service manual
19 pages · EnglishRead →

SingerPDF
Singer 101-4 & 101-12
User manual
56 pages · EnglishRead →

SingerPDF
Singer 101-4 & 101-12 (black and white scan)
User manual
54 pages · EnglishRead →

SingerPDF
Singer 115
User manual
36 pages · EnglishRead →

SingerPDF
Singer 127 & 128
User manual
18 pages · EnglishRead →

SingerPDF
Singer 12K
User manual
12 pages · EnglishRead →

SingerPDF
Singer 15
User manual
36 pages · EnglishRead →

SingerPDF
Singer 15-125
User manual
38 pages · EnglishRead →

SingerPDF
Singer 15-22
User manual
13 pages · EnglishRead →

SingerPDF
Singer 15-30 / 15-87 & Generic 15 Class (rotated for printing)
User manual
14 pages · EnglishRead →

SingerPDF
Singer 15-30 / 15-87 & generic 15 class machines
User manual
14 pages · EnglishRead →

SingerPDF
Singer 15-86
User manual
24 pages · EnglishRead →
From the ISMACS International. Original publisher and archive notices are retained.
Check the model and edition against your equipment.
PDF verified 2026-10-11.