Sewing machines
Singer 306K and 306W — User manual
User manual for Singer 306K and 306W. 50 pages in English. Read the original PDF, download or print a copy without registration.
50 pagesEnglish23.3 MB PDF
Loading your manual…Open PDF directly
Document details
- Brand
- Singer
- Model / document
- Singer 306K and 306W
- Document type
- User manual
- Language
- English
- Pages
- 50
- File size
- 23.3 MB
- Category
- Sewing machines
- Document date
- Not specified in catalog
Search available document text
Find a term, then jump to its page in the original PDF. Image-only pages may not be searchable; check the PDF for exact wording and diagrams.
Page 1 · Read text
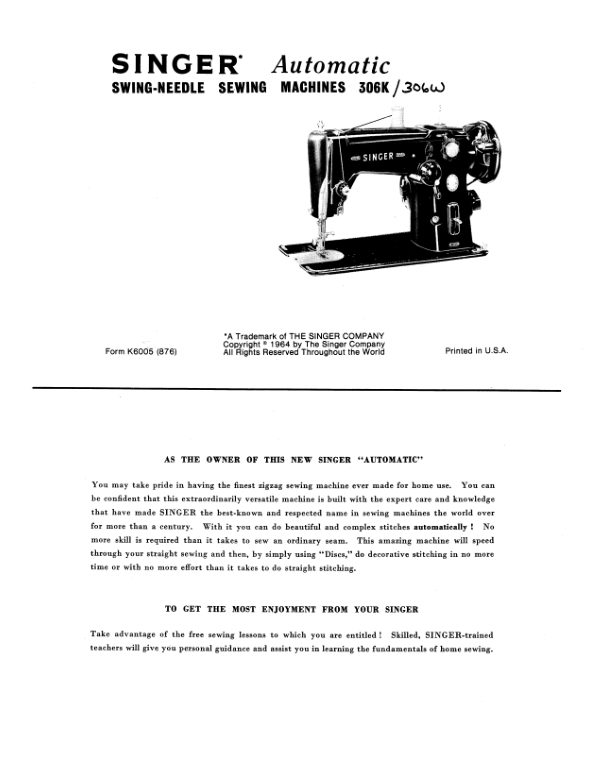
SINGER Automatic
   SWING-NEEDLE SEWING MACHINES 306K / 306W


                                                      WAS SINGER PaS


                                *A Trademark of THE SINGER COMPANY
                                 Coovricht © 1964 ov The Singer Companv
  Form K6005 (876)              All Rights Reserved Throughout the world               Printed in U.S.A


           AS THE OWNER OF THIS NEW SINGER "AUTOMATIC"

You may take pride in having the finest zigzag sewing machine ever made for h
no ronnient that thIs extraordinarily versatile machine Is built with the expert care an d knowledge
that have made SINGER the best-known and respected name in sewing machines the world over
for more than a century. With it vou can do beautiful and complex stitches automatically!No

more skill is required than it takes to sew an ordinary seam. This amazing machine will speed

through your straight sewing and then, by simply using Discs," do decorative stitching in no more

time or with no more effort than it takes to do straight stitching.


            TO GET THE MOST ENJOYMENT FROM YOUR SINGER


 Take advantage of the free sewing lessons to which you are entitled! Skilled. SINGER-trained

 teachers will give you personal guidance and assist you in learning the fundamentals of home sewing.
View original page 1Page 2 · Read text
ADVANCED FEATURES OF THE SINGER 306

    VERSATILITY       straight stitching       CALIBRATED TENSION for accurate
    machine or highest calibre capable of         adjustment to any type o fabric.
                     automatic decorative
      sutching.                          REVERSIBLE FEED for sewing either
                                                 forward or backward-easv to back stitch
   AUTOMATIC  STITCHES - scalloped         and fasten ends of seams.
    edges, blind stitched hems,
     designs or simple mending--are made with      9. CALIBRATED STITCH REGULATOR
     interchangeable Discs which "'remember'         with angertip control.
      ditterent stitch patterns.   Unlimited effects                                                   10. SMOOTH.  SEAMLESS  THROAT
     are possible by simply adjusting the stitch      PLATES clipOn           snag-tree     length and needle position and through the                                                     performance.
     interchange of additional discs.
                                      POSITIVE FEED for handling all types
   TWIN-NEEDLE DECORATIVE WORK           of fabrics.
    can now be done without attachments,
      using the special Twin Needles.            12. FEEDTHROW-OUT permits darning
                                                   and embroidering.
   FRONT THREADING NEEDLE visible                                             13. PERFECT CONTROL whether
     eve is guickly threaded                                                                at hich or low speeds.
  5. ROTARY MOVEMENT for smooth, quiet                                               14. ONE-WAY NEEDLE CLAMP makes it
      performance...full rotary sewing hook.                                                     almost impossible to place needle in clamp
                                                          incorrectly.   FULL VISION BOBBIN CASE facilitates
    removal and replacement.  Time-saving;      ALUMINIUM CONSTRUCTION means
      extra capacity, round bobbir                        durability and light weight.


                   AUTOMATIC STITCH DESIGNS
Many stitch designs are produced automatically through the interchange of Discs. Sit back and
 marvel at the stitch patterns being formed.
The six basic Discs. furnished with the machine and illustrated below. are functional as well as decor-
ative in their application. Further description of each disc is given on pages 21 and 42.
                            DISCS


            1-Zigzag                 2-Multiple Stitch Zigzag              3-Blind Stitch


            1-Scallop
           Each disc is identified by number and by the basic stitch pattern it wrl produce.
View original page 2Page 3 · Read text
CHART SHOWING RELATIONSHIP OF TYPES OF FABRICS, THREAD AND
             NEEDLE SIZES AND MACHINE STITCH SETTINGS


                                                                             MACHINE DITCH DETTINGS
                TYPES OF FARRICS                THREAD    NEEDLE    FOR STRAIGHT SEWING

                                                                                             STITCITINC

   Very thin Silk, Muslin, Cambric. Lightweight Delicate Fabrics.     TOO toI Too Cottor
                                                                               DU DIlk
                                                                            Mercerised
                                                            Darning

        Calicoes, Linens, Shirtings, Fine Silk Goods. Nylon. etc            8u to 100 cotton                   12 t0 15        15 to 20
                                                                               kO Silk


   Plastic Materials                                  En 20                     12


  Shirtings, Sheetings, Bleached Calicoes, Silk, General Domestic      0 to 80 Co                                 a to IS
                     oollen Goods and all classes of general work           oU ollk,
                                                           hO Swiko
  dal KInds Or neavy calicoes, Drill. woolle                      40 to
                    Woollens,        Boys' Clothing, Corsets,
 Tickiaks,      Heavy                        • Clothin              21 toto40soCotton,Liner

  When ordering needles, always specify "Class and Variety 206x13" (Catalogue 2029 and state the size and

   You will obtain the best stitching results from vour Sewing Machine if it is fitted with a SINGER* Needle.
                      See Page 8 for ordering TWIN NEEDLES


                        NEEDLES AND THREAD

    perfect stitching, thread should be selected      206 × 13 (Catalogue 2029) NEEDLE

according to fabric to be stitched and needle must be

correct size for thread to pass freely through its eve.

 Select correct needle according to table on Page 6.

 Be sure that needle is not blunt or bent.


Note: mIhread breakage 1s sometimes caused by

 variations in the diameter of thread. Such breakage

is overcome by using the next size larger needle.


 Use like threads for needle and bobbin. Do not use
 silk on bobbin and mercerized thread in neede or
                                                        LONG GROOVE
                                                   TOWARD YOU

 TO SET THE NEEDLE


  Raise the needle bar to its highest position and loosen

thumb screw F, Fig. I in the needle clamp. Insert

 needle into clamp as far as it will go with fat side to

 the back and long groove toward you. Then tighten
 thumb screw r.

                                                                                Setting Needle
                                                                          In Needle Clamp.
View original page 3Page 4 · Read text
TO SET TWIN NEEDLES
 Hollow same procedure as described for setting
  single needle (see Page ").
 CAUTION :    Before stitching    TWIN       306 x 3 - 3 (Catalogue 2036) NEEDLES

 1s set for central position as shown in fig. 40g
 Page 18 and that the machine is not operated
 at a bight exceeding the
 cross bar of the TWIN NEEDLES. Set bight
 limit screw F2. Fig. 22 at a point equivalent to
             on the cross bar using the method
 describes on rage      Should
 bight be desired. screw E2. Fig. 22. is used in
  addition to screw #2
 In performing TWIN NBEDLE work, the All-
  gun just hroat Plate and        § not.                                                 LONG GROOVES  Special Purpose Presser Hoot must be used In
  addition to setting the machine as described                TOWARD YOU
          Failure to       this caution will result
  in the blunting or breaking o the needles.
  Straight stitching. zigzag stitching, as well as
 ornamental stitching can be performed when
 using TWIN NEEDIGES
  When ordering TWIN NEEDLES, it is neces-
  sary to specity the quantity, class and variety
  306x3. Catalogue 2036 and the space number.
  such as "3 as well as the size of the needles.
  The following is an example o an intelligible
                                                                  Fig. 2. Setting Twin Needles in
    "10 Class and Variety 306×3-3 (Catalogue 2036),                    Needle Clamp.
   Size 14 Needles "


                  UPPER THREADING SINGLE. NEEDLE
Raise take-up lever 5 to its highest point.           Lead thread into self-threading guide I from
Place spool of thread on spool pin and hold     underside.
spool with right hand.                              Down and from right to let behind or in front
                                                       ot centre tension disc 2. Centre disc separates
                                                  threads for twin needle sewing.
                                                      Into the loon of the take-up spring 3.
                                          Under the slack thread regulator 4
                                  Up and from right to let through hole in take
                                             up lever 5.
                                    Down through guides 6 and 7 on face plate.
                                                      Into guide 8 on needle clamp.
                                      From front to back through eve of needle y
                                                 Draw about two inches of thread through eve
                                                   of neede with which to start sewing,


                                                         Fig. 4.Upper Threading
               Fre. 3. Upper Ihreading.                            Around Tension.
View original page 4Page 5 · Read text
UPPER THREADING_ TWIN NEEDLES
 Maise take-up lever a to its highest point. Place a spool o thread on each ot the two spool pins.
 Thread each threading point with one thread at a time in the same manner as for single needle
                 IOlOwing exceptions :
 Tass one thread between the rear and centre tension discs 2 and the other thread between the centre
                                                                     and Iront tension discs.
                                                       Thread eve o each needle from
                                                                      tront to back.
                                               be sure that
                                                        bind each other. Draw
                                                           about two inches of thread through
                                                                     which
                                                                         start sewing.

                   VaN SINGER PAS


                                                                            Fig. 6. Upper Threading
               UpPer Ihreading Twin                         Around Tension Twrn Needles)


TO REMOVE THE BOBBIN               TO WIND THE BOBBIN
                                              See Fros. 8 and g Raise needle to its highest point
Tilt machine back on its hinges               Hold hand wheel . with left hand. and with
                                                 right hand. loosen stop motion screw A to
Open latch G, Fig. • and lift out bobbin case        release hand wheel from stitching mechanism.
Release latch and remove bobbin                Place bobbin on bobbin winder spindle and
                                                 turn bobbin until spindle pin enters slot in
                                                     right side of bobbin.
                                         Lock bobbin in place by pressing bobbin winder
                                                      against hand wheel until latch H engages.
                                                 Place spool of thread on either spool pin.
                                      Draw thread through self-threading guide & On
                                         arm ot machine and pass thread down and from
                                                     let to right under tension
                                                thread up to bobbin and thread from inside,
                                                 through slot in left side of bobbin 4
                                     Hold end of thread as shown in Fig. 9 and
                                                 operate machine as for sewing. End of thread
                                          must be held unti it breaks of
                                           Allow tension discs 3, Fig. 8 to control flow of
                                               thread so that it winds on bobbin in uniform
              G              level rows. Do not guide or hold thread when                                              winding bobbin.
                                    The bobbin winder will stow automaticaliv
                                    when the bobbin is filled. When less than
                 Removing Bobbin Case.                full bobbin is desired, It latch H. rig.
View original page 5Page 6 · Read text
I SINGER


                      F28. 8. To Wind the Bobbin.                              Fig.

 Remove bobbin from spindle and retighten        it bobbin winds high on the left. When bracket
ScreW                                                  is properl centred. thread will wind evenly
                                                000010. netignten
 NOTE : If bobbin does not wind evenly, loosen     screw.screw which holds tension bracket 3 in position
and move bracket to the left it bobbin                               while machine is sewing
 high on the right: move bracket to the right


                    TO THREAD BOBBIN CASE

                      Hold bobbin so that thread will un.
                       wind in direction shown in Fig. 10.

                        Hold bobbin case as shown in Fig. 10
                        and place bobbin into it.
             Fig. 10.
                            Pull thread into slot L. Fig. 11 under
                               tension spring M, Fig. 12 and into slot
                              N at end of spring.  Allow about three
                          inches of thread to hang free
                          bobbin case.


                     TO REPLACE BOBBIN CASE

             Fig. 11.

                             Hold bobbin case b latch and replace
                            it on stud X, Fig. 13, having thread


                            latch and press bobbin case back unti
                            latch catches groove near end ot stud
                      Allow about three inches o thread to
                        hang tree trom bobbin case

                                                                    Fig. 13. Rohnan CaSe
          Fig. 12.                                                                                 I hreaded and Replaced.
View original page 6Page 7 · Read text
TO PREPARE FOR SEWING

This SINGER Class 306 Machine comes equipped with Disc No. 1, ALL-purpose Throat Plate.
and ALl-purpose Hinged Presser Hoot.he Throat Date and Dresser toot have rhe same wide
opening to accommodate the swing of the needle. With the equipment illustrated below, the machine
can perform:

          STRAIGHT       ZIGZAG      ORNAMENTAL STITCHING


                  FOR ALL-PURPOSE STITCHING,


                                                                    105250 Al-burdose
                                                                     hanged Fresser foot


            B2


        Brght control            173088 AU-burbose Throat Plate
deL Jor strargnt serichung.                                                            Disc No. 1


                     TO PREPARE FOR SEWING (continued)
Set Needle Position Lever A2 and Bight

Control Lever B2 for straight stitching

shown in Rig. 20.


 Hold end of nsedle thread with left hand and

turn hand wheel over toward you until needle

goes down and up again, and thread take-up

lever P. rig. 17 1s at its highest point.


Pull up needle thread and bobbin thread will

 come with it, as shown in Fig. 15.
                                                                Fig. 15. Drawing Up Bobbin Thread.

Law both threads back under presser foot
 diagonally across teed to the right or
 depending upon the side of the needle on which

 material is to be located so that when the

 presser foot is lowered the threads will be

 firmly held between the feed and the presser


                                                                    Fig. 16. Threads in Position
                                                                              to start sewrng
View original page 7Page 8 · Read text
TO START SEWING
                             Be sure to have take-up lever P at its highest point.
                                 Adiust Needle Position Lever see Page 18) and Bight
                                         Control Lever see Page 19) to the desired setting

                                          For zigzag stitching, turn hand wheel over toward you until
                                       needle is ready for its extreme let stroke at left needle
                                          position; orits extreme right stroke at right needle position
                 AAN                                 Place the material beneath the presser foot • position
                                    needle in fabric. lower the foot. Hold threads which have
                                been drawn to back and right under the foot. Commence
                                    seWIng.
                               Most materials require only guiding for best sewing results
                                 However, the miracle fabrics, such as nylons and similar
                                         materials,                     rayons, puffed weaves,
                                         sheers, jerseys and tricots, which, by their nature, require
                                            light pressure, also require support in the form of holding
                                                          rial taut at the back and front of the needle as the
                                    needle enters the tabric.  This support assures a smooth
                                 even scar.  Never pull the material when sewing
                                Never operate machine without cloth under presser foot
                                    TO REMOVE THE WORK
                                    stop machine with thread take-up lever, la Fig. 17 at its
                                    highest point. Raise presser toot . draw fabric back and
                                        to left and sever threads on thread cutter   Place ends of
                                                               foot diagonally across feed T as sho
                Fig. 17.


                     TO REGULATE LENGTH OF STITCH

The machine is adiustable to make trom 6 to     Turn limit screw K3 until top of stitch lever J3
 28 straight stitches per inch as indicated by the      rises to setting desired.
numera a on ire rert or re srren indicator scae.   The nee of the limit screw        especiallv
 When zigzag stitching, the stitch regulator     desirable in obtaining ane stitch adiustments
 controls the lengthwise distance between needle    between 25 and 0 for such work as bar tacking
                                                        or satin stitching.
 The top of the stitch regulator lever 33 is the    Numbers    the stitch regulator scale
index for setting stitch lEngths.
                                                    relative and enable the operator to restore any
 To lengthen stitch, loosen limit screw K3 enough     previous stitch setting.
tO allow stitch regulator lever Jo to be lowered
just below number desired


TO REGULATE STITCH LENGTH


 Satin stitching is done with stitch regu-
lator lever 3 set between
position.

 While stitching on a scrap of material
carefully and slowly turn limit screw Na
 until stitches are packed closely together,
 allowing material to feed smoothly and
evenly without irregularity.                                        J3
Special Purpose Presser Hoot 16455
provides a channel for satin stitching and      700459           Fig. 18. Regulating Length of Stitch
gives smooth uniform results.               Special Purbose
                                                    Presser Foot.
View original page 8Page 9 · Read text
NEEDLE POSITION CONTROL


                                                                                   •D2

                                            C2

           Fig. 19.                        Fig.20 Central                   Fig. 21  Right
         Needle Position.                   Iveece Os                       Needle Positron
  When Needle Posi       When • Needle Posi       When        POsie
   tion Lever A2              TION AVer ALL is set             tion Lever AZ is set
  to the leit                     at the central posi-           to the rigne on the
                                                           snown
          •the mach-          Fig.20, the needle            fig. 21. the needle
  ine          the                   equally             SWINGS
                           the left and                           rightg
                          Or centre.as sown        shown in Fig.
  and, as the bight Is          in Fig.
   changed from U to 5, Fig. 194
  the        swings
              extreme          CAUTION: Let Needle Position and Right Needle Position
          shown                are used onlv with the All purpose
    rig. 19A for zigzag              stitching as well as zigzag stitching.
                                   Raise needle out of fabric before changing positions of Bight
                                    Control and Needle Position Levers.


                             CONTROL
STRAIGHT STITCHING can be made in any     INTERMEDIATE   BIGHT
the Three needle nosi            on Page 1866andn     RECTILATOR SCREW
with an Disc when Bight Lever B2 is set at            acts as an intermediate spring
   is recommended that the bight Lever ba be
       in          MAXIMUM BIGHT    bight. This spring-stop
 STOP SCREW F2, by loosening, then retightening    be passed over to
                NTERMEDIATE BIGHT        if desired!
RECITATOR SCREW E2                        These stons arOWVOU
notch, then retighten 1t.                               operate the Bight Lever man-
ZIGZAG STITCHING. The Bight or "swing        ually between set positions
the needle refers to the width of zigzag movement    without
of the needle when stitching with Disc No.                to the dial while sewing. For
BIGHT LEVER B2 regulates the width of zigzag                 To. Jimit zigzag
stitch or stitch pattern.                                     stitching Wetween  66189        Fig. 22.  Bight
RICH SCALE is marked      5.7 Bach line                                        Control Oran
                  5 denotes the width of stitch   loosen"set MAXIMUMBight Lever BIGHTat "
                                                LAHAVER SIF SUREW F2 then tighten. 10 setpattern obtainable up to a maximum o approxi-
                                                 minimum position      set Bight Lever so
matelv * inch.                                                                    loosen INTERMEDIATE
 BIGHT INDICATOR. Arrow C2 is the mark to     BIGHT REGULATOR SCREW E2 and move it up
       the desired DOint ON theDont scale Is           or down until vou teel the notch engaged.
ZERO BIGHT                      straight     tighten screw Ez  "ne Biont.Lever is now set to
                                                    limit the maximum bight at "4* and the
MAXIMUM BIGHT. The machine will sew the              Uther limits such as
maximum width oi stitch or stitch pattern when     and 663°can be obtained in the same manner.
                                                   hen trop movement or 1'he Birnt iewer is desired
MAXIMUM BIGHT STOP SCREW    reStrICuS      Detween zero an • a given Dient. screw
the movement of theBight Lever to a maximum    moved down as far as it will go and then securely
                                                        tightened. Screw rZ is used to limit the maximum

          CAUTION:When Straight Stitching Throat Plate 173090 is used, Bight Lever B2
            must be set at . and needle must be set at Central Position.
         Do not make any zigzag stitch or needle position                 needle
                          when the machine is not in operation.
View original page 9Page 10 · Read text
TO CHANGE DISC.

                                               Raise needle out ot material.

                                               Set Needle Position Lever at central position.

                                             Set Bight Lever at " 0."

                                      Remove knurled nut U.

                                         Grasp edges of Disc v and draw it of shaft.

                                                    Lift lever ^ with let thumb while placing new
          Fig. 23. Remourno Disc               Disc on shaft so that pin ½ engages at slot !.
                                        neplace nut TI and tighten securely.
                                            avoid variation in stitching. Disc must be held
                                               ITIIY.

                                          Set Bight and Needle Position Levers to
                                              desired settings and proceed         regular
                                                       SCWIlIS.

                                   CAUTION. Always operate machine with disc
                                             even when doing straight sewing.


             Fig. 24. Replacing Disc
                on Machine.


                AUTOMATIC STITCHING

 All of these discs do straight stitching when the Bight Lever B2, Figs. 19 to 22

is set at 66 0 99


Zigzag Disc No. 1 W makes a uniform zigzag stitch in all
widths up to approximately & inch. This Disc is recommended for making
buttonholes. sewing buttons, reinforcing seams, making hairline seams,        Zigzag
cording seams, making invisible seams in lace, appliquéing, satin stitching                                                                               Disc No. 1.
scallops, script stitching and wherever uniform zigzag stitching is desirable.

Decorative stitch patterns are produced with Disc No. I by varying one or
more of the control levers, namely, needle position, bight and stitch.


Multiple Stitch Zigzag Disc No. 2 /re makes a three-stitch
zigzag particularly suitable for reinforcing, patching and mending, as well as
for decorative applications.This Disc is especially adaptable for
joining the overlapped seams of interfacings and interlinings, joining seams    Multiple Stitch Zigzag
where there is both lengthwise and crosswise elasticity, and applying bindings        DISC No. 2.
to blankets.

 Blind Stitch Disc No. 3                 produces a straight line of tour
stitches followed by a single zigzag stitch to the left. The depth of the
sideward movement of the needle is regulated by the bight lever. The result-
ing adjustable blind stitch is ideal for hems, facings and zippers.When the
lever is set for a wide bight, this stitch is appropriate for overedging seam,
 hem and facing edges to prevent fraying,


                                                                                       Blind Stitch
View original page 10Page 11 · Read text
Scallop Disc No. 4                    accurately stitches scallops while the
                          fabric moves in a straight line under the presser foot. A single stitch separates
                         each scallop allowing space for cutting and turning when used as an edse finish
                                    the length of the scallop is varied by changing the length of
                         stitch--the width of the scallop. by varving the Bight.
                  Arrowhead Disc 1'0.5 controls the formation of the arrow.
                   head stitch pattern automatically.  This decorative desion is reduced in
                     width by reducing the bight setting. The stitches are packed closely together       Scallop
                   when an almost 0 stitch length is used, and are separated when a longer stitch
                          is used. As a border design or as part o a moti or monogram. the arrowhead
                       design is classic and appealing.
            Domino Disc No. 6 CRAPE automatically forms a decorative
                          stitch pattern attractive in border designs, monograms, motifs and pockets-
                          eftective when applied to linens. children's dresses. blouses and play clothes
                    The design can be varied in width by the Bight Control, and in spacing by the
                        stitch length. Twin needle stitching is particularly attractive and affords the
                       use of threads of two colours.
                      Discs 1, 2, 3, 4 and 6 produce the same stitch pattern whether numbered side
     Arrowhead        of Disc is toward or away from the machine.However, Disc No. 5 forms the
     DISC No. 5.       wide portion of the arrowhead first when disc is placed numbered side away from
                      machine, and point or narrow portion of arrowhead first when disc is reversed.
                         Stitch on a scrap of material until that point in the design is reached that is to
                    be reproduced on the work. Then place work under needle at the exact point
                      where design is to be made.  This procedure is desirable when usingthe
                       scallop and arrowhead discs, but often is used in precise stitching
                       multiple stitch. blind stitch and domino dises.
                       Additional discs, which produce a variety of stitch patterns other than those
                     produced by the six basic discs furnished with the machine, may be purchased
                          at your local SINGER SEWING CENTRE.
      Domino
      DISc No. G


                  DESIGNS MADE WITH ZIGZAG DISC No. 1.

By changing Bight, Length of Stitch and Needle Position, as indicated. (Direction of Stitching, left to right)

                                                 Right. 1
                                                                                           Stitchaw Almost
    Www www
      wwwwwwww.         stitches Almost.@

      sirens a
       sights                            sights


        Bight 5                                              Bicht 5                  Bight 3

  Needle Position--Left         NEEDLESStitch- Almost BightO


 Loosen needle thread tension slightly with each increase in Bight above 2 and with each decrease in stitch lengt
 Special Purpose PresserFoot (161455 should be used with stitch iength or almost U.
View original page 11Page 12 · Read text
DESIGNS MADE WITH MULTIPLE STITCH ZIGZAG DISC No.
  By changing Bight, Length of Stitch and Needle Position. as indicated. (Direction of Stitching, left to right)
                       Bight 10
                                  Bight
                                                         Stiten 95                                    a Almost ®
                                    AAAAAAAAAAAANANAN

                         WWWWWwwww

                                             Bight 3,             Awwwww


                                                                           Needle Position-Right


   For bottom row of twin needle stitching, garment is stitched right side down

   Central Needle Position is used unless otherwise indicated.


                    DESIGNS MADE WITH BLIND STITCH DISC No. 3
  By changing Bight, Length of Stitch and Needle Position, as indicated. Direction of Stitching, left to right)

                                                  Bight
                                                      Stitch-25                          Stitch--Almost
                                        Bight 2
                                                     Stitch-25                                 Stitch

                                                    Bight 3.


                                         Bight 4

                                                           Stitch-


                                                                             Bight
VoY.
VVNeedle Position-V Bisht                                      Needle Position--RightBight
                               TWIN NEEDLES Bight                      Bight 1

                                                                                                  Stitch- -Almost 0

   Loosen needle thread tension slightly with increase in bight above
   Central needle position is used unless otherwise indicated.
View original page 12Page 13 · Read text
DESIGNS MADE WITH SCALLOP DISC No. 4.

  By changing Bight and Length of Stitch. as indicated             (Direction of Stitching, left to right)


                                      Richt R   Stitch-Above 12


                                         siontas


Central Needle Position
 All-purpose Presser Foot (105250) should be used


                DESIGNS MADE WITH ARROWHEAD DISC No.

    By changing Bight and Length of Stitch. as indicated.                (Direction of Stitching, left to right)


                                                  sight


                   Stitch-Above 25


                           bove 25


                 stitch Almost o


               •TWIN NEEDLES
                    #IF


 Loosen needle thread tension slightiv with each increase o Bight above 2 and with each decrease in stitch length
 Special Purpose Presser Foot (161455) is used with stitch ler
                                is used unless otherwise indicated.
View original page 13Page 14 · Read text
DESIGNS MADE WITH DOMINO DISC No.
By changing Bight and Length of Stitch, as indicated                                                                      (Direction of Stitching, left to right)


              Stirch…Above 95


                    Martha.mm.                   mire ew


               Stitch-Above 20         TWIN NEEDLES  Bight           Stitch- Almost


                           TWIN NEEDLES Bight 3          Stitch-Almost


                                                         of Bight above 2 and with each decrease in stitch lengtr
                                should be used with stitch length of almost 0


             DESIGNS MADE BY VARIATION OF NEEDLE POSITION
                AND BIGHT WITH VAGAG IDISC No


            special Purpose Presser Foot (161455) should be used with stitch lenath of "almost
                   Crisp lawn, organdie, or tarletan backing is used if material gathers
                                        on single UncRness.
                                 29
View original page 14Page 15 · Read text
KEY TO STITCHES SHOWN ON PRECEDING PAGE


                                                                                                            SETTING OF BIGHT
                                                                                                                         LIMIT SCREWS.
                        GETTING                                                  rOSITION AND             REFER TO FIG. 22

                                     Bar_ Almost O                                      Stitch bar then zigzag lines

        Centra                            Alternating        Needle Thread -Very light   At 25--6 stitches               F2 at 3
                                                  Needie                 7 glitches of eachmark 10 5       2 0 5        0

                      0.3.8.9                         Thread--Very light                                             sobol read--medium
                      0.3.5.3          Almost O

                      0.365.3          Almost O      Needle Thread--Very light 8 stitches at each

                                                                         14 stitches at each
                                         • wir        Almost 0
                                                                      Bich i or
         Right
                                               Almost C      Needle Thread--Light                               F2 at 4

                                                                             20 stitches at each setting,
                                                    Almost G

                          Alrernatino wi                       NoodleThread=-lignl       Bight 4 at left needle position
                                                                                      biant a o ano z


                          2 Bight = Medium Bight     5 Bight = Maximun Bight


               TO REGULATE PRESSURE ON PRESSER FOOT


The surtace anish on fabrics, as well as their weight, determines amount

of pressure to be applied. The glazed surface of chintzes and polished                                  G2
                 • nan surtace of satin. the deer piled surtace o velvet

the delicate and broken surface of lace and brocade. all require

lighter pressure


 To set a light pressure. turn thumb screw G2. Fig. 25 upward until
fabric moves easily under presser foot without slipping and without  Fig.25. I numb screw for
                                                                           Regulating Pressure on PUPS-
showing teed         Heavy, spongy fabrics like towelling, chenilles.              Se~ HOOL.

 coatings, etc., require heavier pressure.


To set a heavy pressure, turn thumb screw & downward until the

fabric moves easily and the seam edges are carried evenly by the foot

 and the reed


The pressure should be heavy enough to prevent side creepage o

 material and to obtain uniform stitch length, yet light enough to carry

 the material without marking,
View original page 15Page 16 · Read text
THREAD TENSIONS FOR           TO REGULATE NEEDLE THREAD
        STRAIGHT SIMCHING                   TENSION
  For perfect stitching, the tension on needle and     The tension on needle thread can be tested only
  bobbin         must be heavy            Pull                                                          when presser Icot is down.
  threads to centre o material and make a rm stitch
 as shown in f1g. 20.
                                                  The numerals "O' to "9' on dial H2. Fig. 29.
                               i M19. 47, the needle     indicate different degrees of tension that can be
  thread lies Straight along top side                                                  obtained.The numbers do not denote a particular
  causea ow too neavy tension on recale careda or coo
 light tension on bobbin thread.                         size at thread

  In the unbalanced tensions of Fig. 28, the bobbin     When tension has been correctlv set for average
  thread lies straight along under side ot material,
 caused by too light tension. on needle thread or too     sewing. note number at indicator line J2. This
 neavv                                                  setting mav be quickly regained should the tensior

                                                                be altered for special work or change in size of thread.


                                                       To increase tension. turn thumb nut K2

                                                                 gradually to right (clockwise) until required
   528. 26.Perfect                                        tension is obtained. Each higher numbei
    Straight Stitching.
                                                           denotes increased tension

                                             To decrease tension, turn thumb nut K2
                                                                   to leit counter-clockwise until
  Fig. 27. Imberfect                                       required tension is obtained. Each lowes
     strarent struchung.                                                                number denotes less tension


                                                                The tension indicator 12 is marked with theamandar                                        signs - and - , which indicate the directon
   Fig. 28.Impertect      Fro. 29. Needle Thread Iension.   inlesswhichtension.to turn the thumb nut for more or     Straight Stitching


            12   TO REGULATE BOBBIN THREAD TENSION

                                 The tension on bobbin thread is regulated by the larger screw

                                  12, Fig. 30 which is nearest centre of tension spring on outside

                                or the Dooon case.

                           To increase tension. turn screw L2 gradually over to the right

                          To decrease tension, turn screw 12 gradually over to the left.

        Fro. 30.Rahhan
        hread I ensrOn.


 TO REGULATE BOBBIN THREAD TENSION
WITHOUT REMOVING BUBBIN CASE FROM
 MACHINE

 'he thread tension screw is conveniently adiusted while
bobbin case remains in machine. To adiust. raise take-ur
lever almost to its highest point. tilt machine back on its
 hinges and turn the large screw on the bobbin case as shown
 in Fig. 31. Turn screw gradually over from operator to                                                            E23575
 loosen tension and over toward operator to tighten tension
                                                                               Fig. 31.
                                  33
View original page 16Page 17 · Read text
TO CHANGE THE THROAT PLATE

                            When changing from All-purpose Throat Plate to Straight
                                       Stitching Throat Plate or Embroidery Plate, FIRST raise
                                     take-up lever to its highest point, set the Needle Position

                                        Lever at its Central Position and set Bight Lever at 60."

                                           Tilt the machine head slightly with right hand, as illustrated

                                          in Fig. 32.

                                With the left hand tilt the rounded end of throat plate by
                                      pressing it up Irom the underside enough to clear the feed
                                 dog. Then slide the plate to the left.


                                       To Insert the Throat Plate, slip both ends of its spring
                                  beneath the edges o the opening. and, while it is slightly
                                                tilted, slide it over the feed dog, into position. Lower the
           Changing the Throat Plate.     machine head into place


                         SEWING SUGGESTIONS
breaking of needles might be caused by :          3. Bent Bobbin.
  wrong size or needle for thread and material      4. Damaged Bobbin Case.
   -see rage o.                                        Skipping of stitches might be caused by :
2. Wrong throat plate or presser foot for the
   type of work being done see Pages 39 to 41      1. Wrong setting of needle- see Pages ? and 8.
 ronssetting    needle position eVer     2.3. NeedleNeede blunttoo smallor bent.for thread-see Page o.
  and or bight lever--see Pages 18 and 19.          4. Damaged presser foot.4. Pulling of material when stItchIng~-see                                                  S. Damaged throat plate.
   Page 16.
5. Loosely tastened presser foot or special     Looped Stitching might be caused by :
    üttings.                                         1. Wrong threading- see lages 9 and 10.
 6. Wrong class of needle -see Page 6,              2. Tensions set incorrect v-sec Pages 32 and
                                                   33.
Breaking of needle thread might be caused by
                                                         3. IVeedle too hne for thread used.
  A knot in thread.
                                                     4. Improper presser toot.
  Thread too coarse for needle- see Page 6.
  Wrong threading-see Pages 9 and 10.          Gathering or puckering of material might be
4. Upper tension too tight---see Page 34            caused hv :
5. Needle blunt or bent.                          1. Failure to use paper or tarletan backing
o. Iveedle set incorrectly--see lages ? and &           when zigzag stitching with a very wide bight
 7. Roughened hole in throat plate.                   and or on sheer materials.
  Wrong arrangement o threads when start-      2. Excessive needle and bobbin thread tensions
   ing to sew-see rage 10.                          3. Improper presser foot.
 9. Needle thread tension too light.
                                                       If machine runs heavily after standing idle for a
Breaking o bobbin thread might be caused by :      long period, apply a few drops of paraffin at all
.wrong threading or bobbin case -see lage 13       oiling points, run the machine for a few minutes,
 2. Bobbin thread tension too tight----see rages     then wipe clean and apply SINGER" oil as
   aL and so.                                    described on Pages 36 to 38.
 If the suggestions offered here do not correct your sewing problems, call at your local SINGER SEWING CENTRE.
                              35
View original page 17Page 18 · Read text
Remove tac e plate and throat plate and swing
 back cover plate toward hand wheel.
Remove dust and lint with brush except from
sewing hook. Wine hook free        with
cloth or remove with hand vacuum cleaner.


                                                                Fro. 34. Rear View
                                                               showrng Ovling Points.


                                                                                                     TIE TITTERATISTE

                                        Apply a drop of oil to all points indicated by
                                              the unlettered arrows in Figs.33, 34. 35. 36
                                       and 37. Apply a small amount of SINGEF
              Fig. 33. Front Vier,                Lubricant for Electric Motors to the slide block
             snovrne Orang Fornis                    at D3, rig. 34.


                                   Remove face plate A3, Fig. 33 by taking out
                                       thumb screw B3 and slipping plate up and off
                                           screw at Us. Oil the points indicated in rig. 35
                                          and then replace plate A3.

                                    Apply a dron ot oi to race of bobbin
                                                   holder as shown in Fig. 36.


                                                                                         £21858

         F20. 35.Face Plate Remored                             rig. 36. Orang Point in Bobbin
           Showing Oiling Points.                               Case Holder.
View original page 18Page 20 · Read text
Threading_-Covering Cord with Special Purpose Presser Foot.

                   When covering cord with Special Purpose Presser Foot, place spool on
                            spool pin 1. Pass cord through guide & into right side o tension discs

                            3. through needle clamp thread guide 4, and from front to back through

                              evelet 5 in cross piece of toot

                           NOTE: With the equipment on this page and on Page 39, the full range
                           of stitching variations may be attained.The settings for these stitch
       B2-D   variations are attainable by moving the Needle Position and Bight
                           Levers AL and B2 to anv point required.

Fig. 38. Machine Set for Maximum
    Zigzag Stitch in Left Position.


                     STRAIGHT STITCHING EQUIPMENT


     173090 Straight Stitching Throat Plate     105248 Straight Stitch
                                               ing Presser Foot.


                                                            Fig.     Machine Set for Straight
                                                                                       duckchong
       161127 Adrustable corarns Foot.         86742 Rutter.

 CAUTION: All of the parts shown on this page are designed for straight stitching only. They must
              not be used for zigzag stitching. Use only AFTER Needle Position Lever A2 is set at
             central position, and Bight Lever B2 is set at O," as shown in Fig. 39
View original page 20Page 21 · Read text
DISC FOLLOWER LIFTING LEVER
                                                                                     - SPOOL PINS                                                                                                                                                                  , DISC FOLLOWER
                         NEEDLE THREAD
                             TENSION                                                                                 , DISC
     PRESSER BAR                             ARM
                                                                LATCH
PRESSURE REGULATING
   THUMB SCREW                                                                KNURLED
                                                                                      10)
  THREAD TAKE-UP
                                                                                                                                                                     - BOBBIN WINDER
                WA SINGER RAT                                                              - HAND WHEEL   FACE PLATE

    TAKE-UP                                                                        BIGHT INDICATOR
     SPRING                       NEEDLE POSITION                                                                              - SCALE
                                         LEVER.                                    MAXIMUM BIGHT TENSION REGULATING
    THUMB NUT                   INTERMEDIATE BIGHT                                -STOP SCREW
                               REGULATOR SCREW-                                           -3-PIN TERMINAL FACE PLATE
 THUMB SCREW                     BIGHT INDICATOR'                                      •BIGHT CONTROL LEVER

 THREAD CUTTER                         - NEEDLE BAR        MOTOR'                           STITCH REGULATOR AND
 PRESSER FOOT                      BED                                  FEEN REVERSING LEVFR
 THUMB SCREW                                                                           -STITCH INDICATOR

                                                                         BOBBIN WINDER NEEDLE
                                                                              THREAD TENSION
PRESSER FOOT
                                                                                                                                            - STITCH REGULATOR LIMIT SCREW
  THROAT PLATE
                                NEEDLE CLAMP THUMB SCREW
         FEED DOG'
                            NEEDLE CLAMP

                          Fig. 40. Names of Prncibal Parts of Machine 306K25


            APPLICATION OF SINGER AUTOMATIG TO CONSTRUCTION OF

                       GARMENTS AND FURNISHINGS


                            STRAIGHT STITCHING


  Straight stitching is accomplished with all   crepe weaves and all rabrics where the weave or

  of the discs when the bight is set at zero.          finish causes the fabric to cling to the needle.

                                                  either on its unward or downward stroke. The
  Central needle position is used for straight
                                                     Straight Stitching Throat Plate is alwavs used
  stitching except in the unusual situation when
                                                     when free hand straight stitching work is done
   it is desirable to alter the location of the needle
                                                where the presser foot is removed and the
  in relationship to the centre of the presser foot.
                                                        fabric Is held in hoops. as described on Page 94

  The All-purpose Presser foot and All-purpose
   Throat Plate are generally used for both zigzag    The Straight Stitching Presser Foot is
  stitching and straight stitching.                   more convenient for following the edge of a

                                                      lapped seam, the fold of a pleat or when placing
 TheStraight Stitching Presser Foot and    an edgestitching on a yoke or collar. The
  Straight Stitching Throat Plate are designed to    narrow right toe affords an excellent view
  accommodate delicate, soft fabrics, sheers,     the right o the needle for such work.
View original page 21Related documents and language editions

SingerPDF
Adjuster's for the Singer Model 20
Service manual
19 pages · EnglishRead →

SingerPDF
Singer 101-4 & 101-12
User manual
56 pages · EnglishRead →

SingerPDF
Singer 101-4 & 101-12 (black and white scan)
User manual
54 pages · EnglishRead →

SingerPDF
Singer 115
User manual
36 pages · EnglishRead →

SingerPDF
Singer 127 & 128
User manual
18 pages · EnglishRead →

SingerPDF
Singer 12K
User manual
12 pages · EnglishRead →

SingerPDF
Singer 15
User manual
36 pages · EnglishRead →

SingerPDF
Singer 15-125
User manual
38 pages · EnglishRead →

SingerPDF
Singer 15-22
User manual
13 pages · EnglishRead →

SingerPDF
Singer 15-30 / 15-87 & Generic 15 Class (rotated for printing)
User manual
14 pages · EnglishRead →

SingerPDF
Singer 15-30 / 15-87 & generic 15 class machines
User manual
14 pages · EnglishRead →

SingerPDF
Singer 15-86
User manual
24 pages · EnglishRead →
From the ISMACS International. Original publisher and archive notices are retained.
Check the model and edition against your equipment.
PDF verified 2026-10-11.