Sewing machines
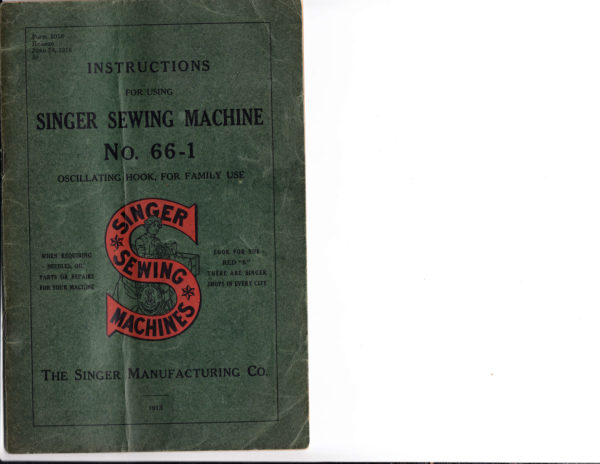
Singer 66-1 — User manual
User manual for Singer 66-1. 17 pages in English. Read the original PDF, download or print a copy without registration.
17 pagesEnglish67.0 MB PDF
Loading your manual…Open PDF directly
Document details
- Brand
- Singer
- Model / document
- Singer 66-1
- Document type
- User manual
- Language
- English
- Pages
- 17
- File size
- 67.0 MB
- Category
- Sewing machines
- Document date
- Not specified in catalog
Search available document text
Find a term, then jump to its page in the original PDF. Image-only pages may not be searchable; check the PDF for exact wording and diagrams.
Page 8 · Read text
13

                      To Oil the Machine                                           The bobbin winder spindle should be oiled through the two
                                                                                                                                    oil holes; also oil the worm which drives the cam wheel and the
          To ensure easy running and to prevent unnecessary wear of                                                                                                thread guide finger where it bears against the cam.
         the parts which are in movable contact, the machine requires oiling                                                                                  To lubricate the hook mechanism withdraw the slide and
                                                                                                            after removing the  lint and dust which may have accumulated
                                                                                         around the oscillating hook, put a few drops of oil on the lubri-
                                                                                                             cator, a small piece of felt at the right of  the bobbin ejector.
                                                                                 The slide should then be replaced.
                                                                                  To reach the parts underneath the bed plate the belt must
                                                                                          be thrown off the band wheel which drives the machine.  For this


                                  FIG.  15.                                    ‘ POINTS To BE OILED

                                                                                                                                          FIG.  16.  OILING POINTS IN BASE OF MACHINE
       and if used continuously it should be oiled each day. With moder-
         ate use an occasional oiling is sufficient.  Oil should be applied at
        each of the places shown by arrows on the illustration above                         purpose a belt shifter is placed at the front of the band wheel. By
          (Fig. 15).  One drop of oil at each point is sufficient.  Oil holes                           pressing the belt shifter lever to the left and working the treadle
         are provided in the machine for bearings which cannot be directly                         meanwhile, the belt is released and the head can be turned back on
         reached.                                                                                                          its hinges.  The places to be oiled are indicated in Fig. 16 by arrows
           Take out the thumb screw near the lower end of the face plate,                           pointing to the  oil  holes and bearings.  After  oiling, the belt
          raise the plate and slip it off over the head of the screw near the                        can be replaced by operating the treadle with the band wheel
        upper end of the plate; within the space thus uncovered the upper                          turning over toward you, when a revolution or two of the wheel
        end of the needle bar and its connecting link, the presser bar and                               will bring the belt back into place.
        the mechanism that operates the thread take—up can be seen; put                                                                       .  To oil the stand, put a drop of oil on the centres upon which
        one drop of oil into each of the oil holes and joints.                                        the band wheel. and treadle work, and both ends of the pitman rod


    »         On the back of the arm is a round plate or cover, fastened by                       which connects the treadle with the band wheel. M;
 we      a thumb screw; loosen the screw, turn the plate upward and


 a,         fasten by  tightening the screw; turn  the balance wheel slowly
                :.-r<,      and oil the moving parts inside wherever one part touches another;           v.52»

       rut.
    n};5-1       then turn the cover down and fasten it as before.

      3.x
   5~-:V-~:l
wwgflyfll
w
View original page 8Page 9 · Read text
14

                    HINTS
   The Belt.  See that the belt is not too tight; it should always
be tight enough not to slip.   If too loose remove one end of the


                                                                                                                                                                                                                                                                                                                                                                                                                                                                                                                                                                                                                                                                                                                                                                                                                                                                                                                                                                     'hook, shorten the belt and rejoin.
   To Throw Off and Replace the Belt.  The belt shifter is on
the stand at the front of the band wheel;  if the small lever  is
pressed over to the left while the machine is running, the belt will
be thrown off the band wheel.  To replace the belt, allow the lever
to spring back to its place and run the machine as in sewing,
with the band wheel turning over toward you.
    Machine Working Heavily.  If the machine runs hard after
standing idle for some time use a little kerosene or benzine in the
                                                          INSTRUCTIONSoiling places, run the machine rapidly, then wipe clean and  oil.
If it still runs hard it is certain that some bearing has been over-
looked in cleaning and oiling.                                                                               FOR USING
   To Avoid Breaking Needles.  See that the presser foot orattachments are securely fastened by the thumb screw.  Do not         ATTACHMENTS
sew heavy seams or very thick goods with too fine a needle. A
large needle and thread to correspond should be used on heavy                                              WITH
work.  See page 28.
                                                    SINGER SEWING MACHINE    See that the needle1s riot bent and avoid pulling the material
when stitching, either will cause the needle to strike on the throat
plate and break.                                                NO. 66-1
    Breaking of Upper Thread.   If the upper thread breaks
it may be caused by:
        Improper threading of machine.
         Tension being too tight.
       The thread being too coarse for the size of the needle.
        The needle being bent, having a blunt point, or being set
            incorrectly.
    Breaking of Under Thread.   If the under thread breaks
it may be caused by:
        Improper threading of bobbin case.
        Tension being too tight.
    Skipping of  Stitches.  The needle may not be  accurately
set into the needle bar or the needle may be blunt or bent.  The
needle may be too small for the thread in use.
View original page 9Page 15 · Read text
27

                                                                         push to the right.  After bringing the hole at the right of the cover              Under Braider (No. 35963)
                                                                                      plate in line with the hole in the throat plate, press the cover into
    Substitute the quilter foot for the regular presser foot. Attach                    position, and close the slide covering the bobbin case.  See Fig. 32.
the under braider as directed for the shirring plate; see page 24.


                                    FIG. 31

The pattern or design to be braided must be stamped or traced
on the wrong Side of the goods.  Pass the end of the braid back
through the guides in the under braider and under the needle.

          EMBROIDERY AND DARNING

         ,   While embroidery and darning can be done on the machine
when threaded for regular sewing, the use of feed cover plate NO.
32622 is recommended, as movable contact with the feed in some
cases might interfere with the handling of the work.
   Do not change the adjustment of the feed dog in any way as it
is essential that its position Should remain aS originally fixed.
   When feed cover N0. 32622 is used it is necessary to lead the
upper thread through the eye in the thread regulator at the left Of the
tension discs, and not under the thread regulator.  See Fig.  82,                              FIG. 32.  MACHINE THREADED FOR EMBROIDERY AND DARNING
page  27.  With  this exception the threading  Of  the machine
is the same as for regular sewing.
                                                                             Feed cover plates are not included in the regular sets of   Remove the presser foot and let down the presser bar lifter to
                                                                                                                                                                                                                                                                                                                                                                                                                                                                                                                                                                                                                                                                                                                                                                                                                                                                                                                                                                                                                                                                                                      ' attachments; they are on sale at  all Singer shops at the price ofrestore the tension on the upper thread, which  is released and
                                                                                   ten cents each.inoperative when the lifter is raised.
    To attach the feed cover plate draw to the left the slide that                        Instructions for making embroidery are contained  in the
                                                                                   “ Singer Instructions for Art Embroidery,” sold by Singer Sewingcovers the bobbin case, then insert the downwardly projecting
                                                                         Machine Company at a reasonable price.hooks on the cover plate under the edge of the throat plate and
View original page 15Related documents and language editions

SingerPDF
Adjuster's for the Singer Model 20
Service manual
19 pages · EnglishRead →

SingerPDF
Singer 101-4 & 101-12
User manual
56 pages · EnglishRead →

SingerPDF
Singer 101-4 & 101-12 (black and white scan)
User manual
54 pages · EnglishRead →

SingerPDF
Singer 115
User manual
36 pages · EnglishRead →

SingerPDF
Singer 127 & 128
User manual
18 pages · EnglishRead →

SingerPDF
Singer 12K
User manual
12 pages · EnglishRead →

SingerPDF
Singer 15
User manual
36 pages · EnglishRead →

SingerPDF
Singer 15-125
User manual
38 pages · EnglishRead →

SingerPDF
Singer 15-22
User manual
13 pages · EnglishRead →

SingerPDF
Singer 15-30 / 15-87 & Generic 15 Class (rotated for printing)
User manual
14 pages · EnglishRead →

SingerPDF
Singer 15-30 / 15-87 & generic 15 class machines
User manual
14 pages · EnglishRead →

SingerPDF
Singer 15-86
User manual
24 pages · EnglishRead →
From the ISMACS International. Original publisher and archive notices are retained.
Check the model and edition against your equipment.
PDF verified 2026-10-11.