Sewing machines
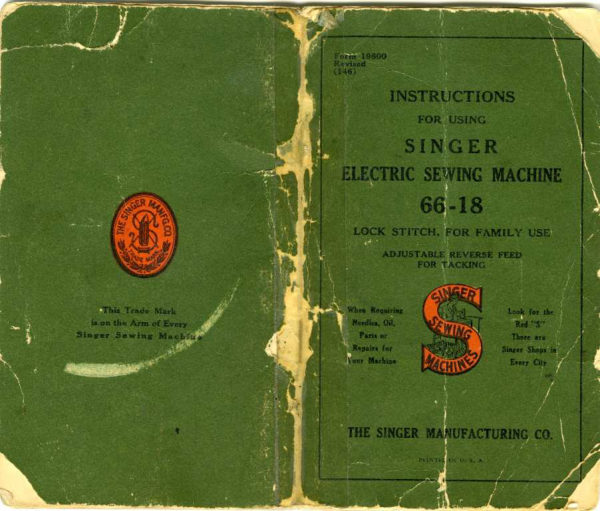
Singer 66-18 — User manual
User manual for Singer 66-18. 33 pages in English. Read the original PDF, download or print a copy without registration.
33 pagesEnglish4.5 MB PDF
Loading your manual…Open PDF directly
Document details
- Brand
- Singer
- Model / document
- Singer 66-18
- Document type
- User manual
- Language
- English
- Pages
- 33
- File size
- 4.5 MB
- Category
- Sewing machines
- Document date
- Not specified in catalog
Search available document text
Find a term, then jump to its page in the original PDF. Image-only pages may not be searchable; check the PDF for exact wording and diagrams.
Page 2 · Read text
.   4214     “mm.


       TIIE IMPORTANCE OF USING
    SINGER LUBRICANTS FOR YOUR                                        THE IMPORTANCE OF USING
      ELECTRIC SEWING MACHINE                                             SINGER NEEDLES FOR YOUR

                                              SEWING MACHINE
    “The Best is the Cheapest”

    Use Singer OiI on Machine
                                         You will obtain the best stitching     Knowing from many years' experience
                                                                      results from your sewing machine      the great importance of using good  oil,
    we put up an  extra quality machine                                  if it is fitted with a Singer Needle.
        oil,  in  cans,  especially  prepared  for
     sewing machines.

  Use Singer Motor Lubricant on Motor                                                          Singer Needles can be purchased
    The Singer Motor Lubricant  is espe-                   from any Singer Shop or Singer
       cially  prepared   for  lubricating  the                                                      Salesman.
     bearings  of the  electric motor.  This
        is a pure non-flowing compound which
      retains  its  consistency and  possesses
                                                          Singer Needles are contained in     high lubricating qualifies.
                                                            the Singer Green Needle Packet
                                                       with the famous red  letter “3“
  Copyright, U. S. A” “115.1920, 1921.1923.1924, 1926. 1928.
     1929. 1931, 1932' 1933, 1935, 1937. 1938. 19-10 and IO-II.               upon  it.
            by Tim Singer Manufacturing Co.
             All Rights Reserved for All Countries
View original page 2Page 3 · Read text
INSTRUCTIONS FOR USING
         S l N G E R
 ELECTRIC SEWING MACHINE

                                         l        66 -             8
  OSCILLATINC HOOK, FOR FAMILY use

           ADJL’S'I'ABLE REVERSE FEED
               FOR TACKINC


                            .\'I.-\«:m_\’15 60-18


THE SINGER MANUFACTURING COMPANY
View original page 3Page 4 · Read text
To all whom it may concern:

  The  placing  or renewal  of the name
“Singer" (Reg. U. S. Pat. OR.) or any of
the trade marks of The Singer Manufac-
turing Company? on any machine that has
been repaired, rebuilt, reconditioned, or
altered in any way whatsoever outside a
Singer factory or an  authorized Singer
agency is forbidden.


 Genuine Singer Needles should be used
            in Singer Machines.
   These Needles and their Containers
           are marked with the
  Company’s Trade Mark “SlMANCO.”  1


      Needles in Containers marked
        “For Singer Machines”
       are not Singer made needles.  _
View original page 4Page 5 · Read text
DESCRIPTION                   Motor Can be Operated on Either Alternating
                                                         Current or Direct Current
   Machine 66-18, for family use, has an oscillating
 sewing hook and makes the lock stitch.                  The electric motor, which is located at the hack
  Back tacking is easily done on this machine after         of the machine, can be operated on either alternat-
 moving the stitch regulating lever to the upper end         ing current or direct. current. as desired. The. standard
of the stitch indicator slot to reverse direction of        windings of the motor are for 110 volts. and motors
stitching as instructed on page 18.                        can be furnished for any voltage between 100 and 250.
   The. machine is especially designed for operation
by electricity, having an efficient electric motor at-           Special motors for 32 volts direct current, and
 tached to the upright part of its arm. The motor          for 50 Volts alternating current and direct current,
 drives the machine through a belt and the speed  is        have also been developed and are available.
 regulated by a combination knee and foot controller.
    It is also equipped with an electric spotlight.
   Phobroidering and darning are accomplished as                                                       Points to Determine Before Connecting instructed on pages 56 and 57.
                                                   Motor to Electric Service Line

                                                        Obtain the following information from  the. Elec-          SINGER SERVICE
                                                                        tric  Light Company which  supplies  the  electric
                                                            current for the  circuit to which the motor  is to  Now that you have purcha‘aed your new Singer,                                                         be connected.we do not want you to feel that your relations with
us have. come to an end. You are cordially invited                                                                                                I.  If current  is direct, what  is the voltage?  The,
to visit your Singer Shop at any time for assistance                                                           Voltage must. be within the range stamped on the
in your sewing problems. You will be most welcome.                                              name plate of the motor.
  We hope, too, that you will make the Singer Shop
your headquarters for sewing supplies and service.                                                                                2.   If current  is alternating, in addition  to the
Only there or through authorized imnded Singer        voltage, what is the number of cycles? The number
representatives can you secure genuine Singer  oil,                                                               of cycles must be within the range stamped on the
needles, belts, parts, etc., so important  in getting                                             name plate of the motor.
the best results from your machine. And remember,
only an authorized Singer representative should he        The voltage  of any  circuit and,  if alternating
allowed  to touch your machine when  repairs or        current, the number of cycles, can he verified by
adjustments are required.                                 looking at the name plate on service watt meter
  World-wide Singer Service has no equal. Use it!    '       installed by the local Electric Light Company.
View original page 5Page 6 · Read text
To Connect the Machine to
               Electric Service Line
   At taeh the terminal plug at the end of the electric
 eord to the nearest electric outlet and the machine                                                   CAUTION
 is really for operatic").
                                               When you have finished your sewing, always dis-    To Turn the Spotlight “On” or “Off"
                                                           eonneet the plug from the electrie outlet.
  Reach over the top of the machine and turn the
 knurled switeh  ll”, Fig. 2) in a clockwise direetjnn.
                                             To Insure Perfect Action of the Machine
     To Remove and Replace the Bulb
                                               “he“ turned by hand, the balance Wheel must
                                F             always turn over toward the operator.

                                                 Do not run the machine with the  pt‘esser  foot
                                                                  resting on the feed without. cloth under the press-er
                                                                        fnnl  .

                                                                           llu not run the maehine when both bobhin ease
                                                      and needle are threaded,  unless there  is material
                                                        under the presser foot.

                                             Do not try to help the machine by pulling the
                                                                       fabric, lest you bend the needle. The maehine feeds
                                                             the work without assistanee.

                                                  The slide over the bobbin ease should be kept
   First remove the. lens (C, Fig. 2) from the spot.-                                                                closed when the machine is in ope ation.light shade by turning the lens to disengage the lugs
on the lens from the lugs on the inside of the shade,
and the lens will drop out.
  The bulb  is removed by unscrewing  it. from  its
socket in the spotlight. To replace, screw the hull)
into the socket, then replace t  1 e lens.
  When purchasing a new bull), specify No. 1951—18
and the voltage of your electric supply.
View original page 6Page 10 · Read text
14

           To Set the Needle

  Turn the balance wheel over toward you  until
 the needle  liar moves up  to  its  highest  position,
 loosen the thumb screw  (V, Fig. 3)  in the needle
clamp (Y, Fig. 3) and put the needle up into  the.
clamp as far as it will go, with  its fiat side toward
 the right; then tighten the thumb screw. To select
 the correct needle, see page (50.


             Upper Threading
          SEE Fm.  ll) ox rm: Founwwo PAGE

  Turn the balance wheel over toward you until the
 thread take-up  lever  (5)  is  raised  to  its  highest
 position.  Place the spool of thread on the. spool pin
at the top of the machine, lead the thread into the
thread guide (I) at the left, down, under and from
right to  left. between the tension discs  (2), into the
small wire spring (3), under the thread mgulator (4)
at the. left (not through the eye in the thread
regulator), up and from right to left through the
hole  in the end of the thread take-up lever  (51,
down into the. eyelet  (6), into the lower wire guide
 (7), then from left to right through the. eye of the
needle  (8).

  Draw about two inches of thread through the
eye. of the needle with which to commence sewing.
  Instructions for threading the machine for darning
and for embroidery are given on pages 56 and 57.                                                                   Fw.10   (Tex-En Tnarcamso
View original page 10Page 11 · Read text
16                                                           17
         To Prepare for Sewing                                                 To Remove the Work
  With the left hand, hold the end of the needle                                                        Let the thread take-up lever rest at  its highestthread, leaving it slack from the hand to the needle.                                                                   osition, raise the presser foot and draw the fabric
                         Turn  the. bal-                                                                llack and to the  left about too inches; pass the
                                a n c e  w h e e.  I                                                        threads over the thread cutter (LL, Fig. 11) and pull
                                 over toward you                                             down lightly to sever them. Leave the ends of the
                                       until the needle                                                        threads under the presser foot.
                             moves down and
                            up again to its                       Tensions
                                     highest position,
                                   thus catching the         For ordinary  stitching, the needle and bobbin
                               bobbin thread.        threads should be locked in the center of the thick-
                      Draw up the        ness of the material, thus:
                             needle thread
                              and the bobbinFro 11  Diuwrso UP Booms Tnnuo                                  thread will come
up with  it through the hole in  the throat plate.
as shown  in  Fig.  ll.  Lay  both  threads  hack
under the presscr foot di-                                                         Fm.- 12. PERFECT Srrnen
agonally across the feed.
as shown in Fig. 11A. to                                                                            If the tension on the needle thread is too tight, or
the right. or left, depend-                                                                                         if that. on the. bobbin thread is too loose, the needle
ing upon which side of the                                                         thread  will  lie straight along the upper surface of
needle the material  is to                                                           the material, thus:
be located. so that when
the presser foot. is lowered.
the. threads will be firmly
held between the feed and                               Fm. 11A Tunnans [Nthe presser loot.                                        I’m-sinus fro Cousins”:
                                                                                               TENSION                                       ocaiso                           Fro. 13. Twin NEEDLE Truman
         To Commence Sewing                                                                           If the tension on the. bobbin thread  is too  ti ht
                                                            or if that on the needle thread is too loose, the bob in  Place the material beneath the presser foot. lower                                                        thread will be straight along the under side of thethe presser foot and commence to sew. pressing the                                                              material, thus:knee controller to the right, or depressing the loot
controller, to start. the machine.
  When sewing thick material, it may be necessary
to turn the balance wheel over toward you by hand                                                                        pry c
to start the machine.  This should also be done  if
the machine stops when sewing across thick seams.
View original page 11Page 12 · Read text
19
                           18
                                                    To Turn a Corner        To Regulate the Tensions
                                                      Stop the machine when the needle is commencing  The truaa'on on the m-wllr Ull‘t’llll should be regulated
only when the prrsser fool is down.  Having lowered       its upward stroke  Raise the presser foot and turn
                          the presser foot, turn the      the work as desired,  using the needle as a  pivot,
                                                                                                                                               l)!“(‘SSt.'I' foot                          small thnmh not       I l', shown                                                        then lower the
                             in  Figs.   l?) and  3:,  at
                        the front of the tension      To Regulate the Pressure on the Material
                          discs, over to the right                                                                                           lt’or ordinary family sewing,  it. is seldom necessary                           to increase the tension.
                    To decrease the  tension,       to change the pressure on the material   If sewing
                          turn this thuml) nut over                                                                                       line. silk or llimsv material, lighten the pressure hv
                             to the left.                                                                                          (0. Fig. 5) on the topot  I’m, 15. Nation»; THIN-LAD                                                        turning the thumb screw                       The tension on the hot»              'l’E.\'Mo.\'                                                                                 To                                                          the machine to the  left so that-it screws up                            hin thread  is regulated hy
                                                                                                                                         litt't‘fistlt‘t‘,  turn  this thumb screw  tothe larger screw (A, Fig. 4) which is nearest the hack           Ittt‘l‘t'uSt‘  the
of the hohbin case tension spring. To increase the      the  right,  so that   it  screws down.  The  pressure
tension, turn this screw over tmvard you. To decrease                                                        should he only heavy enough to prevent the materialthe tension. turn this screw over from you.                                                     from rising with the needle and to enable the feed to  When the tension on the. hohliin thread has been
once properly adjuated,  it  is seldom necessary  to     move the Work along evenly  The heavier the ma-
changcit, as a Correct stitch can usually be obtained         terial,  the  heavier  the  pressure;  the  lighter  the
by varying the tension on the needle thread.                                                               material. the lighter the pressure.
        To Regulate Stitch Length                                                                    Batting
  The machine is adjustahle                                                The longest stitch made by the machine  is found
for stitches from 6 to 30 to the                                                              satisfactorv for basting, after loosening the tensioninch, as indicated by the nu-
merals on the stitch indicator                           on the needle thread so  that. the stitches mav be
plate (A, Fig. 16).                                              easilv pulled from the material.
  Set the lever  lli,  Fig.  16)                                                    Machine basting is lirmer and more even than that
with its upper side in line with                                                    dune by hand. in addition to being much quicker.the numeral representing the.
desired number of stitches to                                                 To Sew Flannel or Bias Seamsthe inch.
  For Back Tacking,  raise.                                      (Tee a short stitch and as light a tension as possible
the lever (B) to the upper end                           on  the  neidlc  thread  to  leave  the  thread  loose
of the indicator plate (A)       "W“                                                    enough  in the seam to allow the goods to stretchmm-kpd “Hack Tuck”  The  Fruits, STITCHllEnl’I..\TOR
                                                                                               it necessary.machine will then stitch in a reverse direction. mak-
ing it easy to fasten the ends of scams.
View original page 12Page 15 · Read text
2.3

                                               To Replace the Bobbin Case

                                                           8mm: AT Tm; l’icox'i' or rm.  .\l.\0'lllVl>'.)                                                                            (t'H-anu'ou
                                                         See that the needle is raised to its highest position
                                                  and that. the latch (00, Fig. 23)  is raised from the
                                                                        slot (PP, Fig. 23) and moved toward you.


                 I’m. 21. Hustxu Tm. LA'nn
   Insert.  the. nail of the forefinger of the  left hand
under the latch (00, Fig. 2l l, raise the latch  just.
high enough  to  clear the edge at  (PP,  Fig.  2!)
and then move it toward you.
  Under no circumstances must the screw
(QQ. Fig. 21) be loosened. The loosening of this
screw will change the clearance for the t bread between
the bobbin case and the. bobbin ease position bracket.


                                                                                            ltonmx  (fixer:                                                                                      Fin. 23. SHHWINU  ‘l‘llt;
                                                                                                Poe-arrow Hum-arm

                                                     Hold the bobbin case between the forefinger and
                                              thumb of the left hand as shown  in  l-‘ig. 22.  Insert
                                                          the forked end of the bobbin case under the throat             Fro. 22.  ltr-zuovtxn Tm: Bonnix CABS
                                                              plate so  that  the  fork  straddles  the end  of  the.
  Hold the bobbin case between the forefinger and                                                      bobbin ease position bracket iRR, Fig. 23). Thenthe thumb of the left hand as shown in Fig. 22. Tilt
the bobbin case to the left and at the same time       with a slight twisting motion  of  the. bobbin case
slightly turn the  right. or forked end toward you        to the left and to the back, lightly press  it down-
so that   it  is moved out of engagement with the      ward  until the edge  of the sewing hook engages
Sewing book.  Then  tilt the bottom  case. toward                                                                    in the groove under the rim  of the bobbin  ease.the right and remove it  (see Fig. 22).
View original page 15Page 17 · Read text
INSTRUCTIONS FOR USlNG THE
          ATTACHMENTS


        THE FOOT HEM MER

                  The Foot Hemmer (Fig. 25)
                               is attached to the. machine in
                      place of the presser foot. Raise
                      the iii-mile to its highest position,
                       loosen the thumb screw which
                   clamps the presser foot to the
                    presser bar and remove the
                      presser foot.  Attach the Foot
                       ."T.'4i   Hemmer to the bar, taking
                      rare to tighten the screw firmlyr
  FIG. 25. Tm; Four    so that the Hemmer will not
     Banana                  become loose when the machine
                               is running.  Turn the balance
wheel slowly  to make sure that the needle goes
through the center of (the needle hole and that the
lower thread  is properly pulled up.

  How to Start the Hem at the Very Edge

  [low to start the hem at the very edge of the
material  is of great importance  in learning to use
the Hemmer.   It" the hem  is not started at the edge
and the material  is pulled bias 3 perfect hem can-
not be made.
View original page 17Page 19 · Read text
33
  Whr-n using this scam the garment must first he
fitted and tho vdgi- Of the material trimnwd, alluw-             Hemming and Sewing on Lace
ing for ubuut one-eighth inch sum]. The twu pdgvs                           in One Operation
are  plat-rd  tum-(her  zind  insvrtml  in  tho  Ilt‘lnlllt‘l’                                                                                 Start. thn hem  in the rvgular way, and with tho
in the same manner as a singli- hum.  If tlu- mntvrizil                  “Pt‘tlll' hulding tlu-  llt'lll in pnsitiun ruisv  llll' prvssr-r
                                             Hf nmtorinlis bulky. the edge of the upper piece
may lw plucml uhnut  nnv-o'iglith inch  in  l'rnni the
edge (if thv lower pit-(w.  See Fig. 28.

  Tho free mlgn nf u  llt‘llllllf'tl  S‘t‘tllll may lw Hillt‘llt'tl
flat. to tlu- gairnu-nt  if  (lt‘Sll't'tl.  First upvn  tlu- w-nrk
                                                      SCI'Hll  ul'  tha-nut  flat,  tht-n plucv thv   lll'tll  in the
                                u guidv, holding thv mlgz-llmnnwr, whivh nets as
 ul’ thv  llt‘lll  in  pnsitiun whih-  it  is  living  stitrlu-d.

    If tlw swam  is stitclmd flat  in the garment unu
 row nf stitching  is  visihlc- nn thi- right  sidr».

  Thu lu-mmvd swim may  l)(' list-d nn muslin, lawn,
                                                                                             Fun. 214.   llF.\|\|I\1$ AN!) Srtwrxr. fix LACE pt‘l‘Ctllt', organdiv nr nllwr finv materials  whvrc' a
narrow scam  is desirable.
                                                                                   hair sull‘wivntly tn zilluw tlm edge at  lllt‘ him“ tn he
                                                                  slipped in nndvr tlw hunt  llt'llllllt‘l', at tlw smut? tinw
                                                               bringing  it up thrmigh  thi- Slut  at.  thi- right Hf tho
                                                          Hi'mnwr.  Son  Fizz.  29.  luwvr  thi-  liar; turn  the
   Genuine Singer Needles should be used               halancv whm'l and catch the edge of  tllt‘ lucv with               in Singer Machines.                                                               tlw nvmllv. Guido the hem with the right hand and     These Needles and their Containers                                                                the lace with tlw left.  (Biro. shnuhl lw taken nut tn              are marked with the                                                                 stretch tho lawn as  it  is living fed into the lIi'mmm'.
                                                                                      1    Company’s Trade Mark “SIMANCO.”                            it  is nut  practical to sow gnthm‘vd lace cm with
                                                                                    tlu- Ftiflt. llmnmvr, HS tin" lulled lace catches in thv
                                              Hummer slut.
        Needles in Containers marked                 A wry uttrzwtivv way of applying lace so  that.
           “For Singer Machines”                        the stitching of the hem is not visihlnis to start the
                                                  hem  in the rvgiilur way, slipping the lucv  in  l'rnm          are not Singer made needles.                                                                                    thi-  left.  until  thr- odgv  is caught  with  the hmn
                                       m thu same position as thr- uppr-r pim'v  (lf material
                                                   when making a lu-innwd scum.
View original page 19Page 20 · Read text
3."

                                         ADJUSTABLE HEMMER  Wide Hamming                       Hamming   ADJUSTABLE HEMMER~—
                                                                                                                     r                                      '      4—‘     I                .                                                                F“ lmlu   a.  In  111 mmv'  than  h,”"  wulv,-    lnusvn tlw
  Rmnuvv thc- prvssvr [nut and uttzu'h llw mljlhlublt-                                                   thumb sou-w  in the llvmmvr nml mun;  llu- sculv
Hvumu-r  in  its  pluvv,  as slmwn  in  Fig.  30.  Tlus


                                                                                                                                        1310. 31
                              I’m. 30
                                                                        tn tht- right as far as it will an, lhvn swing  it, tmvard
                                             fig" to  §%}” widv. TheHmmnvr will turn lwms (rum                                                        yuu  as shnwn  in  Fig.  31 and  (ightvn  thr' thumb
mljusln'wnt  is mmlv by lunsening the thumb sew-W           svrvw.  Fnhl fmfl PIT'HSP down a bun nf thP (lvsirml
«m the annm-r and mnving thv svulc to thv right           wulrh; pass the fold under thv oxtonsinn at  the;- right
nr lul’t until tlw hum mrnml  is  nl' tho dosirml width.                   nl‘  lln' Hmnmvr, and  tlu' ngv lntn  flu:  l"nlCl(‘1' as
Plzwv the clnth  mull-r tlw “Humor and (lmw  the         Slmwn  in  Fig. 31, and pmcvml to stitch the lwm.
mlgv tmvurd tlw  left under thv sealv, as shown  in
                             uf tlw (‘lntln back and fnrthFig. 30. Draw tlw ngf'
until  tlu' fold  nl'  til‘w hvnl  is fm'mml, stupping will]
thl' 0nd umlm' the  nm-(llv.  lmwvr tho press” bar
and mnnmmwt- tn smv, lwing careful in sn guidp the
vlnth as to lump the Hummer full.
View original page 20Page 23 · Read text
ID                                                                                                         ill
                                                           Applying a French Fold to a Curve(if the  liindor and  to the  left, nlluwing unfinished
edges tn 5“ mg naturally intn tho serull ml the Hinder.           A  Fri-Hell (aid  is npphed by plueing the uniterinl
  Never  pull the binding as   it  feeda' tbrnugh  the           under the uttnclunont and stitehing the binding in
Hinder,   :i.~‘ bins material  is very easily atretohod and
will he tun nnrrnw when  it  l‘t'flt‘lit's the needle. “lien
this ueeurs the edge nill nut be turned.
  “lien  binding: n eurvod edge  tsoe big. 37'. turn
the mnterinl nnly us but a» the tnuehine sows.   It  is
nut possible to hold the inntorinl in the entire length
Ht the sernll when binding n snmll (rune.
   l)n nut push the material in [nu first,  {is the edge
will then lwomno puckered. nnd dn nut streteh tho                                                                                (lb/15
 llifillt'l‘lftl  iii“ the eurve will nut be the pmper Slmtw                                                l~|-.. tit  .\l'l'l.t'l.\u    l urzxx n    I HI  [1'-
when finished.  H the stitt'bing din-s  “(it  (‘utt'h the
oilin-  nt' the binding, the  .~('rull sluruhl be adjusted n             pusitinn us slmwn in Fig: 10 A line inmh- in" butting
tt'iili' tn the left.                                                   nr with ohnlk ur peneil may be used as a guide  Ill
                                                             applying rnws where minted.
           Binding Inside Curves                                              THE EDGE-STITCHER
   lt  will be  tii't‘t'>>:tl'_\' tn prm'tiee binding.r an in>ide             This  useful uttnehment  is
curve. un  \'.‘.ll'lUllS  lillitlr ml nuiterml,    7.1.5" this cum:  is              tnstotn‘tl tn the nmt‘hine  in
t'unnd on nearly all garments whioh may be finished             plnoo Hf the press-er hint. and
with a humid edge.                                                          will be. found an indispena‘nble
  When  llllltllllL' an  iltsltll‘ eurvi- with the Binder.             nid whenever stitehinp; must.
straighten nut  the edge in   it  is being fed intu the            be kept noeurutolv  (iii the ex-
uttnehinent. “lien (lttlllflthis,   ‘tll't' slmuld be tnken           treme edge  int  n, pioee  nl' inn-
tint tn  sti‘l'tt‘li the edge ml the material.                                   terizil.  The  sluts. numbered
    If the mntorinl is suit. like lmtiste nr crepe de chine,             l'rum   l to 3 in Fig. l l. sorVe as
add 8 row of nnu'luno stitehing cluso tn the will" “f          guides fur sowing together
the curve betnre binding.                                              lnees, insertions tilltl embroid-
                                                                                 eries, sowing in pnsitinn hem-
                                                   med nr t'nlded edges, piping or
                                                                                                                                                                                                                                                                                                                                 1       ._                                                              .                                                P‘Ill. 4‘
                                                                                        st'“ mg tlzit  l)l'tlltl tn n. garment.     Tm.- lama-Mmmm
View original page 23Page 24 · Read text
42                                                                                    43                                    -
         Adjusting the Edge-Stitcher                                                              Lum- :ind rihhon or othor insortions can ho sot  in
                                                                                                               rind  4,  Fig.  4]   I.  Tho   Aftoi' attnohing tho odgo-stitohor to tho nuu'hino,                  h); usnnu tho sumo Sluts  tl
 turn tho lmlunoo whool slowly  h)’ hand to soo that
 tho noodlo got-S through tho contor of tho noodlo holo.
Tho distunoo of tho lino of stitohingr from tho odgo
 of tho  nmtorinl  in  tho  slots oun  ho  rogulutod by
 pushing tho lug (A, Fig. 41,1 to tho right or loft.  If  it
 llIHVt'H hurd, put a drop of oil undor tho hluo spring,
 thon wipo  it dry.
Sewing Lace Together with the Edge-Stitcher
     It  is ditlioult to sow two lnoo odgos togothor own
uttor hosting. hut  the- odg‘o—stitohor mnhos   it  pos-


                                                                                                 Fin.   »l.'t   Sigr'rix‘o   l.\' I.“  i: l.\~u~:nr|o\

                                                                         mutt-rial may ho foldod ovor hot‘oro placing:  it  in tho
                                                                                    slot so that u douhlo thicknoss  is stitohod nnd  will
                                                                       not pull out. Tho surplus mutorinl  is trimmod nwny
                                                                        oloso to tho stitching as shown in Fig. 43.
                                                               Piping with the Edge-Stitcher
                                                                                     l’ipinp: is  \'or_\‘ nttrnotivo  it' tho oorroot oontrnstintz
                                                                     onlor  is ohoson  for tho piping mntorird.  Pluoo tho
                                                                       piping, with  its finishod odgo to tho  loft,  in  slot  3
                                                                             (Fig. 411.  Placo tho odgo to ho pipod  in slot  4, no
                                                      shown in Fig.  4-1.
                                                                 Piping should profo uhly ho out bins, and should
                                                               ho  (‘ut twiuo tho width of tho Slot   '.3,  Fig. 41!  in
                                                                tho odgo-stitohor so that. it (run ho foldod once.                                         l' in.  4:3.  Si.“ t\l. Lu   t‘. 'l‘o«n-:nn~.n
                                                     Applying Bias Folds with the Edge-Stitcher
sihlo to stitch on tho vory odgo.  Place? one odgo in
                                                              Foldod him: tapo or military hruid, used for noutslot 1umltlu-othorinslotLnndndjustlugiA,Fig.“    1
                                                        and Colorful trimming, may ho sown on by  placing].’until hoth odgos nro ouught hy tho stitching.  llold                                                                tho garmont undor tho odgo-stitchor the sumo ustho two  piooos  slightly m'orlappod  to koop thom
                                                           undor u prossor foot. and placing tho tupo in slot.    1against tho onds of tho slots. Tho thrond tonsiot»                                                                  or 4 (Fig.  oil ). To nmko u squnro corner, sow untilshould ho looso to :i\'oid purl-coring of fino luco.
                                                                 tho turning point  is roar-land. thon romovo tho tape
View original page 24Page 26 · Read text
46                                                     47

      Tucking with the Edge-Stitcher               SHIRRING WlTH THE GATHERER

  Dainty narrow tucking may he pl'UtltH’Hl on the                                                   The gathcrcr  is fastened to thc machine in the
                                                    same manncr as the presscr foot.  Material placededge-Hitcher   l)_\' inserting (‘rcascd folds  Ill slot   1 as
                                                          under  the. gathcrcr and stitched  in the usual way
                                                                             will  be. slightly gathered.  Any fabric that drapes
                                                                      Well  is especially suited for shirring with the gath-
                                                                           crcr. Most shirring with the gat-hercr is done with a
                                                             long stitch and tight tension. To increase the full-
                                                                 ness of the gathers, lengthen the stitch. To  (lt't‘l‘t" so
                                                               the fullness, shorten the. stitch.


       Fm. 18. Tu‘xn‘o wrru rut»: linuic-er'rcntzn

                                                                     Fm. 49. THE (_i.\Tll£l£Elt IN Ueuurioh’
shown in Fig. 43. and adjusting the edge-stitchcr to
right or left for the. desired width of tuck, up to  1.3          With the gatherer, it is possible to shirr in narrow
inch.  Succcssivc tucks may be easily creased by         rows as shown  in  Fig. 49.  The material may he
folding the material at the desired distance from         guided as easily as when sewing with the pressor
the previous tuck, and then running the length of           foot.  Fine materials, such as hatistc,  silk or net,
the fold over a straight edge such as the edge of       may  he very attractivvly shirred.  Where only a
the sewing machine cabinet.  The secret  of good           slight fullness is required, as at the top of a sleeve.
tucking lies in a light tension, short. stitch, and fine           or around the neck, the gatherer will he found very
thread and needle.                                           convenient.
View original page 26Page 28 · Read text
50                                                                                           51
  The names and uses of the principal parts of the                                                To Adjust the Ruffler for Gathering
                                                                                                                                                                                                                                                                            '   a      ’            '                                                             ,    ‘      '\'     -               .                                       .miller are as follows:                            "               ISEE Rznzmwem 1\ Fro. 521                       lho adjusting finger  ll‘, lug. 03>  is not intended
A—Foor  the part by which the miller is attached           for gathering and should be moved forward or awav
        to the presser bar.                                 from the needle, as shown in Fig. 53.
B  Form Ania—tho section  that must  be placed
       astrido the needle clamp.
C  Anurs'rixo Semen—t he screw that regulates the.
        fullness of the  athor.
D  Pm lJE("l‘l().\'—t-llt‘ part. that. projects throughtla»
        slots in the adjusting lover.
E  ADJUSTING LEVER—the lever that. sets the rufiler
        for gathering or for making a  plait once at
      every  six stitches. or once at every twelve
        stitches, as desired; also for disengaging the
        rutfler, when either plaiting or gathering  is
       not desired.
F  AnvaTINci; FINGER—the  part. which  regulates
       the width or size of the plaits.
C— SEPARA'roR Grim;  the guide on the underside
        of the rufilor, Containing slots into which the
      edge of the material  is placed  to keep the                                         F! t}. 53
      heading of the raffle even' also for separating
                                                             Raise the adjusting lover      : K, Fig. 33) and move  it       the material to he rufllod from the material
        to which the ruflic  is. to be attached.                   to the left so that the projection  (I), Fig. 53!  will
H—Rt'rrmm; BLADE—tho. upper blue steel blade         enter the slot marked “ l" in the adjusting lover  {I'll
       with the teeth at the end to push the material       when the lever  is released. The rufiling blade will
         in plaits up to the noodle.                           then move forward and back once at every stitch.
J  SEPMLWOR BLADE—the lower blue stool blade         Insert the material to be ruffled between the two
       without  teeth, which prevents the teeth  of         hluo blades, following the line 2 in Fig. 52. Draw       the milling blade coming into contact with                                                            the material slightly back of the needle, lower the       the feed of the machine, or the material to                                                               presser bar and commence to sew.      which rutlle or plaiting is to be applied.
                                               To make fine gathering, shorten the stroke of the
   To Attach the Rufl‘ler to the Machine             rutfling blade by turning the adjusting screw   (’(',
                                                                   Fig. 53) upward; also shorten the stitch. To make  Raise tho noodle bar to  its highest. position and
remove  the  pressor  foot.  Attach  the. rutflor  foot          full gathering, lengthen the stroke. of the ruffiing
 (A,  Fig. 52}  to the pressor bar by means of the        blade by turning the adjusting screw  t(’l  down.-
thumb screw,  at  the same time placing the fork       ward; also lengthen the stitch. By Varying these
arm 1B, Fig. 52} astridc the needle clamp as shown        adjustments, many pleasing varieties of work can
in Fig. 53.                                                be accomplished.
View original page 28Page 29 · Read text
.- q
                                                      0) a.-                                                          33
      To Make a Ruffle and Sew it to a                      rullle n. that the wrung sides are tngether.   It the
        Garment in One Operation                      iaeing is tn be nn the wrung side_ plaee the right ”it“,
                                                                          ml the gui'nient and the  “till:  tngether,    Insert the material tn be rullled  ltt‘t\\t"l‘tt the twn
 blue blades, as slinun  in fig.  frl, tnllnwing the line


                                                                     Piping a Ruffle
                              FIG. 34                                                                                    lnset‘t the lnztteriul tn be filmed betneen the tu'n
                                                               blue blades, fnlh'm'mg the line  2,  in  Fig. 52.  This 13,  in   l’ig.  52.   l’laee  the garment  tn “hieh  the
 rullle  is tn be nttaehed. under the separutnr blade.
 t‘nllnwing the line   I,  in Fig. 52.  Prneeed the same
as inr gathering.
  The edge   til. the  [milled sealn  t'uti  be bnund by
using the “index:
      To Ruffle and Sew on a Facing
                in One Operation
    lnset't the material tn be rullled  ltet\\eel| the two
blue blades, l’nllnniug the line  2,  in  l’ig.  5L".   l’lnee
the garment  tn whieh the  rttllle  is  tn be attached,
under the separatnr blade. fnllnuing the line   I,  in
Fig. 32.  l’luee the niaterial'l’nt‘ the fueing river the
upper blue  blade.  {is slump  in  Fig.  3.3,  t'nllnwing
                                                                                                                                                                                                                                                                                    .,  futthe line 3,  in  l’ig. 52. The facing may be straight                                                                    I";
nr  bias  material.   It  the  fneing  is  tn  he  (in  the                                                                       nuiterial must  nut  be  “Vet“                                                                                                       l'i  inehes  wide.  asright side (if the garment, pliiee the garment tind the
                                                                                                             it  is earned thrnugh  the  rufller with  the finished
View original page 29Page 30 · Read text
{it
                                                              at , Fig "fin  tllltl thc mljusting tingcr (F, Fig. 37hmlgc nf  tlu'   l‘ltfilt’ tn tlw  right  nf thc nttiu'huwnt
                                                                                                                                                          :i  with-r  pliiit, innvc  tlu- adjusting tingcr us slinwn  in  Fig. 56.                                   in muln-
   Tht- mutt-rial  l‘nr piping must  liicusurc nhnut    1.3              {Fl buck nr tnwnril  iltt' nm-illc and turn  the- zuljust-
                                                                                                                                        (L‘-     :' (itmim'urtl. Tn ninkc  ii smiillt-r plnit. inch  “itlt‘ uhcn  i'nlilml  in thv ccntcr and  is usually        mg scrcw
 cut nn  tlic  bins.   Pl:it‘t’  illt' piping  nmti'rizil   Ill  tln-           turn  tlu- mljusting scrmv iCi upmirtl. The «listzmcu
 rutflcr,  t'nlltm'ing  lilt'  lini-  4,  in  Fig.  52,  with  the,                ljtfth't'il  pliiits is rcgulutvtl by (“P  lt-ngtli nt stitch.
 fnhli-d ctlgc nf tht- piping tn  illt‘ right. Thu intitvrinl
 tn which  tlw piping and  t'utliing   lll't'  tn  bv  si-wn                                                      To Adjust the Ruffler forslinuhl   l)t'  l'nltlcti nn thc cilgc mul  inst-rtml  in  the:                                                    Group Plaiting and Gatheringrufilcr, t'nllnwing thc liiw  7), in Fig. 5;
                                                     Thc  r-‘ufilii  t‘tll lw ucljustiii in] grnup plniting bi
     To Adjust the Ruffler for Plaiting                      lilting tlu adjusting lmw   ~‘.l~., Fig. as» and mnving
    litiisc  tlit" adjusting li'vcr  ul'i,  Fig.  fv'i'runcl runw-
 it  tn  tlu' right so that  illt'  j‘irnjcctinn  ti),  Fig. 371


                              Fin.                                                                                                              it  tn thc  right  sn  thzit   illt' tnp  nt' thc  prnjur-tinn
                                                                           SSI cntcts thc small slnt  llltlit’t'litti by thiwill cntcr the slnt nmrkml “6" in thc adjusting lcvcr            t,“  l'ig
                                                                                                         “Vt r.  This shnuhl hp iliinc- atWlll'll thc lcvcr  is rclcasml. Thc milling  bliitlc will               stiir nu thc mljusting lt
thcn  l'lith' t'nrmml and  back  nncc   iit  cvci'y  six           tho pnints  \\li('t(' win “ish tn mnkc thc sputi- in
                                                         tiwin  thc pluits  The  miller  “ill  then stnp  tilltlstiti'hcs.  Tn adjust  thc rufiling  hliitlc  tn   illttl-it‘   it
                                                                                                                                                                                                                                                                          c-                                                                                  bu in:ulc. “v litn ilit (h sirctl spinplnit nncc at cvci‘y twulvc stitClu-s, plucc thc adjust-          plum stitching “ill
                                                                                    h:is lN‘tn mmlc mljust the» hvcr 4L} sn that thc pru-ing lcvcr   tl‘l,  Fig.  57:  sn that  thc prnjvctinn  in)
                                                                                                     cithi-r thc slnt murkctl “ti” nr thcc-ntcrs thc slnt mm‘kcd “ 12" in thc adjusting lcvcr.              lt‘ttinn  il)i cntvls
                                                                                                                                                                                    nl’lnscrt tho mute-rial tn bu  plziitgl  hc'_t\\('cn the two              slnt murkml “ I2." By ziltcrimti-ly making grnups
bluc blades fnlln“ ing the linc (2    1g.   .Thc siZe             pluits and plain  spin-cs, us shnwn  in Fig. 38, Vcry                      l                                                                         attractive“ Wnrk can lw prntluccil.nr \\itiill nf plnitsis n gulntcd bx thc adjusting st HW
View original page 30Page 31 · Read text
5 ti
            To Oil the Ruffler
    Ocusinnally apply a drop of oil to the working
  parts of tho rufllor at oach of tho plaoos indioatod by
  tho  unlottorod  arrows  in  Fig.  58.  Aftor  oiling,
  oporate  tho. rufflor on a wasto piooo of matorial to
  provont tho oil soiling tho work.  it tho rufilor (loos
  not  plait evenly,  a drop  of  oil may romody  tho
  troublo.
      EMBROIDERY AND DARNING
    W’hilo omhmidorg and darning can ho dono. on tho
 machino whon tl‘n'oadod for regular sowing, tho nso
 of food covor pluto iWW,  Fig.  59)   .\'u. 3262?  is
 rooommondod, as muvahlo Contaot with tho food  in
 some  casos might  intorforo with tho handling  of
 tho work.
   Do not change tho adjustmont of tho food dog in
 any way, as  it  is ossontial that  its position should
 romain as originally fixed.
   Whon tho food covor plato (WW. Fig.  ‘'9) is USod,
   it. is nocéssary to load tho noodlo throad   rough tho
 oyo  in the thread rogulator (VV,  Fig. 59)  at, tho
 left  of the tension discs and  7m!  midf'r Um Mrmd
 regulator.  \Vitii this oat-option. tho threading is the
 sumo as for rogular sowing (soc Fig.  10. page  1.31.
  Romm'o tho prossor foot and lot down the prossor
 bar lifter to rostoro tho tonsion on tho noodle throad,
 which  is  roloasod mid inoporativo when  tho.  lit'tor
 is missed.      ~.
  To attaoh the food covor   lato, draw to tho loft
 tho Slido that covm's tho hoh jlll caso and insort tho
downwardly projooting hooks on  tho  coy-or  plato
 undor tho odgo of tho throat plato and push to tho
 right.  Aftor bringing tho holo at  tho  right  of tho
o'ovor plato in lino with tho holo in the throat plato,
 [JI't‘SS tho cover into position, and closo tho  slide
 (soo Fig. 59).                                                                                                                              ~
  Food cnvor platos are not included in tho rogular
sotsof attaohmonts;thoya-roon salo at all Singorshops.                                                             5/5038
   Instructions for omhroidoring are Containod in tho.
“Singor Instructions for Art Embroidery,” Sold by                                                                                                                                E011 Exmnmnmm AND DunnoSingorSowing Machine (i‘c mipan y at a roasonahlo prioo.                FIG.59.  Martini; Tmummzn
View original page 31Page 32 · Read text
(a9                       58

     The Singer Universal Threader and                   The Singer Material Gripper
             Seam Ripper
                                                         Taking out stitches is no longer a tedious johowhcn
          Makes Threading Easy                                                       you use the Singer Seam Ripperand Material Gripper,


   Th's useful little accessory enables you to thread a
 hand sewing needle or a machine needle without. eve-
 stmin As shown on the following page, it also serves


                                                                               “PENIS“ 5mm wmi
                                                                                                 Sixmzii Slum Riel-nu
                                                                                                                                                            .\1 Armin i. G uievtn Hows Cno'rn


                                                                 as shown above. The gripper acts as a third hand,
                                                              holding your material while you  pin, sew or  rip.
                                                                           It  is sold by all Singer Shops at a reasonable price.
Tints/imam NEEDLE: wrm
Human Narnia: Tnumwmt


 as a seam ripper with a blade set at just the right
 angle for quickly picking out stitches  Both ends fold
 into  the. handle like  at jack-knife   It  IS sold hy  all
 Singer Shops at. a reasonable price
View original page 32Related documents and language editions

SingerPDF
Adjuster's for the Singer Model 20
Service manual
19 pages · EnglishRead →

SingerPDF
Singer 101-4 & 101-12
User manual
56 pages · EnglishRead →

SingerPDF
Singer 101-4 & 101-12 (black and white scan)
User manual
54 pages · EnglishRead →

SingerPDF
Singer 115
User manual
36 pages · EnglishRead →

SingerPDF
Singer 127 & 128
User manual
18 pages · EnglishRead →

SingerPDF
Singer 12K
User manual
12 pages · EnglishRead →

SingerPDF
Singer 15
User manual
36 pages · EnglishRead →

SingerPDF
Singer 15-125
User manual
38 pages · EnglishRead →

SingerPDF
Singer 15-22
User manual
13 pages · EnglishRead →

SingerPDF
Singer 15-30 / 15-87 & Generic 15 Class (rotated for printing)
User manual
14 pages · EnglishRead →

SingerPDF
Singer 15-30 / 15-87 & generic 15 class machines
User manual
14 pages · EnglishRead →

SingerPDF
Singer 15-86
User manual
24 pages · EnglishRead →
From the ISMACS International. Original publisher and archive notices are retained.
Check the model and edition against your equipment.
PDF verified 2026-10-11.