Sewing machines
Singer 66-18 — User manual
User manual for Singer 66-18. 64 pages in English. Read the original PDF, download or print a copy without registration.
64 pagesEnglish12.5 MB PDF
Loading your manual…Open PDF directly
Document details
- Brand
- Singer
- Model / document
- Singer 66-18
- Document type
- User manual
- Language
- English
- Pages
- 64
- File size
- 12.5 MB
- Category
- Sewing machines
- Document date
- Not specified in catalog
Search available document text
Find a term, then jump to its page in the original PDF. Image-only pages may not be searchable; check the PDF for exact wording and diagrams.
Page 2 · Read text
THE IMPORTANCE OF USING
 ..SINGER"          TUBRICANTS FOR YOUR
    ETECTRIC SEWING MACHINE

   "The Best is the Cheapest"
 Use "SINGER' Oil on Machine
   Knowing ftom many years' experience
    the great importance o[ using good oil,
   we put up an extra quality machine
     oil, in cans, especially prepared for
    sewing machines.


 Use "SINGER" Motor Lubricant on Motor
   The "SINGER" Motor Lubricant is
     especially prepared for lubricating the
    bearings of the electric motor. This
      is a pure non-fowing compound which
    retains its consistency and possesses
    high lubricaing qualities.

Copyrieht, U. S.A., 1915, 1920,1921' 19m' 1924' 1926' 1928'
   1929, 1931, 1932, 1933,1935,1937,  r938, 1940 and 1941,
          by The Singer Manufactuing Co.
       AU Rights Reseryed for All Countries
View original page 2Page 3 · Read text
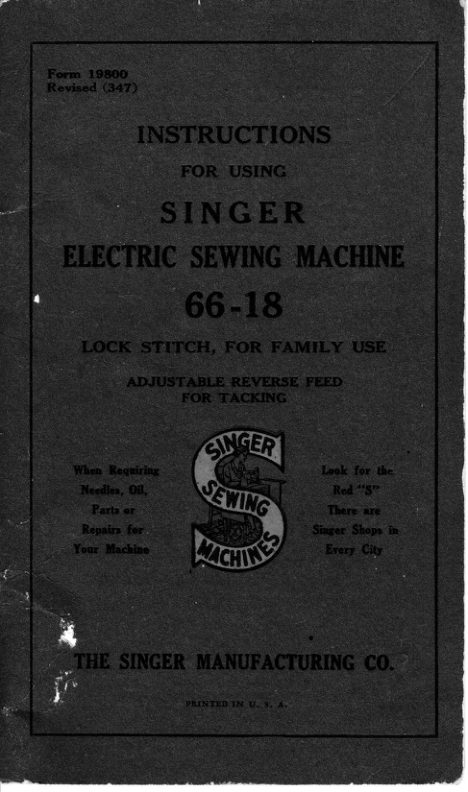
INSTRUCTIONS FOR USING
           SI NGER
 ELECTRIC SEWING MACHINE
        66-tB
  OSCILLATING HOOK, FOR FAMILY USE
        ADJUSTABLE REVERSE FEED
             FOR TACKING


THE SINGER MANUFACTURING COMPANY
View original page 3Page 5 · Read text
TO ALL WHOM IT MAY CONCERN:
  The irnproper placing or renewal of the
Trade-Mark "SINGER" or any other of the
Trade-Marks of The Singer Manufacturing
Cornpany (all of which are duly Registered
Trade-Marks) on any rnachine that has been
repaired, rebuilt, reconditioned, or altered in
any way whatsoever outside a Singer factory
or an authorized Singer agency is forbidden.


    Genuine "SINGER" Needles should
      be used in "SINGER" Machines.
     These Needles and their Containers
             are rnarked with the
                     's Trade-Mark "SIMANCO"  1

       Needles in Containers rnarked
       ..FOR          SINCER MACHINES''
     are NOT "SINGER" rnade needles.  2
View original page 5Page 6 · Read text
{
            DESCRIPTION
  Machine 66-18, for famill' use, has an oscillating
serving hook and makcs thc lock stitch.
  Back tacking is casily dttnc on this muchine aftcr
moving the stitch regulating Iever to the uppcl encl
of the stitch intiieator sk.rt to roverse dircction oI
stitcliing as instructed on page 18.
  The machine i-q e-*pocially' cle-.igned for operatirtn
by elcctricitl'', havirtg an efllcient electlic motor at-
tached to thc uplight part of its arm. The motor
drives the macliine througli a belt and the .speed is
rcgulated by a combination knee and foot controllcr"
   It is also equippcd rvith an clectric spotlight'
   Embrericlcring and datrting ale eccornplished ls
instructed on Pages 56 and 57.
            ..SINGER'' SERVICE
  Norv that )'ou have purchlsed vournew"SINGER,"
r,e do rtot want You to fecl that your relations ivith
us have come to an end. You are coldially inl'ited
                                                                                                                                 f or assis-to visit your " SINGIIR" Shop at any time
tance in your serving problcms. You will be rnost
l.elcome.
  We hope, too, that 1'ou rvill make the "SINGER"
Shop 1'oirr htradquat'tcr'-s for scwing supplie-s and
.".'r,i.". Oniv therc or through authorized bonded
"SINGIIR" reprcsentatives  clrll you secure gonuine
"SINGER" oil, needlcs, hclts, parts, etc', so im-
 Dorl ant in g('l ting the hcsl  t osull s  l'l om vour ntachine'
 Arrd tememher, onll an u'utlrorized "Sl\GI-R"  n'p-
 lesentative shoulci bc allolved to touch your machilte
 rrhen repairs or adjustntcnts are required'

                                                                                                                                                                             !   World-r'idc  " SI\GIIR"  Ser-vice has no equal' Iise  it
View original page 6Page 7 · Read text
o

 Motor Can be Operated on Either Alternating
          Current or Direct Current
   The electric motor, which is located at the back
 of thc machine, can be oper:rted on either altenrat_
 ing currcnt or direct currcnt as desired. The stancialil
 u-indings of tlie motor are for 110 volt-q. and motor.s
  catt ho furnished lurrrrl \-ullagc l)(.1\\er.n I00and 2;,0.
   Spccial motors for 32 volts direct current, and
 for i0              alternating cur.rent and clirect cullent,         _volts
 have also been developed and arc available.

    Points to Deterrnine Before Connecting
       Motor to Electric Service Line
   Obtain the following inl'ormation frorn the Elec-
 tric Light Compan5, rvhich supplics the electlic
 curlent for the circuit to rvhich the motor. is to
 bc connectcd.
   1. If current is direct, rvhat is the voltage? The
 voltagc must be within the range stan.rped on the
name pJatc of the n'rotor.
  2.  If current is alternating, in addition to the
voltage, rvhat is the numbel of cvcles? The number
of cyclcs must be rvithin the range stanrped on the
nan're plate of thc motor.
  The voltage of any circuit and, if  alternating
cuuent, the numbcr of cvcles, can be verificcl bv
looking at the name plate on service rvatt mete_r
installed by the local Electric Light Company.
View original page 7Page 8 · Read text
6

       To Connect the Machine to
              Electric Service Line
  Attach the terminal plug at the end-of .the elect.ric
cord to the nearcst elcctric outlet and the rnachine
is ready for oPeration'
                                        t'Off"    To Turn the Spotlight "Ontt or
  Reach over the top of thc machine and -turn thet         srvitch (F, Iig. 2) in a clock\Yisc direction' "".t"a
     To Rernove and RePlace the Bulb


                            Frc. 2
   First remove the lens (G, Fig. 2) from the spot-
 lisht shade bv turning the lens tb disengage the hlgs
 oi th" lnn. from the lugs on the inside of the shade'
 and--   the lens will drop out.                                                               iLs  Th" brrlb is remov:ed by unscrewing it from
 socket in the spotlight. To replace, screw the buib
 into the socket, then replace the lens.
  When purchasing a n6rv bulb, specjf5' No' 195148
 nnd the vohage of your electr.ic supplv.
View original page 8Page 9 · Read text
CAUTION

  When you have finished your sevring, alu'ays dis-
connect the plug from the elcctric outlet.

  To Insure Perfect Action of the Machine
  Wlien turncd by hand, the balance u'hcel must
ahvays tuln over totrard the opcrator.
  Do not run the machinc x'ith the prcsscr foot
resting on the feed *.ithout cloth under the presscr
foot.
  Do not run the machine when both bobbin case
and nccdle are t,hreaded, unless there is material
under the presser foot.
  Do not try to hclp thc machine by pulling the
fabric, Iest you bcnd the needle. Thc machine feeds
the rrork *.ithout assistance.
  The slide over the bobbin case should be kcpt
closed nhen the machine is in operation.
View original page 9
Page 10 · Read text
E
   Instructions for Operating the Machine
  Raise the prcsser foot (\) by n'reans of the pt'es-.er
bar lifter (Z) to prevent injurl' to the foot (X) and
feed (W).


               Frr;. 3. Fno-rr \.rus' or rsn ]fucsrxo
  Piace a piece of cloth under the prcsser foot and
let thc foot dorvn upon it.
          To Start the Machine
  After connccting the electric cord to the outlet,
pross thc knoe eurrtloller to thc right or dopross tlre
foot rontroller. As  t lre pressure on the knpp rotrttollct'
<.rr fuot controller is incleased, thc speed of the ma-
chine is incrcascd, the speed being controlled entirely
by the amount of prcssure on the controller. Operate
tlie machine in this lray, rvithout being threaded,
until you have become accustomed to guiding thc
material and operating the knee or foot controller.
View original page 10Page 11 · Read text
I
         To Take Out the Bobbin
  Dral' to the left the slidc in the bed of the
machine arrd prcss the forcfinger of thc right hard


               Frc. .1. Rurrovrsc rH ri IloBBr\
upon the bohbin ejeetor ,lt, Fig. {); rlris rr-ill r.uise
llr" bohbin so thet it can easily be tiknn out.

    Genuine "SINGER" Needles should be
        used in "SINGER" Machines.
     These Needles and their Containers
              are rnarked with the     Cornpany's Trade-Mark ..SIMANCO',  t

        Needles in Containers rnarked
       ..FOR           SINGER MACHINES"
      are NOT "SINGER" rnade needles.  2
View original page 11Page 12 · Read text
10

          To Wind the Bobbin
   It  is necessar5r to understand the stop motion
(Q, FiC. 5) by rvhich the balance wheel (P) can be


   Frc. 5. ltlcsrsu  Tstorpoo  rotr \\:rrolxo rnu BogsrN

relcased u'hcn required, thus permitting the winding
of bobbrn." rvithout running tlie stitching mechanism.
  To relcase the balance u'heel (P), turn the stop
motion screrv (()) ovcr torl'ard you. It is nccessary
to hold the balance u'heel u'hile loosening the stop
motion screlr..
  Place the bobbin on the bobbin winder spindle (R)
and push it on as far as it will go. Put the spool of
View original page 12Page 13 · Read text
11

threa.i on the spool pin (1) and pass thc thread fronr
the spool pin into the thread guide (2), then dorvn
and to thc right into thc lorver notch of the bobbin
rvinder thread guide (3) at the front of the machine
bcd, then around the back of this guide and into its
upper notch, then up and through the hole in the
left sidc of thc bobbin (4) from thc inside. Prcss tlic
bobbin rvinder puiley (5) down against the hub of the
balance whcel. Press the knee controller or depress
thc foot eontroller as lor soving.

  The end of the thread must be hold by hand
until a feu. coils a,r'e rvountl and slxrultl then be
broken off. l'ig. 5 shorvs the bobbin rvinder properly
thrcadcd and in position for rvinding. \\'hen suflftcicnt
thread has been s'ound upon the bobbin, pull the
bobbin l-inder pulley au'ay from the halance wheel
and remove the bobbin from the spindle.

   If the thread does not u.ind evenly on the bobbin,
loosen the screu. r,r-hich holds the bobbin s'inder
thread guide (3) in position on the bed of the ma-
chine, and turn this guide to tho right or left, as
may be rcquired, thcn tighten the screw.
View original page 13
Page 14 · Read text
72
         To Replace the Bobbin
  Hold the bobbin betrveen the thumb and fore-
finger of the left hand, the thread leading on top
from the right torvard the left, as shos'n in Fig. 6.


                Frc. 6. Roprlcr\c  rrrE BoBBTN
  Place the bobbin into the bobbin casc end dla\\'
the thrcad into the slot (1, Fig.7) in the bobbin
ca-qe. as shol'n bclolt.


          Frc.7. 'I'qnorprro rut Boaers Crsr
View original page 14Page 15 · Read text
13
  Dralv the thread backx"ard betrvecn the bobbin
ce-sc and the tcnsion spring until  it rcaches the
notch (2, Fig. 8), thcn pull the thread torvard the
right, as shorvn in Fig. 8.


                    I'rti.8.  Boanr-r C_lsu Tano-roro
  When closing the slido, sec thul the thread is in
the slul r3, Fig. 9t in the righl edgo of the slirlc.
ts slr,ru n l,o[orr'.
View original page 15Page 16 · Read text
t4

           To Set the Needle
  Turn the balance l'heel over toward you until
the needle bar moves up to its highest position,
loosen the thumb scrcu- (V, Fig. 3) in the needle
clamp (Y, Fig. 3) and put the needle up into the
clamp as far as it rvill go, u'ith its flat side tou'ard
the right; then tighten the thumb screw. To sclect
the correct needle, see page 60.

            Upper Threading
          Spp Frc. 10 oN TEE Forrorvtrc Paco
  Turn the balance l-heel over tos'ard you until the
throad takc-up lcver (5) is raiscd to its highest
position. Place tlre spool of thread on the spool pin
at thc top of tire machine, Iead thc thread into the
thrcad guide (1) at the left, down, under and fl'om
right to left betrvccn the tcnsion discs (2), into the
small x'ire spring (3), under the thread regulator (4)
at thc lcft (not through the eye in the thread
regulator), up and from right to left through the
hole in the end of thc thrcad take-up lever (5),
dou'n into thc eyelet (6), into the lor,'er rvire guide
 (7), then from left to right through the eye of the
nccdle (8).
  Drarv about tl,r.o inches of thread through the
eye of the necdle rvith u'hich to commence  sel'ing.
   Instructions for threading the machine for clarning
and for embroidery arc given on pages 56 and 57.
View original page 16Page 18 · Read text
1ri
          To Prepare for Sewing
  With the left hand, hold the end of the needle
thread, leaving it slack from the hand to the needle
                        Turn the bal-
                       ance  \Yheel
                                  over toward you
                                      until the needle
                              moves do$.n and
                          up again to its
                                    highest position,
                                     thus catching the
                             bobbin tlircad
                          Dravr up the
                            needle thread
Frc 1I Dna*'rrc up BosnrN TuRpao lil*#:tl*H:
up rvith it thlough tlie hole in thc throat plate,
ai shon'n in Fig. 11. Lay both threads back
under the presser foot di-
agonallv across the feed,
as shor,n in Fig. 11A, to
thc right or left, dopend-
rng upon rrhich side of llre
needle tire material is to
be loceted, so thal u'hcn
the oresser foot is lol,-eled.
the ihrcads uill br' firmly
held betrveen tlre leed and                                         Frc. 11A. Tsnpros trthe presser foot.                  Posrrros to Cotrlroxcr
                                       Snwrsc
         To Cornmence Sewing
   Place the material beneatli the presscr foot, lou'er
the presser foot and cominertco to sew, pressing-the
knec controller to the right, or depressing the foot
controller, to start the machine.
  When scrving thick mxlerial,  it may be neeesslrv
to turn the balanee u'heel over torrlrd vou bv hand
to start the machine. This should also be done if
the machine stops $'hen serving across thick seams.
View original page 18Page 19 · Read text
t7
         To Remove the Work
  Let the thread take-up lever rest at its higliest
position, raise the presser foot and drau. thc fabric
back and to the lcft about tu-o inches; pass the
thrcads ovcr the thread cutter (LL, Fig. 11) and pull
dou'n lightly to sever them. Leave the ends of the
threads under the presser foot.
                 Tensions
  For ordinary stitching, thc ncedie and bobbin
threads should be Iockcd in thc center of the thick-
ness.f thc rnatorinl, tlrus:


                   !rc. 12. I']pnrncr Srrrcn
   If the tcnsion on thc nccdle thread is too tight, or
if thet on the holrhin tlrread is tou looser tlre lreedle
thrcad v'ill lie straight along the uppcr sulface of
tlre nruleriei, thus:


          Frc. 13. Trorrr Noporp Tunoro l'pxsrox
   If the tension on the bobbin thread is too tight
or if that on the needie  t hrnad is too loose,  t he bobbin
thread rvill lie straight along the under side of the
materiai, thus:


          Frc. 14. Loosu Nneplp TsRpao Tnxsrox
View original page 19Page 20 · Read text
18
        To Regulate the Tensions
  The tension on th.e neetlle thread shottld be regulated
only whert. the presser loot is dorn. Having lo*-ered
                       the presscr foot, turn the
                                srnall thumb nut (Ll', shorvtr
                        in Figs. 15 and 3), at
                      the flont of thc tension
                         discs, over to titc right
                         to increase the tension.
                 To decrease the tensiott,
                        turu this thumb nut ovcr
                           to the left.
                       The ten-.ion on thc bclb-  l'rc. 15. 'r'ossros\oror.e Tsnorn                          iri,iilr;;Ji;;"e"ir1"a lv
the )algel screl' iA, Fig. 1) l'hich  is ueat'est thc back
of the"boblrin clse tension .ptilrg. To inct'elsc llrr'
 t onsiott,  l urn  I lr is sol o\\'  I rvol  l r's ll.tl You' To decttase
 tlrt.terr,si,,n. luttr  llris sclo\\'o\cl   l'11'ln ]')u.
  Whon tLc telrsioll on tlre hohbin  t hreatl  lrr'  hc"rl
once properll- adjusted,  it  is seltlrrn necessar'1' to
 charrg^e it, as i  correct stitch can usualll--be obtained
 h1- r.ar'f ing the tension on the nccdle thrcad.
        To Regulate Stitch Length
  The n'rachine is adjustable
 for stitches fl orn 6 to 30 to thc
 inch, a,q indicatod bv the nu-
 rnelals on the stitch indicator
 nhtte {-{. Fis. 16).  '   Set tho Ievcr (IJ, Fie. l6)
 rvith its uppel side in linc rvith
 the numeral representing the
 desired numbcl of stitches to
 tlic inch.
  For Back Tacking, r'aise
 thc lever (B) to the upper end
 of the indicatol plate (A)
 markod "Back Tnck." The   Frc. 16. Srrrcs REGUL-\ToR
 machine s-ill then stitch in a reverse dircction, mak-
 ing it easy to fasten the ends of seams.
View original page 20Page 21 · Read text
19
            To Turn a Corner
   Stop the machinc when the needle is commencinc
 its uprvard stt'oke Raise the ,""..".  f,*         ;;,.;
 the rvork as desired, using the needlc as ";;a pivot,
 thcn lo*,er the presser foot
   To Regulate the Pressure on the Material
    l-or ordinary familv seu-ing, it is seldom necessar.\.
 to change the plessure on thc matelial  If seivrng
 fine silk or flimsy matcrial, lighten the pressure b),
 turning lhe thumb screu. (O, Fig. 5) on tho top of
 the machine to the left so that it screu.s up To
 inclcase tlic pt'essure, turn this thumb screw to
 thc right, so that it scrou-s doivn. Thc plessure
 should be only hcavy enough to plevent the material
 from rising rvith the needle and to enablc the feed to
 move the work along evenly The heavier the ma_
 terirl, the }ieavier the prr:ssure; the iighter the
 matelial, the lighter the pr.essure.
                   Basting
  Thc longest stitch made by the machine is found
 satisl'actory for basting, after loosening the tension
on the needle thrcad so that the stitchcs mav be
 e:rsilr' lrullt.d from tlre rneterial.
   N{achine basting is fir'mcl and more even than that
done by hand, in addition to being much quicker.
      To Sew Flannel or Bias Searns
  Use a sliort stitch and as liglit a tension as possible
on the needle thread to leave the thrcad loose
cnough in the seam to allog. the goods to strcteh
if neccssary.
View original page 21Page 22 · Read text
20

          To Oil the Machine
 To insure easy running, the machine requires
oiling and if used continuously should be oilcd


           l'rc. 17. l-no^-r Ytl:l', Suorvuc OrLl-\G Por\TS
each day. With moderate use, an occasiona'l oiling
 is sufficient. OiI should be applied at each of the
 places shorvn by unlcttercd arrov's in Figs' 17 and 18'
 bne d.op of oii at each point is sufficicnt' Oii holes
 ar" p.ovid"d in the machine for bcarings u'hich can-
 not be directly reached.
  To oil the mechanisn'r under the slide, dra'w' the
 slide (see FiS. 17) to the left anil after removing the
 lint and dust lvhich may have accumulatcd  (sce
 instructions on pages 23 lo 26, inclusive) put- a
 feu. drops of oil on the small piece of Jelt at -the
 right of the bobbin ejector. The slide should then
 be closcd.
View original page 22Page 23 · Read text
27

   Take out the thumb screr. (G, Fig. 17) ncar thc
 lou'cr end of the face platc, raise thc plate and slip
  it  off over thc head of the scrcw ncal the uppct.
 end of the plate; put onc drop of oij into each of
 thc oil holes and joints.
  At the back of the machine is a round plate or
 cover, fastened by a thumb screwl loosen the scrcrv,
 turn the plate uprvard and fasten by tightening thc
 screu.; turn the balance u-heei sior.ly and oil the
 moving parts inside, then turn the cover down aud
 fasten it as before.


      Frc. 18. Orr,tsc PotNrs _lr rup Basp or-MacrrNp

  To reach the parts underneath the bed of the
machine, turn the machine back on its hinges and
apply oil to the oil holes and bearings indicated
by thc arrows in Fig. 18.
View original page 23Related documents and language editions

SingerPDF
Adjuster's for the Singer Model 20
Service manual
19 pages · EnglishRead →

SingerPDF
Singer 101-4 & 101-12
User manual
56 pages · EnglishRead →

SingerPDF
Singer 101-4 & 101-12 (black and white scan)
User manual
54 pages · EnglishRead →

SingerPDF
Singer 115
User manual
36 pages · EnglishRead →

SingerPDF
Singer 127 & 128
User manual
18 pages · EnglishRead →

SingerPDF
Singer 12K
User manual
12 pages · EnglishRead →

SingerPDF
Singer 15
User manual
36 pages · EnglishRead →

SingerPDF
Singer 15-125
User manual
38 pages · EnglishRead →

SingerPDF
Singer 15-22
User manual
13 pages · EnglishRead →

SingerPDF
Singer 15-30 / 15-87 & Generic 15 Class (rotated for printing)
User manual
14 pages · EnglishRead →

SingerPDF
Singer 15-30 / 15-87 & generic 15 class machines
User manual
14 pages · EnglishRead →

SingerPDF
Singer 15-86
User manual
24 pages · EnglishRead →
From the ISMACS International. Original publisher and archive notices are retained.
Check the model and edition against your equipment.
PDF verified 2026-10-11.